Custom MsgBox 9
By Richard Rost

 3 years ago
Custom MsgBox in Access. Part 9: Custom Icons In this Microsoft Access tutorial series, we focus on creating a custom message box using VBA, enhancing the standard MsgBox function.
In Part 9, e will learn how to add custom icons to our message box form and make it so that the icon will slide to the right and down if the box gets bigger. MembersMembers will learn how to create custom Intellisense dropdown menus for their function parameters so that you don't have to remember option 1 is for the Question icon, option 2 is for Exclamation, and so on. You'll be able to pick "IconQuestion" and so on from a dropdown list like normal Access function parameters do. We'll use something called an Enumeration. Silver Members and up get access to view Extended Cut videos, when available. Gold Members can download the files from class plus get access to the Code Vault. If you're not a member, Join Today!
PrerequisitesLinksRecommended CoursesComing Up
Keywords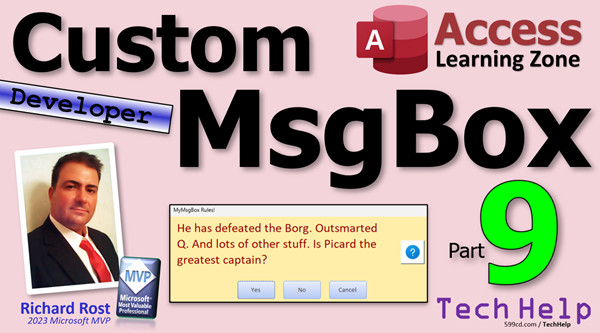 TechHelp Access 2016, Access 2019, Access 2021, Access 365, Microsoft Access, MS Access, MS Access Tutorial, #msaccess, #microsoftaccess, #help, #howto, #tutorial, #learn, #lesson, #training, #database, Custom Dynamic MsgBox, Custom MsgBox in Access, Icons, Custom Icons, vbQuestion, vbExclamation, vbCritical, vbInformation, Custom Intellisense Entries, Enumerations, function dropdown list, enum
Intro In this video, we continue the Custom Message Box series in Microsoft Access by learning how to add icons to your custom message boxes. I will show you how to capture and insert different icon images, place and arrange them on your form, control their visibility with VBA code, and adjust other controls dynamically based on icon size and placement. We also discuss best practices for storing small images in your database and demonstrate customizing the appearance and anchoring of icons. This is part 9.Transcript Today we are continuing on with the Custom Message Box series. We are up to part 9 already.
Today we're going to learn how to add that little icon right there to the message box. Not just that one - you can add as many as you want, all kinds of different stuff.
And of course this is part 9, so you know what that means. If you haven't watched parts 1 through 8 yet, go watch them and then come on back.
Alright, so our message box is coming along nicely. We can position it, we can change its size, we can change all these colors and all those options. What about putting a little icon right there? Little icon. And the icons that are available, you see them with the standard message box.
If I just come into here, if I just give me a message box, hi. Some of the options in here, and this is one of the things I don't like about the way that this handles it, you've got to add all these together. Well there's a VB critical, that's one of them you can get. And then I'll just exit sub here.
Alright, VB critical throws up what I'm sure you've seen a million times. Where'd my button go? Oh, I just installed an Access update and they changed the icons up here, this used to be something different. If you watch my older videos, you'll see what I'm talking about. This was my macro to run my main menu - they changed it on me. The little changes they sneak in there all the time. I just added the update to get this SQL View feature and they changed that button. I'm sure I'm going to find all kinds of little things they changed.
Anyway, there's a critical - little icon right there.
Okay, so how do you get the icon? Well, you can use anything you want as icons. Use your screen capture tool, whether it's the Windows Snip or I like to use HyperSnap, I just hit my key there and I can just grab anything I want like this. Just like that and then snip, and now it's saved in my clipboard.
Okay, now once it's in your clipboard, go to your form, my message box form here, Design View. I'm going to make this a little bit smaller. We'll deal with resizing this in a minute. I'm just going to paste the image in here like that. There it is. Slide it over where you want it - you can put it on the left, you can put it on the right, I like it on the right myself. I'm going to name this guy - let's go to all here and let's call this critical image.
Okay, and I think I like the raised look better. So come in here and go find special effect. It's right down here, we're going to go to raised just like that.
Alright, that looks pretty cool. Looks good - you can make it big or small, you can put a larger image in here if you want to. If this somehow gets bigger, bring that back where it belongs.
Now I know what you're thinking if you've watched my images video before. I have talked up and down, left and right about not storing images in your database. Now I'm talking about image files - I'm talking about pictures of customers, pictures of products, those kinds of things. We don't want to store images in our tables, using either OLE fields or attachments or any of that. No, that stuff's bad. That's what I explained in this video.
But if you've got little tiny icon files or little tiny logos that you want to have in your forms and reports, those are fine. This is tiny, this is probably a couple kilobytes if that. I'm talking, you don't want to store 30 megabyte images inside your databases. That'll bloat the database and databases aren't designed to store images in them. But for design purposes, little things like this are just fine. Don't get the wrong idea.
Alright, now I'm going to go and just screenshot the other images. You got VB question, exclamation and information. You could use whatever other images you want - just find whatever pieces of clipart you like on the web or on your computer and just use those as images inside your form if you want to. Put a picture of your face if you want to. Put an image of Captain Picard on your form. I don't care. There are your Legos. Do what you want with them. I'm just going to use the built-in system ones.
So I'm going to copy and paste all four of these onto my form. Not going to make you watch me do the whole thing.
Alright, I'll do one more. We'll copy this guy. I'm using my HYPERSNAP tool, Windows Snip and Sketch or whatever they call it. I don't know. I did a video on it. The Snipping Tool, whatever they call it now. Snip & Sketch is what it used to be. This works just fine too. I've been using HYPERSNAP for 20 years, so I love it. So it's my go-to. I'll put a link to that down below too if you want to check it out.
But anyway, I got it in my clipboard. I'll click on the background here, paste it in. There it is. And again, I don't know why that footer goes down, but it's okay. We're going to call this one the question image. And again, we'll set the special effect to raised. Alright, raised.
There, I'll do the other two. Alright, we got the information image. We got the exclamation image. We got critical image, and we got question image.
Alright, now I am going to set all of their visible properties to no. We don't want to see them. We're going to turn them on in code if we do want to see them. And furthermore, I'm going to put them all over each other like this. They don't have to be exactly the same size, but you can put whatever - you can make one big, you can make one small. If you want critical to be huge, that's fine. Just kind of stack them in one spot like that. Doesn't matter if they're all exactly the same size, just like that. Because you're not going to see more than one of them at the same time, so it doesn't matter.
Alright, let's save this. Now we're going to add it to our function - global module. We have to add it. Remember, we've done this a bunch of times. We have to add the icon to our options. So, optional icon as long. We're going to default it to zero, which means no icon.
Okay. And I'm going to put right in here in the help icons. Alright, zero will be none, one will be question, two is going to be exclamation, three will be information, and four will be critical.
I know that Access has its own constants for that - the VB critical, VB all that stuff. You can use those if you want to. I'm going to show you a way to make your own custom - it's called an enumeration, a list of these things - in the extended cut. I'll talk about that more toward the end.
Yeah, I know we had an extended cut yesterday. I'm spoiling you, giving you another one today. Sometimes I skip a week. Sometimes you get two or three in one week, so I just try to keep it fair.
Alright, so we got it up here in the declarations. Let's come down here and add it down here. Send the icon to the form.
Okay, save it. Let's go to the form's code - my message box F over here. Find the form's code. Now up here with our declarations up top, I like to just manually make sure they're all not visible to begin with.
Alright, so question_image.visible = false. And the other ones. Alright, exclamation_image, information_image.visible. And notice how, again, and I mentioned this in a bunch of my videos, notice how I'm not capitalizing information image property. I'll leave the whole thing lowercase when I type it, and when I press enter, if Access doesn't automatically capitalize that information_image like that - that camel case or whatever you call it, Pascal case, I don't remember - that's a visual cue to you right there that you might have typed it in wrong. You might have spelled it wrong because if you type it in wrong and, first of all, you don't see the .visible pop up in the properties. But if I finish that and it doesn't capitalize, you'd be surprised how many questions I get and it's just people spelling things wrong. So spelling is important. critical_image.visible = false.
Alright, now we got to tell the code down here, if you see the command for the icon, set which one of those visible we need. So, case icon. And now we need another select case in here.
So, select case on the value that is sent. The value is, guess what, namevalue1, the array. So we get to the end of it. In here, this just replaces another if-then block. Alright, case 1: question_image.visible = true. And the colon there, you can put multiple commands on the same line if you put a colon between them like that. That's just shorthand.
Okay, and now we can take this, copy, and we can go to three, four like that. Control-Y to get rid of that middle blank line. Three, or, and if you want, you just copy from up here - exclamation_image is two, information_image is going to be three, and critical_image equals four.
Save it. Let's go see what we got. Debug compile. Oh, not run. I always hit that by habit - I meant to say debug compile. Oh, hang on. Oh, look what I did. Good thing - that's why you do debug compile, and every now and then, I put an End If in here. Did anybody catch that? If you did, you're sharper than me. Sometimes I get typing, I get talking and I miss simple things like this. It's going to be End Select. The compiler is smarter than we are. Well, not really.
Okay, close it. Save it. Close it. Open it. Alright, well, we got my old "hi" in there. Let's go back and fix that - back to the code. That's in main menu, and I put that stuff up there so we can get the old message box.
Alright, save it. Back up. Yeah. Hit the button. There we go. We didn't specify an icon. We got this empty space over here. We'll deal with that in just a minute.
Alright, cancel that. Let's come back to the form. Actually, no, we're in the main menu still, right here. Alright, we got the thing all set out. Now we can go comma, we got icon zero as the default. Let's put one in there. And again, it'd be nicer if we could see a list of what they are, right here. We're going to do that in the extended cut.
Save it. Back over here. Hit our button. Boom. There it is. Now our form is stretched, but this guy hasn't stretched. This hasn't moved at all. It's not anchored where we left it. So, however you want to anchor this is up to you.
Now, you can have it here. Select all of these guys, go to Arrange, Anchoring. Now it's top left, which means it's going to stay in this position relative to the top left corner. So you can go top right, which means if this moves, it's going to slide over with it but stay to the top. Or you can go bottom right. It'll move and stay with the bottom corner. Stretch means your buttons will stretch, your icons will stretch, which that's not really desirable.
I'm going to stick with top right. So this guy's going to stay here about that far off the top and it'll widen out to the right there. Well, let's see what we got now.
Save it. Close it. Click it. And then oh, look at that. See, it went to the right and it stayed relative to the top. Could you move it down? Yeah, you could center it here. That's going to involve a lot of that mathematical stuff that I covered in the extended cut yesterday or the day before. One of those extended cuts where I showed you how to center these buttons. Yeah, that was yesterday's extended cut. You could do the same thing with the height over here and center this guy. I'm not going to bother because I think that's fine right there. But if you want to do it, sure, it's definitely possible. Anything's possible. Or if you want this guy to stay low, anchor it to the bottom. It's all up to you. It's your Legos.
Alright, now let's deal with this prompt size if you don't have an icon over here. Let's go back in and design view. Now take this prompt and stretch it all the way out to there where it used to be. Save it.
Now what we're going to do is we're going to say if one of these guys is visible, we're going to subtract the width of that guy from the prompt box's width. Makes sense. So if these boxes are visible, we're going to subtract that much from the prompt. You could subtract a little more if you want to, for a little space in there, that's up to you.
Save that. Go back to your form's code, which is this guy. Now we're going to be using multiple lines. So we'll do it like this. We're going to say in here, prompt.width = prompt.width - question_image.width. That's all. And if you want to subtract a little more, so you got spacing in there, you have to see what it looks like. I think this looks just fine. And we'll do this and we'll do that and you can paste this and you can paste that. I'm just kidding.
Alright. So we need to do this because these could be different sizes. You could have different size icons in here. So I do it for each one. You can make your exclamation one huge if you want to. Alright.
Save that. Debug file. Come back up. Yeah. Close it. Open it. Boom. Look at that. And if there is no box, if we go back to this and set that to zero, it should go the full width. Uh-huh. See, all the way to the edge. Isn't that special? Isn't that pretty?
Okay. And this way, if one of them is big - let's say, let me send you to the back - send it back. Let's take this guy, which is, which one is exclamation? If exclamation is huge, and we'll do like a stretch on this one, I know it's pixelated and all.
Okay, save it. And let's go back to, where's the calling thing, menu. Right here, we want exclamation, which is, see, this is why you need that - I think that's two. If you're not sure, you're going to have to right-click on this, go to definition, and you can see, okay, it's two. Alright, that was correct.
Alright, and now, boom. Look at that. It's huge, and it pushes this over even that much further. Pretty cool. And if you want to show a custom image in here, just use the technique that I show in the imaging video, and you can put a picture block here and just change the control source and specify a file name on your drive if you want to, in your database folder, whatever you want to do. I covered that in that video. So go watch that. You just pass the file name as another parameter if you want. Of course, if you guys want to see that, let me know and I'll do another part for the series.
Now, if instead of a 3 here or a number or a 0, it'd be nice if you could do this - comma, and then, ooh, look at that. I got my own set. I made my own set of variables and they show up there in the IntelliSense. So now I just can pick icon information and it works and it goes in there.
How do I do that? Well, that is going to be covered in the extended cut for the members. Silver members and up get access to all of my extended cut videos. Gold members can download these databases. You get my code vault. Everybody gets free classes and lots more. So check it out. I'll put a link down below.
And that, my friends, is going to be your TechHelp video for today. That's part nine. I got part 10 planned and that might be the last one. I'm not sure yet because every time I post one of these, I get 20 emails from people that want to see more. So that's why it's going on so far.
But if there's something you want to see, let me know. Because once I put this to bed, I'm putting it to bed. I'm not going to touch it for a while.
That's it for today. Live long and prosper, my friends. See you next time.Quiz Q1. What is the main new feature added to the custom message box in this video?
A. The ability to resize the box
B. The option to change its background color
C. The addition of customizable icons
D. The removal of buttons from the box
Q2. What tool does the presenter prefer for capturing images to use as icons?
A. Windows Paint
B. HyperSnap
C. Adobe Photoshop
D. Microsoft PowerPoint
Q3. Why is it generally discouraged to store large images inside an Access database?
A. It can slow down the code execution
B. Large images can cause database bloat and Access is not designed for image storage
C. Access only supports black and white images
D. Images cannot be viewed in Access at all
Q4. Under what circumstances is it acceptable to store images in the database, according to the presenter?
A. Never store images in a database
B. Only when the images are animated
C. Only for small icons or logos used in forms and reports
D. Only when using PNG format
Q5. How does the code determine which icon to display in the message box?
A. By checking the file extension of the image
B. By analyzing the button text
C. By using a parameter sent to the function
D. By randomly selecting an icon
Q6. What is the purpose of setting all the icon images' Visible property to False initially?
A. To free up memory
B. To allow only one icon to be visible at a time
C. To make the form load faster
D. To enable image editing
Q7. How are the icons positioned on the form so that only one is visible at a time?
A. They are arranged in a row at the top
B. They are stacked directly on top of each other
C. They are randomly placed on the form
D. They are arranged in a column on the left
Q8. What technique does the video show to adjust the prompt box's width when an icon is visible?
A. Leave the size unchanged for all icons
B. Subtract the icon's width from the prompt box width
C. Overlap the prompt with the icon
D. Hide the prompt text
Q9. Which anchoring option did the presenter choose for the icon so it remains properly positioned as the form resizes?
A. Bottom left
B. Top left
C. Top right
D. Stretch
Q10. What is the benefit of using custom enumerations to represent icons in the code?
A. It makes the icons display faster
B. It removes the need to write any code
C. It allows you to select icons with IntelliSense and improves code readability
D. It enables the use of animated icons
Q11. If you want to use your own custom images as icons in the message box, what should you do?
A. Only use the built-in Access icons
B. Use the technique shown in the image video to specify a file name as a parameter
C. Store them directly in the database tables as large images
D. Email them to Microsoft for approval
Q12. How does the code ensure only the correct icon is visible at runtime?
A. By hiding all icons first and then making the chosen one visible
B. By hiding the form before showing an icon
C. By deleting unused icons each time
D. By setting all icons visible and layering them
Q13. What method is used to allow the prompt box to expand to the full width when there is no icon?
A. Set prompt.Visible to False
B. Set the width to a constant value
C. Stretch the prompt to the right edge if the icon is not visible
D. Move the prompt below the icon
Q14. If you want an icon to stay anchored to the bottom of the message box as it resizes, what anchoring option should you use?
A. Top left
B. Bottom right
C. Top right
D. Stretch
Q15. What is the primary warning the presenter gives about storing images in Access databases?
A. Never store images under any circumstances
B. Only store images if they are JPEGs
C. Large images can cause the database to become very large and inefficient
D. Images can only be stored in OLE fields
Answers: 1-C; 2-B; 3-B; 4-C; 5-C; 6-B; 7-B; 8-B; 9-C; 10-C; 11-B; 12-A; 13-C; 14-B; 15-C
DISCLAIMER: Quiz questions are AI generated. If you find any that are wrong, don't make sense, or aren't related to the video topic at hand, then please post a comment and let me know. Thanks.Summary Today's TechHelp tutorial from Access Learning Zone continues our series on creating a Custom Message Box in Microsoft Access, and we are now up to part nine.
In this lesson, I will show you how to add a small icon to your custom message box. You are not restricted to just one; you can include as many icons as you like, giving you plenty of customization options.
Since this is part nine of the series, it is important to mention that if you have not seen parts one through eight yet, I recommend that you watch those first so you have all the background needed to follow along with what we are doing here.
So far, our custom message box can be repositioned, resized, and we have control over the colors and various other options. Now, let's address how to add a little icon, similar to the ones in the standard Access message boxes. For example, if you use a standard MessageBox function and specify options like VB Critical, you will see one of these built-in icons. Although Access requires a combination of constants to show particular icons, I will show you a way to have even more flexibility.
To add a custom icon, you can use any image capture tool you like. I prefer HyperSnap, but the Windows Snip tool or Snip & Sketch also work well. Simply grab an image of the icon you want, and it will be copied to your clipboard.
Once you have the image copied, open your custom message box form in Design View. Adjust the form's size if necessary, then paste the image directly onto your form. You can position the icon wherever you like; personally, I prefer it on the right. Give the image a useful name in the property sheet, such as "critical image." I also like to give it a raised special effect by changing that property to "Raised," making the icon stand out a bit.
You can use larger or smaller images as you wish, and reposition them as needed. Now, I have emphasized many times in my videos that you should avoid storing large images (such as customer or product photos) directly within Access tables. This is because Access databases are not designed to handle large image files, and doing so will bloat your database. However, this rule does not apply to small icons or logos used for design purposes in forms and reports. These small files are typically only a few kilobytes, so storing them directly in your form design is perfectly fine for this purpose.
Next, you might want to add other built-in message box icons, like question, exclamation, and information. You can use capture tools as before to grab images of these icons, or find alternative images or icons online. You can use anything you like, even a picture of yourself if you want to. For this example, I am just sticking with the system icons.
Once you have all your icons, copy and paste each one to your form. After that, give each icon a unique name: "question image," "information image," and "exclamation image," and so forth. As a finishing touch, apply the raised special effect to each image.
With all four icons in place, the next step is to set their Visible property to No so that they are hidden by default. Then, move the images so they overlap in the same spot on the form. Exact sizing does not matter, as only one icon will be visible at a time, so stacking them works just fine.
Now, let's update our message box function by adding an optional parameter for the icon. This parameter will default to zero (no icon), and specific numbers will represent each icon: zero for none, one for question, two for exclamation, three for information, and four for critical.
Even though Access provides its own constants for message box icons, I will show you a more flexible approach using enumerations in Visual Basic, which I will go into more detail on in today's Extended Cut.
After updating the function declaration, ensure your routine passes the icon identifier to the form. In your form's code module, make sure you start by setting all icon images to not visible. This avoids multiple icons appearing at once.
When deciding which icon to display, use a Select Case structure that checks the icon value. Depending on the value, you set the appropriate image's Visible property to True. You can also perform quick checks in your code editor to make sure you spelled the property names right, as Access will automatically capitalize them if they match.
After implementing this, compile your VBA code to check for any mistakes, such as missing End Select statements. Access will help you catch these with the Debug Compile command.
Test your form to see how the icons work. If you do not specify an icon, you will just see empty space where the icon would go. To select an icon, pass the corresponding number as the icon argument. For greater convenience, in the Extended Cut, I will show you how to make an enumerated list so you can simply refer to the icons by name and get them listed in IntelliSense.
Positioning and anchoring the icons is next. Access lets you anchor controls so they stay relative to the top right, top left, bottom right, or bottom left corner of the form when resized. I recommend anchoring the icons to the top right corner so that as the form's width changes, the icon moves appropriately.
After saving and testing, you will notice that if you do not have an icon, the prompt text can stretch out to its full width. If an icon is present, you probably want the prompt box to shrink so it stops before the icon. To do this, set the prompt box's width in code to subtract the width of the visible icon, plus a little extra for spacing if you like. Be sure to handle each icon separately, since your images could be different sizes.
Test this by making one of the icons especially large - the prompt will adjust accordingly so there is no overlap. If you want to show a completely custom image, you can use the same technique I described in my video about images in Access. Add a picture control, set its control source to an image file name, and pass that into your message box as another parameter if you wish.
I will also demonstrate in the Extended Cut how to define your own set of named constants for the icons, so that instead of passing a number, you can use descriptive names like IconInformation or IconExclamation directly in your code and have them appear in IntelliSense.
That wraps up this installment of our Custom Message Box series. I have part ten planned and that might be the conclusion, but if there is something you want to see, send me your suggestions. Once I finish this series, I am planning to move on to other topics for a while.
You can find a complete video tutorial with step-by-step instructions on everything discussed here on my website at the link below. Live long and prosper, my friends.Topic List Adding icons to a custom message box form
Using Windows Snip and HyperSnap to capture icons
Pasting and positioning images on an Access form
Setting the Special Effect property to Raised for images
Naming image controls for different icon types
Discussion of storing small icons versus large images in databases
Copying and pasting multiple icon images onto the form
Setting image controls' Visible property to No by default
Stacking multiple images in the same location on the form
Updating the global function to accept an optional icon parameter
Defining icon options with numeric values in VBA
Toggling icon image visibility using VBA Select Case
Anchoring icon images to corners of the message box form
Adjusting the prompt width dynamically based on visible icon
Handling icon images of different sizes
Testing the message box with various icon settings |


