|
|
Free Lessons Courses Seminars |
TechHelp Fast Tips Templates |
Topic Index Forum ABCD |
|
||||||
|
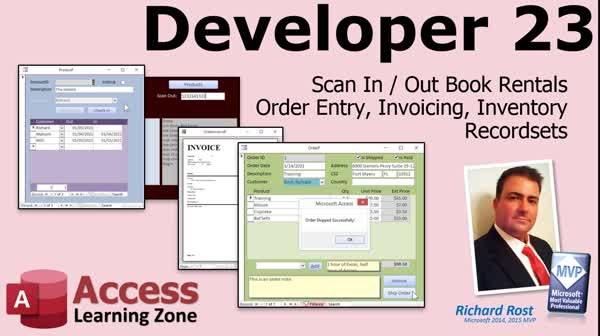
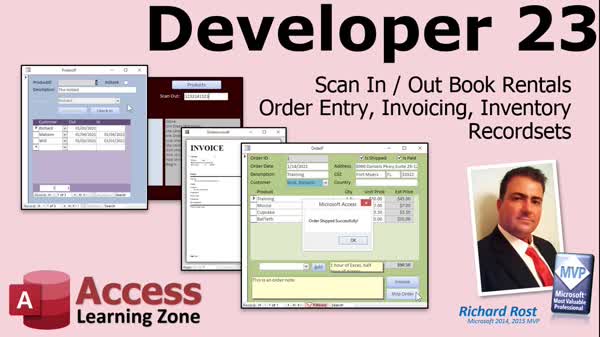
Access Developer 23 Rental Tracking, Serial Numbers, Barcodes, Orders Welcome to Access Developer 23. In this course you will learn how to build a complete rental inventory system in Microsoft Access, including tracking check-outs, check-ins, and due dates, as well as adding serial number tracking with barcode scanning and processing batch check-ins. We will also cover how to create an order entry system with invoices, copy customer addresses to orders, add products to orders, and track inventory by auditing product history and order shipments, including preventing duplicate shipments and checking for payment and inventory quantity before processing orders. Lessons
Database FilesResources
Lesson SummaryWelcome! Rental Inventory & Order System - Welcome to Microsoft Access Developer Level 23. In this course we will work extensively with record sets as we cover scanning rental items in and out, building a rental inventory system, adding serial number tracking with barcode scanning, and processing batch check-ins. We will also discuss creating an order entry system with a subform and printable invoices, copying customer addresses to orders, adding products to orders, and tracking inventory by auditing product history and order shipments. I will show you how to prevent duplicate shipments, check for payment before shipping, and ensure inventory quantity before processing orders.
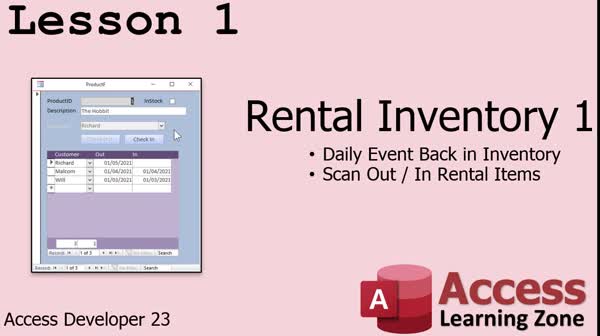
Lesson 1: Track Rentals & Automate Check In/Out - In Lesson 1, we will build a basic rental inventory form that can track items like books or tools, customers, check-outs, and due dates. I will show you how to automatically mark overdue items as returned to inventory using an update query that runs each day when your main menu form opens. We will walk through creating tables for products, adding sample data, building the necessary queries and forms, and setting up VBA to automate the process. This lesson provides the essential foundation for a rental inventory system in Microsoft Access.
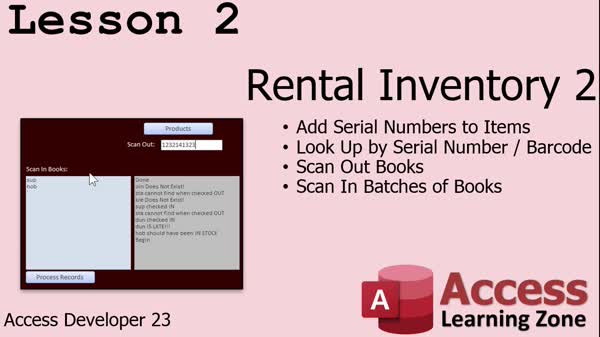
Lesson 2: Serial Numbers & Batch Barcode Scan - In Lesson 2, we will enhance our rental inventory database by adding serial numbers to items, discuss using barcode scanners for effective check-in and check-out, and walk through setting up text boxes to batch process scanned items. I will show you how to modify forms for barcode entry, set up proper field properties, and use recordsets in VBA to efficiently handle batch check-in of items, including error handling for common scenarios such as missing records or already checked-in items. We will also talk about choosing barcode fonts and preparing your database for real-world rental inventory management.
Lesson 3: Order Entry: Invoices & Forms - In Lesson 3, we will build a simple order entry system in Access, starting with designing tables for orders and order details, establishing relationships, and entering sample data. I will show you how to create queries to calculate line item totals, design an order entry form with a subform for order details, and ensure proper navigation and formatting. We will walk through creating a printable invoice using an Access report, bringing together order, customer, and order detail information, and discuss techniques for showing the correct data for each order. This lesson focuses on the core process of order entry.
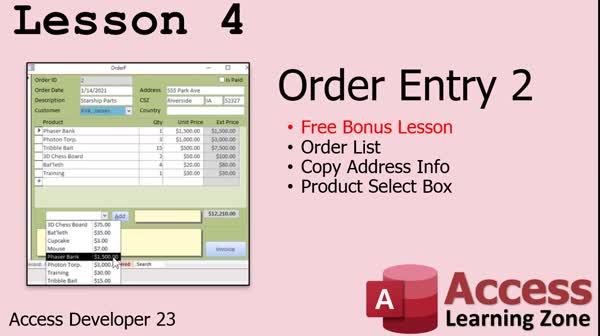
Lesson 4: Order Entry: Lists & Product Selection - In Lesson 4, we continue building the order entry system by creating an order list form to view all orders in the database, including paid and unpaid orders. I will show you how to copy customer address information to each order for historical tracking, add a product selection combo box for easier product entry, and ensure that quantities and unit prices update totals automatically. We will discuss techniques for navigating between related records, handling form refresh issues, and copying product and customer data appropriately. This lesson covers several commonly requested order entry features.
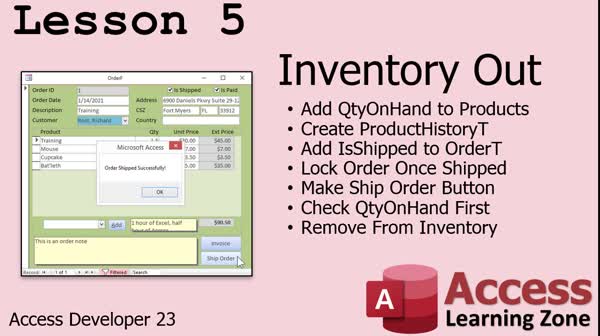
Lesson 5: Track Inventory, Prevent Double Ship - In Lesson 5, we will walk through how to track inventory out in our order entry system. I will show you how to add a quantity on hand field to the products table, set up a product history table for tracking inventory transactions, and add an "is shipped" flag to orders so we can ensure orders are only shipped once. We will build a ship order button that checks for payment, confirms sufficient inventory exists, updates product totals when shipping, and locks the order to prevent further changes. We will also discuss audit trails and updating the order list display.
Lesson 6: Course Highlights & Membership - In this course we learned about a wide range of Access development topics, explored various examples based on your feedback, and discussed how to utilize search tools and indexes on the website to locate materials. We covered the benefits of membership options, such as access to extended videos, download folders, and priority support. We also talked about ways to stay updated, including using Twitter for site updates, and mentioned what is planned for future lessons.
NavigationKeywordsrental inventory, order entry system, inventory tracking, barcode scanning, check in check out, serial number tracking, batch check-in, printable invoice, audit trail, prevent duplicate shipments, payment check before shipping, product history, order ship
IntroIn this lesson, you will learn how to manage rental inventory and order processing in Microsoft Access. We will talk about scanning rental items in and out, adding and using serial numbers or barcodes, and building a full order entry system with a printable invoice. You'll also see how to create an order list, add product selection features, and track inventory with a product history table. We cover critical tasks like copying customer address data, controlling order shipment status, and locking shipped orders to prevent changes. This is Access Developer Level 23.TranscriptWelcome to Microsoft Access Developer Level 23 brought to you by AccessLearningZone.com. I am your instructor, Richard Rost. In today's class, we are working more with record sets.Today we are going to cover scanning in and out rental items, building an order entry system with a printable invoice, and tracking inventory. I will be using Access 365, which is roughly close to Access 2019. Everything I cover in today's class should be good going back to, I am going to say, 2007. This class follows Access Developer 22. I strongly recommend you watch that class first. And of course, all of my previous classes from the beginner, expert, advanced, and developer series, especially 16 and on, where we start covering record sets. If you have any questions regarding the material covered in today's class, just scroll down to the bottom of the page that you are on and post them there. Also, take a minute to read through any of the other questions that have been posted as your question may have already been answered. Make sure you click on the big red subscribe button to get notified if any other questions or comments are posted for this class. If you have any questions that are not about the material covered in today's class, feel free to post them in the Access forum on that website. Now, let's take a closer look at what is covered in Developer 23. In lesson one, we are going to build a form to do rental inventory. This is where you have either books, videos, tools, or a library - whatever you have rental inventory needs to track. You have a specific item like a book. You have a list of customers. The customers will check out those items. They are due back in on a specific date. You check it out, check it in. You have to lock the customer field, lock the buttons. Do all kinds of things. We will scan in and out rental items in lesson one. In lesson two, we are going to take our rental inventory database and add serial numbers to the items. These serial numbers can be whatever you want. You can print out barcode labels if you choose to and you can put those on your items. Then we will scan those out by scanning in the barcode number or the serial number. Then we will be able to scan them back in batches. So if a whole bunch of books come back, you can just go scan, scan, scan, scan into a text box, hit the process records, and then our record set will loop through all of the items. It will check them, make sure they were out, check some other rules, and then scan them back in. In lesson three, we are going to build a simple order entry system, including an order entry form with a subform and a printable invoice. In lesson four, we are going to continue with the order entry system. We are going to build an order list form so we can see all the orders in the system. We are going to copy the customer's address information to the order when the order is placed. That way, you have a history of where that order was shipped to. We are also going to add a product selection box so you can pick a product from a list, hit add, and it adds it to the order. You do not have to type in the order information and the pricing and all that stuff. In lesson five, we are actually going to track inventory out in our system. We will create a product history table so we can audit the transactions. Every time product goes out, I want to know about it. We will add "is shipped" to each order, so I know if this order has been shipped or not. We do not want to ship the same order twice. We will lock down that order once it has been shipped, so they cannot change any of the details or delete it. Then we will make our ship order button. We will check to make sure the order has been paid first and that it has not already been shipped. We will run through all of the items first with a record set and make sure we have enough quantity to ship all the products on this order. If so, we will ship it and tell the user the order has shipped successfully. Then we will remove those products from the inventory. QuizQ1. What is the primary focus of Microsoft Access Developer Level 23?A. Learning basic database design principles B. Working with record sets, rental inventory, order entry, and inventory tracking C. Writing advanced SQL queries only D. Designing table relationships for the first time Q2. Which version of Access is showcased in this class? A. Access 2003 B. Access 2019/365 C. Access 2000 D. Access 2013 Q3. What feature is added to rental items in lesson two? A. Customer reviews B. Serial numbers and barcode scanning C. Rental insurance calculation D. Late fee tracking Q4. What is the advantage of adding barcode labels to rental items? A. It allows price calculations B. Enables quick scanning in and out of items C. Sends automatic emails to customers D. Automatically renews rentals Q5. In the order entry system built in lesson three, what functionality is included? A. Shipping management only B. Order entry form with a subform and a printable invoice C. Emailing customers about their orders D. Customer loyalty points tracking Q6. What enhancement is made to orders in lesson four? A. Orders can have video tutorials linked B. Product selection box and copying customer addresses to the order C. Multi-language support for orders D. Automatic reordering suggestions Q7. Why does the order entry system copy customer address information to the order when placed? A. So that orders can be printed in bulk B. To preserve the shipping history as it was at the time of the order C. For calculating shipping fees D. To integrate with a third-party shipping provider Q8. What key functionality is added in lesson five regarding inventory? A. Importing inventory data from Excel only B. Creating a product history table for auditing transactions C. Generating monthly sales reports only D. Automating returns processing Q9. What is the purpose of adding an "is shipped" field to each order? A. To enable order deletion after shipment B. To prevent shipping the same order twice and lock it after shipment C. To allow customers to track their package online D. To calculate the shipping cost automatically Q10. Before shipping an order, what does the system check? A. If the customer has a newsletter subscription B. If the order has been paid and not already shipped C. If shipping labels are available D. If the order is linked to a promotion Q11. How does the system ensure enough inventory for an order? A. It estimates shipping times B. It runs through all items with a record set to make sure there is enough quantity C. It contacts suppliers automatically D. It allows negative quantity in stock Answers: 1-B; 2-B; 3-B; 4-B; 5-B; 6-B; 7-B; 8-B; 9-B; 10-B; 11-B DISCLAIMER: Quiz questions are AI generated. If you find any that are wrong, don't make sense, or aren't related to the video topic at hand, then please post a comment and let me know. Thanks. SummaryToday's video from Access Learning Zone focuses on Microsoft Access Developer Level 23. My name is Richard Rost, and in this lesson, we will advance our work with record sets.In this class, I'll be showing you how to scan rental items in and out, build an order entry system that includes a printable invoice, and manage inventory tracking. I'm using Access 365 for these demonstrations, which is very similar to Access 2019, and all the techniques I teach today should work back to Access 2007. This course builds directly on material from Developer Level 22, so I highly recommend reviewing that class first. It is also helpful to be familiar with my earlier courses, particularly Developer Level 16 and onward, since those start to dive into record set programming. If you have questions about anything in today's class, you can scroll to the bottom of the course page and leave your comments there. I also suggest reading other students' questions, since your concerns might have already been addressed. Be sure to subscribe using the large red button, so you are notified if any updates or new questions are posted for this course. For questions that are not directly related to today's material, please use the Access forum on my website. Here's a summary of what we will cover in Developer 23. To start off, in lesson one, we will design a form for managing rental inventory. This is suited for businesses that rent out items such as books, tools, or movies. The purpose is to keep track of individual items, customers, due dates, check-out and check-in status, and enforce proper locking of fields and controls. The main focus will be on managing the process of scanning items in and out for rental. Next, in lesson two, we will enhance our rental system by adding serial numbers to the inventory items. These serial numbers can be printed as barcodes if you wish and attached to your rental items. When renting items out or checking them back in, you can use these barcodes for quick scanning, making batch returns much faster and more efficient. We'll set up a process where multiple items can be returned by entering or scanning their numbers into a text box and processing them all at once. The record set for this lesson will cycle through the entries, verify their rental status, check any rules we set up, and update their return status accordingly. In lesson three, we will shift to building a simple order entry system. This includes creating an order form, a subform to handle multiple order items, and generating a printable invoice for each order. For lesson four, development of the order entry system continues. I will show you how to create an order list form for viewing all orders, and teach you how to copy the customer's address information into the order at the time it is placed. This allows you to keep track of the shipping address history. We will also add a product selection feature that lets you pick a product from a list and add it to the order, eliminating manual data entry for product information and pricing. In lesson five, we will focus on inventory tracking as orders are processed. We will introduce a product history table to audit every inventory transaction. Each time an item leaves inventory, details will be recorded. We'll add an "is shipped" status for every order to ensure no order is shipped more than once, locking the order record after shipment to prevent further changes or deletion. The shipping process will include validations: confirming that payment has been received and that the order has not already been shipped. We will check product quantities, and if there is enough stock, the shipment will be processed and inventory levels will be adjusted accordingly. You can find a complete video tutorial with step-by-step instructions on everything discussed here on my website at the link below. Live long and prosper, my friends. Topic ListBuilding a rental inventory tracking formScanning rental items in and out Locking form fields and buttons for check out/in Adding serial numbers and barcodes to rental items Processing batch check-ins using barcode scanning Validating rental items during batch check-ins Building a simple order entry system Creating an order entry form with subform Generating printable invoices Developing an order list form Copying customer address to new orders Adding product selection to orders Tracking inventory on shipped orders Creating a product history audit table Adding shipped status to orders Locking orders after shipping Validating payment and shipping status before order fulfillment Checking inventory quantity before shipping Processing order shipments and updating inventory |
||||||||||||||||||||||||||||||||||||||||||||||||||||||||||||||||||
|
| |||
| Keywords: rental inventory, order entry system, inventory tracking, barcode scanning, check in check out, serial number tracking, batch check-in, printable invoice, audit trail, prevent duplicate shipments, payment check before shipping, product history, order ship PermaLink How To Track Rental Inventory, Scan Barcodes, and Build Order Entry Systems in Microsoft Access |