|
|
Free Lessons Courses Seminars |
TechHelp Fast Tips Templates |
Topic Index Forum ABCD |
|
||||||
|
|
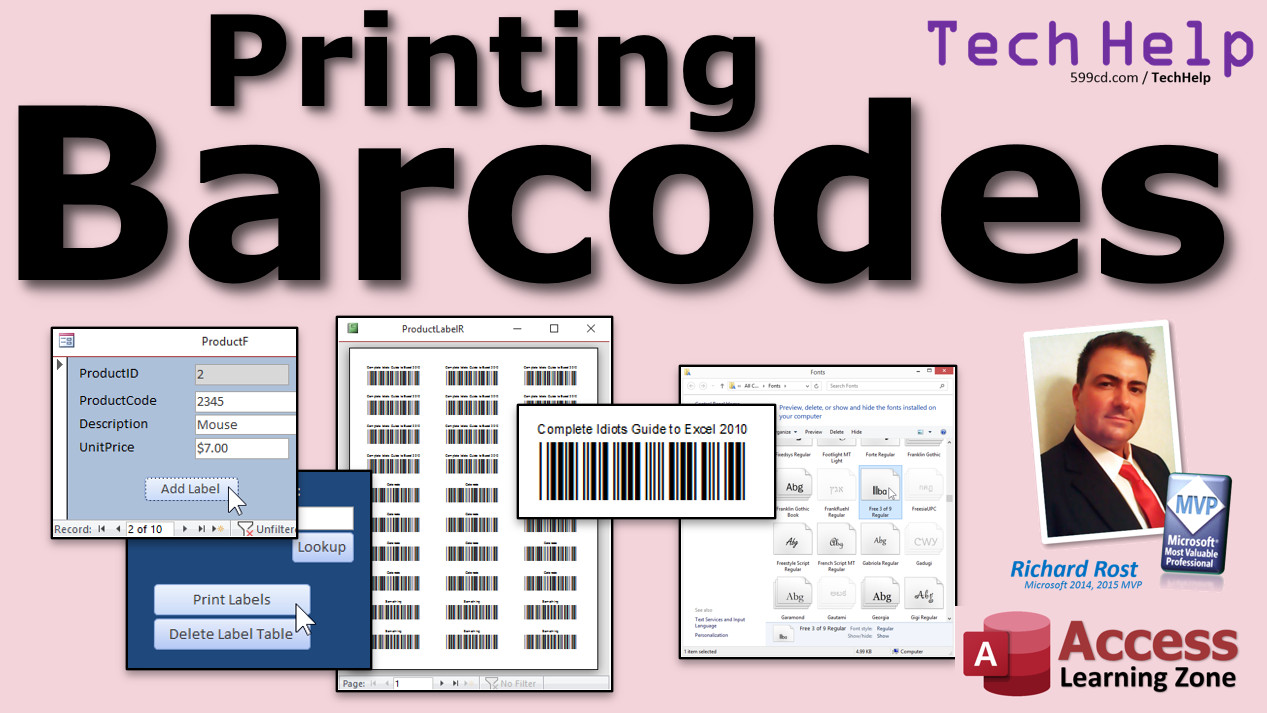
Barcode Printing By Richard Rost Printing Custom Barcode Labels from Access Learn how to print barcode labels from Microsoft Access. We'll talk about the Code39 barcode and why I prefer it for Access databases. I'll show you how to install a FREE Code39 barcode font. Then we'll see how to create custom barcode labels for our products and print them out from Access. Ciara from Fort Wayne, Indiana (a Gold Member) writes: I watched your video yesterday on scanning barcodes. It was excellent. Thank you. How do I go about printing my own barcode labels? I sell products that we make in house, and we don't have UPC codes for them. So I just need a simple barcode I can scan things in and out of inventory with. MembersMembers will learn how to print multiple labels for the same product, so if you want to print out 10 copies of the same label, it's easy to do. We'll create a button on our Product Form to create individual labels, and then a button to clear the table once we've printed.
Silver Members and up get access to view Extended Cut videos, when available. Gold Members can download the files from class plus get access to the Code Vault. If you're not a member, Join Today!
Barcode Lessons
Font DownloadSpecial thanks to Matthew Welch of Square Gear for creating this font. I used it back in the late 90s for inventory in my computer hardware business. It's a great product, and it's free!
Links
TranscriptWelcome to another TechHelp video brought to you by AccessLearningZone.com. I am your instructor, Richard Rost.Yesterday, I showed you how to scan barcode labels. In today's video, I'm going to show you how to print your own barcode labels in Microsoft Access. Today's question comes from Sierra from Fort Wayne, Indiana, one of my gold members. Sierra says I watched your video yesterday on scanning barcodes. It was excellent. Thank you. How do I go about printing my own barcode labels? I sell products that we make in-house, and we don't have UPC codes for them, so I just need a simple barcode I can scan things in and out of inventory with. Well, Sierra, I've got you covered. I did something very similar. Back in the 90s, in fact, I used to have my own PC hardware business, and we would buy computer components from various manufacturers - motherboards, hard drives, keyboards, and so on. They would all have their own unique UPC codes, of course, for each product. But we'd build the computer, and then that computer, we'd want to put our own sticker on it with the barcode. So let me show you how you can print your own barcode labels using Microsoft Access. First thing I want you to do is go watch the barcode scanning video if you haven't. For everyone else, I know Sierra has watched it already. If you haven't watched the one on scanning barcodes, go watch that first. Then come back to this one where I show you how to print barcodes. Go look down below the video in the links section. You'll find links to my other videos related to barcodes, the barcode font download, which we'll talk about in just a second, and some other goodies. Now, in the last video, I talked about the difference between the two types of barcodes: the 1D barcodes, which is your typical looking barcode that we've had for years, and the newer 2D barcodes like the QR codes. If you're just printing barcodes for your in-house inventory purposes, then 1D barcodes are just fine. I used them for years in my business. We had a pretty good amount of inventory go through. 2D barcodes are cool. They can encode a lot more information. I will be making a video on 2D barcodes later, but for today, we're going to focus on the simpler 1D barcodes. Now, of the 1D barcodes, there are lots of different symbologies. UPC, EAN, all kinds of different stuff. We are going to focus on the Code 39 barcode today. It's the easiest one to implement. Now, Code 39 has a bunch of different names. It's been around for years. Code 3 of 9 sounds like a Borg designation, but that's all the same code. It's all the same barcode. Code 39 was named that because it originally had 39 characters. When they expanded it to 43, in fact, you might sometimes see it referred to as Code 39 Mod 43. That's a bunch of different names for it. But there are the characters you can use: uppercase letters, numbers, and some punctuation, including the space, dollar sign, percent sign, period, and so on. We're only going to focus on using letters and numbers. Again, we're making the database. We create the rules. Code 39 is what's called self-checking. In other words, unless the barcode is severely damaged, it's almost impossible for a scan to give you a wrong character. The bars themselves check the number. On the downside, it is low density, which means it's going to be a bigger label than something else like Code 128. But generally, for your in-house purposes, you only need 6, 7, maybe 8 characters. That's not going to be too big of a label. Now, the major benefit is you don't need to program a checksum digit. With some other codes like 128 and UPC, you have to program a check digit on the end, which involves a little math. It's not super hard, but it's just an extra step that you don't have to bother with with Code 39. All you have to do is enclose whatever your code has to be inside of asterisks like that. That's it. That's how the barcode scanner knows where to begin and end the barcode. With something else like Code 128, it's higher density, which means it can make a smaller barcode. It's got more information packed into a smaller space, and it does add more characters. You can use lowercase letters if that's important to you. It's not to me. It never has been. It does require a check digit on the end, which means you have to do some math. But honestly, I've used Code 39 for years. At least five years in my computer hardware business, and never had a problem with the barcode. So here's what we're going to do. First thing is you're going to download a free barcode font from this website. I'll put a link down below in the links section. There, if you feel like typing it in, if you don't want to click on the link, I put it in my URL shortener for you. This is a barcode that's been around since at least 1997. I was using it in my business in the late 90s. It's solid. It works. It's been working since Windows XP, and it works in Windows 10. So click here to download the file. That will save it to your downloads folder. Now you can't just click here to open the file. That will open up the zip file, and you can see what's inside it, but you can't install the font this way. Here are the fonts. The TTF file stands for TrueType font file, but we're inside a zip file, so you can't install them this way. Go up to the downloads folder. Click right here. Go up to the downloads folder. Now go to the zip file, right-click on it, and go to extract all. It's going to extract it into a folder in the downloads folder. Hit extract. Now here's a folder inside your downloads folder that has the files in it. Now we can actually install this guy. There are two different font files in here. There's Free 3 of 9 - that's the one we want. There's another one that's Free 3 of 9 Extended. Don't worry about that one. Use this one, Free 3 of 9. Click and then go to install. Now it's going to install it just for you. If you want to install it for all users on the computer, you have to be logged on as administrator. I'm just going to click on install. The installing window flashes and goes away almost immediately. If you want to make sure that it's installed, let's close this stuff. Close this. Close this. You can close your browser now. Go down here to your search bar and type in fonts. Whoops. I can't type today - fonts. Here's your font settings. It's a folder inside of your system settings. Here are all your fonts down here. You can scroll down and see all the fonts that are installed on your system. You're looking for Free 3 of 9. Should be down here somewhere. Let's see. Come here. Where are you? And there it is. Free 3 of 9. Click on it. And you should see, well, that's pretty much all you're going to see. If you want to preview it, type in, you know, 599 CD. And there it is. And this is Windows 10. Windows 8, which is my other system - a lot of you are probably still using Windows 8. It looks like that. There's your fonts folder. And if you open up the font in Windows 8, you'll see that. Notice, you can't use lowercase letters. So those don't show up in the font of the barcode; they just show up there normal in Arial or whatever that is. So we can only use capitals and numbers. So now the font is installed on your system. Now we can use it just like any other font in our database to make reports or mailing labels or whatever. So you should be good to go at this point. Next thing you're going to do is send Matthew a thank you. If you're going to use his font for free, which he put a lot of work into making, send him a thank you. There's his email address. I'll put a copy of it down below. You can click on it. He says you can use them for personal or commercial projects. He asks no money. He just would love to hear from you. So drop him an email and say, hey, I saw your font featured in one of Richard Rost's videos. Tell him I sent you. He's not charging for the font and I'm not charging for the video, so you're welcome. Now, he says you're under no obligation to do this. But your teacher says, send him a thank you note. When you're in school and the teacher says we're doing thank you notes for your parents or whatever - well, send him a thank you note right now. Do it. You can't watch the rest of the video. So now that we have the font installed, let's see how we can use it in Access. Here we are back in the TechHelp free template. This is a free download from my website. However, we made some modifications to it in the last video where we learned how to do product lookups with the scanning. So this database has those changes in it. So again, go watch that video if you need to know how to make these changes. We added a product table with a product code. That's the UPC code. Now, for the purposes of this class, we're going to assume that these are products that I make in-house. So I'm just going to put smaller codes in here. All right, one, two, three, four, five, and then maybe something like that. Two different product codes, two different products. You can add as many as you want. You can put letters in here if you really want to. Make sure they're capitals, though. I mean, we can convert them later, but it's better if you just put capitals in here. A lot of people ask me at this point, hey, Rick, is it possible to start my product code at one or a thousand or whatever number and have the next product get assigned the next code? Yeah, certainly possible. I have a video for it, custom sequential number. I do it with order IDs, but you can use it with product IDs, custom IDs, whatever. Go watch that video if you want to learn how to take your product code, start it at a thousand, and then have the next one be a thousand one, a thousand two. I mean, they're your products. You can assign whatever number you want to them. I'll put a link to this video down below in the links section. But for now, we're just going to type my own codes in because it really doesn't matter for the purposes of class. Something. And it costs $13. So now I got my product table, I got my product codes, I want to print some barcode labels based on these numbers here. How do we do that? Well, look at ProductT, go to Create, go to Labels. The mailing label wizard appears, pick a label that fits the size of the label that you want. If you have a Dymo label printer where you can print them one at a time, great, I've got a video on how to do that with Access. You can use a Dymo label writer, which I strongly recommend. I think they cost around $60 or $70. They're not expensive. If you're going to be doing a lot of one-up labels, watch this video. Get the label printer, use this guy. It works fantastic, and you can use the same techniques that I cover in this video to print your barcode labels. Because remember, as I'm going to show you in a second, the barcode label is going to be just like a regular mailing label except you use the barcode font. That's it. If you don't have a label printer, just find a label in here that looks like what you want to print it on. I usually like the Avery 5160s. It's the one where you get 30 on a page. There's three columns, 10 rows. That's my favorite mailing label to use. Next. I cover how to use this guy in my Access Beginner 1 class, so if you don't know how to use the label wizard, go watch that class. Again, that's free. So we're just going to set it up with the wizard and then we're going to change stuff around. Just use the default. That's fine. Now, you could put the product name in there if you want to and the product code. If you want to see that product name on it, that's okay. There isn't anything wrong with that. Let's go right there and put enter. Sometimes it happens. Backspace, enter. Sometimes if you put two things next to each other, it messes up. You have to put the product name in there, hit enter, and then put the product code in there. Little bug. Next. What do you want to sort by? It doesn't really matter. Let's sort by product name. That's fine. Next. Let's give it a good name. I'm going to call this ProductLabelR. Data may not be displayed. You get this a lot. This just means that there's not enough horizontal space. I talk about this in Beginner 1. For some reason, the wizard always makes the labels too wide. We just have to shrink them down a little bit. Get on that one, Access team. So here we go. There are our labels. Let's go into design view. First thing, let's make this a little bit narrower like that. That's usually all you have to do. Just shrink it down just a little tiny bit. Save it. Close it. Let's do a print preview here. Print preview. Did I get it? Yeah. I got it. See it. Then it's almost not noticeable when you go to print it. Now, I do not want to see one, two, three, four, five there. I want to see the barcode. So go to design view. Let's make this guy a little bit bigger because the barcode's going to come in larger. Maybe slide that up there. Let's change the font of this guy. Right up here. Format - font to the Free 3 of 9. There it is. Free 3 of 9. Let's save it. Actually, let's make it a little bit bigger. Let's make the font larger. A little bit bigger. That's why you don't want to use too many digits. Maybe center it. Save it. Close it. And print preview. There it is. Now, it looks good, but if you try to scan this with the barcode scanner, it's not going to work. Why? Because we don't have the little asterisks before and after it. That's necessary for the code to work. I just verified that. I printed that out and I tried scanning it with my scanner. No bueno. It would not read. Now, let's add the asterisks on it and try it again. Go back to design view. How do you do that? We're going to come in here. Go to all. I don't like leaving things named Text3, so this can be ProductCode, and let's call this ProductCodeTXT like that. We're going to make the control source equals an asterisk and ProductCode and another asterisk. That is called string concatenation. If you don't know what that is, go watch my concatenation video. I'll put a link down below. That's free as well. There, in case you can't see what I typed in there, I know it's kind of hard to see on the full screen. It's equals, and then an asterisk inside double quotes, ampersand, ProductCode, that's the field, ampersand, another asterisk inside of double quotes. Basic string concatenation. So we can close that. I'm actually going to make this font a little bit larger. I printed it out and it's still kind of small. Let's go 36 point. That should be better. Maybe 48. Let's do 48 point. Now, you don't change the label size, because the label vertical height and stuff like that has to be set, but that should be more than enough space. I got one, two, three, four, five, six, seven, eight. Yeah, that should fit just fine. Save that. Close it. Preview it again. Looks a lot better. Let me print this out. Right-click print. Here I am with the handy dandy scanner again. First, I've got the barcodes that we did first. Now, I made them a little larger because they were kind of small. Let's try to scan these. Nothing. They're not scanning at all. Now, I've got the second batch that we made with the asterisks in. I'm going to try to scan these. Look at that. They scanned right in. Got it. Got it. And they went right into my Notepad just like we did in the last class. Perfect. So there you go. That's how you print out barcodes for your products. Once again, if you're going to print out a lot of single barcode labels, go get yourself a Dymo printer. They're not expensive. They work great. Now, if you want to print out a lot of the same label, like let's say 15 copies of this barcode, then I will show you how to do that in the extended cut. That involves a little more finesse and a tiny bit of coding. Want to learn more? In the extended cut, I show you how to print multiple barcodes for the same product if you want to print 10 of a particular label, for example. We'll add a button on the product form. We create a product form in the extended cut for the last video for the scanning barcodes. We'll add an "Add Label" button there. You click it four times if you want four labels; that adds it to a label table. Then we use that to generate the barcode labels, so you can print out as many as you want. Then on the main menu, we'll make a button to print the labels. When you're done printing, a button to delete the labels out of the table. So it's clear and ready for the next time you want to print labels. All of that is covered in the extended cut for members. How do you become a member? Click the Join button below the video. After you click the Join button, you'll see a list of all the different types of membership levels that are available. Silver members and up will get access to all of the extended cut TechHelp videos, live video and chat sessions, and more. Gold members get access to a download folder containing all the sample databases that I build in my TechHelp videos, plus my Code Vault where I keep tons of different functions that I use. Platinum members get all the previous perks plus access to my full beginner courses and some of my expert courses. These are the full-length courses found on my website and not just for Access. I also teach Word, Excel, Visual Basic, ASP, and lots more. But don't worry, these free TechHelp videos are going to keep coming. As long as you keep watching them, I'll keep making more. If you liked this video, please give me a thumbs up and feel free to post any comments that you have. I do read them all. Make sure you subscribe to my channel, which is completely free, and click the bell icon and select All to receive notifications when new videos are posted. Click on the Show More link below the video to find additional resources and links. You'll see a list of other videos, additional information related to the current topic, free lessons, and lots more. YouTube no longer sends out email notifications when new videos are posted, so if you'd like to get an email every time I post a new video, click on the link to join my mailing list. Now, if you have not yet tried my free Access Level 1 course, check it out now. It covers all the basics of building databases with Access. It's over three hours long. You can find it on my website or on my YouTube channel. If you like Level 1, Level 2 is just one dollar. It's also free for all members of my YouTube channel at any level. Want to have your question answered in a video just like this one? Visit my TechHelp page and you can send me your question there. Click here to watch my free Access Beginner Level 1 course, more of my TechHelp videos, or to subscribe to my channel. Thanks for watching this video from AccessLearningZone.com. IntroIn this video, I will show you how to print your own barcode labels using Microsoft Access. We will cover where to get a free barcode font, how to properly install it in Windows, and how to create barcode labels for your products using the Access label wizard. I will also explain the basics of Code 39 barcodes, how to format your product codes, and how to set up your labels so they scan correctly with a barcode scanner.QuizQ1. What is the main focus of the video?A. How to create barcodes in Excel B. How to print your own barcode labels in Microsoft Access C. How to scan QR codes on mobile devices D. How to manually enter UPC codes Q2. Which barcode symbology does the video recommend using for in-house inventory labels? A. Code 128 B. QR Code C. Code 39 D. EAN-13 Q3. What is Code 39 known for? A. High-density barcodes for small labels B. Being self-checking and easy to use without a checksum digit C. Only supporting lowercase letters D. Requiring a mathematical checksum for all codes Q4. To make the barcode readable by a scanner using Code 39, what must you include before and after the product code? A. Spaces B. Parentheses C. Asterisks D. Underscores Q5. If you want to install the barcode font for all users on a computer, what is necessary? A. Nothing special, just double-click the font B. Use a special barcode font installer C. Be logged on as an administrator D. Only install it using the command prompt Q6. After installing the Free 3 of 9 barcode font, how is it used in an Access label report? A. Select the font for a text box that displays the code wrapped with asterisks B. Change all fonts in Access to Free 3 of 9 C. Apply the font to table fields only D. It cannot be used in reports Q7. What types of characters does the Free 3 of 9 barcode font support? A. Only numbers and lowercase letters B. Only uppercase letters and numbers, plus some punctuation C. All Unicode characters D. Lowercase and special symbols only Q8. Why might the label wizard in Access display a "Data may not be displayed" message? A. There are too many records in the table B. The label size is too small horizontally C. The barcode font is not installed D. Product codes are too long Q9. What is the recommended mailing label template mentioned in the video for printing multiple labels per page? A. Avery 5160 B. Dymo 150 C. Avery 8167 D. Brother 2050 Q10. If you want to print multiple labels for the same product, what does the extended cut of the video suggest? A. Duplicating the records in the product table B. Using a button to add labels to a separate label table C. Printing the same label sheet multiple times manually D. Changing the product code to print more labels Q11. What should you do to thank the creator of the Free 3 of 9 font? A. Pay him a licensing fee B. Send a thank you email C. Share his website on social media D. Write a review on YouTube Q12. What is string concatenation used for in this video? A. Installing fonts on Windows B. Combining asterisks and product codes for barcode display C. Sorting table records D. Printing labels on a Dymo printer Q13. Which of these is a benefit of using a Dymo label printer according to the video? A. It can print in color B. It prints one-up labels efficiently and is inexpensive C. It creates QR codes automatically D. It replaces the need for barcode fonts Q14. What is the suggested action if you have not viewed the barcode scanning video prior to watching this one? A. Proceed without it B. Watch the scanning video first C. Skip Access and use Excel D. Use random product codes Answers: 1-B; 2-C; 3-B; 4-C; 5-C; 6-A; 7-B; 8-B; 9-A; 10-B; 11-B; 12-B; 13-B; 14-B DISCLAIMER: Quiz questions are AI generated. If you find any that are wrong, don't make sense, or aren't related to the video topic at hand, then please post a comment and let me know. Thanks. SummaryToday's video from Access Learning Zone focuses on how to print your own barcode labels in Microsoft Access. Yesterday, I went through the process of scanning barcode labels, and now I'm going to take you through creating and printing your own, which is especially useful for inventory systems when your products do not already have UPC codes.This topic was inspired by a question about making barcode labels for in-house products where standard UPCs are not available. I encountered this scenario in my own PC hardware business years ago when we built custom computers and needed our own barcodes for inventory tracking. If you have not watched my previous video on scanning barcodes, I recommend you start there first because this lesson builds on some of the foundational concepts introduced in that tutorial. There are different types of barcodes, with the main distinction being between 1D barcodes (the familiar linear ones) and 2D barcodes (like QR codes). For inventory tracking and most in-house applications, 1D barcodes are more than sufficient. They are simple, reliable, and easy to implement, and that's what we'll focus on today. Within the 1D barcode family, there are several formats such as UPC and EAN. However, the one we will use is Code 39 since it is the most straightforward to implement in Access. Code 39, sometimes referred to as Code 3 of 9, can encode uppercase letters, numbers, and a few punctuation marks. For this example, I recommend sticking to uppercase letters and numbers for simplicity. One of the major benefits of Code 39 is that it is self-checking, making scanning errors very rare unless the label suffers significant damage. While it is not as compact as other codes like Code 128, the slightly larger size is a small trade-off for the convenience it offers by not requiring a check digit or complex programming logic. All you need to do is wrap your code in asterisks to indicate the start and end. The next step is to download the Free 3 of 9 barcode font, which has been reliably used for decades. The font works in all recent versions of Windows. Once you download the font, make sure to extract it from the zip file before installing it on your system. Choose the original Free 3 of 9 (not the extended version), and install it for your user account. You can verify it's been installed by searching for fonts in your system settings and looking for Free 3 of 9 in the list. It's also clear from the font preview that only uppercase letters and numbers are supported, so stay within that limitation. After installation, I encourage everyone who makes use of this excellent free resource to send a thank you note to the font's creator, Matthew. His contact information can be found with the font download. He permits both personal and commercial use and appreciates hearing from users, even though it's not required. With the barcode font installed, let's look at how to use it inside Access. Start by ensuring your product table includes a field for storing product codes. These can be any unique identifiers you choose—just remember to keep them uppercase. If you want to automate the assignment of sequential numbers to new products, I cover that process in another video; you can find the link in the resources section below. With your product table set up, you can use the Label Wizard in Access to design and print barcode labels. You can select any of the standard label layouts, such as the Avery 5160 format, which provides a convenient size and layout for most inventory applications. If you have a dedicated label printer like a Dymo label writer, I also have a separate video showing how to print labels one at a time, which can be very efficient for frequent or high-volume label printing. Once the wizard has created your basic label layout, switch into design view for refinement. You might need to adjust the width of the label to accommodate your data. Replace the visible product code field on the label with one using the Free 3 of 9 font. Increase the font size so the barcode is easy to scan, but remember, if you simply format the field as a barcode without including the necessary asterisks at the beginning and end of the code, your scanner will not recognize the barcode correctly. The solution is to update the control source for the product code field to concatenate an asterisk at the start and end of your code. This is a basic string operation in Access that you can replicate as needed. After saving and printing your updated label design, test the ability to scan the barcodes. Without the asterisks, the scanner will not pick up the code. Once you add them, the scanner should immediately recognize your barcodes and enter the codes automatically—perfect for inventory management. If you anticipate printing multiple copies of the same barcode label, the process can be automated further, and for that, I provide additional guidance in the extended cut available to members. Here, I cover how to add features that allow you to quickly select how many labels to print per product, tie this into the label printing workflow, and manage the temporary label data so you are ready to print batches of labels efficiently. The extended cut includes creating buttons to add labels, print them in batches, and clear the temporary label table when you are done. If you want access to these in-depth lessons and downloadable sample databases, consider becoming a member of my site. Membership starts at the Silver level for extended videos and live sessions, with Gold and Platinum levels providing even greater access to sample databases, code libraries, and advanced courses spanning Access, Word, Excel, Visual Basic, and more. Feel free to leave comments with questions or feedback. If you are not already subscribed, signing up is free and ensures you stay updated on new content. For email notifications, join my mailing list as YouTube no longer emails new video alerts. You can also find a comprehensive Access Level 1 course on my website and channel, free of charge. If there is a specific question or scenario you would like covered, submit it through my TechHelp page. You can find a complete video tutorial with step-by-step instructions on everything discussed here on my website at the link below. Live long and prosper, my friends. Topic ListDifference between 1D and 2D barcodesOverview of Code 39 barcode symbology Character requirements for Code 39 barcodes Benefits and limitations of Code 39 Downloading and installing the Free 3 of 9 barcode font Verifying barcode font installation in Windows 10 and 8 Creating a product table with custom product codes Using the Access label wizard to design label reports Selecting appropriate label formats (Avery, Dymo, etc.) Applying the barcode font to labels in Access Adjusting label and font sizes for barcode visibility Adding asterisks for correct Code 39 barcode formatting String concatenation in Access label fields Testing printed barcodes with a barcode scanner Troubleshooting scanning issues with Access barcode labels Primary Topicsbarcode printing, Microsoft Access, Code 39 symbology, barcode font installation, label report design, mailing label wizard, string concatenation, label printer useSecondary Topicsinventory management, label formatting, product code assignment, scanner testing |
||||
|
| |||
| Keywords: TechHelp Access barcode printing, print barcodes, dymo, barcode labels, how do i print barcodes in access, create print barcodes PermaLink Barcode Printing in Microsoft Access |