Customer Discount
By Richard Rost

 4 years ago
Customer Discount. ComboBox.Column Property
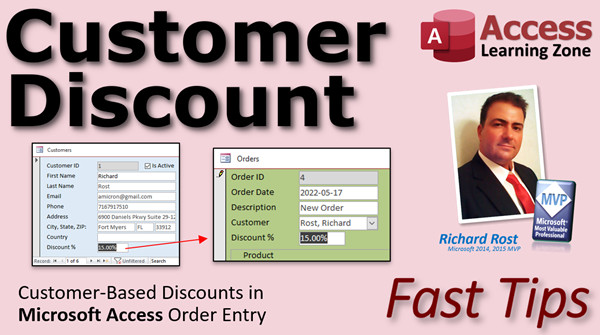
In this Microsoft Access tutorial, I will show you how to set a discount percentage for each customer. That value will then be copied to any new orders that you make for that customer. We will learn about various combo box properties, including column, column count, column widths, list width, list rows, column heads, and more. We'll use the AfterUpdate event to copy the value from the customer combo box to the discount percent field with one line of VBA code.
Recommended Courses
Links
 Keywords Keywords
access 2016, access 2019, access 2021, access 365, microsoft access, ms access, ms access tutorial, #msaccess, #microsoftaccess, #help, #howto, #tutorial, #learn, #lesson, #training, #database, #fasttips, combo box .column property, combobox.column(x), ComboBox.Column property, Use the Column Property of a Combo Box, copy discount to order, column count, column widths, list width, list rows, column heads
Intro In this video, I will show you how to set up a customer-based discount in your Microsoft Access order entry system, so each customer can have their own default discount rate automatically applied to new orders. We will cover adding a discount percent field to the customer table and form, updating the order entry process to copy the customer's discount for new orders (without affecting past orders), customizing combo boxes to display the discount, and adding a bit of VBA code to automate the process. You'll also see tips for managing form layouts and improving data entry with tab order settings.Transcript Welcome to another Fast Tips video brought to you by AccessLearningZone.com. I am your instructor, Richard Rost.
In today's video, I'm going to show you how to make a customer-based discount in your Microsoft Access Order Entry System. This is where you want to make a discount that applies to a customer. So Joe Smith always gets a 12% discount. Me, Richard Rost, I always get a 15% discount. John McPickard always gets a 17% discount and so on. So anytime you make an order for them, that discount is automatically applied.
Now, while this may be a Fast Tip video, this is a follow-up to a previous TechHelp video that I did called Order Discount. That's where you can put a discount on the order form. If you don't have the discount already on your order form, you're going to have to do a lot more work. Go watch this video first if you haven't already. Build that database and then come back here and I'll show you how to put the discount on the customer form.
Here's the database that we built in the other discount video. On my TechHelp free template database, you can grab a copy of this off my website if you want to. But unless you're a member, you still have to build the discount part into it.
So go to Customer Form, go to Orders, and you'll see right there, there's a 10% discount. This is what I teach how to do in that other video, and then it puts the discount down here and actually calculates the amount. If you go to another order here, you see that 0% there, you can set it on each order differently. So if this order is 5%, maybe they got a coupon.
If you go to create a new order for them, it's set back to 0%. The goal here is you might have certain customers that always get a specific discount. Maybe they're in a particular purchase level or, for example, my gold members get a certain discount, and my platinum members get a 50% discount. So any orders they place, they automatically get that discount, if they use their discount link.
What I want to do is put that discount right here on the customer form, and then anytime I make a new order for them, that discount gets applied. You have to be careful. You can't make this related directly to the orders because you don't want it changing the existing discounts on the existing orders. You can't just look this up from here every time you have an order. When you make a new order, you have to copy it from the customer form to the order form.
You see the challenge here? You can't just make a query and pull that value in from the customer table because it will change if you change it on the customer. If they cancel their membership and now their discount goes back to zero, you don't want it changing all their old orders. So we have to copy it. Whenever we make a new order, we copy it over.
The first thing I have to do is put this discount percent value in the customer table and on the customer form. We can just copy it from here. Let's start with the table.
Go to the Order table Design View. There's Discount Percent right there. It's a number of type double, format it as a percent. The default is zero. I'm just going to copy that, Ctrl+C. Let's go over to the Customer table Design View and we'll just paste that in here on the bottom, click there and then go Paste. There we go. That's easy.
Save that. Close it. Close it.
Now it's the same thing with the forms. Go to the Order Form, right click, Design View. Now it's named the same thing, so I can just copy this. Click on the text box, it also selects the label. Copy that. You can close that form now. Design View on the Customer Form, and we'll just make some room and paste it down here.
There. Perfect. We'll slide this over so it lines up.
Save it. Close it. Open it up. There's your blank discount. Now everybody who's currently in the database will have a null value there. If I go to a new record though, you'll see my default zero is in there. But anybody who's currently in here, whenever you add a new field, you get null values.
For me, I only got six customers in here, so I just type in some values. I'll just put zeros in for everybody right now.
If you have a lot, if you have thousands of records and you don't want to do that, you can use an Update Query to set it to whatever you want. If you don't know how to do an Update Query, there is a video for you. I'll put links to all this stuff down below in the description below the video. You can go click on that and watch the update queries video.
Now close that. I can come back to my Customer Form. I could put something in here for me. I'll put in 10 and then I'll press Tab. There is another thing I don't like. Remember your tab order. Since I brought this field in last in my design view, this guy is at the bottom of the tab order.
So I could fix my tab order. Let's go back into Design View. Go to Form Design, go to Tab Order. Let's figure out where we want to put that thing. Here it is, down here under Discount Percent. I want it to go after, let's say, the Country field. So I'll click on it and drag it right up here under Country.
That's the tab order. Save it. Close it. Now this way when I'm in here and I go Country, Tab to Discount, and then Tab over to Family Size. That's called tab order. Got a video about that too. Go watch that one if you want to learn more.
I'll set my discount to 10%. I'll set Jimmy Kirk's to 6%. Let's go to Jean-Luc. Maybe he's got 17% discount or 17.01% discount. My Star Trek nerds. I love it.
Now here's the problem. When I go to create an order, I want that discount rate to appear in there. Now there are two things I have to do. First, we can set the default value of this equal to whatever that is over there when this form opens. That's the easy thing to do. Let's do that first.
Let me close both of these down. Let's go back in Customer Form, Orders, right click, Design View. If you watch the previous videos, you know, for example with my customer combo box here, it gets its default value from Forms Customer F Customer ID. I covered that in the invoicing video and I got a whole separate video on how that works too. It's called getting a value from an open form. Go watch that. Again, links will be down below.
I'm just going to copy this to make things easier. Let's copy that. Click on the Discount Percent. Go to its Default Value and we'll get rid of Customer ID. Now watch this. That list pops up right there. You don't get this in older versions of Access. This is relative to the new 2007 or 2010. This was added.
Scroll down. Where is it at? Find that Discount Percent. Oh, there it is right there. Pick it and there you go. Now, this means when we open up the order form, while this guy is open in the background, any new orders will grab that default rate.
So let's go back over to Jean-Luc Picard and hit Orders. Now you can see there's the discount rate for a blank new order. That's all fine and dandy. But what happens if I come into the order form by itself? Let's say you got a button over here and you don't want to have to look up the customer's record first. You just want to come straight into the order form and go to a new record.
Now this is saying Name?#Name here because that field or form isn't open, so it can't find that field. What we need to be able to do is, when we drop this down and pick someone like Jean-Luc, at that point, I need to update that value right there. We have to assume that the customer form isn't open.
There are a lot of different ways you can do this. My personal preferred method is to store that value inside this combo box. Just put it as another column in here. It's the least amount of work that you can do, and then you just copy that column's value into that field.
How do we do that? This combo box is based on something called CustomerLFQ. If you watched the invoicing video, which you should have if you watched the other discount video, everything's kind of based on something before it.
Let's go edit this CustomerLFQ and add the Discount Percent to it. I'm going to close this stuff down. I don't like working on stuff with other things open, main menu is an exception. Let's find that CustomerLFQ. Remember, the purpose of this guy is just to take Last Name and First Name and put them together like that. So we're just going to add that field to this query. Go down to the bottom. There it is. Any other fields you want in there too, you can do this with the address if you want to copy that address over to the invoice so you know where this invoice was shipped to. I covered that in a couple of the videos.
When I run this now, there are their discount percentages. Save that query and let's go back to our combo box. Now we're just going to add it to this combo box. You might find it easier to just recreate the combo box with the wizard, but we already know how to do that. Let me show you some new stuff here. Let me show you how to modify this combo box. Let's say you got this combo box all set up and it's pretty. You don't want to have to rebuild it again. We can just change this in this combo box.
Double click on it to open up its properties. The row source right here, I'll zoom in so you can see what's in there. Shift+F2. This is an SQL SELECT statement. It's basically picking what's in the box, where it's getting its data from: SELECT CustomerID and LF, which is Last Name, First Name, from that query. We're going to order by LF so it's sorted Last Name, First Name.
This isn't an SQL lesson. I really recommend you do take some time to learn SQL and I have some great lessons on that. Here's a free one if you want to go watch this, it gives you all the basics of how SQL works in Access. Go watch that.
But you can modify this guy without even using SQL. All you have to do is click on the little dot dot dot right there, the little builder button. It opens it up like a query. See, that's the little query builder. All you have to do is just add Discount Percent to that query to put it in the row source.
Save it. Close it. It will update that row source and if you take a peek at it now, look at that, added Discount Percent to it. Or you can just type it in here, either one. Whatever works for you. Some people like the graphical way, some people like the SQL way.
Now that adds the column to the row source, but we still have one more thing we have to do. Go over to Format. It doesn't actually change the number of columns that are in there. We have the Column Count property. We've now gone from two columns to three columns. So change that to three.
Remember, the first column is hidden. That's the ID. Go back over here and take a look at it again. That first column is the Customer ID. See it? Customer ID. You can ignore this CustomerLFQ. We only have one query or table that this is based on, so that's moot. Basically CustomerID is column zero. The columns are zero-based. That's column zero. Column one is Last Name, First Name. Now column two is the Discount Percent.
We now have a total of three columns: zero, one, and two. That's the first thing we have to change.
The second thing you have to change is the Column Width property. This just looks like that, and you make this in the wizard when you make your combo box. You can slide these left and right to change the sizes. This is kind of hard to read like that, so I'm just going to change that to 1.2 inches. Then we have to add the width for the second, or actually the third column, column two. Since that's going to be a percent number, kind of small, let's go semicolon and then 0.5 inches like that. Let me get half an inch.
We've just changed the widths of all the columns in the combo box.
One more little setting. I know I said it's easier to do it this way, but just bear with me. Now this is the List Width. This is how wide the combo box is when you open it up. Remember, it can be wider than the box itself when it's closed. Before, it was just the same width as that, but now let's make it, let's see, we've got 1.7 about here. So let's make that 1.8 inches. I like to make it a little bit wider than the total width there, because it gives room for your scroll bar.
See that? That's Column Widths, Column Count, and then the List Width.
While we're at it, List Rows is how many you want to see when the box is open. If you only want to see four at a time, the default is 16. If you've got more than 16 records in this combo box, you'll see 16 of them with a scroll bar. You can change that to 8 if you want to or 10 or whatever number you want in there.
There's also the Column Headers. That's if you want to see the names of the columns above each column. I don't like that setting at all. Maybe in a list box, but not in a combo box.
If you want to learn about all of these different combo box properties, I cover them in detail in my Access Beginner Level 8 class. And things like tab order, tab stop. We go over all kinds of combo box related stuff. Lots of cool stuff in this class.
Access Beginner Level 8. Again, I'll put a link to this down below.
We got our combo box looking like we want it to look. Close that, save the form, close it, open it back up again. Always close your forms and reopen them. I don't like switching between design view and then back to form view and then back to design view. Especially when you get into programming, things can get messed up with events not firing right. Just close it down, reopen it. Get in that habit.
Now when you drop down this customer combo box, look at that. There's your discount rates there. Any other information you want to see in that combo box when it's open, you can put in those columns.
Now, here's the tricky part. If we open up an order and we change the customer, we want the discount rate to change too. So if I change this to Jean-Luc, I want that to change to 17.01 and apply accordingly. In order to do that, we have to use something called the After Update event, which means we need one line of VBA programming. One line.
Now don't be scared. A little tiny bit of VBA makes your database a whole lot more powerful. You're going up to a whole other level. But it's not hard. Go watch my Intro to VBA video. It's absolutely free. It's about 20 minutes long, and it will teach you everything you need to know to get started with VBA.
We just need one line of code. We got nowhere to put it.
So, Design View. We're going to open up the properties again for this combo box. Go to Events and find After Update. The After Update event will fire when we change the value in the customer combo box. Hit the dot dot dot button. That will open up your VBA code window. There it is.
If you watched the other video, you've been through this. You know the Discount Percent After Update runs a refresh to refresh that data on the bottom if you change it. We basically have to say in here, I want to copy the value that is in column two of the customer combo box to the Discount Percent rate. So it looks like this:
DiscountPercent = CustomerCombo.Column(2)
Remember, zero, one, two.
Notice I intentionally didn't capitalize everything because watch this: when I press Enter or down and move off of that, look at that. The letters all capitalize themselves the way they should be. That's the way you can tell that you spelled everything right, because if you don't spell something right, it won't auto-capitalize like that.
Now after we do that, I lied. We need two lines of code because we also have to run Me.Refresh after this too, so
Me.Refresh
That way, if you change the discount percentage, it'll also refresh the calculations at the bottom of the screen.
So yeah, we need two lines of code. Sorry. But let me rephrase that. We need one line of new code because we already have it down here.
Save it. Close your code editor. Close this. Close that. Open this up.
Now I'm going to drop this down. I'm going to pick Jean-Luc. Boom. And look at that. It updated that to 17.01%. If there was actually data in here - data, get it? If there's data in there - what's data doing in there? That's not funny, is it?
If I change it, look, the discount is $20 now. If I change it to Jimmy Kirk, look at that. It updated. Changes that. It gets the value out of the combo box, puts it in that field, and then refreshes all the calculations.
Now the reason we do it this way is because if we close this, if we change James Kirk's Discount Percent to 5%, and then if we go and, let's say, we go back, we come into him later on, and we open up his old orders, that's the one that was already in there. See, the ones that are already in there don't change. That one still says 6%. And this one here, is that an existing one? Yeah, it's an existing one. There's one in there already that's got 20% in there. But that must be an old one. That's why we do that.
It's the same thing with addresses. I covered that in the invoicing video, and it's in the extended cut for the members. This database alone is worth the cost of membership. Gold members can download a copy of this, too.
So in your Customer Form, if you go to Orders, there are a couple of reasons why this one's enhanced. If you go to create a new order here, and I picked Jean-Luc Picard, for example, you want to change it, are you sure? Yes. It puts his address in there using a very similar method to what we just did. We can pick products down here from a product table.
Here's the product table over there. We've got an actual product list with a markup and everything. Lots of stuff in this members video. If we drop this down, we pick something like the Bat'leth, hit Add, pulls that in there. Some of that data is in the combo box. We copied it over from the columns.
Now, some things you can't put in a combo box. For example, if you look at Training, if I hit Add, look at that. Training has notes associated with it. Those notes are in a long text field. You can't put long text fields in a combo box; it's just one of the limitations. You have to use a different technique altogether to do that. That is covered in my invoicing videos, extended cut for the members.
If you want to learn a lot more about building an order entry system, Access Expert Level 8 and Level 9. We build a very detailed order entry system. We build a product database. We do tax, sales tax, discounts, all that kind of stuff. That's Expert 8 and Expert Level 9, part of my full complete series where you don't have to jump around - it's all one class after the next.
You pick products and stuff. I show you a couple different methods for doing this stuff, building invoices. These are all in the full classes.
There you go. There's your Fast Tip for today. I hope you learned something, and we'll see you next time.
How do you become a member?
Click on the Join button below the video. After you click the Join button, you'll see a list of all the different membership levels that are available, each with its own special perks.
Silver Members and up will get access to all of my extended cut TechHelp videos, one free Beginner class each month, and more. Gold Members get access to download all of the sample databases that I build in my TechHelp videos, plus my Code Vault, where I keep tons of different functions that I use.
You'll also get a higher priority if you decide to submit any TechHelp questions to me, and you'll get one free Expert class each month after you've finished the Beginner series.
Platinum Members get all the previous perks, plus even higher priority for TechHelp questions, access to all of my full Beginner courses for every subject, and one free Developer class each month after you've finished the Expert classes. These are the full-length courses found on my website, not just for Access, too. I also teach Word, Excel, Visual Basic, and lots more.
You can now become a Diamond Sponsor and have your name or company name listed on a sponsor's page. They will be shown in each video as long as you're a sponsor. You'll get a shout-out in the video and a link to your website or product in the text below the video and on my website.
But don't worry, these free TechHelp videos are going to keep coming. As long as you keep watching them, I'll keep making more and they'll always be free.Quiz Q1. What is the primary goal of the video tutorial?
A. To show how to apply a customer-specific discount automatically in Access Order Entry
B. To explain how to create a simple order entry form in Access
C. To demonstrate how to send emails from Access
D. To teach how to create a customer report in Access
Q2. Why is it important to copy the discount value from the customer to the order when a new order is created?
A. It guarantees that all orders have a discount, even if the customer does not have one
B. So that changes to the customer discount do not affect existing orders
C. So that database size is minimized
D. To automatically delete discounts when customers are removed
Q3. Where does the customer-based discount percent value need to be stored to achieve the tutorial's goal?
A. Only in the Orders table
B. Only on the order form
C. In the Customers table and on the Customer form
D. In a separate Discounts table
Q4. After adding the discount percent field to the Customers table and Customer form, what should you do if existing records have null values?
A. Nothing, keep them as null
B. Manually enter discount values or use an Update Query to set them
C. Delete all existing records and re-enter them
D. Export data to Excel and re-import
Q5. Why is fixing the tab order important when adding new fields to a form in Access?
A. It affects how data is saved to the database
B. It determines the appearance of reports
C. It makes data entry smoother and more logical for users
D. It increases the speed of form loading
Q6. When opening the order form while the customer form is open, how is the default discount rate set on a new order?
A. By reading the value directly from the customer table for every order
B. By copying the value from the open customer form into the new order's default value
C. By manually entering it for each order
D. By using a macro attached to the order table
Q7. Why can't you simply pull the customer discount value into every order using a query?
A. Access does not support such queries
B. It would change past orders if the customer's discount changes later
C. It is too slow for large databases
D. It requires advanced SQL knowledge
Q8. How is the customer's discount value added to the order entry combo box?
A. By creating a new table for discounts
B. By adding the Discount Percent field to the customer combo box row source/query
C. By setting a static value in the combo box properties
D. By modifying macros
Q9. In Access combo box setup, what is the purpose of setting the Column Count and Column Widths properties?
A. To hide all columns from users
B. To specify how many fields are displayed and control their display size
C. To control data validation for the combo box
D. To set the font and background color
Q10. How do you make the customer discount update automatically when the customer is changed on an order form?
A. By using a macro on the form
B. By adding VBA code in the combo box After Update event to set the discount field from the appropriate column
C. By creating a linked Excel table
D. By changing the default value of the discount field for every order
Q11. What is the correct VBA code to set the discount percent when the customer is changed in the order form's combo box (assuming the combo box is named CustomerCombo and target field is DiscountPercent)?
A. DiscountPercent = CustomerCombo.Column(0)
B. DiscountPercent = CustomerCombo.Column(2)
C. DiscountPercent = CustomerCombo.Value
D. DiscountPercent = 0
Q12. What additional line of code is recommended after copying the discount percent in order to update calculations on the form?
A. Me.Calculate
B. Me.Refresh
C. Me.Reset
D. Me.Update
Q13. Why does updating the value via the combo box's second column prevent past orders from being affected by a change in the customer discount?
A. Because it only displays data, not saves it
B. It stores the value at the moment of order creation and does not pull from the customer record afterward
C. The combo box automatically locks past orders
D. It uses Excel to separate past data from current data
Q14. Why can you not use a combo box to store long text fields like product notes?
A. Combo boxes only support numeric fields
B. Combo boxes can only display up to two columns
C. Combo boxes do not support long text (memo) fields
D. Combo boxes only work with lookup tables
Q15. What Access property controls how many rows are visible at once when the combo box dropdown is open?
A. Row Source
B. List Rows
C. Column Count
D. Tab Index
Q16. What is the benefit of closing and reopening forms after making design changes in Access?
A. It clears all form data
B. Ensures design changes and events are properly applied
C. Prevents other users from accessing the database
D. Makes the database faster
Q17. Which membership level grants you download access to all sample databases from TechHelp videos?
A. Silver
B. Gold
C. Platinum
D. Diamond
Answers: 1-A; 2-B; 3-C; 4-B; 5-C; 6-B; 7-B; 8-B; 9-B; 10-B; 11-B; 12-B; 13-B; 14-C; 15-B; 16-B; 17-B
DISCLAIMER: Quiz questions are AI generated. If you find any that are wrong, don't make sense, or aren't related to the video topic at hand, then please post a comment and let me know. Thanks.Summary Today's video from Access Learning Zone covers how to create customer-based discounts in a Microsoft Access Order Entry System. Sometimes you want a particular customer to always get a specific discount percentage automatically when making a new order, like Joe Smith always receiving a 12 percent discount, or someone else getting 15 percent every time.
This Fast Tips lesson builds on a previous TechHelp video focused on general order discounts, where a discount can be added to each individual order. If your order form does not already support per-order discounts, you should watch that previous video first and get your database set up, as this lesson builds directly on that foundation.
In the sample database from the previous video, you can see that each order may have a different discount. For example, one order might show a 10 percent discount, while another is set at zero or five percent if a coupon was used. However, when creating new orders in that system, the discount always defaults to zero. The goal now is to set a default discount for each customer—like gold or platinum members who are always entitled to a set percentage—so that any new orders for them automatically use their discount, without affecting old orders.
It is important to avoid creating a direct relationship where the order always references the customer's current discount. If you did this, and then the customer's discount changed, all their previous orders would reflect the new rate, which is usually not what you want. Instead, when creating a new order, you need to copy the current discount from the customer record onto the order, leaving existing order discounts unchanged.
The first step is to add a Discount Percent field to the Customer table and the Customer form. You can copy the Discount Percent field from the Order table, including its properties like number type and percent format, and paste it into the Customer table in Design View. Make sure to save the table afterward. Then do the same for the Customer form: copy the discount text box from the Order form in Design View and paste it onto the Customer form, arranging it as needed.
Once this is complete, existing customers will have a blank, or null, discount percent entry. When you add a new customer, the default will be zero. For databases with many customer records, you can use an Update Query to fill in a default discount; there are separate instructions and videos covering how to create and run Update Queries if you need guidance.
After adding the discount field, remember that controls added last tend to appear last in the tab order. Adjust the form's tab order in Design View so the user experience flows logically, such as placing the discount field after the country field. There are videos available that discuss setting the tab order in detail if you're interested.
With the discount fields in place, you can start entering values for customers. For example, set yourself to 10 percent, set someone else to 6 percent, and perhaps give someone else a more unique value like 17.01 percent.
Now comes the task of utilizing this customer discount when creating an order. You want the discount percent on new orders to default to the customer's current discount. This can happen in two main ways. The simplest is to set the order form's Discount Percent control to automatically use the customer's discount percent when opened from the Customer form. This is handled by setting the Default Value property to refer to the field on the open Customer form.
However, if you open the Order form by itself (not from the Customer form), this method can fail because there's nothing to reference if the Customer form isn't open. To solve this, you should include the Discount Percent in the customer combo box on the Order form. Add Discount Percent to the row source query of the combo box so that its list includes this value. Update the combo box properties: increase the column count and adjust column widths to accommodate and display the discount percent clearly.
Access combo boxes use a zero-based index for columns, so column zero is the Customer ID, column one might be name, and column two becomes the Discount Percent. Make sure to update the combo box's Column Count and Column Widths properties accordingly.
If you'd like a more visually friendly combo box, adjust settings like the List Width and List Rows to control how much information appears and how many items are visible at once. Column Headers can be toggled, but these are usually not preferred for combo boxes.
Now, when using the combo box to pick a customer, you want the Discount Percent field on the order to update automatically to match. This requires using a bit of VBA: an After Update event on the combo box copies the value from the relevant column of the selected customer over into the Discount Percent field on the order form. A simple two-line VBA routine accomplishes this and triggers a refresh so that any calculations based on the discount update on the form.
Once set up, anytime you choose a customer in the order form, their default discount is applied to new orders. Previous orders remain unchanged, and changing a customer's discount will not retroactively alter any old entries. This same technique can be used for copying addresses or other customer information to orders or invoices—so you always capture the value at the time the order was created.
Addressing scenarios where more complex fields (such as long text notes) need to be copied, alternate techniques are needed, as combo boxes are not suitable for long text fields. These methods and many more order entry system enhancements are discussed thoroughly in my full-length Access classes (specifically Expert Levels 8 and 9), where we cover everything from tax and discounts to building a complete product database.
If you want to learn more about combo box properties, VBA basics, SQL, or any other concept mentioned here, there are dedicated introductory videos and full classes available.
For those interested in supporting the channel and accessing more resources, I offer various membership levels, each with additional perks such as extended cut TechHelp videos, downloadable databases, and priority support for your questions. These memberships range from Silver up through Platinum, with increasing benefits at each level.
All of the events and programming covered here today are available with step-by-step instructions and sample databases in my complete video tutorial, which you can find on my website at the link below.
Live long and prosper, my friends.Topic List Adding a discount percent field to the customer table
Adding a discount percent control to the customer form
Setting default values for new discount fields
Updating existing customer records with an Update Query
Adjusting tab order to include the discount field
Setting default discount value on the order form based on customer
Modifying the customer combo box row source to include discount percent
Adjusting column count and widths in the combo box
Displaying discount percent in the combo box drop-down
Using VBA After Update event to copy discount percent
Refreshing the order form calculations after customer selection
Ensuring historical order discounts do not change when customer discount changes |


