|
|
Free Lessons Courses Seminars |
TechHelp Fast Tips Templates |
Topic Index Forum ABCD |
|
||||||
|
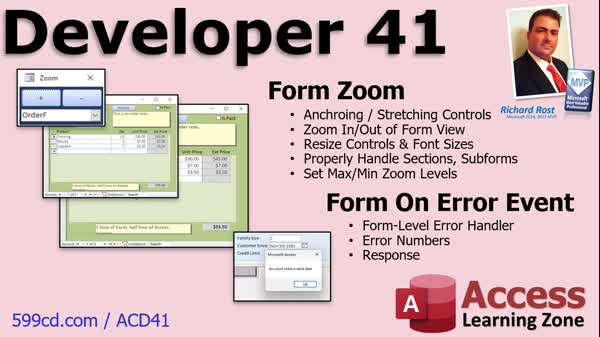
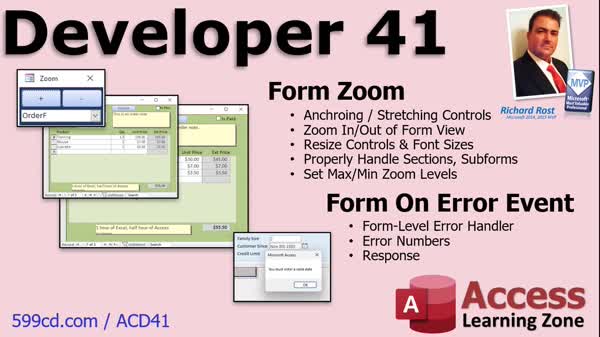
Access Developer 41 Zoom Controls, Anchoring, Form Error Events Welcome to Access Developer 41. In this course you will learn how to zoom in and out of forms in Microsoft Access by resizing controls and handling different zoom levels across various form sections. We will cover techniques such as anchoring controls for flexible layouts, using VBA code to adjust zoom, managing form-level error events for custom messages, and handling subforms and headers during resizing. You will also see how to set minimum and maximum zoom limits, store user-specific zoom levels, and discover resources for further topics after this level. Lessons
Database FilesLinks
Resources
Lesson SummaryWelcome! Zoom, Resize, and Error Events - Welcome to Microsoft Access Developer Level 41. In this course we will address how to zoom in and out of a form in Microsoft Access, including workarounds for resizing forms and controls, using anchoring, and handling different zoom levels across form sections like headers, footers, and subforms. We will also discuss form-level error handling events, including how to add custom error messages and minimize user-unfriendly errors. This course builds on Developer Level 40 and prior Access training, and is suitable for users of most recent versions of Access.
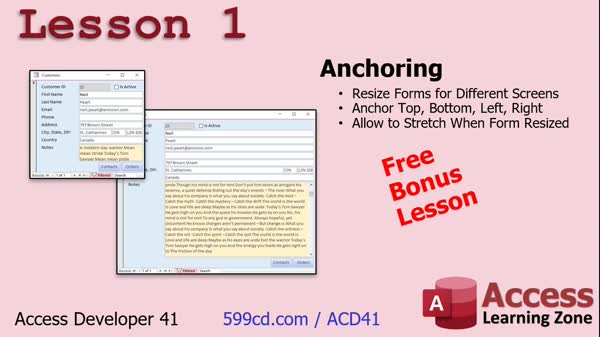
Lesson 1: Resize Forms with Anchoring - In Lesson 1, we will learn about anchoring in Microsoft Access forms, a feature that lets you resize form controls like text boxes and buttons so they adjust to different screen sizes. I will show you how to set anchoring properties to keep buttons in a specific corner or stretch text fields when resizing the form. We will walk through step-by-step examples using the Arrange tab in design view and discuss best practices for anchoring different types of controls so your forms remain flexible and user-friendly across devices and resolutions.
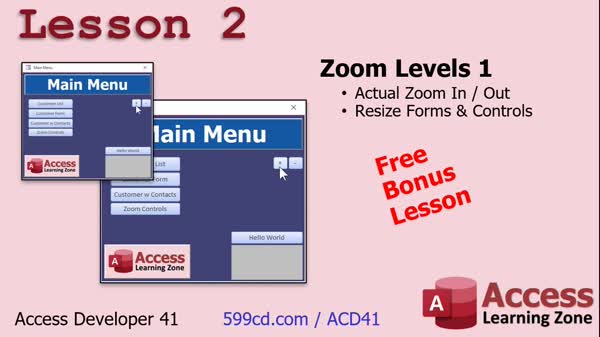
Lesson 2: Zoom In/Out Forms with VBA - In Lesson 2, we will walk through how to zoom in and out of forms in Microsoft Access by resizing controls, the form itself, and the fonts dynamically. I will show you how to create zoom in and zoom out buttons that adjust the height, width, position, and font size of controls using VBA. We will discuss how to loop through all controls for scalable design, handle form and section resizing, and address runtime issues like overlapping and scrollbars. We will also touch on special cases such as subforms, multiple sections, and setting minimum and maximum zoom levels.
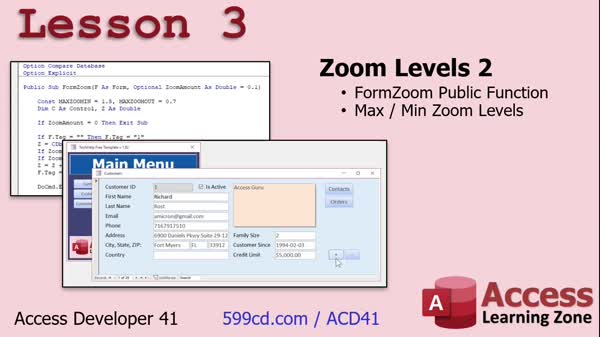
Lesson 3: Public Form Zoom: Min & Max Limits - In Lesson 3, we continue working with form zoom levels by making the Form Zoom function public so it can be called from any form in the database. We will move the zoom code into a global module, change the parameter names for consistency, and add controls to prevent users from zooming in or out too far. I will show you how to use the form's Tag property to store and track the current zoom level and demonstrate setting maximum and minimum zoom limits to enhance the behavior of your forms.
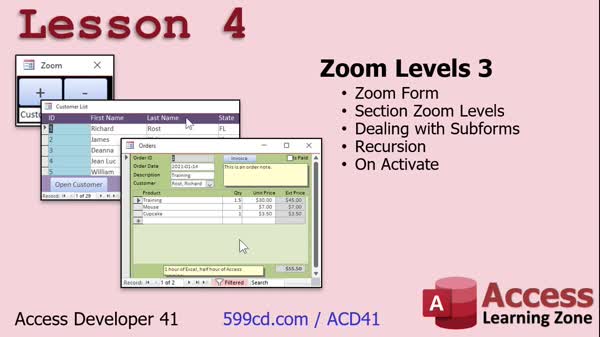
Lesson 4: Zoom Controls: Forms & Subforms - In Lesson 4, we will continue working with form zoom levels, focusing on how to resize different form sections, including headers and footers, as well as handling subforms using recursion. We will walk through creating a zoom form with controls to zoom in and out on selected forms, set up a combo box to choose which form to zoom, and discuss handling section resizing and potential issues like overlapping footers. We will also talk about troubleshooting zoom problems, working with control types, implementing the OnActivate event, and ideas for storing zoom levels per user in your database.
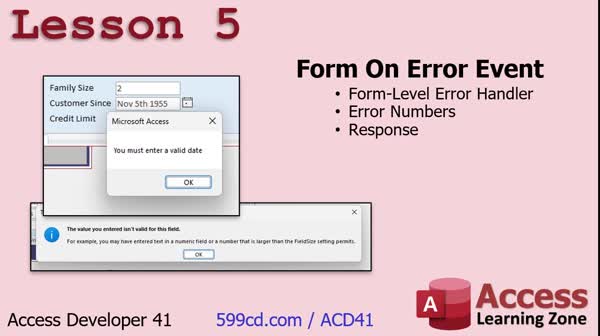
Lesson 5: Custom Error Messages with On Error Event - In Lesson 5, we will explore the form On Error event in Microsoft Access. I will show you how this event allows you to trap errors at the form level before validation rules or control-level events occur, enabling you to replace the default Access error messages with your own custom messages. We will walk through practical examples, such as handling invalid date entries and data type mismatches, using the DataErr error codes to identify specific issues, and tailoring responses for different fields on the form. This lesson will give you more control over how errors are handled and displayed in your forms.
Lesson 6: After Level 41: Finding More Topics - In this lesson, we will discuss what is next after Access Developer Level 41, including plans for future topics such as customizing the ribbon, right-click menus, and a possible temp virus lesson. I will explain how you can suggest and vote on upcoming topics, encourage you to fill out the class survey, and show resources like the topic index and additional TechHelp and Fast Tips videos for finding more information. We will also talk about ongoing efforts to update the website's search index to make it easier to locate topics covered in the classes.
NavigationKeywordszoom forms, resize controls, form anchoring, zoom buttons, VBA zoom code, zoom in, zoom out, font scaling, subform resizing, form sections, on error event, custom error messages, dataerr codes, control resizing, form zoom limits
TranscriptWelcome to Microsoft Access Developer Level 41 brought to you by AccessLearningZone.com. I am your instructor, Richard Rost.Today's class will focus on zooming in and out of a form. This is one of the major complaints that people always have when it comes to Access. In other applications like Word and Excel, you can zoom in and out. You can make the document bigger, or the spreadsheet small or whatever. You cannot do that in Access. So, in today's class, we are going to see how you can do that. We will show you some really cool tricks. Now we are going to learn about form-level error handling events. You can have events that cover the whole form. They can take care of all kinds of different error responses. You can get rid of some of those built-in, user-unfriendly error messages. This class follows Access Developer Level 40. I strongly recommend you have finished all of my previous classes - Beginner, Expert, Advanced, and Developer levels - before continuing with today's class. My lessons are really designed to be followed one after the other, so do not skip levels. See this page for details. This class is recorded with Microsoft Access as part of a Microsoft 365 subscription, which I strongly recommend. It is currently 2022, so if you are using the retail version, this is roughly equivalent to Access 2021. However, the lessons covered in today's class should work with any version of Access going back to 2007. If you have any questions regarding the material covered in today's class, just scroll down to the bottom of the page that you are on and post your questions there. Take a minute to read through any other questions that may have been posted as your question may have already been answered. Also, make sure you click on the red Subscribe button to get notified if any other questions or comments are posted for this class. Also, make sure you visit the Access Forum on my website if you have any questions about Access in general. Let us take a closer look at exactly what is covered in today's class. In Lesson One, we will begin by learning about anchoring, which is a technique that allows you to resize the controls like the text boxes on your form. People with different screen sizes can stretch the form and have bigger text boxes. You can also anchor buttons so they stay in the bottom right corner. For example, as the form gets bigger, those buttons move. That is all covered in Lesson One. In Lesson Two, we will learn how to actually zoom in and out of forms by making the controls, the forms themselves, and the fonts larger and smaller. In Lesson Three, we are continuing to work with zoom levels. We are going to make Form Zoom a public level function so we can call it from any form in the database. We will set maximum and minimum zoom levels so the user cannot zoom in too far or out too far. In Lesson Four, we are going to continue and finish with zoom levels. We will deal with different sections on the form like the form header and form footer. Those have to grow and shrink too. We will deal with subforms - not only do you have to grow and shrink the subform control, but you have to handle all of the objects inside that control, which is another form. This means we have to learn recursion, which is having the zoom function call itself. That is pretty cool. Then we will learn the OnActivate event, which I did cover briefly back in Access Advanced 2, way, way back, forty-some lessons ago. That is what happens when you jump from form to form. There is lots of cool stuff in Lesson Four. In Lesson Five, we are going to learn about form On Error events. This is an event handler that happens before a validation rule and before any control-level error handling. You can use these to put your own custom error messages there instead of the unfriendly Access default error messages that sometimes pop up. IntroIn this lesson, you will learn how to add zooming capabilities to forms in Microsoft Access, including techniques to resize controls using anchoring and dynamically adjust form and font sizes. We will cover creating public functions for zooming, setting maximum and minimum zoom levels, and handling zoom across different form sections and subforms, including recursion. You will also see how to use the OnActivate event and implement form-level error handling to create custom error messages.QuizQ1. What is the main focus of Microsoft Access Developer Level 41?A. Working with table relationships B. Zooming in and out of a form C. Creating custom queries D. Building macros for automation Q2. Why is zooming in and out challenging in Access compared to Word and Excel? A. Access does not support custom fonts B. Access forms do not have a built-in zoom feature C. Only reports can be zoomed in Access D. Access automatically resizes everything Q3. What is anchoring as described in Lesson One? A. Locking controls so they cannot be moved B. Aligning controls with the center of the form C. Allowing controls to resize or move as the form changes size D. Grouping all controls together Q4. In Lesson Two, what does zooming in and out of forms involve? A. Automatically switching between different forms B. Changing the color of form controls C. Making the controls, forms, and fonts larger or smaller D. Locking the form size Q5. What is the purpose of setting maximum and minimum zoom levels in Lesson Three? A. To always keep forms at 100 percent size B. To prevent users from zooming in or out too much C. To allow only administrators to use zoom D. To set the zoom based on user access levels Q6. Why is recursion important when handling subforms for zooming? A. It combines two different forms into one B. It copies controls from one subform to another C. It allows the zoom function to process objects inside subforms by calling itself D. It disables zooming for subforms Q7. What Microsoft Access event is mentioned that occurs when switching from one form to another? A. OnOpen event B. OnClose event C. OnActivate event D. OnTimer event Q8. What is a key benefit of handling form-level On Error events as taught in Lesson Five? A. Automatically correcting user data B. Displaying custom error messages instead of default Access messages C. Disabling all error messages D. Allowing errors to be ignored Q9. What does the instructor recommend regarding course sequence? A. Skipping to advanced lessons as desired B. Completing all previous classes in order before this one C. Watching only the lessons that seem interesting D. Starting with Developer Level 41 Q10. Which versions of Access will the techniques in this class work with? A. Only Access 2022 and later B. Only Access 2007 C. Versions from Access 2007 onwards D. Access 2003 and earlier only Answers: 1-B; 2-B; 3-C; 4-C; 5-B; 6-C; 7-C; 8-B; 9-B; 10-C DISCLAIMER: Quiz questions are AI generated. If you find any that are wrong, don't make sense, or aren't related to the video topic at hand, then please post a comment and let me know. Thanks. SummaryToday's video from Access Learning Zone will focus on a common challenge that many Access users face – the inability to zoom in and out of forms the way you can in Word or Excel. I often hear from students who wish they could adjust the view size in Access for better readability or easier form design, but unlike many other Microsoft applications, Access does not come with a built-in zoom feature for forms. In today's class, I'm going to show you practical methods to achieve this effect and provide you with some valuable tips.We'll also cover an important topic: form-level error handling events. These allow you to manage errors across the whole form, replacing the built-in error messages that are often unclear or unfriendly. I'll show you how to handle various error scenarios more gracefully, so your users get better feedback when something goes wrong. Before we move ahead, keep in mind that this lesson builds directly on Developer Level 40, and it really is essential that you've already completed all my earlier classes. I design these courses to be followed sequentially, starting from Beginner and moving through Expert, Advanced, and then the Developer series. Skipping around will leave big gaps in your understanding, so if you're not caught up, I recommend going back and working through the previous material. This class uses Microsoft Access from the Microsoft 365 subscription. Even if you're using a different version, like Access 2021, everything I show here should work for any edition going back to Access 2007. If you have any questions during the course of this lesson, you can scroll to the bottom of the web page, where you can post your questions. I suggest looking through questions from other students – your query may already have been answered. Staying involved in the discussion and subscribing to updates is a great way to keep learning. If your question is about Access in general instead of this specific class, remember that there's an active Access Forum on my website where you can get help. Now, let me outline what today's class covers. In Lesson One, we begin with anchoring. Anchoring lets you resize controls like text boxes on your form. This way, when different users with various screen sizes adjust the form, the controls grow or shrink appropriately. Buttons can also be anchored so they remain in a specific location, like the bottom right corner, even as the form size changes. Lesson Two addresses the main topic: making it possible to zoom in and out on a form. You'll see how to change the size of the controls and text on your forms, effectively creating a zoom effect. Lesson Three extends the zoom concept further. Here, I'll show you how to make your form zoom feature public so that you can call it from anywhere in your database. We'll also set sensible limits, so users can't zoom in too much or out too far and lose the usability of the form. In Lesson Four, we finish building out the zoom features. We'll tackle growing and shrinking different form sections, like headers and footers. We'll also discuss how to manage zooming in and out of subforms and their embedded objects. Since subforms are really just forms inside forms, you'll see how recursion – having the same function call itself – is useful in this context. I'll also revisit the OnActivate event, last covered way back in Access Advanced Level 2. This event helps control behavior when switching between forms. Lesson Five wraps up with a detailed look at handling form On Error events. This event happens before any validation rules or control-level error handling, and gives you the ability to present custom error messages rather than the generic ones built into Access. This makes for a much better user experience. You can find a complete video tutorial with step-by-step instructions on everything discussed here on my website at the link below. Live long and prosper, my friends. Topic ListAnchoring controls to resize with the formKeeping buttons anchored to corners during resizing Zooming forms in and out by resizing controls and fonts Creating a public zoom function for forms Setting maximum and minimum form zoom levels Applying zoom to form headers and footers Handling zoom for subforms and their child controls Implementing recursion in zoom functions Using the OnActivate event for form navigation Implementing form-level On Error event handlers Customizing error messages on forms Primary TopicsAccess form zoom, anchoring controls, control resizing, zoom function design, recursion in VBA, subform resizing, OnActivate event, form On Error event, custom error messagesSecondary Topicsminimum and maximum zoom limits, Access version compatibility |
||||||||||||||||||||||||||||||||||||||||||
|
| |||
| Keywords: zoom forms, resize controls, form anchoring, zoom buttons, VBA zoom code, zoom in, zoom out, font scaling, subform resizing, form sections, on error event, custom error messages, dataerr codes, control resizing, form zoom limits PermaLink How To Zoom In And Out of Forms, Anchor Controls, and Handle Form Errors in Microsoft Access |