Followups
By Richard Rost

 4 years ago
Customer Followups in Microsoft Access, Part 1
In this Microsoft Access tutorial, I'm going to show you how to create a customer followup system. We'll start with our Contact Management database. We'll add a form to see only items marked as followups. We'll create a button to open the followups form from the main menu. We'll add a combo box to see/change the customer for each followup. We'll make a double-click event to open the customer form from the followup form.
Pre-Requisites
Links
Up Next
Recommended Courses
Keywords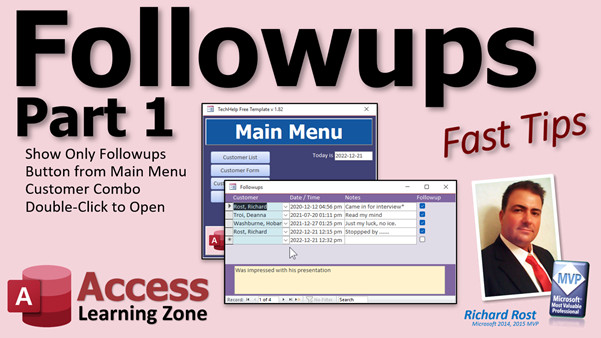
access 2016, access 2019, access 2021, access 365, microsoft access, ms access, ms access tutorial, #msaccess, #microsoftaccess, #help, #howto, #tutorial, #learn, #lesson, #training, #database, How To Create A Customer Follow-Up System, organize your database followups, Database Follow up, follow-up template, Sales Follow-up System, customer follow-up system, Creating an Effective Follow Up System, show only followups, button from main menu, customer combo, double-click to open, contact management, crm, Show only followups, button from main menu, customer combo, double-click to open
 Subscribe to Followups
Get notifications when this page is updated
More InformationTranscript Welcome to another Fast Tips video brought to you by AccessLearningZone.com. I am your instructor, Richard Rost.
This is part one of a little series I am going to do called Follow Ups. Lots and lots of people say, "Hey, you have a follow up checkbox in your database in the TechHelp Free Tip Template Database, but you do not really do anything with it." So, I have a laundry list of items that people want to see me add to the database. That is what we are going to be doing over the next couple of videos.
This is part one. We are going to make a query and a separate form so we can see only the contacts that are marked for follow up. We will make a button from the main menu to get to that form. We will make the customer combo box and add a double click event so we can double click on the customer to open up their customer record.
Before we get started, go watch my Customer Contacts video, a free video, which is on my website. This is the prerequisite. The stuff we are doing in this follow up series is based on the contact portion of my other database, so go watch the Blank Template video if you have not watched that yet and watch the Customer Contacts video. You are also going to need to know how to use query criteria; there is another video for that.
I am going to be sprinkling in little bits and pieces of VBA. No serious coding in this series, just a couple of lines here and there. If you know a little tiny bit of VBA like I am going to show you, you can make your databases a whole lot more powerful. If you have never done any VBA before, do not be scared. Go watch this. It is about 20 minutes long. It will teach you everything you need to know.
I am going to do little things like we are going to open a form with one command. For example, a double click event to open up the customers from the follow up form - things like that are very hard to do without VBA, or at least they are a lot more cumbersome. So, go watch this to get a little background on VBA, and then come on back. Go watch my On Double Click video too, where I show you how to do the double click event. I am going to show you again in this video, but if you want to watch it, go watch that.
Okay, so in the TechHelp free template, way back when we built this, we added in the contact system a little checkbox for follow up. The meaning of that is when you talk to a client, or they visit or whatever, you put in some notes - stopped by, blah blah, whatever - and then down here you can mark that as a follow up.
But we really have not done anything with this follow up, and I have gotten dozens of emails from people asking me to do some stuff with this and make it useful, because right now it is just a checkbox. So, in the next couple of classes, we are going to do a little series on this: part one, part two, part three, whatever. I do not know how many we are going to do. I have a whole list of questions here. I am going to try and get through as many of them as I can. We will do a little bit every day. If there is stuff you want to see, post it in the comments down below and I will add it if I can.
The first thing we are going to want - and this is the number one request - is to make a list of all of the follow ups that we have to make. Not every contact is a follow up. Sometimes you just put it in here because you want to track what was talked about, but you do not necessarily need to call them back or do any other kind of follow up. So, let's make a continuous form that is similar to the contact form, but it just shows the follow ups.
I am going to close this. Now, before we build a form, I am going to build a query. The query is going to put some criteria on here so I do not see contacts that are not marked as a follow up.
So let's go to Create > Query Design, bring in that contact table, and we can close that now. Bring in the fields that you want to see; I am just going to bring them all in. I am going to set Follow Up equal to True down here so I will only see records that are marked follow up. Now if I run this just to see what I got, there are four of the contacts marked follow up.
Now, I got this thing over here called Field0 and this guy is ContactT.FollowUp. Why is that? Well, that is because I got the same field in here twice, so to prevent that we just hide that guy. That way you can bring in the star, bring in fields a second time, put criteria on them or sorts or whatever, and then it does not change the name of your field up top. That is a little trick.
Now let's save this as MyFollowUpQ. Close that, and now we are going to make a form for our follow ups. I have already got a form that is very similar to it - it is the contact form. So, let's just repurpose this guy.
I am going to click on this guy, Ctrl+C, Ctrl+V, copy and paste. We are going to call this FFollowUpForm, and then we will design it. Just so we can keep things separate, I am going to change the colors just a little bit so I do not get confused as to which form I am working on. Let's make this one purple. There we go. We will change that background color and there it is, a lighter purple, so I will pick maybe that one.
Now, for this one, since it is based on follow up, I am going to move this up here so I can more easily check things on and off when I am done making a call, for example. I am going to cut that label off of it, click in the form header and paste it, then get the hand and drag it this way. It used to be a hand - now it is a four-way arrow. I am still in the habit of saying "the hand;" back when you used to do that, you would get a little hand, it goes over it. I do not know why they changed that. I liked that.
All right, so it is slightly different than the other form and you will see why I am doing this in a minute. We are going to add a date here too.
Save that, close it, and open up my follow up form. Now, the follow up form is still getting its data from the contact table, so let's change that. Design view, open up the form's properties right there, and change the ContactT to FollowUpQ. Look down the right one: FollowUpQ. You can get rid of any other things in here like the filters - we do not need that.
Save it, close it, and now let's open it back up again. There we go. Now you can see I can more easily check these on and off for each record.
Let's put a button on the main menu to open this form up and let's change that header right there. Let's go to design view, properties - this is no longer contacts, so we are going to call this "Follow Ups." You can make it "FollowUps" like that or however you prefer. I always make it one word. Now, I made this plural because that is just a caption. I try to keep all my field names and my form names and stuff singular, that is just me.
Let's make a button and put it on here to open up our follow ups form. Like I said at the top of the class, you can enhance your databases a ton by learning a teeny tiny bit of VBA. Yes, you can do this with the Command Button Wizard to open a form if you do not want to learn programming, that is fine. But I am going to sprinkle a little bit of VBA throughout this video and the rest of the series because I want you to get in the habit of seeing just a tiny bit of code here and there.
Watch how easy this is. I am going to copy one of these other buttons - copy, paste, Ctrl+C, Ctrl+V. We will change this to "Follow Ups". Let's change the name of the button over here to "FollowUpBTN". Right click on it, build event - that will open up your code builder. I am right here, and it is very simply:
DoCmd.OpenForm "FollowUp"
Since I am making all of my actual object names - my form names, my field names - singular, I do not have to worry about whether it is "Follow Up" or "Follow Ups."
I am just going to open that form and show all the records. Let's close this, close that, open the main menu back up again and there is my follow ups.
It would be nice on this form to see who this customer is and maybe even be able to double click to open up the customer record. That would be pretty cool. So, let's go to design view. I am going to add a combo box in here that has the customer's first and last name, and of course it is linked to their ID because there is the CustomerID field right there. That is how we know who belongs to this contact - this follow up.
I am just going to make some room. We are going to put it in here, but then I am going to slide it over to the left. I like this being on the left hand side, so let's make this. Now, we have a query (if you remember from the blank database template) - we have the CustomerLFQ that has last name, first name already as a field. We use this to get that to go in our combo box.
So, it is going to be Form Design, give me a combo box - where are you? Right there. Drop it here. Now, this is a good wizard; I like this wizard.
We are going to say, "I want the combo box to get the values from a table or query" - queries - "CustomerLFQ." Bring over both fields, because the ID is what it is bound to. Next, you want to sort these? Sure, sort them by LF. Next.
Now we have to do this: if the combo box is based off a table, then the wizard will see the primary key field and you will have that little checkbox to hide it, but if not you have to manually resize that to zero width. Just remember that one. Next.
Which is the bound field? That CustomerID has the actual value in it. Next, we are going to store that value in a field, which is CustomerID. We already have a text box for it, but we will be combining them both. If we change the combo box, we want to have it change the customer, right? Next. What label do you want? Does not matter; we are going to delete it anyway and then finish.
There is our customer combo box. I am going to delete the label. Now I am going to slide all of this, move that over here, and slide all of this stuff over to the right. Then I am going to put the customer on the left, make it a bit bigger, and I am going to borrow one of these labels - copy, paste, slide that over here, change that to "Customer," that is just a label, slide that up, slide that up, and of course do not forget your tab order. Tab order - we will just do auto order.
Now, one thing I can see here every time I do tab order, the combo box wizard does not give you a combo box a good name. It is "Combo8." We do not like that. We are going to click on that guy, change this to "CustomerCombo." Now, that I have got the CustomerID on this form, I really do not need this guy hanging around anymore. I had it hanging around on the other form because we did not need to see the customer since the only way to get to the contacts for that customer was through the customer form. So here we can just delete it and that will give us more room here for notes - so much more room for activities.
Save it, close it, open it back up again - oh, wrong one - open it back up again, and there you go. Now I can see who each of the customers are here too.
Now it would be nice if I had a way to jump to this customer, if I could double click on this and it opens up their customer record.
So, I am going to come into the office in the morning, hit my Follow Ups button, see who I have to call, and then I want to be able to double click on them and bring up their phone number or their information, their orders, all that stuff. We can do that with the On Double Click event, which is one of the other videos I told you to watch at the top of the class. Click on this guy, go to Events, find the On Double Click event right there, click the ellipsis (...).
Now, we are going to open up the customer form for this matching customer. So, it is going to be:
DoCmd.OpenForm "CustomerF", , , "CustomerID=" & CustomerCombo
"CustomerCombo.CustomerID" should work too because "CustomerID" is a field in the recordset under the form, but basically I try to match it to the field it is on.
Save that, give it a quick Debug > Compile, close it, close this, open it back up again, and now if I double click on one of these guys, it should open up the customer form. There it is, right there, for that guy.
Close it, open it. I like to make that field blue too, so it looks different, so the user can visually tell something is going on when they double click on that field. Let's make it that color blue. That way, everywhere in the database where the user sees a blue field, they know they can do something. I will see what else I have here. No, not in here. No, I think I did it on the customer list form because you can double click here - same thing. Now, in the follow-ups form, you know you can double click on the customer to go right to them.
That is about it for today. Each one of these parts is going to be about 10 minutes and we are a little over 11 right now. That is enough for today. I have a lot of stuff coming up. We are going to add a follow-up date on here. We are going to make it so that you only see follow-ups that are up to today, so you do not see the ones that are in the future. If you do not have to call someone until next Thursday, then you do not need to see them on there.
What else have we got in here? Automatically moving a follow up to the next business day, all kinds of questions people wanted to see for this stuff. If you want to see some stuff having to do with these follow-ups, post a comment down below, and if it is good, I will add it to the list. I am guessing there will probably be maybe four or five parts of this. We will see. Then I might package it all up into a nice little template. Gold members, you will be able to download this off the website, but you are probably going to want to build it yourself or wait until the last one if you want to get the whole thing.
So, there is your Fast Tip for today: part one of the follow-ups series, more to come. If you have any questions or stuff you want to see, post it down below. Hope you learned something. I will see you next time. Intro In this video, we will talk about how to create a follow-up system in Microsoft Access using the TechHelp Free Tip Template. I will show you how to build a query and a new form to list only the contacts marked for follow-up, add a button to your main menu to open this form, and set up a combo box so you can easily see and access customer records. You'll also learn how to use simple VBA to open customer records with a double click. This is part 1. Quiz Q1. What is the primary purpose of the "Follow Ups" form created in this video?
A. To display all customer records in the database
B. To show only contacts marked for follow up
C. To display sales reports
D. To create new customer entries
Q2. Which database object is created first to filter contacts needing follow up?
A. A new table
B. A query with criteria set to filter follow up records
C. A report grouped by date
D. A macro to sort all records
Q3. How is the "Follow Up" status implemented in the original database template?
A. As a text box where users type "Yes" or "No"
B. As a radio button group
C. As a checkbox field in the contact system
D. As a drop-down list of options
Q4. What is the main function of the combo box added to the Follow Ups form?
A. To input a new follow-up date
B. To select and display the customer's name associated with each follow up
C. To assign a priority level to a follow up
D. To filter all contacts by phone number
Q5. Why is the combo box based on the CustomerLFQ query in the video?
A. Because it stores follow up notes
B. Because it contains a calculated field for last name, first name
C. Because it shows the total number of follow ups
D. Because it is used to generate reports
Q6. What feature is implemented to allow a user to quickly open the customer record from the Follow Ups form?
A. A double click event on the customer combo box
B. A right-click context menu
C. An input mask on the combo box
D. A new navigation pane
Q7. What simple VBA command is used in the button to open the Follow Ups form from the main menu?
A. OpenTable "FollowUp"
B. DoCmd.CloseForm "FollowUp"
C. DoCmd.OpenForm "FollowUp"
D. RunMacro "FollowUp"
Q8. Why does the instructor recommend renaming the combo box to "CustomerCombo"?
A. Because the original name was too long
B. To follow a consistent naming convention and prevent confusion
C. To avoid accidental deletion
D. To enable color coding
Q9. In the customizations shown, which of the following design elements is used to visually cue users that an action can be performed?
A. Changing the label font to bold
B. Making the double-clickable field blue
C. Increasing the form size
D. Adding a tooltip on every field
Q10. What is the planned future enhancement for the Follow Ups form, as mentioned toward the end of the video?
A. To allow emailing customers automatically
B. To show only follow ups due up to today, excluding future ones
C. To add a chart of follow up activity
D. To lock records after completion
Q11. Why is it important to watch the prerequisite videos such as Customer Contacts and the VBA intro before starting this series?
A. They contain specific customer data needed for this project
B. The follow up series builds upon the design and concepts taught in those videos
C. They explain keyboard shortcuts used in the main video
D. They offer free downloadable code used directly in the follow up form
Q12. What is a benefit of learning a small amount of VBA, according to the instructor?
A. You can eliminate the need for queries altogether
B. It allows you to add powerful features with minimal code
C. It is required for creating any form in Access
D. It replaces the need for tables
Answers: 1-B; 2-B; 3-C; 4-B; 5-B; 6-A; 7-C; 8-B; 9-B; 10-B; 11-B; 12-B
DISCLAIMER: Quiz questions are AI generated. If you find any that are wrong, don't make sense, or aren't related to the video topic at hand, then please post a comment and let me know. Thanks. Summary Today's video from Access Learning Zone focuses on enhancing the Follow Up feature in my free TechHelp Template Database. Many of you have pointed out that although there is a Follow Up checkbox in the contact system, it does not actually do anything yet. Over this series, I plan to work through a list of requests to turn this checkbox into something useful and practical.
In this first installment, the aim is to create an easy way to view only those contacts that are marked for follow up. We will build a query that filters for records where the Follow Up box is checked and then use that query as the basis for a new continuous form. This form will differ from the regular contact form by specifically showing only those contacts that need some follow-up action.
To begin, I recommend making sure you have watched my Customer Contacts and Blank Template videos. These serve as the foundation for what we are building here, and you should also be familiar with setting query criteria, as we use that to display just the follow-ups.
We will use a bit of VBA throughout this series, mostly for small enhancements. You do not need advanced coding experience, but knowing some basics will allow you to add some really useful features to your database. If you are new to VBA, there is a quick 20-minute introduction on my site that will show you what you need.
Back in the TechHelp template, the Follow Up checkbox was always intended as a way to flag contacts where future action is needed, like calling a client back. However, up until now, it has served as nothing more than a visual marker. I have received a lot of feedback from users asking for more functionality, so over the next few videos I will work through various improvements and demonstrate how to implement them. If you have suggestions, feel free to leave a comment and I will try to address as many as I can.
The most frequent request has been a way to see a list of all follow-up contacts, not just the entire set of contacts. To accomplish this, we will create a continuous form that lists only those marked for follow up.
The process starts by building a query. This query uses criteria to show only those contacts where the Follow Up checkbox is set to True. Simply bring in the relevant table and fields, apply the True criteria to the Follow Up field, and you now have a targeted list.
Once the query is ready, we create a new form based on this query. I like to clone the existing contact form for consistency, changing its name to avoid confusion. To visually distinguish the new form, I update its colors. I also rearrange some controls, like moving the Follow Up checkbox to a better spot to simplify marking items off after a call.
Switching the form's data source from the contact table to the new query ensures it now only shows follow-ups. I remove any unneeded filters or properties and update the form caption to reflect its purpose.
Next, we want to be able to open this new Follow Up form directly from the main menu. We add a button and use a tiny bit of VBA to open the form with a single command. Even if you prefer using the built-in wizards, sprinkling in small pieces of VBA like this can make your workflow more efficient.
It is also helpful to see which customer each follow-up relates to, and to have a way to jump directly to a customer's record. For this, I insert a combo box linked to the CustomerID. The combo box uses a query that combines first and last names to keep things user friendly. After adjusting the layout, I eliminate the older CustomerID field to free up space.
To add interactivity, I set up an On Double Click event for the combo box. With a few lines of VBA, double clicking a customer's name now opens their full record. I highlight this control so users know something special happens when they interact with it, and I keep this color coding consistent throughout the database.
That covers the basics for part one of this series. In future installments, we will look at additional improvements: adding a follow-up date, filtering so only due or overdue follow-ups appear, and handling items scheduled for future dates. There are many more enhancements on my list, like automatically moving tasks to the next business day and others suggested by users.
If you have ideas for more features, please leave your suggestions in the comments. I expect this series will span several parts, and eventually I will package everything together into a template you can download from my site.
For a detailed, step-by-step video tutorial covering all of these steps, visit my website at the link below. Live long and prosper, my friends. Topic List Creating a follow up query using criteria
Building a continuous follow up form
Repurposing and customizing an existing form
Changing form background color for clarity
Reassigning label and modifying form header
Switching form record source to filtered query
Adding a button to the main menu for the follow up form
Using VBA to open a form from a button
Adding a customer combo box to the form
Configuring the combo box to display customer names
Binding the combo box to CustomerID
Modifying field names and adjusting tab order
Removing unnecessary fields from the form
Using the On Double Click event to open customer records
Writing VBA for the double click event
Visually highlighting interactive fields on the form Primary Topics Access queries, continuous forms, follow-up tracking, menu button creation, combo box lookup, double-click events, VBA basics
Secondary Topics color-coding forms, tab order management, record navigation, form repurposing
|


