Signatures
By Richard Rost

 3 years ago
Collect Signatures on Access Forms with InkPicture
In this Microsoft Access tutorial I'm going to show you how to use the InkPicture control to capture customer signatures directly into your Microsoft Access database.
Ralph from Reno, Nevada (Platinum Member) asks: Is there a way to capture customer signatures directly into my Access database like the way that the post office does with their tablets when they drop off a package that requires a signature? My field agents already have Windows-based tablets that run our Access database so I'm wondering if this is something that is easily done or not?
Members
Members will learn how to save the signature with a filename based on the OrderID and then display it on the order form and invoice report. We will also make a button to clear the signature if the user wants to start over.
Silver Members and up get access to view Extended Cut videos, when available. Gold Members can download the files from class plus get access to the Code Vault. If you're not a member, Join Today!
Pre-Requisites
Links
Recommended Courses
Keywords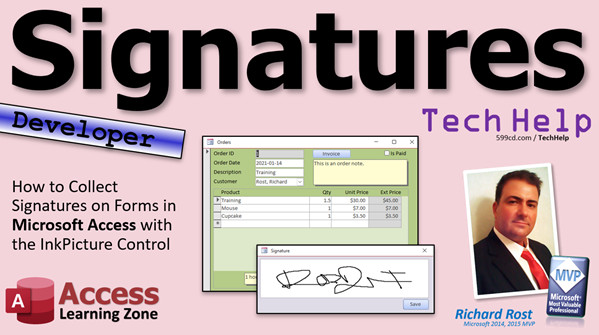
access 2016, access 2019, access 2021, access 365, microsoft access, ms access, ms access tutorial, #msaccess, #microsoftaccess, #help, #howto, #tutorial, #learn, #lesson, #training, #database, collect signatures, Can Microsoft Forms collect signatures, Get User Signature, include signature, How do I create a signature in Access, signature block, digital signature, signature tool, inkpicture, activex, electronic signature, capture customer signature on quote form
 Subscribe to Signatures
Get notifications when this page is updated
Transcript Welcome to another TechHelp video brought to you by AccessLearningZone.com. I am your instructor, Richard Rost.
In today's video, I am going to show you how to collect signatures directly in your Microsoft Access forms using the Ink Picture Control. To be clear, I am talking about having someone actually sign a form in your database. I am not talking about digital signatures or digitally signing your database. That is a whole separate video, but if you want to collect customer signatures inside your database, this video is for you.
Today's question comes from Ralph in Reno, Nevada, one of my platinum members. Ralph says, Is there a way to capture customer signatures directly into my Access database, like the way that the post office does with their tablets when they drop off a package that requires a signature? My field agents already have Windows-based tablets that run our Access database, so I am wondering if this is something that is easily done or not.
Yes, Ralph, there is an ActiveX control called Ink Picture, which I will show you in just a minute. With that and a couple of lines of code, you can save that signature.
As I noted on the cover slide, this is a developer-level TechHelp video, so you need to know a little bit of VBA. Do not worry to follow along. If you have never done any VBA programming before, go watch this video. It is free. It is on my website. It is on my YouTube channel. It has everything you need to know to get started in about 20 minutes.
Here I am in my TechHelp free template. This is a free database you can grab a copy of on my website if you want to. I am just going to use my single F form that I have got here - a simple little single form.
Let's rename it first. Right-click Rename. Let's call this my Signature F. I will open this guy up and go to Design View. I am just going to take these controls right off of here. We are going to put an ActiveX control on this guy.
What is an ActiveX control? An ActiveX control is a control that is not itself part of Access. You can find it by clicking on this little guy to open up the toolbox. You will see ActiveX controls right here.
Generally, I recommend against using ActiveX controls unless everyone that is going to use this database has the exact same version of Microsoft Office and the exact same version of Windows, preferably, but at least the same version of Office. If you are making a database to distribute to a bunch of other people in a bunch of different places, then I try to avoid ActiveX controls.
But if this is for you and your employees to use and everyone's got the same hardware and software setup, same version of Office, you should be OK. Especially with this control because you are going to come down here and you are going to find the Microsoft Ink picture control. If it says Microsoft in the front, it is generally safe. It comes with Office.
There is stuff for Outlook in here. There is stuff for all kinds of other things in here. But there is also stuff that might be installed by different software providers based on what you have got on your computer. So try to stick with the Microsoft stuff if you can. I have done some videos on some of these other controls in previous videos, like the Progress Bar, for example. Some of these are OK.
Let's pick the Ink picture control. Hit OK. There we go. It is a pink, and we have a picture box right there on our form.
We are going to resize this guy to look like a signature block, something like that. Let's open up the properties for it. Right-click, go to Properties. It is called Ink picture for. I am going to rename that to just Signature.
That is my signature block. Let's resize this like this. Leave a little room down here for a button. Save it. Let's close it and open it up and see what you got.
There you go. If you notice, if you move your mouse over, you get this little pointer here and you can draw like this. Just like you are signing something. If you have got a tablet that is touch sensitive, you can use your pen or your finger.
A couple of little modifications. I am going to turn off these navigation buttons and the record selectors. Let's close this. Open it back up in design view. Open up the properties for the form. Let's turn off the record selectors, navigation buttons, and scroll bars. That is good enough for now. Close it. Save changes. Yes. Open it back up again. That looks cool.
Slide it where you want it. You can draw your little signature in there.
Drawing in the box is no big deal. We are going to need some VBA source code to save that drawing, that ink, as a file on our drive. It is not super hard. Let's go back into design view here.
Let's drop a button down here. Come up here and find the command button. Drop it down. Cancel the wizard. Change this so it says Save Signature.
We are going to open up this guy's properties and we are going to make this the save signature button. Right-click, build event - that will open up your VBA code editor.
There is not a lot of code involved. I have tried to simplify this as much as possible. There are a lot of other things that you can add to it, and I am going to add a bunch more stuff in the extended cut, like some error handling and some ways to deal with different file names and stuff. But this is the minimal amount of code you need to get this to work.
First, we need a variable. It is going to be a byte array to store the actual picture in memory, so we can save it. A byte array is basically an area of bytes. Do not worry about what that is. It is basically a block of memory. We are going to save all of the different pixels in the image.
We are going to Dim BA and then open close parentheses - it makes it an array - As Byte. It is an area of bytes.
Here is the next line. I am just going to paste it in from my clipboard.
BA, our byte array, is going to be equal to Signature.Object.Ink.Save, and then in parentheses 2. What does that mean? That tells the signature block object to save the data in it in the BA byte array. The 2 there means it wants to save it as a GIF, the GIF file format.
There are some other options. I am not going to cover them in this video. Trust me, just use 2. Use a GIF.
Next line: Open, and then your file name. Where do you want to save this file to? I am going to save it as G colon backslash mydrive backslash signature.gif For Binary As #1. That is going to open up a binary file using file handle number 1 and save that data from the byte array, which is the data from the signature block, to that file right there.
That opens the file. The next line, Put #1, , BA actually puts the data from the byte array in the file and then Close #1. We are all done with that file. That is it. Minimal amount of code you need to get this thing to work.
So close this. Let's close it, save it, whatever. Open it back up again. I am going to scrawl my name in here, draw it with the mouse the best I can, and then hit Save Signature. Close that down. Now I will go check my drive and there in my mydrive folder is my signature.gif. There it is.
That is it. That is the minimal amount of code you need to get this to work. Of course, that minimal amount of code does not really do a whole lot aside from collecting the signature and saving it as a file.
You may want to do more with it inside your database. For example, you might want to go into a customer's orders and then down here in the bottom of their order form, click on Get Signature, have this guy pop up, have them sign it, save it, and then it saves that in the database. Or you go to somebody else, let's go to Jean Luc Picard, go to one of his orders, get signature, JLP, save it. There it is. Print out his invoice. His signature is right on his invoice.
That is a lot more useful, and I will show you how to do all that in the extended cut for members. We will save those collected signature files with a special file name based on the order ID so we know which signature file belongs to which order ID. We will display that signature on the order form and on the invoice. We will also make a clear button so you can clear it or delete it.
It is all covered in the extended cut for the members. Silver members on up get access to all of my extended cut videos and Gold members can download these databases.Intro In this video, I will show you how to collect handwritten signatures directly in your Microsoft Access forms using the Ink Picture ActiveX control. You will learn how to add the Ink Picture control to a form, let users draw their signature with a mouse or tablet, and use a bit of VBA code to save the signature as a GIF file on your computer. This tutorial is ideal if you need to capture signatures from users in your database and want a simple way to save them as image files.Quiz Q1. What is the main purpose of the Ink Picture Control in Microsoft Access as described in the video?
A. To collect handwritten signatures directly in an Access form
B. To embed audio notes in Access forms
C. To digitally sign the database for security
D. To capture digital fingerprints for authentication
Q2. What kind of control is the Ink Picture Control?
A. A standard Access control
B. An ActiveX control
C. A macro-based control
D. A VBA custom form
Q3. When is it generally safe to use ActiveX controls in your Access database?
A. When distributing to many users with different setups
B. When all users have the exact same version of Office and Windows
C. When using Access on Mac computers
D. When using the web version of Access
Q4. What file format is used to save the signature image in the minimal code example?
A. JPEG
B. BMP
C. PNG
D. GIF
Q5. What type of variable is used to store the signature image before saving to disk?
A. String
B. Integer
C. Byte array
D. Variant
Q6. Why should you avoid using non-Microsoft ActiveX controls, if possible?
A. They require special licenses
B. They can cause compatibility issues depending on what software is installed
C. They are always less secure
D. They need internet access to function
Q7. What minimal code is needed to save the ink data as a file?
A. You only need to call SaveAs method with a file name
B. Use a byte array, save the ink data to it, and write it to a file
C. Just export the picture using File menu
D. Copy and paste the image to Paint
Q8. What is a practical use of the captured signature in a real-world Access database?
A. To delete customer records automatically
B. To digitally watermark images in the database
C. To display the customer's signature on an invoice or order form
D. To generate custom reports for database security
Q9. According to the video, what should you do if you want to get started with VBA but have never programmed before?
A. Read the Access help manual
B. Start programming right away without any prep
C. Watch a free beginner VBA tutorial available on AccessLearningZone.com and YouTube
D. Hire a professional programmer to write your code
Q10. What additional features are planned for the extended version of this tutorial?
A. Uploading signatures to a web server
B. Creating error handling, saving with unique file names, and displaying signatures on forms and invoices
C. Sending signatures by email automatically
D. Encrypting the database with digital certificates
Answers: 1-A; 2-B; 3-B; 4-D; 5-C; 6-B; 7-B; 8-C; 9-C; 10-B
DISCLAIMER: Quiz questions are AI generated. If you find any that are wrong, don't make sense, or aren't related to the video topic at hand, then please post a comment and let me know. Thanks.Summary Today's video from Access Learning Zone focuses on collecting handwritten signatures directly in your Microsoft Access forms by using the Ink Picture Control. Many people ask if it is possible to have someone physically sign a form inside an Access database, much like how the post office captures your signature when delivering a package. The answer is yes, and in this lesson, I will walk you through what you need to know.
The question was inspired by someone who works with field agents using Windows-based tablets that already run an Access database. The concern was whether there is a simple way to capture customer signatures, especially in a workflow where the hardware and software environment is already standardized.
For this solution, we will use the Ink Picture ActiveX control. This control allows you to capture handwritten input with a stylus or finger right inside a database form. While ActiveX controls are not part of Access by default, certain Microsoft-provided ActiveX controls, like the Ink Picture control, are considered safe for environments where everyone is running the same version of Microsoft Office and Windows. If you are planning to deploy a database to multiple users with different setups, you should generally avoid ActiveX controls for compatibility reasons. However, for in-house systems where you control the software environment, this approach should work fine.
The steps begin by opening your form in Design View. For demonstration purposes, I am using a simple single form from my TechHelp free template, which you can download from my website. First, rename the form to something like SignatureF for clarity. After removing any existing controls that are not needed, you can insert an ActiveX control by accessing the toolbox and choosing the Microsoft Ink Picture control from the list.
Once you add the control to your form, you can resize it to resemble a typical signature box. Rename the control to something meaningful, such as 'Signature', so it is easy to reference in your code. After arranging your form and making cosmetic adjustments like removing navigation buttons and record selectors, you will have a space where users can sign using their tablet pen or mouse.
Now, while drawing inside the box is easy, the next challenge is saving the actual signature as a file. This requires a bit of VBA programming. The idea is to extract the drawn signature as a GIF file and store it on your drive. The code to do this is simple and direct. You will declare a variable to hold the byte data for the image, call a method on the Ink Picture control to save the ink to a byte array, and then write that array to a file using basic file operations in VBA.
After this script is attached to a Save Signature button on your form, the workflow is as follows: the user signs in the box and clicks Save Signature; the signature is then written as a GIF file to the selected location on your drive. This is the bare minimum required to capture and save ink signatures.
Beyond this introductory technique, you may want to integrate signatures more deeply into your database workflow. A practical scenario would be capturing a customer signature for a specific order, saving the signature file with a name that matches the order ID, and displaying the signature on screens or reports such as printed invoices. Additional features such as a clear button for signatures or the ability to delete them can also be implemented.
I will show you step-by-step how to handle these additional tasks, including file management and error handling, in the extended cut for members. These advanced techniques cover saving signature files with order-specific names, displaying the collected signatures on your forms and reports, and more. If you want full access to all extended cut lessons or to download example databases, you can become a member at my site.
For a complete video tutorial that covers every step discussed here in detail, visit my website using the link below. Live long and prosper, my friends.Topic List Renaming a form in Access
Adding and resizing an ActiveX control
Selecting the Microsoft Ink Picture control
Configuring the Ink Picture control properties
Disabling navigation buttons and record selectors
Drawing signatures using the Ink Picture control
Adding a save signature command button
Writing VBA to save signature as a GIF file
Using a byte array to store image data
Saving the signature image to a specified folderPrimary Topics Ink Picture ActiveX control, Access forms customization, collecting signatures, saving images via VBA, byte arrays in VBA Secondary Topics developer-level requirements, hardware/software compatibility, minimal code approach, navigation/form design tweaks |


