Calculator 3
By Richard Rost

 3 years ago
Build an On-Screen Calculator in Access - Part 3
This is part 3 of my Microsoft Access on-screen calculator tutorial. We are continuing to build the calculator that we started in part 1. In today's video we're going to create a backspace button, learn about the string functions Left and Len, create a button to raise a number to a power, create an x² button with a superscript in the label that will immediately square the value in the calculator, and we're going to learn about the ASCII extended characters.
Members
There is no extended cut, but here is the database file:
Silver Members and up get access to view Extended Cut videos, when available. Gold Members can download the files from class plus get access to the Code Vault. If you're not a member, Join Today!
Prerequisites
Next Video
Links
Recommended Courses
Keywords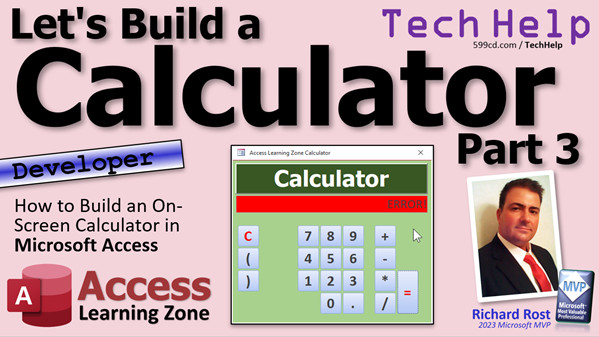
access 2016, access 2019, access 2021, access 365, microsoft access, ms access, ms access tutorial, #msaccess, #microsoftaccess, #help, #howto, #tutorial, #learn, #lesson, #training, #database, Onscreen calculator, calculator, on-screen calculator, error handling, back button, backspace, left, len, string functions, square, power, carat, superscript, ascii extended characters, alt codes
 Subscribe to Calculator 3
Get notifications when this page is updated
Intro In this video, we'll continue building our calculator in Microsoft Access by adding a backspace button using the LEFT and LEN functions, making it easy to delete the last entry. I'll also show you how to add buttons for raising numbers to a power, including a shortcut for squaring a number with special ASCII characters. We'll make improvements to our code structure by introducing a reusable calculation subroutine, and discuss handling empty or NULL values in the process. This is part 3.Transcript Welcome to another TechHelp video brought to you by AccessLearningZone.com. I am your instructor Richard Rost. Guess what? We're still building the calculator. This is part three of my Let's Build a Calculator series. So let's go build a calculator.
Before you continue, if you haven't watched parts one and two, go watch those first. You'll find links down below. In part one, we built all the basics, got everything up and running and working, and learned about the Evaluate function. In part two, we added some error handling and some other nifty features. So go watch those parts first if you haven't yet.
All right, so the first thing I want to do is make it so that users can easily back up if they typed in something. For example, I just typed, oops, I typed in 556985 and I meant to type in a four there. So now I have to clear it and start all over again. 5569854.
It would be nice to have a little back button. That's really easy to do. In order to do that, what I basically have to do is look at this string and say, I want to back up, so I want to erase the last one. Essentially, I want to take the left five characters off of that six-character string. So I need to know how long that string is first, because it could be longer or shorter. That's the LEN function, LEN for length. Then I want to take the left number of characters off of that string, and then there's n-1. So if it's ten characters long, I want the left nine characters.
We need two functions for this: LEFT and LEN for length.
To learn more about these types of functions, I have a whole separate video on string functions. We cover LEFT, we cover LENGTH. There are other ones too. There's RIGHT, which gets the right side of the string, MID pulls stuff out of the middle of the string, and there's INSTR that determines if there's something inside of another string. There's also INSTRREV, which is a whole different ball of beans. Watch this if you want to learn more about string functions, but we only need two of them right now. I think we'll need RIGHT a little bit later, but LEFT is the big one and LEN is also a very important one.
Let's start by making our back button. Just copy one of these guys. Copy, paste, slide you right there. What do you want for the back symbol? Something like that maybe. You can go and find a picture if you want to put a picture on a button. There are all kinds of things you can do. Let's make those a little bit smaller, maybe like 16. Yeah, that looks good. That's our back button.
We don't need this in here because we're not adding to that string. Let's make sure we give it a good name, something like buttonBackspace. That's fine. Right-click, build event. We're in here. So here we're going to say the calc is going to be equal to the LEFT of calc. How many characters? I want the LEFT n minus one. What is n? n is the length of the string. So it's going to be LENGTH of calc minus one. See how that works? LEFT takes two bits of information. LEFT takes the string and the length. If you want the left one, you go LEFT(calc, 1). You want the left three, you go LEFT(calc, 3).
All right, so we want the length of the string minus one from the left side. One more thing: we are going to add an On Error Resume Next. Now this is fine. There is just one line of code in here. If that generates an error, just skip out. The reason why we're not putting proper error handling in here is because if they don't have anything in the string, then that will generate an error, and we don't really want to see that.
So save that, close it, save it, open it. If I hit this now, it would generate an error because there's nothing in that string. So length of n minus one would be negative one, which no. But if I put in a bunch of stuff, then I hit the back button—look at that, isn't that cute? Oops, made a mistake, back, back, back, back. See? That's all. We don't want to put error in there if you can back up past that. Just leave it. It's fine. That's good.
Another thing you might want to do is raise a number to a power. There are a couple of different things we can do. We can make an x squared button, which just squares it, or we can add the caret symbol that allows you to actually do numbers to a power.
Remember, you can type in here. If I go 2^2, that's two to the second power, equals four. If I go 10^3, that's ten to the third power, equals 1,000. So you can give the user the caret if you want to, like a donkey with a carrot. Copy, paste that. We'll stick that right down here. We'll just replace that with a caret. And this one could be, let's say, buttonPower, PWR is fine. This one can use that event, because all we're doing is adding a caret to the thing.
But you might also want to make a button that just squares what's in the thing. You hit the x squared button and boom, it squares it for you. Let's put a button right next to that one that just takes what's in there and squares it, like a shortcut. Copy, paste, we'll put it right there. In this one, we're going to type in x.
Now, I would like the little superscript that goes next to it. I don't want to put that in the button. Let's put it in there. How did you do that? Well, there's an extended set of characters you can use if you know how to type in the extended ASCII characters.
I'm just going to open up Notepad real quick to show you these. If I hold down the Alt key on your keyboard on the left side, and then from the numeric keypad type in 253 and let everything go, there's your square. There are a bunch of cool ones. We're going to learn some more in a minute for division and multiplication and stuff.
So it's Alt+253. How do I know it's Alt+253? Well, I googled it. There's a chart—an ASCII chart—and there's a bunch of them. Just pick any one of these, you'll get a whole list of all the different characters that are available.
There are all the numbers and extended characters. This one doesn't have all the cool ones on it. This one's got all the cool ones. Here's 253, it's a little superscript 2. There's the radical for that, that's 251. We'll use that in a minute. There's the division sign, 246.
Now that we know that trick, we can go Alt+253 in there and there's my little square.
This button is going to take whatever is in there and instantly do something to it. We're going to make that a red button. All our red buttons just change what's in there. What am I going to call this? Let's call it buttonSquare, BTNSQR, and we don't need that event procedure—we have to do some stuff.
So in our on-click event, how are we going to handle squaring this? Well, what I'm going to do is put parentheses around the whole thing and then add the caret to it, and then evaluate it.
So we'll say calc equals, we'll put calc inside parentheses like that, then we'll put the caret 2 after it, and then we'll evaluate the whole thing. Now, to evaluate the whole thing, we could just call buttonEquals_Click, but like I said before, it's better to make this its own subroutine.
So what we're going to do is this. Watch. I'm going to say Private Sub DoCalc. All of this stuff has now turned into DoCalc. We have this guy hanging around up here. So watch this: End Sub, and inside you will say DoCalc. So the buttonEquals_Click is now going to call DoCalc, which now means that other people can call DoCalc too. So I can change that guy and then come right down here and say DoCalc.
So, behind the scenes, we're going to add the parentheses and the caret 2, and then DoCalc, and this guy handles all the error handling and all the rest of that stuff. See? I did that. I'm modifying the thingy, modifying the calc box, and then immediately calculating it. That's what the red buttons do.
Save it, a little debug compile action, come out here, close it, open it. 9 plus 6, everything's working fine so far. 15 squared—boom, 225. Keep going. How far can we go? Oh, I got too big. There is a limit.
One thing I also wanted to add in here is this—I do want to say, because this will come in handy in the future, I'm going to say: If IsNull(calc) Then Exit Sub.
What does that mean? If there's nothing in there, if it's blank, don't bother with the rest of this stuff.
If you want to learn more about NULL, I have a whole video on NULL—the NULL functions, NULL values, and lots to learn about nothing.
So there we go. We have a back button now. We can raise to any power, or we can quickly square something that's in the window there. Lots more to come, folks.
We're going to do our obligatory end-of-lesson change. Let's go with, like, pink. Pick one of them. Okay, that was beautiful, and now we're looking like that.
That's part three. And members, just so you're aware, at the end of the series there's going to be an extended cut with lots of cool extra stuff that I've been saving up a list for, because people have been posting in the forums with suggestions for this thing. So at the end, we're going to have an extended cut with lots of cool members-only stuff. Don't worry about that.
That's your TechHelp video for today. I hope you learned something. Live long and prosper, my friends. I'll see you next time.Quiz Q1. What is the main purpose of the LEFT and LEN functions in the context of the calculator project?
A. To extract a substring and get its length to implement a backspace feature
B. To capitalize the first letter of each word in a string
C. To convert numbers to text format
D. To replace a specific character in a string
Q2. Why is "On Error Resume Next" used in the backspace button code?
A. To prevent the program from stopping if the string is empty
B. To automatically handle all calculation errors
C. To highlight errors for the user to fix
D. To slow down the code execution for debugging
Q3. Which ASCII code combination was used to create the superscript 2 (²) character for the square button?
A. Alt+253
B. Alt+221
C. Alt+159
D. Alt+127
Q4. What is the function of the caret (^) symbol added by the power button in the calculator?
A. It allows users to input exponentiation expressions
B. It adds multiplication functionality
C. It resets the calculator to zero
D. It divides the current value in half
Q5. What is the benefit of creating a Private Sub DoCalc subroutine in the calculator project?
A. It centralizes the calculation logic so multiple buttons can reuse it
B. It increases the size of the calculator interface
C. It allows the calculator to export results to Excel
D. It changes the theme of the calculator automatically
Q6. Why should you check "If IsNull(calc) Then Exit Sub" before performing operations on the input?
A. To avoid errors if the input box is empty or has no value
B. To ensure that the result is always a number
C. To convert NULL values to zero
D. To display an error message to the user every time
Q7. How does the new back button improve the user experience in the calculator application?
A. Users can correct a mistake without clearing the entire entry
B. It automatically formats numbers with commas
C. It saves all previous calculations for review
D. It disables invalid input from the keyboard
Q8. What is the purpose of making the square button red in the interface?
A. To visually indicate that it instantly changes the value and performs a calculation
B. To highlight it as a dangerous or delete action
C. To match the color with multiplication operations
D. To increase the size of the button for better visibility
Q9. Besides LEFT and LEN, which other string functions did the video mention are commonly used in string manipulation?
A. RIGHT, MID, INSTR, INSTRREV
B. UPPER, LOWER, REPLACE, SPLIT
C. CEILING, FLOOR, MOD, ROUND
D. CONCAT, FIND, TRIM, SUBSTITUTE
Q10. What is the result of pressing the square button when the calculator displays "15"?
A. 225
B. 30
C. 90
D. 60
Answers: 1-A; 2-A; 3-A; 4-A; 5-A; 6-A; 7-A; 8-A; 9-A; 10-A
DISCLAIMER: Quiz questions are AI generated. If you find any that are wrong, don't make sense, or aren't related to the video topic at hand, then please post a comment and let me know. Thanks.Summary Today's TechHelp tutorial from Access Learning Zone continues our Let's Build a Calculator series in Microsoft Access. This is part three, so if you have not already worked through parts one and two, I highly recommend you do so before proceeding. In the earlier segments, we set up the basic functionality of the calculator and explored the Evaluate function. We also added error handling and introduced some additional useful features.
In this lesson, I want to make it easier for users to correct mistakes as they input numbers. Previously, if you typed an incorrect digit, you had to clear the entire entry and start again. To improve this, we are going to add a back button, similar to the backspace key, that deletes the last character from the current input.
To remove the last character from a string, we need to know how long the string is and then keep all but the final character. In Access VBA, the LEN function returns the length of a string, and the LEFT function lets us retrieve a specified number of characters from the beginning of a string. So, the approach is to use LEFT with the length of the string minus one.
If you are new to these, LEFT returns the leftmost characters from a string, and LEN tells you how many characters are in the string. There are also other useful string functions such as RIGHT, MID, INSTR, and INSTRREV, but here we mainly need LEFT and LEN. If you want to learn more about string manipulation, I have additional tutorials covering these in greater depth.
To create the back button in our calculator, you can use one of the existing button controls as a template and simply adjust its position and appearance. You might want to pick a suitable symbol or even use an image for the backspace button. Give your button a clear name like buttonBackspace for maintainability.
Next, in the code for this button, set it up so that when clicked, it assigns the current value of the calculator display to be itself, but with the last character removed. This is done by recomputing the display value as LEFT(current value, LEN(current value) minus one). Be sure to include a basic error bypass like On Error Resume Next to cover situations where the string might already be empty. In this case, trying to remove another character would cause an error, but since it is not a critical problem, we just skip processing further.
By doing this, users can now easily delete characters one by one, making the calculator much more user-friendly and forgiving of small mistakes.
Another useful feature I wanted to implement is the ability to raise numbers to a power. You could add an x squared button for convenience, or provide a way for users to input the power operator (the caret symbol ^), which lets them raise numbers to any power they choose. For example, entering "10 3" and evaluating would result in 1,000.
To make this work, create a new button on the calculator and label it with the caret symbol. When the button is clicked, add a caret to the input string. For users who prefer a one-click way to square the number, add a separate button for squaring, where clicking it automatically takes the value in the display, applies the square operation, and displays the result.
For a more professional appearance, use a superscript 2 for the square symbol. You can insert these special symbols by using the extended ASCII character codes. For instance, holding Alt and typing 253 on the numeric keypad gives you a superscript 2. If you want to explore more of these codes, charts are available online listing all the possibilities, including symbols for division and radicals, which we will use later on.
Make the new square button visually distinct - for example, by coloring it red, to indicate that it changes the value rather than just appending to the input.
In your VBA code for the square button, enclose the current calculator value in parentheses, append the caret and the number 2, then perform the calculation. To keep the code modular and flexible, move the calculation logic into its own subroutine, such as DoCalc, and call that sub from each relevant button, including the equals and square buttons. This makes it easier to maintain and extend the code as you add more features.
It is also a good practice to check if the calculator text box is empty or null before performing any calculation. If so, just exit the subroutine. This prevents errors and keeps your calculator running smoothly.
At this point, the calculator now supports backspacing to delete the last character, raising numbers to any power with the caret button, and quickly squaring values with a dedicated button. As always, feel free to customize the calculator by choosing different colors or rearranging controls as you see fit.
Just to mention, when we reach the end of this series, I will be recording an Extended Cut with additional features and tips contributed by the community. That content will be exclusively available to members.
That wraps up today's lesson. You can find a complete video tutorial with step-by-step instructions on everything discussed here on my website at the link below.
Live long and prosper, my friends.Topic List Adding a backspace button to the calculator
Using the LEFT and LEN functions to remove last character
Naming and setting up the backspace button
On Error Resume Next to handle empty strings
Adding a caret button for exponentiation
Allowing users to enter the caret symbol for power
Creating an x squared (square) button
Using Alt codes to insert superscript 2 in button captions
Programming the square button to evaluate the square
Refactoring with a shared DoCalc subroutine
Checking for blank input with IsNull before calculation |


