Vertical Lines
By Richard Rost

 2 years ago
Add Vertical Lines in MS Access Report Columns In this Microsoft Access tutorial, I will show you how to neatly insert vertical lines in report columns for a more organized and easier-to-read layout. Elena from Grapevine, Texas (a Platinum Member) asks: How do I add straight vertical lines in my Access report to separate the columns? It looks kind of messy without them, and I want to make it easier to read. Can you show me a simple way to do this? MembersIn the extended cut, I will show you how to adjust the height of lines in an Access report using VBA code to accommodate variable amounts of text in the detail section. This solves the issue of fixed height lines when you have entries that change in size due to the can grow property. Silver Members and up get access to view Extended Cut videos, when available. Gold Members can download the files from class plus get access to the Code Vault. If you're not a member, Join Today!
PrerequisitesRecommended CoursesMember Links
Keywords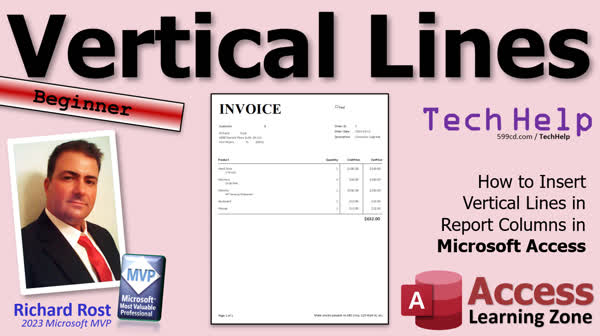 TechHelp Access, insert vertical lines, Access report formatting, Can a vertical line grow with the report, Allow Vertical Lines to Grow with Other Fields, detailed section design, Access line tool, modify report layout, report column separator, design view tutorial, report design techniques, customize Access report, line control Access, Access report lines guide, design mode tips, adding lines to reports, vertical line alignment, Access report readability
 Subscribe to Vertical Lines
Get notifications when this page is updated
Transcript Today we've got one for the beginners. I'm going to show you how to insert vertical lines in your report columns in Microsoft Access. But developers, don't go anywhere because the extended cut's going to cover some advanced developer stuff. So stick around.
Today's question comes from Elena in Grapevine, Texas, one of my Platinum members. Elena says, "How do I add straight vertical lines in my Access report to separate the columns? It looks kind of messy without them and I want to make it easier to read. Can you show me a simple way to do this?"
Well, of course, Elena, we're going to use the line tool and simply draw lines on the report wherever you want them. And when we're done, we'll have nice neat vertical lines just like these. There, I'll zoom it in so you can see it better, alright?
Now before we get started, if you have not yet watched my Invoicing video, go watch this first. I explain how I build my basic database. It's got a customer system, order entry in it, and invoices. And this invoice is what I'm going to be using in today's video to put the vertical lines on. You can do this with any report that you might have handy, but if you want to learn how I built this database, go watch this video.
Okay, so here I am in my TechHelp free template. This is a free database. You can grab a copy off my website if you want to or build it yourself from my videos, whichever you like. And in here, I've got a customer form, and customers can have orders, and you can print those orders out as invoices. This is what we build in that other video that I recommended.
Now, we did put some horizontal lines in this report, but we want to put some vertical lines in it now. Alright, so let's go to design view. I'm going to turn off the property sheet for right now and let's make this a little bit bigger so we can see the whole thing. I'm going to open up my ribbon by double-clicking on it up here. Down here you can see here are my horizontal lines. There's one right there in the page header, and there's one right down here in the page footer. What I want is I want the lines to come in through here. We're going to go through the header, probably from this line down, and then through the detail section and then in the footer right to that spot.
Alright? So let's make some room for those lines first. I'm going to just slide these over just a little bit like that. We'll put one of the lines here, and then I'm going to slide this one over just a little bit like that. We'll put a second line there. And if you want to add more, you can. You put a line here; you can put a line over there. You can put as many lines on here as you want to.
Alright, let's go over to our report design, and in the control box here, drop this guy down and find the line tool. It looks like that now. It used to be a straight line across. In fact, someone just asked in my forums a little while ago, he's like, "Why can't I find the line tool?" Yeah, they changed it sometime around, I'm going to guess, 2013, 2016 maybe. This used to be a single straight line; now it looks like a line chart. Anyways, pick that guy. And now that you've got the line tool, we're going to come right here. Let's start with the detail section. I'm going to click right here and click and drag it straight down, keep it straight, and drop it right about there.
Alright, and if you miss it, you've got to click on it, and you can get the little double arrow there, and you can drag it around. Yeah, that's not easy, I have a hard time with this. The older I get, the harder it is to see, too. And you can't zoom in and out in design mode like you can in Word and Excel. That's a little frustrating. Access, guys, come on.
Alright, so now what I'm going to do is I'm going to click on this, and I'm going to copy and paste this exact guy. Copy, Control+C, paste, Control+V. It puts it down below here, but just grab it and drag it and slide it up where you want it over on this side. See that? Now, we'll bring our bottom of the section up like that and now that should look just like that.
Alright, let's save it, close it, and then open it back up again. Always save, close, open. Open it up and okay, it looks pretty good. Let's zoom in so we can see a little better here. Not bad, not bad. We got that line right there between our sections now. It looks like it's missing a piece here and then missing a piece down there. That's because of the header section. We've got to put a teeny, teeny lay teeny... teeny teeny teeny little section right up top here. Try to say that ten times fast. I know it sounded like I said "teeny-tiny," I didn't. I said "teeny-teeny."
Alright, so here's that line section and here's the horizontal line above it. We've got to put a little teeny-teeny line right in there. Sometimes it's even easier to open this up a little bit so you can work. You can copy this guy too if you want to, or just try dragging and dropping a new one.
Alright, so here we'll click, and I'm going to come right there and try to drag that down just two tips and I always miss it. See, I missed it right there. Then you just click on it and drag it, get it up. Okay, there you go. That looks about right.
Right, okay, so I'm going to copy that, copy, paste, Control+C, Control+V, slide this one up over the top of the other one right there. Okay, and we'll bring our section up. Looks like they match up.
Okay, now here's the confusing thing that gets a lot of beginners. You've got a page header, detail section. That makes perfect sense. Now, page footer is in design mode above the report footer, which is weird because when you print preview this thing or print it out, the report footer comes after the last detail section at the end of the report. But on page one, if it's a one-page report, it's going to come above the page footer. It's really weird. It takes some getting used to. But ignore the page footer for now. This is going to be on the bottom of the page. This report footer is actually going to be above it.
Okay? So again, you can draw it if you want to or you can copy these guys. I'm going to copy this one. Watch. Copy, Control+C, click in the report footer and hit paste, Control+V. Now it's going to come way over here in the left-hand section. Just come over here and grab it and then try to drag it and line it up under that guy. I think I got it.
Okay, looks good and it's a little bit tiny bit too big, so we're going to try and make it a little bit smaller just like that. Let's see. All right, I got it.
There we go. So now I'll click on you, copy and paste. Yeah, this is a little tough to do. Sometimes it takes a lot of practice. I've been doing this for a few years, folks. And even I have a hard time with it. See, I even just missed it right there. And I think it's good. I think they line up.
Okay, save it, close it, open it, and they look good. They look good, and there you go. That, in a nutshell, is how you put vertical lines between the columns on your Access report. It looks decent.
Alright, so that's the end of the beginner lesson. Now here comes a little bit more tricky stuff, okay? And this we're going to go into the extended cut here with this. What happens if you've got a long description in here? Remember we covered in the Invoicing video, we covered the can grow, can shrink properties. If this hyperdrive here, okay, and remember the detail notes are here. If this gets really long, let's say I come in here and I just type a bunch more stuff in. Typing, typing, typing... and it works fine if you have no notes or one line of notes. If you have two lines of notes, then I got a problem.
And unfortunately, if you go into design view and you look at the properties for these lines, they don't have a can grow, can shrink, do they? They're just set to a fixed height. So this is going to involve a little programming, a little VBA. And I will cover that in the extended cut for the members. Silver members and up get access to all of my extended cut videos, not just this one, all of them. There are hundreds of them by now, so there's tons to learn.
And of course, Gold members get access to my code vault, and you can download these databases that I built. But this is what we're going to do right here. We're going to manually adjust this with some VBA code and it's not that hard. I'll show you how to do it in the extended cut.
But that is going to be your TechHelp video for today. I hope you learned something. Live long and prosper, my friends. I'll see you next time.
TOPICS:
Adding vertical lines in an Access report
Using the line tool in Access
Drawing lines on an Access report
Inserting vertical lines in report columns
Design view in Access
Moving fields to make room for lines
Using the report design tools in Access
Saving and closing reports after design changes
Utilizing the detail section in Access reports
Aligning lines between different sections
Report header and footer management
Understanding page headers vs report footers
Copying and pasting line controls
Adjusting line sizes and alignment
Using the can grow and can shrink properties
Handling long descriptions in report fields
Programming with VBA to adjust lines
Adjusting fixed height properties for lines
Access VBA for dynamic line adjustments
Extended cut for advanced Access techniquesIntro In this video, I will show you how to insert vertical lines between columns in your Microsoft Access report to make your data easier to read. We will go over using the line tool in design view, arranging your report layout, aligning lines between different sections, and managing headers and footers. I will also cover tips for copying, pasting, and adjusting line controls to achieve a clean and organized look for your reports.Quiz Q1. What is the primary tool used to insert vertical lines in an Access report according to the video?
A. The rectangle tool
B. The control wizard
C. The text box tool
D. The line tool
Q2. Why does the presenter recommend watching the Invoicing video before starting this tutorial?
A. To learn how to use the control wizard
B. To understand how to manipulate text boxes
C. To learn how he built the basic database that will be used in the tutorial
D. To discover advanced VBA techniques
Q3. What did the line tool icon used to look like before it was changed around 2013 or 2016?
A. A line chart
B. A dotted line
C. A single straight line
D. A pencil
Q4. While designing the report, which sections did the presenter add vertical lines to?
A. The page footer only
B. The detail section and the page header only
C. The page header, the detail section, and the report footer
D. The page header and the report footer only
Q5. What advice does the presenter give after making changes in the design view of the report?
A. Always lock the controls before saving
B. Save the report, close it, and then open it again
C. Leave the report open for a few minutes to avoid errors
D. Refresh the page to see the changes
Q6. What formatting issue is addressed in the extended cut for members?
A. Adjusting the width of vertical lines
B. Changing the colors of the lines for better visibility
C. Aligning the horizontal lines with the vertical lines
D. Adjusting the vertical lines with VBA code when the detail section 'can grow'
Q7. How does the presenter suggest you can get the lines to line up correctly when you struggle to place them manually?
A. Use the alignment tool in the ribbon
B. Zoom in and out in design mode
C. Copy and paste the line
D. Turn on the grid lines for precise placement
Q8. According to the presenter, how is the report footer positioned in design view as compared to the printed report?
A. It is shown at the top of the design view
B. It is shown at the bottom of the design view
C. Above the page footer in design view, but comes after the detail section in the printed report
D. Below the detail section in both design view and the printed report
Answers: 1-D; 2-C; 3-C; 4-C; 5-B; 6-D; 7-C; 8-C;
DISCLAIMER: Quiz questions are AI generated. If you find any that are wrong, don't make sense, or aren't related to the video topic at hand, then please post a comment and let me know. Thanks.Summary Today's TechHelp tutorial from Access Learning Zone is focused on a topic for beginners, but I'm also going to touch on some important points for developers in the extended cut. We are going to cover how to insert vertical lines between columns in your Microsoft Access reports.
The question came in from a member who wanted to know how to make Access reports neater and easier to read by adding straight vertical lines to separate the columns. This is a common request. The process is straightforward. We'll be using the line tool to place vertical lines exactly where we want them in the report.
Before we go further, I always recommend watching my Invoicing video if you have not seen it yet. In that video, I go over how I built the foundational database that contains the customer system, order entry, and invoicing features. What I am about to show you works with any report, but if you want to see how my system is designed from the ground up, start there.
For this example, I am using my free TechHelp template database, which you can download from my website or build yourself by following along with my videos. This template has a customer form, orders tied to customers, and you can print those orders as invoices. In a previous lesson, we added horizontal lines to a report. Now, I want to focus on inserting vertical lines between the columns for improved readability.
Starting in design view for the report, I maximize the workspace for a better overview. The horizontal lines I previously added are located in the page header and page footer. My goal is to have vertical lines running from the header, but only as far down as the horizontal line, through the detail section, and ending at the corresponding spot in the footer.
Before drawing the lines, I reposition the fields in the report to make room for them. You can decide where you want your lines and move your fields over as needed. If additional lines are desired, you can add them wherever you like. Access gives you as much flexibility as you need here.
To insert a vertical line, I go to the report design controls and select the line tool. The icon for the line tool has changed over the years, and it now looks more like a chart than a simple line. After selecting the tool, I draw the line straight down through the appropriate section of the report. If you do not get it perfect the first time, you can always click to adjust it. Sometimes accurate placement can be challenging, but you can move and nudge the line until it is set correctly.
Once the initial vertical line is positioned, I copy and paste it to create a duplicate for another column. The new line appears elsewhere on the report at first, but you can drag it into position as needed. Proper alignment is important for an organized look. When satisfied, I always recommend saving, closing, and reopening the report to check your progress and make sure everything looks as expected.
You might notice that the line appears as if it is missing a short section either in the header or the footer. This commonly occurs due to the way report sections are structured. A small additional line must be inserted into the header where the gap appears. At times, it helps to temporarily resize sections to get better access for drawing and aligning these small lines.
Similarly, the footers in Access can be confusing to beginners. The page footer, in design view, appears above the report footer, but in print or print preview, the report footer comes after the last detail entry at the bottom of the page. You can safely ignore this oddity for now and focus on matching the line placement visually.
To finish the look, I copy an existing line, paste it into the necessary footer section, and then drag and adjust its height for a seamless vertical appearance. This process sometimes requires multiple attempts for perfect alignment. Even with years of experience, it can take a bit of patience to get everything looking just right.
After the final adjustments, save and reopen the report to inspect the appearance. The clean vertical lines should now separate your report columns, making the information clear and organized.
That covers the basics for beginners. In the extended cut for members, I am going to tackle a more advanced scenario. If your report includes fields like a product description that can take up multiple lines, perhaps because you have turned on the can grow and can shrink properties as I explained in the Invoicing video, you might see problems. The vertical lines do not automatically expand if a field grows in height. The line controls themselves do not have can grow or can shrink options and are fixed in size.
Addressing this requires some simple VBA programming to manually adjust the length of the lines at runtime. I will walk through that in the extended cut video for members. Silver members and above have access to all my extended cut content, with Gold members also able to download the finished databases for personal use.
That wraps up the core lesson for today. A complete video tutorial with step-by-step instructions for everything discussed here, along with the extended cut for members, can be found on my website at the link below.
Live long and prosper, my friends.Topic List Adding vertical lines in an Access report
Using the line tool in Access
Drawing vertical lines in report columns
Navigating design view in Access
Moving report fields to make space for lines
Selecting and placing line controls
Copying and pasting vertical lines
Aligning lines between detail, header, and footer
Adjusting line length for section alignment
Working with page headers and report footers
Saving and reviewing report design changesPrimary Topics Access reports, vertical lines, line tool, report design view, aligning controls, section management, copying controls, fixed height limitations
Secondary Topics report headers and footers, can grow/can shrink, introductory VBA, handling long data fields
|


