Multiple Addresses 4
By Richard Rost

 2 years ago
Storing Multiple Customer Addresses in Access, Part 4 In this Microsoft Access tutorial, I will show you how to enhance a customer database by allowing the selection of multiple addresses per customer through a junction table and combo box setup. Learn to streamline address selection with combo boxes and create a dynamic interface for address management. This is part 4 of our series. MembersThere is no extended cut, but here is the database download: Silver Members and up get access to view Extended Cut videos, when available. Gold Members can download the files from class plus get access to the Code Vault. If you're not a member, Join Today!
PrerequisitesUp Next
Keywords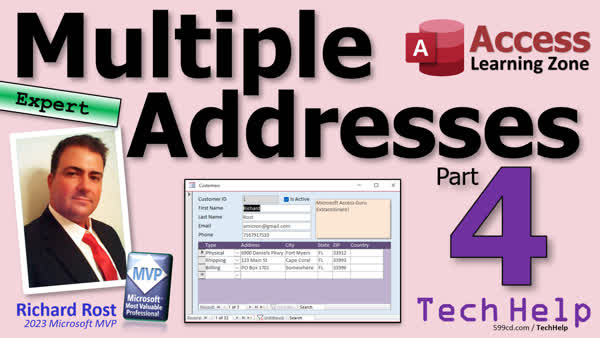 TechHelp Access, many-to-many relationship, junction table in Access, manage multiple addresses, create junction table, scalable database structures, address history management, Access subform design, combo box setup in Access, using queries in forms, managing customer addresses, edit list items form, allow value list edits, limit to list feature, setting up SQL in Access, basic VBA for Access, Access database customization, efficient data entry, database management tutorial, relational database setup
Transcript This is part four of the multiple addresses series. So if you haven't watched parts one through three, you know what to do. Get out of here. Go watch those. Come on back. So we left off in part three. We made our junction table. Right there is our junction table. And then we made a query, an address query, so now each address in the system will show up like that.
So now I want to take my form here, my address subform, and instead of having a full address where the user just types in address city, state, zip, I want them to pick from a list in this subform here. So let's go back to our address, F, design view, and members, by the way, I've kept the database from every video on my website. You'll find it in the members section. So gold members, if you want to keep this version of the database you'll find it on part three. If you want the new version, you'll find it today, or after the next one, or whatever.
Anyways, so you'll see now that there's no longer an address. See, I got the little green thingy there, that little green pop-up hoo-hoo dilly. That thing says the control has an invalid control source. Why? Because we took the address type ID off of the address form.
Now this subform no longer is going to be bound to the address table. It's now going to be bound to... anybody? Guess what's going to be in the subform under the the customer. We want the junction table. The junction table is where we're getting our data from for the subform now.
Okay, now we don't want all of these either. So we're going to get rid of all of these guys, delete, and we're going to simplify this now. It's literally just an address. We're going to have a list of addresses we can pick from. You'll see the full address here in this combo box. Now let's make the combo box.
Alright, so form design, find your combo box. Where are you? Right there. Drop it in here. It's the tricky part now. Again, we're getting our data from a table of query. We're getting it from the query that we built in the last class, though. We want the address queue. It's got the full address. We're still picking an address ID, so I want both of these fields over there; I want the address ID that's linked to the address table right and the full address is what's going to be displayed. That's why I wanted all of it in one field because of the combo box. When you drop it down, you'll only see the first visible field. Now, I see you might have, you know, ten 101 Main Streets in there, but only one Main Street at that full address.
Okay, next we're gonna sort it by the full address. Now there's a little, like this comes up in a lot of my beginner classes; outcome, I don't have a little checkbox here that says hide the key field. Well, it's because this combo box is based on a query; now based on a query, you don't get that checkbox, only if it's based on a table and only if you have an auto number. But we can just easily take this and shrink it down to zero, bring it past the line a little bit, so it makes sure it's zero, and make this guy as wide as it needs to be to fit that data.
Okay, next. Now which is the bound field? The address ID, of course. And what are we going to do with it once the user picks it? Well, we're going to save it in the address ID in the junction table. Right, we're picking an address, save it in the junction table, and that's going to link it to the customer.
Alright, next, what label do you want? It doesn't matter, we're going to delete it anyway, and there's our combo box. Here's another one of my pet peeves, Sammy, for the Access team. Right, I specified a width for that field in there. This should be wider. Well, I don't know because when you open up the box, it's going to be, but I think the box should at least start out that wide. I don't know, maybe that's just more of a preference.
Alright, so let's bring this guy over here. Let's resize it to maybe, I don't know, there. Now let's go about the same width we had before. I don't have to change too much around. There we go. Okay, bring that bottom section up, save it, close it.
Now, if I open it up, you'll see there's all my addresses. And you'll see this one's in there twice, because it's two different customers. We don't need the customer ID in here, because again, that relationship will be formed with the subform. And there you go. See? Now, if James Kirk also happens to have an address at 6900 Daniels, watch this. I come over here. I say, all right, what's your home address? My physical address is 6900, oh, look at that. Is it 6900 Daniels Parkway Street, oh yeah, that's it, okay, perfect. See, now we can pick from addresses that are already in our database. That was the whole point of this lesson.
Alright, oh, I got a P.O. Box too. Okay, so what's your PO box? PO box, all right, it's PO box 101. Okay, well, there's no 101 at all in here. So let me drop the box down here. Let me see, I don't have that. So I need to add it.
Alright, so how would I go about adding something to this combo box? Well, that's where the list items edit form comes in. Alright, this guy. This is the easiest way to do it. This is the only non-programmer way to easily do it. There are some better techniques that require some programming, using like a not in list event. Maybe we'll cover that in the extended cut. I haven't decided yet.
But without a list items edit form, you would have to say, well, okay, hold on, sir. I have to hit escape. I have to close this record out. I have to come back over here to the address table, or open a form, put it in. So that's what we're going to make a list items edit form for.
Now, that's just a simple little single form even. Right, we'll just use our single form, and we'll just put the address fields in here. So I'll copy the single form, copy, paste. We'll call this my address. Now we already have an address F, that's our subform. We'll make this the address edit. Edit F. Edit, add, same thing.
Okay, so we're going to edit this guy, design view. And I'm going to get rid of these because I already have the fields that I want. Guess what, they're right here. So, design view and I am going to grab the copy M and paste, and yet we don't need these over here, one of them with these, liberator, so there's that. If you want to throw the address ID in here, you can, but we really don't need it when it's nice and small. There it is. Save it. Close it.
Now we have an address edit F. And if you open it up, you can just... Oh, oh, oh, hang on. It didn't bind it. We've got to bind it. Don't forget your bindings. Open it up. And go to the form properties, go to data, record source, address T. Now we can save it. Close it. Close it. Open it up. Take a peek. There we go. You might want to make them a little bit bigger, that's up to you. Or you can make this a continuous form if you want a big long list of them, totally up to you. But what I can do now is I can come back to my subform, this guy. I can open up this guy's properties, alright. Oh, there's another thing, it's combo 62, remember that? We got to make sure we give it a name first, right, address combo. You don't have to give it a name, but when you start getting into programming, when you start getting into VBA, it's real annoying if it's combo 62 in your code. You're trying to look through the code, and what's that? Address combo, or at least address ID, tells you, hey, that's the address.
Okay. Alright, so let's go to data. Now you got limit to list. I recommend leaving that yes because you don't want the user just freely typing in the box, but if the item that they're not looking for if the item that they're looking for is not in the box, you want them to be able to allow value list edits. And the list edit, list items edit form is the address F, or excuse me, the address edit F that we just made, that guy.
Okay, save it, close it, close it, open it up again. Alright, let's go back to James Kirk. Alright, what's your PO Box here? Oh, it's 101, oh, it's not in the list. Well, let's see, drop it down. Let's hit the list items edit thingy right there. We can go to the end, add it in. 101 PO Box Street, whatever, I don't know. Something, something, something. Somethingville, somewhere, right, okay. somethingbill somewhere so if one of the about three and there and now if I drop this down there it is the about one. Okay, are there more elegant solutions than this? Yes, of course, there are. Uh... they require some programming. This is the uh... I'd I'd I want to show you guys how to do this without coding in let's say, you know, 255 North whatever whatever, enter, and you'll get this, right, the text you entered is in the list, would you like to edit the list now? Yes, of course. Right, go to a new record, and yes, you can program this to go to a new record if you want to. Again, that does require a little code, but you can put it in here and then there's your 255 North, and now you've got multiple addresses in the system that multiple people can use, and you know for your reporting it's the same address, and again I'm going to reiterate, is this best for each business? No, this is completely up to you if you want to use this or not. It works for a lot of companies.
Alright, now let's say you've been using this database for a year or two, three, six, 20, like me. And you've got thousands and thousands of addresses in here. And so you want to search maybe first, before you start typing in the address. You want to maybe look and see, hey, show me all the addresses I have in here from Buffalo, or whatever. It would be nice if you had some way to filter this list instead of opening this up and there's a million records in here.
Well, in the next part, I'm going to show you how to do that. We're going to put little filter boxes up here. So I can come in here and say, all right, show me all of the addresses in Florida. So I'll type in FL, press Tab, and there you go. It'll limit it to all the ones in Florida. Or if, let's say, you want to see a particular zip code. 1422. And there they are. There's only one, but you get the point. Then let's say you want to go, OK, let's go over to a new record here. Alright, like this guy here, brand new. Alright, show me everybody from Buffalo. And there's the Buffalo person. Now I can just pick this and hit Add. And it'll add that to the guy's record. See that? Now this is gonna involve some programming so hey I gave you four parts that were no programming involved, right? So in the next part, part five, we're gonna up it to developer but we don't need a ton of code. We're gonna need a little a little bit of SQL, a little bit of VBA, not much. We'll go over the prerequisites next time and that will be your video for Monday. Today is what Friday the 26th of April 2024. I'm gonna give you the weekend to play with the stuff and then on Monday we're gonna hit part 5, and I've got an extended cut coming for the members. But that is gonna be your TechHelp video for today part 4. I hope you learned something. Live long and prosper my friends. Enjoy your weekend. I'll see you Monday for part 5.
TOPICS:
Creating junction tables in Access
Designing queries for addresses
Updating form design for address selection
Binding subforms to junction tables
Configuring combo boxes in forms
Setting up address selection via combo box
Hiding key fields in combo box display
Setting the bound field in a combo box
Configuring storage of selections in junction tables
Creating and using a list items edit form
Allowing edits through a list items edit form
Linking combo box selections with customer records
Enabling value list edits in combo boxes
Deploying address management without coding
Managing address database updates and scalability
Proposing future enhancements for address filteringIntro In this video, I will show you how to update your Microsoft Access forms to allow users to select addresses from a list using a combo box that is bound to a junction table and address query. We will cover removing the old address fields, redesigning the subform to work with the junction table, setting up a combo box for address selection, and configuring a list items edit form to add new addresses without programming. You will also learn how to manage address entries for multiple customers and prepare for adding filtering options in the next part. This is part 4.Quiz Q1. What is the purpose of the junction table mentioned in the video?
A. To connect customers directly to addresses.
B. To store new addresses not related to customers.
C. To act as a bridge between customers and their addresses in the database.
D. To replace the need for an address ID in customer records.
Q2. Why is the control source in the address subform reported as invalid?
A. The address subform is incorrectly linked to the customer table.
B. The address type ID from the address form was removed.
C. The junction table doesn't exist in the database yet.
D. There's an error in the database software itself.
Q3. In the video tutorial, why is the address ID included in the combo box?
A. To display the full address to users.
B. To ensure that only customers can use the addresses.
C. For linking the selected address back to the customer through the junction table.
D. To show random addresses which may not be linked yet.
Q4. What does the 'List Items Edit Form' allow users to do?
A. Filter addresses by state.
B. Directly add new addresses into the system via the combo box.
C. Remove existing addresses from the database.
D. Automatically generate new customer IDs.
Q5. According to the tutorial, what will form the basis for addressing enhancements in part five of the series?
A. Removing all interactive elements to simplify database management.
B. Complexity reduction of the backend SQL database.
C. Introduction of coding with SQL and VBA to enhance functionality.
D. Deprecation of the junction table in favor of a more robust system.
Answers: 1-C; 2-B; 3-C; 4-B; 5-C.
DISCLAIMER: Quiz questions are AI generated. If you find any that are wrong, don't make sense, or aren't related to the video topic at hand, then please post a comment and let me know. Thanks.Summary Today's TechHelp tutorial from Access Learning Zone continues our series on managing multiple addresses in Microsoft Access. This is part four, so if you have not gone through parts one to three yet, it will be helpful to review those first to follow along with everything covered in this installment.
At this point in the series, we have created a junction table and built an address query. This allows us to represent each address in the system individually and sets the foundation for more advanced address management.
The next step is to update the address subform in our database so that, rather than allowing users to freely type in address, city, state, and zip, we prompt them to select an address from a list. To do that, we need to modify our subform design. Previously, the subform was bound directly to the address table. Now that we have a junction table to map the many-to-many relationships between customers and addresses, the subform will instead reference this junction table to display and manage address assignments for each customer.
To streamline this process for the user, we will remove unnecessary fields from the subform and include only an address selector. The main feature will be a combo box listing all possible addresses. The combo box will get its data from the address query we built earlier, which contains the full address as a single field. This design ensures the user easily distinguishes between similar street names by displaying the complete address, such as including city, state, and zip.
When configuring the combo box, it is important to choose both the address ID (which uniquely identifies each address) and the full address for display. The combo box will present the full address to the user, but store the address ID in the junction table, linking the selected address to the customer. If there are multiple entries for the same street address, only the unique combinations—such as street, city, and zip—will be shown, ensuring accurate selection.
The combo box field is set to sort by full address to make browsing easier. If you notice there is no option to "hide the key field" during combo box configuration, that is because this option only appears when sourcing data directly from a table with an AutoNumber field as the key. In this case, since we are sourcing from a query, the workaround is to manually set the width of the address ID column to zero, effectively hiding it from display. You can then adjust the remaining column widths as needed for optimal readability.
After setting up the combo box, make sure the bound field is the address ID, since that is the value you want to store in the junction table. The form label for this field is not particularly important here, as we are simplifying the form's design.
Once these changes are complete, opening the form will display all addresses available for selection. Each address associated with a specific customer appears in the subform, and when a customer has more than one address, they all are visible and selectable. With this setup, users can now pick from existing addresses in the database without redundantly entering duplicate data.
This approach is particularly useful when multiple customers might share the same address or when new addresses need to be added. For example, if a particular address is not present in the list, the user can add it using a "List Items Edit Form." This feature allows users to add new addresses directly through a simple form, without having to leave the process or manually navigate to the address table. Creating this supporting form involves duplicating a basic address entry form and binding it to the address table, then specifying it as the List Items Edit Form for the combo box.
It is also strongly advised to give the combo box a meaningful name rather than leaving default names like "Combo62." This makes future programming and maintenance much easier, especially if you expand the database or begin using VBA.
In the combo box properties, the "Limit to List" setting should typically be "Yes," to restrict users to selecting only from known, valid addresses. With the List Items Edit Form configured, users can add new addresses if their desired option is not present. When attempting to input an address not already on the list, the system prompts to open the edit form for a new entry. This approach allows the database administrator to manage addresses efficiently without requiring additional code.
While there are more sophisticated methods—such as coding custom not-in-list event handlers—for handling new address entry, this solution provides a user-friendly, code-free method for most needs.
As your database grows and accumulates thousands of addresses, it might become difficult for users to efficiently find the exact address they need. In the next part of this series, I will show you how to add filtering capabilities to the form so users can quickly narrow down the list of addresses by criteria like state or zip code. This enhancement will involve some VBA and SQL, but not an extensive amount. I will review the prerequisites and guide you through the process step by step.
For today, that wraps up part four of this Access TechHelp series. You can find a complete video tutorial with step-by-step instructions on everything discussed here on my website at the link below.
Live long and prosper, my friends.Topic List Binding subforms to junction tables
Configuring a combo box to select addresses
Using a query as the combo box data source
Displaying full addresses in a combo box
Setting the bound column in a combo box
Customizing combo box width and field visibility
Saving selected address IDs in the junction table
Removing unnecessary fields from subforms
Creating and setting up a list items edit form
Configuring combo box to enable list edits
Linking the list items edit form to the combo box
Adding new addresses using the edit form
Renaming combo box controls for clarity
Adjusting combo box properties like Limit To List
Demonstrating address selection for multiple customersPrimary Topics Access forms, junction tables, subforms, combo boxes, address queries, binding forms, list items edit form, address selection
Secondary Topics combo box design, data integrity, record source configuration, user interface tweaks
|


