Read Only
By Richard Rost

 13 months ago
How to Create a Read-Only Form in Microsoft Access
In this Microsoft Access tutorial I will show you how to create a read-only form so users can view information but not make changes, including how to lock down specific fields, visually indicate non-editable areas, and set up a simple password unlock feature using VBA for advanced users.
Tessa from Tacoma, Washington (a Platinum Member) asks: How do I make it so users can view information in a form, but not change anything?
Members
There is no extended cut, but here is the file download:
Silver Members and up get access to view Extended Cut videos, when available. Gold Members can download the files from class plus get access to the Code Vault. If you're not a member, Join Today!
Prerequisites
Links
Recommended Courses
Keywords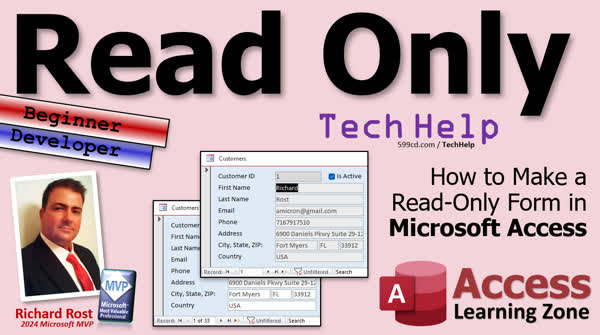
TechHelp Access, read-only form, form properties, allow edits, allow deletions, allow additions, locked property, field-level lock, gray fields, password protect form, manager mode, edit mode button, VBA editor, InputBox password, Me.AllowEdits, Me.AllowDeletions, Me.AllowAdditions, free template, customer form
 Subscribe to Read Only
Get notifications when this page is updated
Intro In this video, you will learn how to make a read-only form in Microsoft Access. I will show beginners how to copy and back up a form, set properties like Allow Additions, Allow Deletions, and Allow Edits, and lock specific fields using the Locked property and visual formatting. For more advanced users, I will demonstrate how to use VBA code with a password-protected button to toggle edit mode on a single form, allowing admins or managers to edit records while keeping regular users in read-only mode.Transcript Today, I'm going to teach you how to make a read-only form in Microsoft Access. I'm going to show the beginners how to do it, and then I'm going to show a little trick for the advanced developer students. So, a little bit of something for everybody in this video.
Today's question, I hear this all the time, but I got an email from one of my Platinum members, Tessa from Tacoma, Washington. She said, how do I make it so users can view information in a form but not change anything?
There are a couple different ways to do this. Let me show you my favorite method.
Here I am in my TechHelp free template. This is a free database. You can grab a copy off my website if you want to. In here I have a customer list, and the customer list will take you to a customer form.
Now, let's say you don't want users being able to change things in here, just you. Everybody else can only look stuff up. I have had situations where this was the case. The main secretary entered all the data in, and everybody else in the office could just look up stuff.
So, the first thing we're going to do is make a copy of this form. Why? Because we still want to have a copy available that we can work with ourselves. I'm going to take CustomerF, copy it, and paste it. That's Control-C, Control-V. We're going to call it CustomerF_Full or whatever, so you have a backup copy of your full form.
Now, let's go into Design View on the customer form. Then we're going to open up the form properties. Double-click on that little box where the ruler is. Go over to Data, and you're looking for three properties you're going to change. Allow additions allows them to add new records. If you want them to be able to add new stuff, that's fine too. A lot of offices want users to be able to add a new customer, but not change existing data.
Allow deletions - that's a big one. You don't want customers getting deleted. Allow edits allows changes to the record. So turn all three of those things off, save it, close it, then open it. Now you'll see in here I'm typing and nothing is happening. I can't go to a new blank record, and I can't select this and hit Delete. Nothing happens there either. So this is effectively locked down.
How do you edit anything? You can come into your Customer Full form. Just don't give them access to get to this. You can hide the navigation pane if you want to. I cover how to do that in my simple security video. Go watch this one, it'll show you how to lock it down so your average Access user can't get in and find it. If someone like me really knows Access, sure we can get around it, but this will keep 99 percent of people out of it.
Another thing I like to do in here is, if you've got fields that they can't access, I like to just make them gray. Go to Format, and then pick a light gray, like that one there. That visually tells them they can't change that stuff.
Now what if you do want them to be able to change certain fields but not others? Maybe they can change the notes, or maybe they can change first name, last name, but not the rest of the fields. You can do that too. Here is how you do that.
First, turn Allow Edits back on, because if that's off, they can't do anything. Now they can't add, they can't delete, but they can edit. So now we can change certain fields to allow them to edit them.
Let's say we want to allow them to edit first name, last name, and notes - that's it. This is locked. There is a property called Locked, but it's a field-level property. Select all the fields that you want to lock. Let's just start with this group here. Find Locked and set that to Yes. At the same time, while I'm doing that, I'm also going to make them gray. So those fields there are now locked. We can do these ones over here too - Locked: Yes. Make those gray too. There we go. Maybe even the IsActive box up here, let's lock that. You can't really set that gray because it's a check box.
Now the user can also visually see what they're allowed to change. Save it, Control-S, save it, close it, open it.
Now I can't come in here and change their phone number, but I can come in here and change their last name or add some notes. But these fields are all locked. You have to allow edits, but then you can lock the fields.
Again, you get two different forms running here: one for you, where you can come in here (the full one) and change anything you want, and one for them. You just give them the button that you want on the main menu. If you want to add stuff, you have to go into your unlocked database and just come in here.
Now that's the beginner method. Now I'm going to show the advanced students how you can do the same thing using one form.
I'm going to get rid of this customer-after form that we just modified. I'm going to copy this guy back, copy, paste, CustomerF. This is my original customer form the way I had it before.
Now, what we can do is have it so that it's normally locked, but the manager can enter a password to unlock it.
Go into the customer form, design view. Set AllowAdditions to Yes, AllowDeletions to No, and AllowEdits to No.
We're going to make a button in here that's going to turn that stuff back off. Copy, paste, and then we're going to put in Edit. So put you in edit mode. Make the name of the button EditMode.
At this point, if you open up this form, everything is locked and you can't delete anything. Click on Edit, nothing happens yet because we didn't put any code in the button yet, but we're going to do that right now.
Right-click, Design View, right-click on this guy, go to Build Event. This will bring up my VBA editor. If you get a window that asks you what editor you want, say you want the Code Builder.
If you don't know how to program in VBA yet and want to learn how, go watch this video; I'll put a link down below. It's free. It's about 20 minutes long. It teaches you everything you need to know to get started with VBA.
Once I'm in here, if you click the Edit Mode button, we can say:
Me.AllowDeletions = True
Me.AllowEdits = True
We already made Me.AllowAdditions = True, and then I'll put a Beep after that. That'll indicate that manager mode is now active.
So watch this: if I close this, save it, open it, if I try to modify something, I can't. But if I click Edit, there's my beep. Now I just changed those settings, and now I can come in here and make some changes.
But how do I keep the average user from clicking that Edit button? We can put a little password in here using InputBox.
I can say:
If InputBox("Enter the password", "Password") = "Rick" Then
' unlock code
End If
So if they enter the right password, which is "Rick," then that stuff will happen. Otherwise, nothing happens.
Save it, close it, open it. Now I'm typing and can't do stuff. Let me hit Edit. Oh, what's the password? I don't know. I'll hit OK, and I still can't edit stuff.
Let's try it again. Edit. I'll put in something random, hit OK. Still can't do stuff.
Let's try one more time. Edit. I'll put in Rick. Oh, there's the beep, I heard the beep this time, and now I can do stuff. Now we know our button is working.
And that's it. Four little lines of code, and I was able to add some really cool functionality to my database. That, folks, is the power of learning VBA. You don't have to become a programmer or a developer overnight. You can just learn these little, cool tricks to make your database have some extra cool added functionality.
That's why I like to push people into VBA as much as I can. Not because I'm trying to create developers, but this is just a little stuff you can do to make your databases really cool.
These are the kind of little tips and tricks I try to put into my videos and my courses. I have lots more to learn on my website. Check it out.
That is going to be your TechHelp video for today. I hope you learned something. Live long and prosper, my friends. I'll see you next time.
TOPICS:
Making a read-only form in Microsoft Access
Copying and backing up Access forms
Setting Allow Additions, Allow Deletions, and Allow Edits properties
Locking form fields to prevent editing
Formatting locked fields with a gray background
Allowing edits for specific fields only
Using the Locked property at the field level
Using separate forms for admin and user access
Creating a toggle button to enter edit mode
Writing VBA code to change form properties
Implementing password protection for edit mode with InputBox
Using VBA to enable edits and deletions conditionally
COMMERCIAL:
In today's video, you will learn how to make a read-only form in Microsoft Access. I will show you the beginner method for locking down your forms so users can view but not change information, including how to lock certain fields and make them visually stand out. Then, for advanced users, I will teach you how to use VBA to unlock the form with a password, giving managers or admins the flexibility to edit while keeping everyone else locked out. You'll find the complete video on my YouTube channel and on my website at the link shown. Live long and prosper my friends.Quiz Q1. What is the primary purpose of making a read-only form in Microsoft Access?
A. To allow users to edit all data at any time
B. To let users view information without being able to change it
C. To create a backup of your data
D. To increase the speed of data entry
Q2. Why is it recommended to make a copy of your form before modifying it to become read-only?
A. To ensure you have a version that you can still edit later
B. To share the copy with users
C. To back up your entire database
D. To speed up the form
Q3. Which property disables the ability to add new records in a Microsoft Access form?
A. Allow Edits
B. Allow Additions
C. Allow Deletions
D. Locked
Q4. If you want users to view records but not delete them, which property should you turn off?
A. Allow Edits
B. Allow Additions
C. Allow Deletions
D. Locked
Q5. What is the result when you set Allow Edits, Allow Additions, and Allow Deletions all to No on a form?
A. Users can add but not delete records
B. Users can view but not change, add, or delete records
C. Users can only delete records
D. Users can change all fields
Q6. What visual cue does the video suggest to show users that form fields are locked?
A. Make the fields bold
B. Color the fields light gray
C. Hide the fields
D. Add a label "Locked" beside each field
Q7. Which property is used to lock specific fields at the field level?
A. ReadOnly
B. Disable
C. Locked
D. Allow Edits
Q8. When you want only some fields to be editable and others locked, what do you need to ensure at the form level?
A. Allow Edits must be set to No
B. Allow Additions must be set to Yes
C. Allow Edits must be set to Yes
D. Allow Deletions must be set to Yes
Q9. What advanced technique does the video show to allow editing with a password?
A. Hide records behind a login screen
B. Use a second form that asks for a password
C. Add a button that unlocks editing after entering a password
D. Encrypt the entire database
Q10. What VBA code is shown to prompt a password before enabling edits?
A. If InputBox("Enter pass", "Password") = "Pass" Then
B. If MsgBox("Password") = "Rick" Then
C. If InputBox("Enter the password", "Password") = "Rick" Then
D. If Prompt("Password?") = "Rick" Then
Q11. In the advanced example, what happens when the correct password is entered?
A. The form automatically closes
B. The form allows editing of records
C. The form becomes read-only
D. The form creates a backup
Q12. According to the video, why is learning basic VBA in Access beneficial?
A. It makes forms look more colorful
B. It allows you to build extra functionality easily
C. It is required to use Microsoft Access
D. It helps create SQL queries
Answers: 1-B; 2-A; 3-B; 4-C; 5-B; 6-B; 7-C; 8-C; 9-C; 10-C; 11-B; 12-B
DISCLAIMER: Quiz questions are AI generated. If you find any that are wrong, don't make sense, or aren't related to the video topic at hand, then please post a comment and let me know. Thanks.Summary Today's TechHelp tutorial from Access Learning Zone covers how to create a read-only form in Microsoft Access. I will cover a method suitable for beginners as well as a more advanced approach for those of you who like to work with VBA. No matter your skill level, you should find this helpful.
The question I often get is how to allow users to view the information in an Access form without being able to change anything. This comes up frequently in office environments where, for example, a secretary or administrator is responsible for data entry while other staff members only need to look up information without modifying it.
To demonstrate, I will use the free TechHelp template database available on my website. Inside this database, I have a basic form that displays customer data. Imagine the scenario where you want to restrict most users so they can only look at records but not edit or delete them.
The first and most important step is to make a backup copy of your form. The idea is to retain a version of the form with full access for yourself, while creating a restricted, read-only version for everyone else. To do this, simply copy the form and give the copy a name such as CustomerF_Full, indicating that this is your unabridged, editable version.
Now, switch to Design View of the customer form and open the form's property sheet. Under the Data tab, you will see three important properties: Allow Additions, Allow Deletions, and Allow Edits. If you do not want users to be able to add new records, delete records, or edit existing records, set all three properties to No. If you want to permit the addition of new records (for example, adding new customers) but still block edits or deletions, you may choose to leave Allow Additions set to Yes. In most cases, though, turning them all off provides maximum protection against unwanted changes.
After making those adjustments, save and close the form, then reopen it to test. You will notice that typing into the fields does nothing, there is no way to navigate to a blank record, and attempts to delete records will not work. You now have a read-only form for your users.
For situations where only specific users, like yourself, need editing access, you should use the fully editable version of the form you copied earlier. Make sure that your general users do not have navigation options to get to this full-access form. You can further restrict access by hiding the navigation pane, which I cover in my simple security video available separately on my site. While someone with advanced Access knowledge might bypass these restrictions, this simple method is enough to block most users.
For improved usability, I recommend providing a visual cue that fields are locked. You can change the background color of locked fields to a light gray in the form's formatting options so that users immediately recognize they cannot edit those fields.
You may occasionally want users to edit certain fields but not others. To accomplish this, first enable Allow Edits at the form level. Then, use the Locked property at the field (control) level: select the fields to restrict, set their Locked property to Yes, and optionally shade them gray. The fields you want users to edit (for example, first name, last name, or notes) can remain unlocked and shown in the normal color. This way, users can edit only what you allow while everything else remains protected.
This method effectively leaves you with two forms: one for general users with selective or read-only access and one for yourself or trusted staff with full access. From a menu or switchboard, just make sure users only see the appropriate version.
For those of you interested in a more advanced approach, it is possible to manage this with a single form by introducing a conditional editing mode. Delete your modified, locked form and restore your original editable form for this technique.
Go into Design View on the customer form and set Allow Additions to Yes, Allow Deletions to No, and Allow Edits to No. Add a button to the form labeled Edit, naming the button EditMode. By default, users will not be able to edit or delete records. Clicking the Edit button will unlock the form for editing, but to prevent unauthorized editing, you will add a password prompt using VBA.
When the Edit button is clicked, the code checks for a password. If the correct password (in my demonstration, "Rick") is entered into the InputBox, the form's Allow Edits and Allow Deletions settings are switched to Yes, accompanied by a simple beep as confirmation. If the password is incorrect or left blank, the form remains locked.
Testing this, you will see the prompt for a password when Edit is clicked. If you enter the correct password, the form becomes editable; otherwise, it remains locked. This technique adds a powerful layer of security on top of the basic Access features. With just a few lines of code, you can greatly enhance the functionality and control of your database.
This approach illustrates the value of basic VBA skills. You do not have to become a full-time developer to implement helpful features and customizations like this in Access. Little tricks like these can make a big difference in the usability and security of your database applications.
If you want to see all of these techniques demonstrated in detail, step by step, you will find a complete video tutorial on my website at the link below. Live long and prosper, my friends.Topic List Making a read-only form in Microsoft Access
Copying and backing up Access forms
Setting Allow Additions, Allow Deletions, and Allow Edits properties
Locking form fields to prevent editing
Formatting locked fields with a gray background
Allowing edits for specific fields only
Using the Locked property at the field level
Using separate forms for admin and user access
Creating a toggle button to enter edit mode
Writing VBA code to change form properties
Implementing password protection for edit mode with InputBox
Using VBA to enable edits and deletions conditionally |


