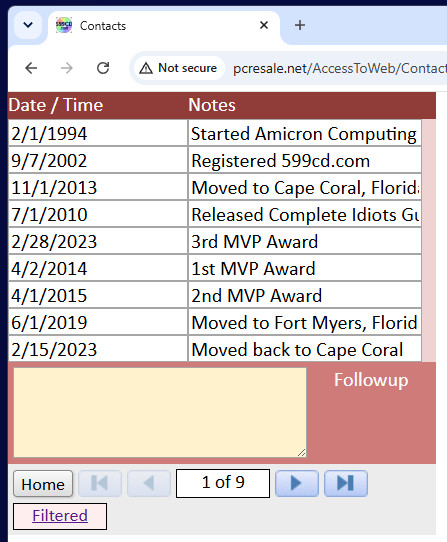
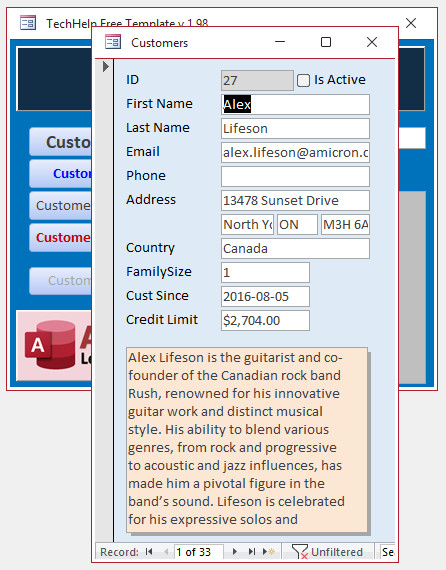
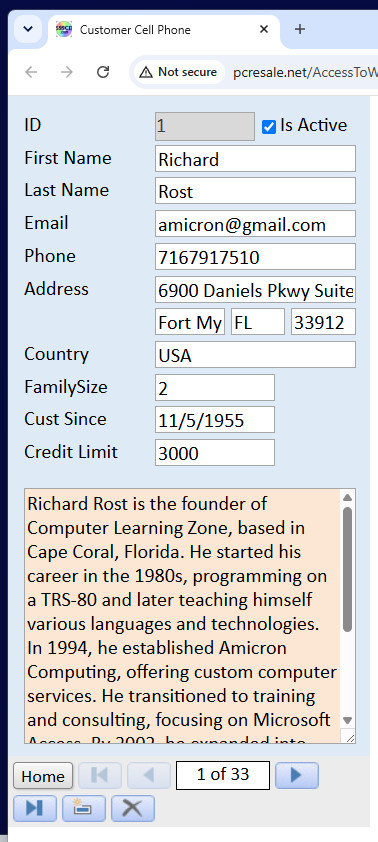
A few years ago, while I was on vacation, my wife wasn't feeling well, so I had a couple of days to myself with nothing but my laptop. I started wondering if I could make a Microsoft Access form behave like a web page. After a few hours of tinkering, I had text boxes working. Then I thought, "What if those web pages connected to SQL Server instead of local Access tables?" That worked too. I had a simple proof of concept running over a weekend, thought it was pretty cool, and then put it on the shelf for a couple of years. You know, like I do with a lot of projects.
Over the Fourth of July weekend, while my wife and I were babysitting our dogs through all the neighborhood fireworks, I dusted the project off and decided to see how far I could take it. What started as a fun little experiment has turned into something that I think a lot of Access developers are going to enjoy.
I'm calling it Access Web Publisher.
By far the number one thing I hear from Access developers is, "I wish my database worked on the web." Every week I hear from people who are moving away from Access, not because they dislike it, but because they need browser access for their users. Some have even canceled their memberships because they're migrating to web-based platforms. I completely understand why. Microsoft Access is still the best front-end database development tool ever created. Pair it with SQL Server, and you've got an incredibly powerful solution for desktop users, whether they're on your local network or connected over the Internet.
But what about users on iPads, Android tablets, Chromebooks, Macs, or phones? What about employees working remotely who don't have Microsoft Access installed? That's the gap I've been thinking about for years, and it's exactly what I'm hoping Access Web Publisher will help fill.
Before anyone gets too excited, let me set expectations. This is not a magical "take your 20-year-old Access application and instantly turn it into a website" button. If you've spent fifteen years building forms with thousands of lines of VBA code, custom controls, and every trick you've ever learned, this isn't going to wave a wand and make all of that run in a browser. That's simply not realistic.
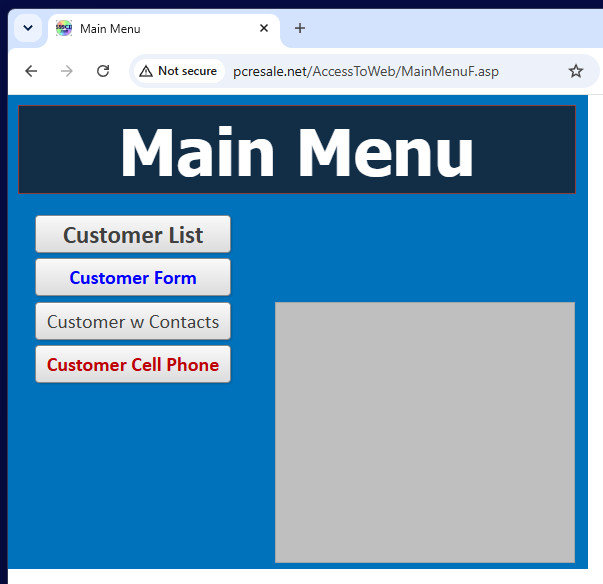
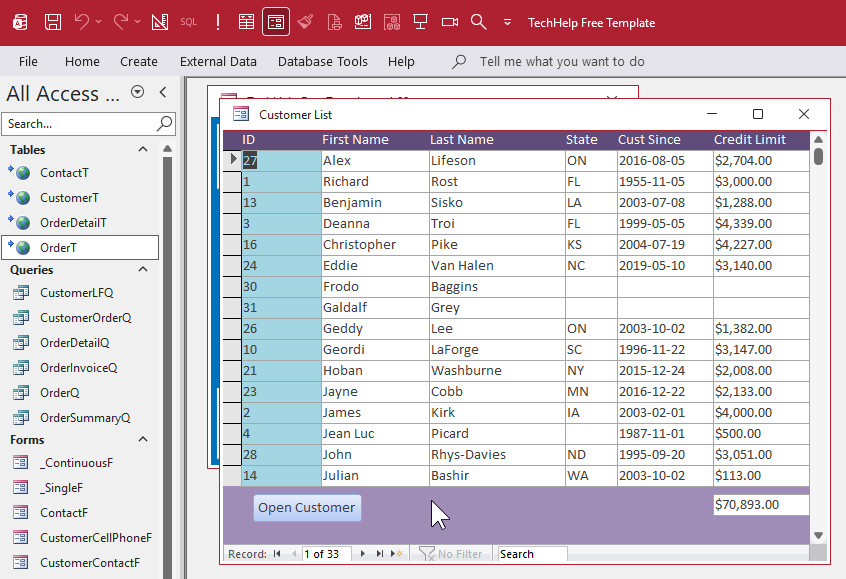
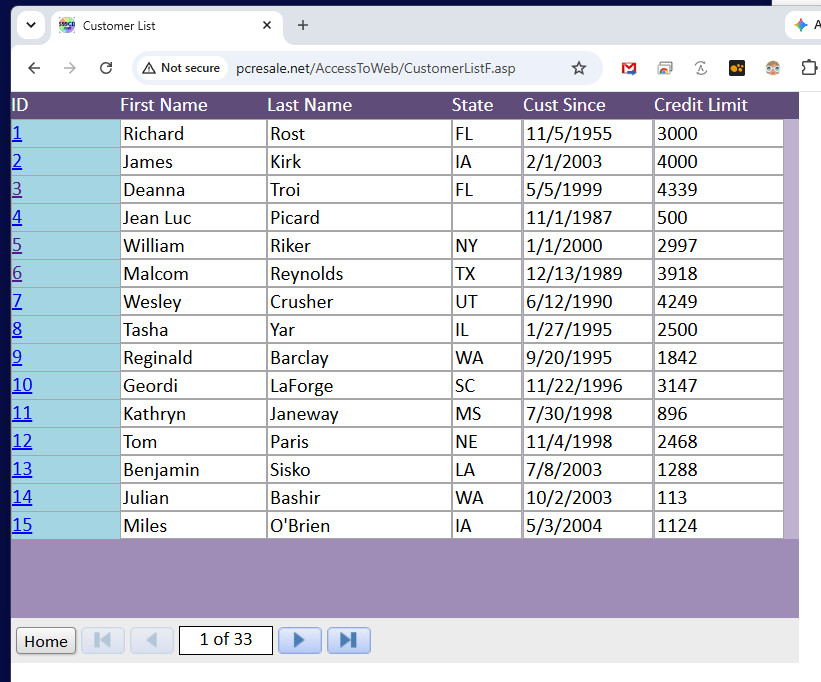
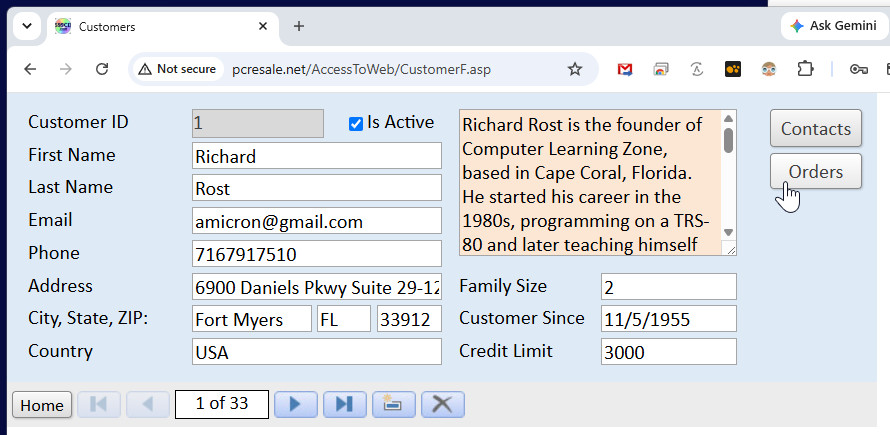
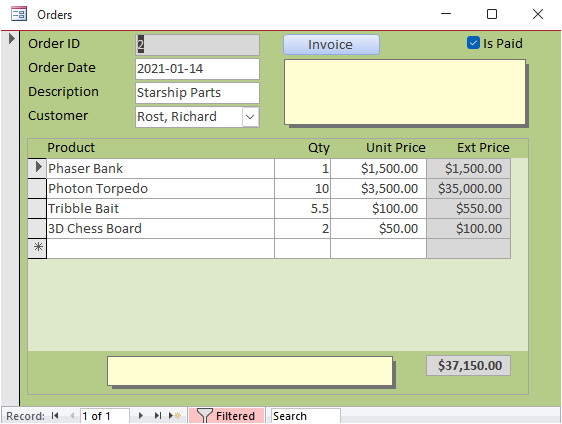
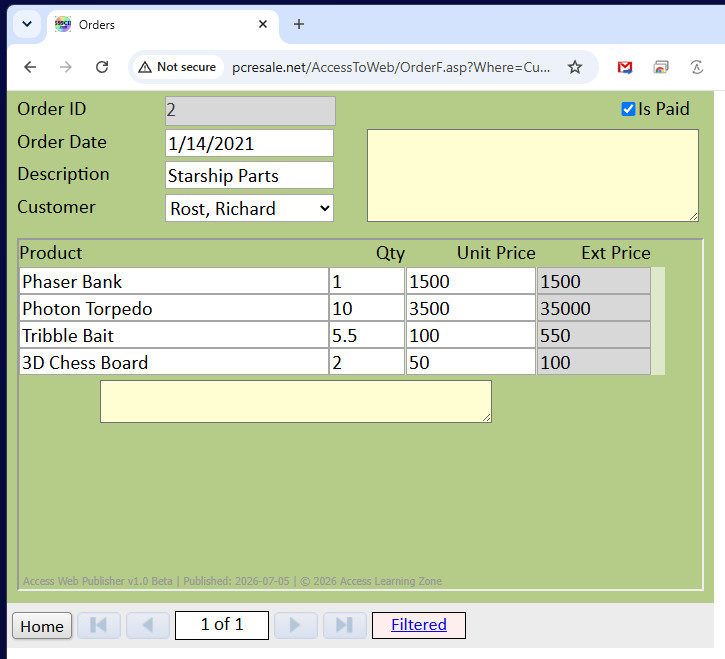
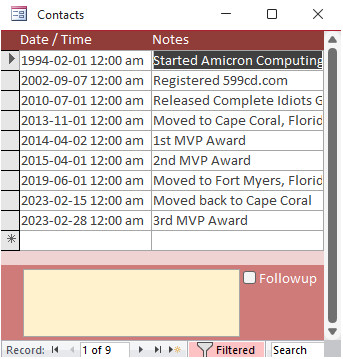
Instead, the goal is something much more practical. Build your forms in Microsoft Access, where you're already comfortable and productive, then publish those forms as web pages that look and behave very much like the originals. You continue designing your interface in Access, and Access Web Publisher generates the web version for you.
One of the unexpected bonuses is that I built SQL Server migration right into the project. It can create your SQL Server tables, copy your data from Access, and relink your Access front end so it continues working against SQL Server. At the same time, it generates the matching web pages that connect to those same tables. That means you can have both an Access desktop application and a browser-based interface using the exact same data. I honestly didn't set out to build a migration tool, but it turned into one almost by accident.
Right now the beta already supports quite a bit.
* Single forms, fully CRUD * Continuous forms, RU (no create or delete yet) * Text boxes, including multi-line memo fields * Simple relational combo boxes (drop-down lists with ID, visible text) * Check boxes * Labels * Navigation command buttons (OpenForm only, with or without criteria) * Parent-child subforms * Read-only mode * Edit-in-place mode using AJAX (saves data as you edit each field) * SQL Server table creation * Access to SQL data migration * Automatic relinking of your Access front end * The generated pages preserve most your Access form layout
There are still plenty of limitations, and I'm not trying to hide them. Adding and deleting records only works on single forms. Combo boxes need to be simple lookup lists without fancy VBA tricks. Subforms currently relate only through the parent's primary key. VBA code doesn't magically become JavaScript, so any custom business logic will still need to be recreated on the web if you need it there. This is Version 1.0 beta, and there's still a lot of work left to do.
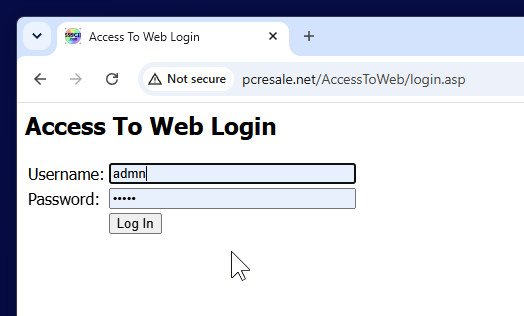
The next items on my list are filtering, searching, sorting, better command button support, more Access control types, and a much more complete security system. Right now there's just a single username and password for the generated website, which is fine for beta testing but certainly not where I intend to leave it. Eventually there will be proper user accounts, permissions, and security tied into SQL Server.
The Access Web Publisher database itself is really an administrative tool, so you'll want to keep it somewhere safe. It stores your deployment settings and server information. The generated website is a different story. Once everything has been published, your connection information lives inside the ASP code on the server, where visitors can't simply browse to it.
This project is aimed squarely at Microsoft Access developers. If you've ever wished you could let customers, employees, or remote users work with your Access data through a web browser without rewriting your application from scratch, that's exactly the problem I'm trying to solve. I'm not promising magic, but I do think this is going to save a tremendous amount of time for a lot of people.
Once I finish filtering, searching, sorting, and a few other finishing touches, I'll invite a small group of beta testers, starting with Alex, Kevin, and the other moderators, to beat on it and tell me what works, what doesn't, and what features they'd like to see next.
I'm genuinely excited about this one. It started as a vacation experiment, sat forgotten for a couple of years, and now it's become one of the coolest projects I've worked on in a long time. I can't wait to show you what it can do.
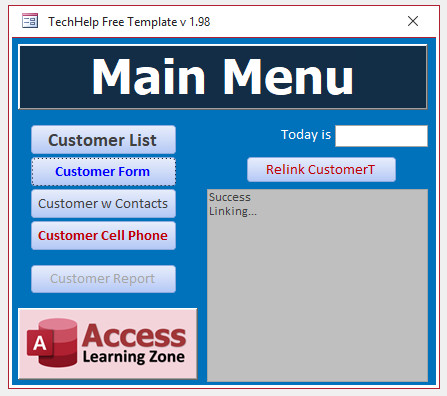
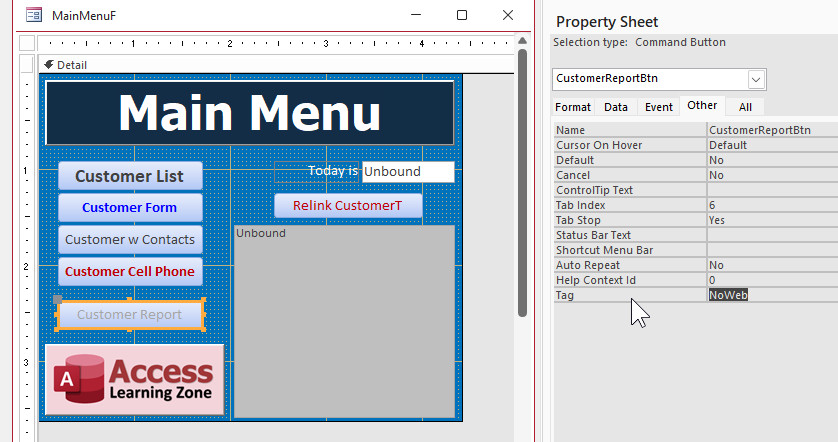
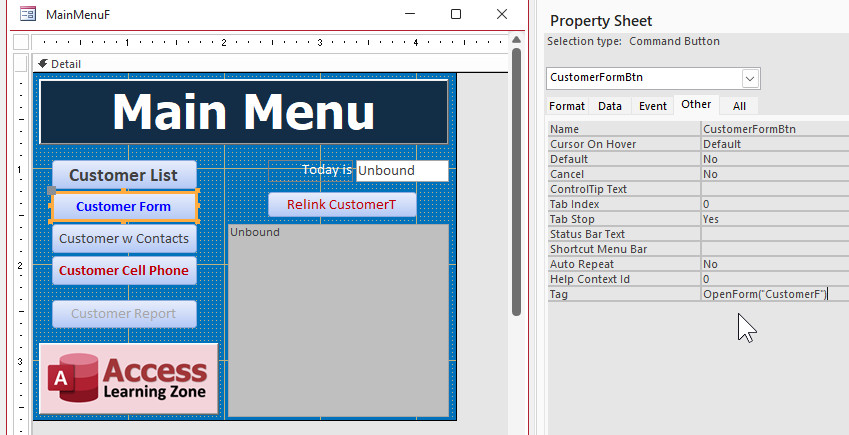
Now you're probably wondering why certain objects don't exist on the main menu. Well, images I haven't gotten to yet, and you can hide buttons that don't do anything by using the NoWeb tag, and then they just don't get published.
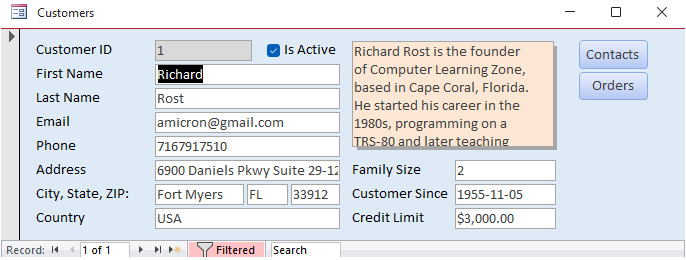
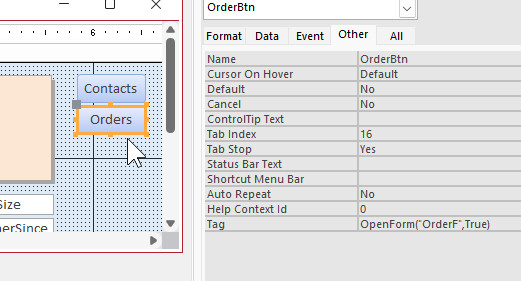
And for now, OpenForm has one parameter, which is True. If that's the case, it opens up that form and filters it based on the primary key of the form that you're on. This way, from the customer form you can show just their orders.
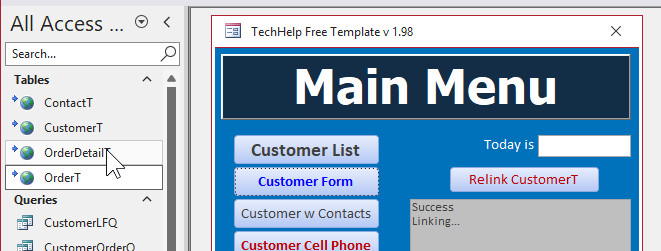
One of the big problems with Access security, with linking tables to SQL Server, is that it sometimes stores the passwords with those links. I specifically did it so that it needs the password, obviously, to make the link in the first place, but then it doesn't save that in the database. You will, however, need to relink one table when the database starts back up, and I'll provide you with the code to do that or a button. Once it's linked, that's it. The password is stored in the VBA code, so as long as you compile it into an ACCDE and give that to your user, they won't get a hold of the password.
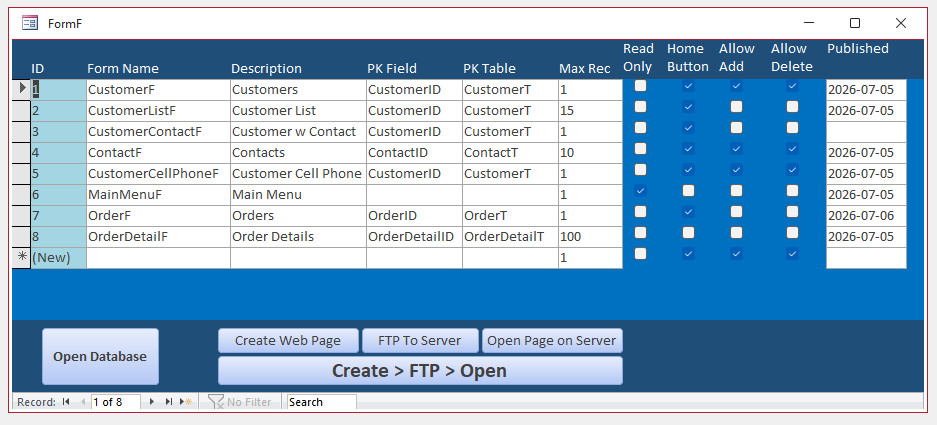
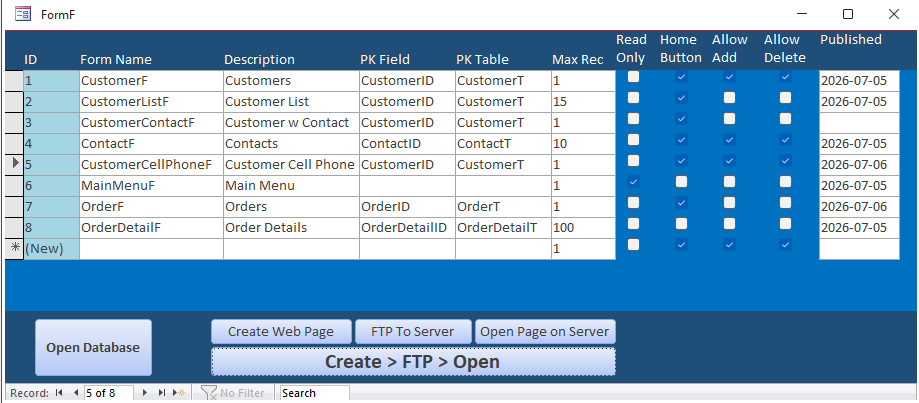
This is the Form Publisher, where most of the work gets done. Start by selecting the Access form you want to publish and give it a description, which becomes the page title on the website. Next, specify the primary key field and the primary key table. This is necessary because a form can be based on a query instead of directly on a table, so the publisher needs to know where records are actually being added, edited, or deleted.
Speaking of queries, forms based on queries are supported as long as the query exists on the SQL Server as a view. Right now you'll need to create those views yourself, but I'm thinking about adding a Query-to-View converter so the publisher can generate them automatically. As long as your calculated fields exist in the view, they'll continue to work just like they do in Access.
You can choose whether a form is read-only or editable, decide whether it should display a Home button, and specify which page serves as your application's home page, such as your Main Menu form. There are also options to allow or prevent adding and deleting records, and the publisher keeps track of when each form was last published so you know which pages need to be updated after making changes.
Finally, there are buttons that will generate the web page, upload it to your web server automatically via FTP, and open it in your browser for testing. You can also do all three steps with a single click, which is the option I usually use.
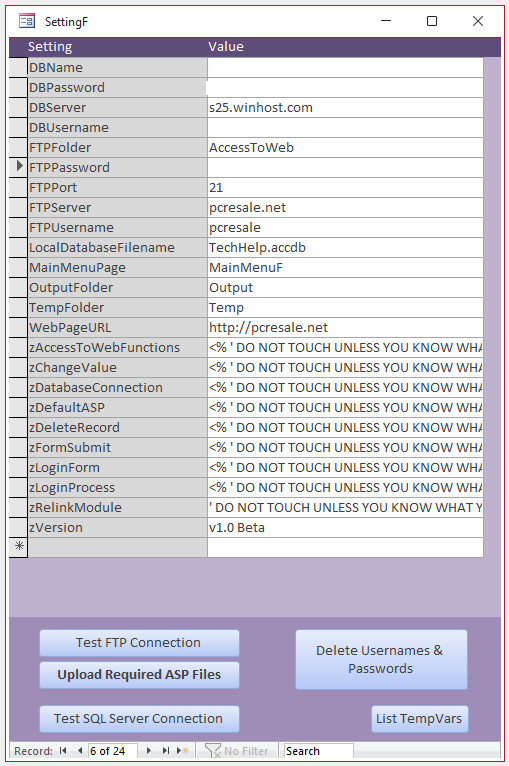
This is the Settings form, where you configure everything the publisher needs to connect to your SQL Server database and your website. Just enter your SQL Server name, database name, username, password, and then your FTP server information, including the server name, username, password, and port number.
Yes, you will need your own web hosting account with SQL Server support. But as I've mentioned in about a million videos over the years, hosting is incredibly inexpensive these days. A company like WinHost offers website hosting with SQL Server for around five bucks a month. Honestly, if you can afford my lessons, you can probably afford five dollars a month for web hosting. I don't want to hear any excuses. It's cheaper than a fast-food lunch.
You'll also specify your local Access database file. Right now the publisher assumes the database is in the same folder as the application, which is the recommended setup anyway. You can also specify your Main Menu form, which becomes the destination for the Home button on your generated website. The output and temporary folders generally don't need to be changed, so you can leave those at their default values.
You'll also enter the URL for your website. There are several support files that need to be uploaded to your web server, including JavaScript, ASP include files, and other helper routines that don't change very often. One of those files also contains your database connection string. There's a button labeled "Upload Required ASP Files" that takes care of all of that for you. Just click it during the initial setup, and it'll upload everything you need. I'll cover that in the setup instructions.
There are also a few utility buttons. You can test your FTP connection, test your SQL Server connection, and remove any saved usernames and passwords. That last one is mostly for me, so before I build the ACCDE for distribution, I can strip out all of my personal server credentials with a single click. There's also a "List TempVars" button that I originally added as a debugging tool, mostly for Adam and me while we were testing. I'll probably remove it before the final release, so you can safely ignore that one.
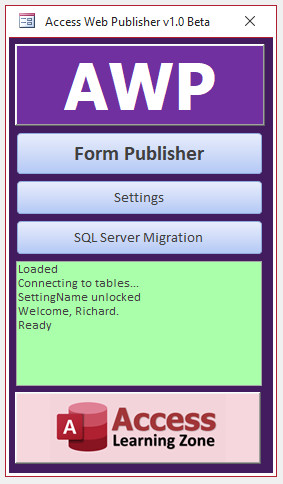
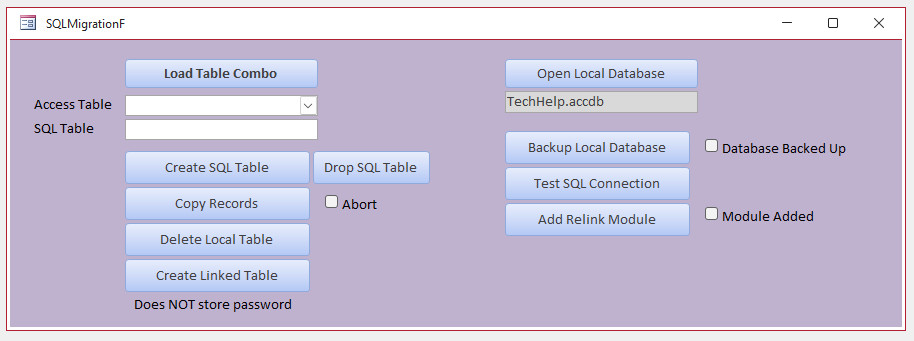
This is the SQL Migration form. The first thing you'll do is load the table list. The publisher scans your local Access database and populates the combo box with all of your local tables. Select the table you want to migrate, and it'll automatically fill in the SQL Server table name using the same name as your Access table. I recommend leaving it that way. You can certainly rename it if you want to, but if the table names match, your forms will continue working without any additional changes, which makes life a whole lot easier.
From there, you can create the SQL Server table with a single click. If you're making design changes and need to start over, there's also a button to drop the SQL Server table, although you'll want to be careful with that one since it permanently deletes the table and all of its data. Once the table exists, click Copy Records to migrate all of the data from Access to SQL Server. Is it the fastest migration tool in the world? No. If you've got a few hundred or even a few thousand records, it'll work just fine. If you're moving millions of records, there are better tools for the job. But for the kinds of databases most Access developers work with, it gets the job done with almost no effort. When the copy finishes, you can delete your local table, relink your Access front end to the SQL Server version, and you're off and running.
Over on the right are a few convenience buttons. There's one to reopen your original Access database before you start deleting or relinking tables, just to make sure you've got the correct database open. There's another to test your SQL Server connection, and one of my favorite features, Add Relink Module. Clicking that button automatically inserts a VBA module into your database containing all of the code needed to reconnect your linked SQL Server tables at startup. All you have to do is call the reconnect routine from your startup form or Main Menu, and you're done. I wanted to make the migration process as painless as possible. Even a caveman can do it.
Lisa Snider
@Reply 3 months ago
Just WOW! Although I won't even begin to pretend to know how all of this works... it certainly sounds impressive. Great job Richard!
Kevin Robertson
@Reply 3 months ago
Wow. That looks amazing. You have certainly been busy over the weekend.
Bruce Vivash
@Reply 3 months ago
Wow, That looks awesome. As Kevin says you have been busy.
Joe Holland
@Reply 3 months ago
You always positive when teaching us but this page expresses a "kid in a candy store" feel. Glad you are having fun!
Sam Domino
@Reply 3 months ago
Great work, Richard!!! Make sure you lock down the IP (Intelllectual Property). This could be a game changer! One day I'll be able to say "I knew Richard before he became a "bazzilionaire"! LOL!!!
Sam I'll be releasing this one as an ACCDE template so people can use it, but the code under the hood is staying proprietary.
Dave Clark
@Reply 3 months ago
Richard, You Make me want to work for you maybe just to hang around and watch and learn from the Master! This Database is definitely a game changer for a lot of us! Looks Amazing. Can't wait for the release.
Jon Stephanou
@Reply 3 months ago
Kenneth A Thomas
@Reply 3 months ago
WOW! You sure are an Over Achiever.!
Michael Olgren
@Reply 3 months ago
Been away for a while... Yes, this looks amazing. Your talent for documentation is equally amazing.
Sorry, only students may add comments.
Click here for more
information on how you can set up an account.
If you are a Visitor, go ahead and post your reply as a
new comment, and we'll move it here for you
once it's approved. Be sure to use the same name and email address.
This thread is now CLOSED. If you wish to comment, start a NEW discussion in
Captain's Log.