Calendar Control Addendum 2
Year/Month Buttons, Name of Month
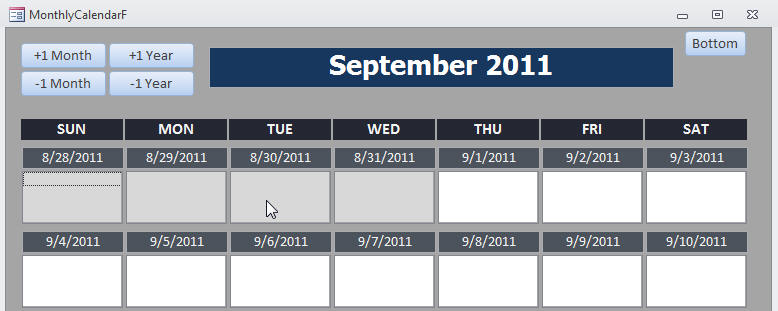
This addendum video will show you how to add
buttons to the top of the monthly calendar form so you can move
between months and years without having to leave the form. You'll also
see how to put the name of the current month and year on the top of the
form. Finally, I'll show you how to make buttons to quickly jump between
the top and bottom of the form if it's too tall to fit on one screen.
Here is a VIDEO TUTORIAL
that will walk you through this topic in detail. Click on the link
below.
There is also a supplemental copy of the database
available on the
Student
Databases page for owners of the full Calendar Seminar. You will need your
password for the class to open the database file.
ADDENDUM to the
ADDENDUM ...
One of my very observant students pointed out that with
this new code, when you move from month to month the greying-out of the days
code is now broken. You can see this in the video if you look carefully. This is
because we were only checking to see if the day needed to be set to gray but NOT
setting it to WHITE otherwise... because we were only opening the form ONCE
before to a single month, and white was the default color. So to fix this, just
add this new code in the DatePickerF form's OpenCalendar sub:
If Month(Forms!MonthlyCalendarF(S1))
<> Month(Calendar) Then
Forms!MonthlyCalendarF(S2).BackColor = &HD8D8D8
Else
Forms!MonthlyCalendarF(S2).BackColor = &HFFFFFF
End If
The new code is in green. That should fix the problem.
Now we're comparing the dates, and if the month is NOT the same, set it to
grey... ELSE if it IS the same, set it to white.

By Richard Rost


Click here to sign up for more FREE tips
| 


