In this tutorial you will learn how to build an RGB Color Picker using VB6.
This Project was created by Kevin Robertson (Forum Post).
Preview
Open VB6.
File | New Project
Choose Standard EXE.
Choose the Project and change the name to RGBColorPicker.
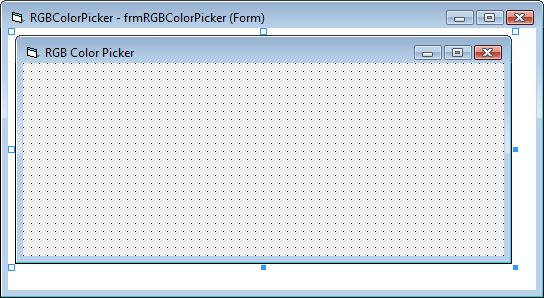
Now select the Form and change the name to frmRGBColorPicker
You can change the Caption/Title of the Form using the Caption Property.
Change the Height to "3435" and the Width to "7455".
Now let's add some controls to the Form. We need a 1 for each of the Colors (Red, Green, Blue).
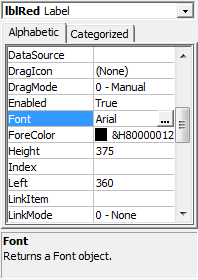
We want 3 Labels. Names these "lblRed"/"lblGreen", "lblBlue" with their respective values.
Scroll down to the Font Property, click on the Ellipse and then change to the values you want. (Arial, Bold, 12)
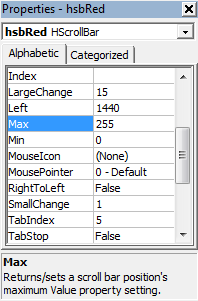
Now add 3 Horizontal Scrollbars to the Form.
Call these "hsbRed", "hsbGreen" and "hsbBlue" respectively.
By Default the Horizontal ScrollBars have a "Min" value of "0" and "Max" of "32767".
Since RGB is from 0-255 we need to change the "Max" to "255". Leave "Min" as 0.
Now add 3 Textboxes and name them "txtRedValue", "txtGreenValue", "txtBlueValue".
These will show the User what the current value for each color is.
We need a way of showing the color that is made up from your 3 choices. We can use a Shape.
Add a Command Button to the Form. Call it "cmdExit". Set it's Caption to "E&xit". The "&" before the "x" allows you to use "Alt+X" to press the button with your keyboard shortcut instead of the mouse.
Highlight the Form and change the "BorderStyle" to "1 - Fixed Single".
We can also add a Menu with an About option.
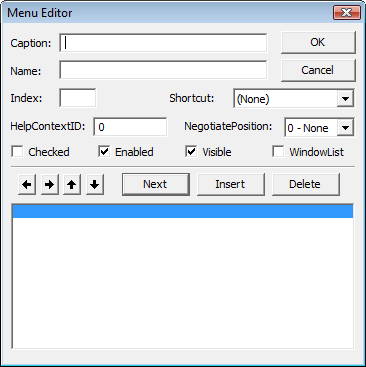
You can add a Menu by either clicking on the Menu Editor Icon, or "Tools | Menu Editor"
Now add a Caption of "&About RGB Color Picker" and a Name of "mnuItemAbout".
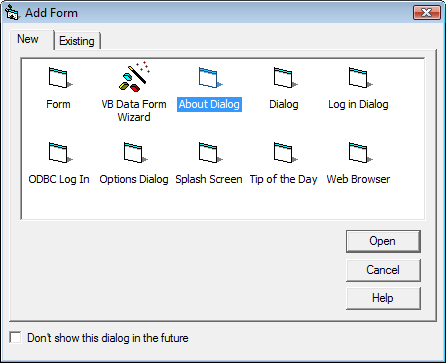
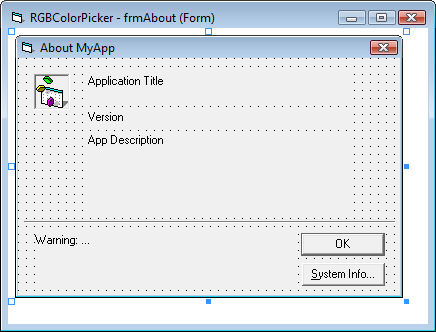
We now need a couple of other Forms, the first being the About Form. VB6 has a Template for this.
Go to the "Project" Menu and "Add Form". Choose "About Dialog" and click "Open".
Change the Caption to "About...".
Change the Picture (picIcon) to the Logo.
There are a few Labels to change.
lblTitle
lblVersionNum
lblDeveloper
lblCopyright
You also need a Command Button (cmdOK)
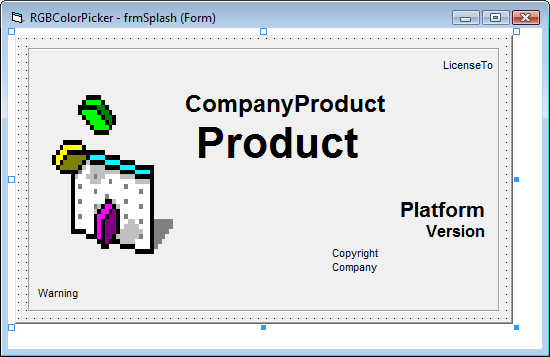
Repeat for the Splash Screen.
Change the Caption to "Splash Screen".
Border Style - "0 - None".
Add a Label (lblTitle) with a Caption of "RGB Color Picker" and change the BackColor.
Copy this Label and move it behind, below and to the right. make it's BackColor Black and this will give a Shadow effect.
Add a PictureBox and change the Picture to the RGB Logo.
Add a Label called "lblLoading" with a Caption of "Loading...".
Add a Label called "lblCancel" with a Caption of "Cancel".
Add a TextBox called "txtCounter" with a Text of "-1".
Add a Line and use it to separate bottom.
Add a Timer (timSplash) and change it's Interval to "1000".
Finally add a Shape and use it to box off the Form.
You will arrive at the following:
We have the UI setup, let's get to the coding.
We will start with the About Form.
Close the Form if OK is clicked.
	Private Sub cmdOK_Click()
		Unload Me
	End Sub
Set the Labels when the Form Loads.
	Private Sub Form_Load()
		lblTitle.Caption = App.Title
		lblVersionNum.Caption = "Version: " & App.Major & "." & App.Minor & "." & App.Revision
		lblDeveloper.Caption = "Developer: Kevin Robertson" & vbNewLine & _
			"Company: " & App.CompanyName
		lblCopyright.Caption = App.LegalCopyright
	End Sub
Next we can do the Splash Screen.
Set the Labels when the Form Loads.
	Private Sub Form_Load()
		lblDeveloper.Caption = "Developer: Kevin Robertson" & vbNewLine & _
			"Company: " & App.CompanyName
	End Sub
Close the Form if Cancel is clicked.
	Private Sub lblCancel_Click()
		End
	End Sub
As there is a Timer control on the Form and it is set to update every 1 sec we can add some code to do different things at different times.
Let's update the UI to show each color then load the main Form.
	Private Sub timSplash_Timer()
		txtCounter = txtCounter + 1

		If txtCounter = 0 Then
			lblLoading.Visible = True
			lblLoading.Caption = "Loading Red"
		ElseIf txtCounter = 2 Then
			lblLoading.Caption = "Loading Green"
		ElseIf txtCounter = 4 Then
			lblLoading.Caption = "Loading Blue"
		End If

		If txtCounter = 5 Then
			Load frmRGBColorPicker
			Me.Hide
		End If

		If txtCounter = 6 Then
			Beep
			frmRGBColorPicker.Show
			Unload Me
		End If
	End Sub
Now to the main Form where the most work is done.
Add a global variable at the top of the Form.
Dim X As Integer
The Exit button needs some close code.
	Private Sub cmdExit_Click()
		End
	End Sub
When you click on the About Menu Item you want it to open the About Form.
Load the Form into Memory then show it Modally so nothing else can be actioned until this is closed.
	Private Sub MnuItemAbout_Click()
		Load frmAbout
		frmAbout.Show vbModal
	End Sub
We can create a Function that sets the RGB, this uses the RGB Function and fills in each TextBox value with the value from the ScrollBars.
	Function RGB(Red As Integer, Green As Integer, Blue As Integer) As Long
	Member of VBA.Information
	Returns a whole number representing an RGB color value
	Private Sub SetRGB()
		shpRGB.FillColor = RGB(hsbRed.Value, hsbGreen.Value, hsbBlue.Value)
		txtRedValue = hsbRed.Value
		txtGreenValue = hsbGreen.Value
		txtBlueValue = hsbBlue.Value
	End Sub
We can then call this Function when the Form Loads and whenver a value is changed via a ScrollBar.
	Private Sub Form_Load()
		SetRGB
	End Sub

	Private Sub hsbBlue_Change()
		SetRGB
	End Sub

	Private Sub hsbBlue_Scroll()
		SetRGB
		cmdExit.SetFocus
	End Sub

	Private Sub hsbGreen_Change()
		SetRGB
	End Sub

	Private Sub hsbGreen_Scroll()
		SetRGB
		cmdExit.SetFocus
	End Sub

	Private Sub hsbRed_Change()
		SetRGB
	End Sub

	Private Sub hsbRed_Scroll()
		SetRGB
		cmdExit.SetFocus
	End Sub
You can type a value into the Color TextBoxes. This needs to be actioned.
If a value is removed change it to 0.
If a value is entered check if it is Numeric unsing the IsNumeric or Val Functions.
	Private Sub txtBlueValue_Change()
		If txtBlueValue = "" Then txtBlueValue = 0

		If Not IsNumeric(txtBlueValue) Or Val(txtBlueValue) > 255 Then
			ErrMsg
			txtBlueValue = X
			SelectValue txtBlueValue
			Exit Sub
		End If

		txtBlueValue.SelStart = Len(txtBlueValue)
		hsbBlue.Value = txtBlueValue.Text
	End Sub

	Private Sub txtBlueValue_GotFocus()
		X = Val(txtBlueValue)
		SelectValue txtBlueValue
	End Sub
A useful function has been created here called "SelectValue", this highlights the value in a Textbox so that when a new one is entered the previous one is overwritten.
	Private Sub SelectValue(TextName As TextBox)
		TextName.SelStart = 0
		TextName.SelLength = Len(TextName)
	End Sub
A convenience Function has also been created called "ErrMsg", this is so that we can reuse the same Error Message throughout.
	Private Sub ErrMsg()
		MsgBox "The value you entered is INVALID." & vbNewLine & _
			"Enter a number between 0 and 255 only!", vbInformation, "Invalid RGB Value!"
	End Sub
Repeat for Green.
	Private Sub txtGreenValue_Change()
		If txtGreenValue = "" Then txtGreenValue = 0

		If Not IsNumeric(txtGreenValue) Or Val(txtGreenValue) > 255 Then
			ErrMsg
			txtGreenValue = X
			SelectValue txtGreenValue
			Exit Sub
		End If

		txtGreenValue.SelStart = Len(txtGreenValue)
		hsbGreen.Value = txtGreenValue.Text
	End Sub

	Private Sub txtGreenValue_GotFocus()
		X = Val(txtGreenValue)
		SelectValue txtGreenValue
	End Sub
Repeat for Red.
	Private Sub txtRedValue_Change()
		If txtRedValue = "" Then txtRedValue = 0

		If Not IsNumeric(txtRedValue) Or Val(txtRedValue) > 255 Then
			ErrMsg
			txtRedValue = X
			SelectValue txtRedValue
			Exit Sub
		End If

		txtRedValue.SelStart = Len(txtRedValue)
		hsbRed.Value = txtRedValue.Text
	End Sub

	Private Sub txtRedValue_GotFocus()
		X = Val(txtRedValue)
		SelectValue txtRedValue
	End Sub

 VB6.
VB6.


 Labels. Names these "lblRed"/"lblGreen", "lblBlue" with their respective values.
 (Labels).png)

 Horizontal Scrollbars to the Form.
 (HScrollBars).png)
 Textboxes and name them "txtRedValue", "txtGreenValue", "txtBlueValue".
 (TextBoxes).png)
 Shape.
 (Shape).png)
 Command Button to the Form. Call it "cmdExit". Set it's Caption to "E&xit". The "&" before the "x" allows you to use "Alt+X" to press the button with your keyboard shortcut instead of the mouse.
 (Command Button).png)
.png) Menu Editor Icon, or "Tools | Menu Editor"
Menu Editor Icon, or "Tools | Menu Editor"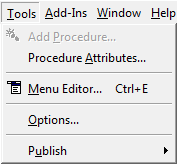
.png)
 (Menu).png)


 (Labelled).png)
 PictureBox and change the Picture to the RGB Logo.
 Line and use it to separate bottom.
 Timer (timSplash) and change it's Interval to "1000".
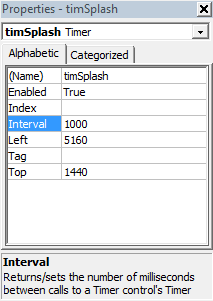
 (Labelled).png)


