Conditional Formatting
By Richard Rost

 5 years ago
Conditional Formatting Highlight Items Over Budget
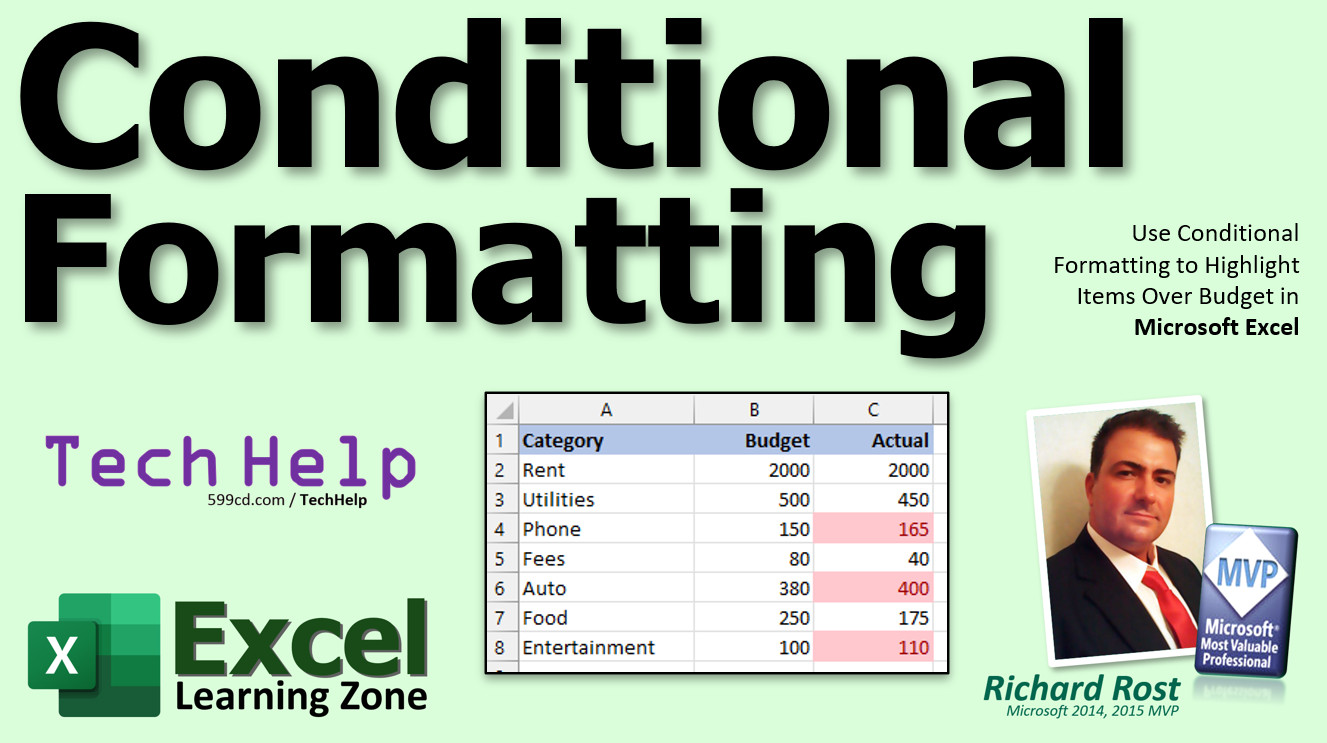
In this video, I will teach you how to use Conditional Formatting to highlight cells that are over their allotted budget in Microsoft Excel.
Lawson from River Oaks, Texas (a Gold Member) asks: I'm putting together my year-end budget report. I have the budgeted amount for an expense in column B and the actual amount in column C. How can I make it so that any items over budget show up highlighted?
Members
Members will learn how to see multiple levels of conditional formatting, for example, we'll display items that are within 20% of their budget as yellow, equal to their budget as green, and over budget as red. We'll also see how to make a conditional formatting search box.
Silver Members and up get access to view Extended Cut videos, when available. Gold Members can download the files from class plus get access to the Code Vault. If you're not a member, Join Today!
 Links Links
Learn More!
Questions?
Please feel free to post your questions or comments below. Thanks.
Keywords
microsoft excel, ms excel, #excel, #msexcel, #microsoftexcel, #help, #howto, #tutorial, #instruction, #learn, #lesson, #training, Use conditional formatting to highlight information, Highlight patterns and trends with conditional formatting, Applying Conditional Formatting, budget vs actual
Intro In this video, I will show you how to use conditional formatting in Microsoft Excel to highlight expenses that are over budget. We will talk about how to set up a budget sheet with budgeted and actual amounts, apply conditional formatting to flag items where the actual spending exceeds the budget, and explain the important difference between absolute and relative references when copying formatting down a column. This tutorial will help you quickly spot over-budget items in your year-end Excel reports.Transcript Welcome to another TechHelp video brought to you by ExcelLearningZone.com. I am your instructor, Richard Rost. In today's video, I'm going to show you how to use conditional formatting to highlight items that are over budget in Microsoft Excel.
Today's question comes from Lawson in River Oaks, Texas, one of my Gold members. Lawson says, I'm putting together my year-end budget report. I have the budgeted amount for an expense in column B and the actual amount in column C. How can I make it so that any items over budget show up highlighted?
To do this, we're going to use something called conditional formatting. It's really easy to use. Let me show you how.
Here I've got a simple budget sheet set up. I've got the category, the budgeted amount, and the actual amount. What Lawson wants to happen is if the actual amount of money spent is over the budget, like this one here, he wants this to show up highlighted. We'll use conditional formatting to do this. It will change the format based on a condition.
Let's pick the top one here. I like to start at the top of the column. Go to conditional formatting. There are all kinds of different conditional formats that you can use. I cover all these in my full classes.
Go to Highlight Cells Rules, then Greater Than. In other words, it's going to highlight the cell if the value is greater than some value. Click on Greater Than. You can put an actual amount in there, but I want to check to see if it's greater than the value in a different cell. Click on that cell right there. Those supports equals B2 in that box. Hit OK.
This time, it wasn't over budget, but let's say that it was. Put 2030 in there. Look at that. It highlights it now in red. Put it back where it was, and it's fine.
Now we could use the Format Painter and format paint that conditional format all the way down the column. Click on the Format Painter and then click and drag down the rest of the column and nothing happens. Why is nothing happening? You'd think that this one would now show up highlighted because 165 is definitely over 150.
The problem is if you go into the conditional formatting now and click on Manage Rules, it will show you the current selection right there. The cell value greater than B2. It's stuck with B2. Why? Because B2 is an absolute reference. An absolute reference with those dollar signs means it's always going to point to B2, even if you autofill down or use the Format Painter.
Close this and undo that. Hit undo a couple times. Undo. Undo. Undo. Undo. OK. It should be gone now. Managed Rules. OK. It's gone. There are no rules in there.
This time, I'm going to do the same thing, but I'm not going to use an absolute reference. Go to Conditional Formatting. Highlight Cells Rules, Greater Than, just like before. Click on that cell, but I don't want B2 there to have the dollar signs in front of it. You can either manually remove them or press the F4 key a couple of times. You'll see it goes to just equals B2.
Now hit OK. If I grab the Format Painter and format paint down the rest of the column, look at that. It copies the conditional formatting, but it also brings down the row.
If you want to learn more about these two things, I cover conditional formatting in my Excel Beginner Level 2 class. Absolute versus relative references are covered in Excel Expert Level 1. There are links there. You can click on those if you want more information.
What if you want to see different colors based on how close to the budget it was? For example, maybe if it's within 20 of the budget, but not up to the budget yet, show it as yellow. If it's exactly equal to the budget, show it green. If it's over budget, show it as red. How do you do that?
I'll cover that in the extended cut for the members. If you want to learn more conditional formatting in the extended cut for members, I will show you how to have multiple colors for different conditions for your budget. Is it over half the budget? Is it over 80 percent? Is it completely over budget? Different colors for different levels.
Plus, I'll show you how to make a conditional formatting search box, so you can type in the search criteria here like Florida. All that's covered in the extended cut for members.
If you want to become a member, click the Join button below the video. After you click the Join button, you'll see a list of all the different membership levels that are available, each with its own special perks.
Silver members will get access to all of my extended cut TechHelp videos, live video and chat sessions, and other perks. Gold members get access to download all of the sample spreadsheets that I build in my TechHelp videos, plus my code vault where I keep tons of different functions that I use and more.
Platinum members get access to all the previous perks, plus all of my beginner full courses and one new expert course every week. These are the full-length courses found on my website and not just for Excel. I also teach Word, Access, Visual Basic, ASP, and lots more.
When you sign up to become a member, I need you to email me and tell me you want more Excel. The vast majority of my videos are for Microsoft Access because that's been my focus for the past few years. However, I'm happy to add more Excel videos if I get more Excel members, so make your voice heard and I'll make lots more TechHelp lessons for Excel.
Don't worry, these free TechHelp videos are going to keep coming. As long as you keep watching them, I'll keep making more and they'll always be free.Quiz Q1. What is the purpose of using conditional formatting in the budget spreadsheet discussed in the video?
A. To automatically sort the data
B. To highlight items that are over budget
C. To calculate the total expenses
D. To import data from another sheet
Q2. In the scenario Lawson described, where are the budgeted and actual amounts placed in Excel?
A. Both in Column A
B. Budgeted in Column B, Actual in Column C
C. Budgeted in Column C, Actual in Column B
D. Budgeted in Column D, Actual in Column E
Q3. Which conditional formatting option is demonstrated to highlight cells where actual is greater than budget?
A. Highlight Cells Rules - Less Than
B. Data Bars
C. Highlight Cells Rules - Greater Than
D. Top/Bottom Rules
Q4. What issue occurs when you use a cell reference like $B$2 in your conditional formatting rule and use the format painter?
A. The formatting does not copy to other cells
B. The formatting applies randomly
C. The reference always points to B2, so other rows do not compare correctly
D. The worksheet crashes
Q5. What kind of cell reference must you use for conditional formatting to correctly compare each actual value to its corresponding budget value?
A. Absolute reference with dollar signs
B. Mixed reference
C. Relative reference without dollar signs
D. Hard-coded value
Q6. How can you remove the dollar signs from a cell reference when setting up conditional formatting in Excel?
A. You cannot remove them
B. By pressing the F4 key a couple of times or removing them manually
C. By highlighting the cell and pressing Delete
D. By using the Format Painter
Q7. What does the Format Painter do in the context of conditional formatting?
A. Deletes all conditional formatting rules
B. Duplicates conditional formatting to other cells
C. Converts formulas into values
D. Hides budget items
Q8. What level of Excel class does the instructor say covers conditional formatting basics?
A. Excel Beginner Level 1
B. Excel Beginner Level 2
C. Excel Expert Level 2
D. Excel Advanced Level 1
Q9. What feature is demonstrated in the extended cut for members?
A. Mail merging budgets
B. Using multiple colors for different budget conditions
C. Importing data from Access to Excel
D. Creating pivot tables
Q10. Which membership level grants access to all of the sample spreadsheets and the code vault?
A. Silver
B. Bronze
C. Gold
D. Basic
Q11. What is required after signing up for membership if you want more Excel-focused content?
A. Nothing, it happens automatically
B. Email the instructor and request more Excel videos
C. Call the support line
D. Register each spreadsheet you download
Q12. What will the instructor do if enough Excel members join?
A. Focus on Access only
B. Stop making free videos
C. Produce more Excel TechHelp videos
D. Cancel all membership levels
Answers: 1-B; 2-B; 3-C; 4-C; 5-C; 6-B; 7-B; 8-B; 9-B; 10-C; 11-B; 12-C
DISCLAIMER: Quiz questions are AI generated. If you find any that are wrong, don't make sense, or aren't related to the video topic at hand, then please post a comment and let me know. Thanks.Summary Today's video from Excel Learning Zone focuses on how to use conditional formatting to highlight items that are over budget in Microsoft Excel.
The question I am answering comes from a viewer who is working on a year-end budget report. In his spreadsheet, the budgeted amounts are in column B, and the actual expenses are in column C. He wants to make sure that whenever a value in the actual column exceeds the budget, that cell gets highlighted automatically.
This is a perfect use case for conditional formatting, which allows you to change the appearance of a cell based on the value it contains or a condition you set.
To demonstrate, imagine a simple budget worksheet with categories, budgeted amounts, and actual expenses. The goal is to have any actual expense over its respective budget amount stand out visually. Conditional formatting handles this by automatically changing cell formatting when the specified condition is met.
Start by selecting the first cell where you want conditional formatting to apply, usually at the top of the actual expenses column. Using the Conditional Formatting menu, choose Highlight Cells Rules, and then select Greater Than. This lets you highlight a cell if its value is greater than another value. Normally, you might just enter a static number, but in this situation, we want to compare the value to what's in the adjacent budget cell. So, select the appropriate budgeted amount from the corresponding row.
After applying this rule, if you adjust the actual spending to be higher than the budget, you will notice the cell becomes highlighted according to the formatting option you chose. If you bring the actual amount back below or equal to the budget, the formatting disappears.
You may be tempted to use the Format Painter to copy this formatting down the entire column. However, you might notice that it only works for the first cell. The reason is that, by default, Excel makes the reference to the budget cell absolute, which means each rule still points to just the first budget cell no matter where you paste the formatting. As a result, only that row works properly.
To fix this, you need to set up the conditional formatting with a relative reference to the budgeted cell (without those dollar signs in front of the cell notation). This allows the rule to adjust for each row when you apply it down the column. You can do this either by manually removing the dollar signs or by pressing the F4 key until the reference is relative. After making this change, use the Format Painter again to copy the formatting. Now, each actual value is correctly compared to its own budgeted amount, and any items over budget are highlighted as intended.
If you're interested in exploring conditional formatting in more depth, this topic is thoroughly explained in my Excel Beginner Level 2 class. I also cover the concept of absolute versus relative referencing in detail in Excel Expert Level 1.
Some users want to go further and use different colors to represent how close an item is to the budget. For example, you might want yellow if an expense is close but not over budget, green if it matches the budget exactly, and red if it goes over. Configuring multiple colors for different scenarios requires adding more conditional formatting rules and understanding how to structure those conditions.
I explain how to set up multiple colors and thresholds for your budget in the extended cut for members. In that version, I show how to create rules for different budget levels, like when an expense is over half the budget, over eighty percent, or completely over. I also demonstrate how to set up a search box for conditional formatting, which lets you highlight items by specific criteria, such as a location.
If you are interested in accessing more in-depth content and extended tutorials, consider becoming a member. Membership levels offer various perks: Silver gets you access to extended videos and live sessions, Gold includes sample spreadsheet downloads and access to my code vault, and Platinum adds all full-length beginner courses and a new expert course each week. I cover Excel as well as Word, Access, Visual Basic, ASP, and more.
If you do sign up as a member, please email me and let me know if you are looking for more Excel content. Most of my lessons so far are on Microsoft Access since that has been my focus, but if enough people express interest, I will make more Excel tutorials.
Remember, my free TechHelp videos will always be available. As long as these videos keep getting views, I will continue to produce them and keep them free for everyone.
You can find a complete video tutorial with step-by-step instructions on everything discussed here on my website at the link below. Live long and prosper, my friends.Topic List Using conditional formatting to highlight over budget items
Setting up a basic budget comparison sheet
Applying conditional formatting with Greater Than rule
Selecting cell references in conditional formatting
Understanding absolute vs relative references
Fixing conditional formatting to use relative references
Copying conditional formatting with the Format Painter |