Company or Person 2
By Richard Rost

 2 years ago
Show Company or Person Name in MS Access Part 2
In this Microsoft Access tutorial, I will show you how to conditionally display either a company name or a person's name using queries, calculated fields, and key functions like IsNull and string concatenation. This is part 2.
Members
There is no extended cut, but here is the database download:
Silver Members and up get access to view Extended Cut videos, when available. Gold Members can download the files from class plus get access to the Code Vault. If you're not a member, Join Today!
Prerequisites
Links
Recommended Courses
Keywords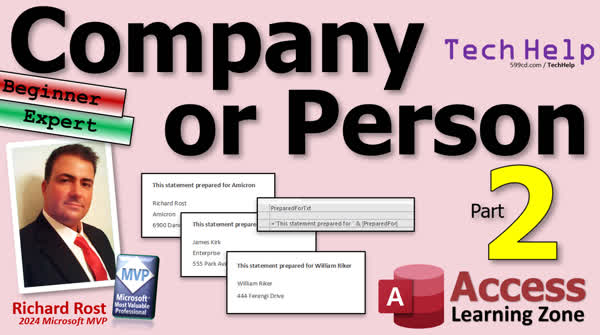
TechHelp Access, conditional display in Microsoft Access, company or person name in Access, Microsoft Access calculated fields, string concatenation in Access, IsNull function usage, Microsoft Access if function, query design in Access, creating calculated fields in Access, Access report customization, Nesting if functions in Access, using CanShrink in Access reports, Access string manipulation, Access report layout tips
More InformationTranscript Today is part two of Is it a company or is it a person? I don't know. Let's go check. We're going to discuss how to display the company or person name with a little bit of query action and some functions and some other funny parts.
So in yesterday's video, we did this where we made a little report showing either the company or the person just by simply using CanShrink. Well, what if you want it to be a little more professional? So today we're going to learn how to do it with a query, some calculated fields, and a few other things.
Let's talk about the prerequisites first. We are going to use calculated fields today, so if you've never used this both in a report and in a query, go watch this video if you haven't done that before. You should know how to use string concatenation. That's putting two string fields together.
Also, as a side note, go watch my video on null math and I'll explain why a little bit, but this is a pretty good one. Speaking of null, you should know what null is and how to check for null values with the IsNull function. We're going to watch this and finally we're going to bring it all together with the if function. If, right? I F. Yes, I'm silly when I say if, but it's so you remember it because a whole bunch of times I get people sending me emails wondering why it's not working and they did I F F. It's not if. It's not Silence of the Lambs, right?
Fava beans, it's if, and me being silly will hopefully let you remember that. Okay, go watch all these videos if you haven't yet. They're on my website. They're on my YouTube channel. They're all free and then come on back.
All right, so the first thing we're going to do is create a query that's going to have the fields we want in the report in it, and we're going to make a calculated field that says, hey, if I got a company name, I want to see the company name as who it's who the statement's prepared for. If there is no company name, use the person's name, okay?
Okay, so we're going to go to Create -> Query Design. I'm going to bring in my customer table and then bring in just the fields that you want on the report. If you want the ID, great, bring it in. If not, I just need first name, last name, company name, and we'll just do address.
Okay, now over here we're going to make a calculated field called prepared for. Who is the statement prepared for? I'm going to zoom in so you can see it better. That's Shift+F2 to open a zoom window with bigger text, right? We'll call this prepared for:
I'm going to use the if function. So if, what's the first thing I'm checking for? Well, if the company name is null, so I'm going to use If(IsNull([CompanyName])). Now come on, what is the value to use if that's true? If the company name is null, then I want to use the person's name. So here I'll put first name & " " & last name. What's the condition if it's false? If the company name is not null, then I want to see the company name, right? All right, so CompanyName. And that's it, right? Three parts to my if function. What's the condition? This will return a true or false, right? IsNull(CompanyName). If that's true, if there is no company name, then give me first name and last name. Otherwise, I want that company name. All right, hit OK. Let's save this as my customer Q, customer query, and now when I run it, there you go, there's your prepared for right over here. Right, I got a company name for these four fields, so they could see the company name over here, and if not, I got a person's name. Now, if they're both blank, I don't know what to tell you. You could do a nested if function with another level and say, you know, if both of those things are null, then give me the customer ID and say, you know, statement prepared for customer 14 or whatever you want to see.
But we're just going to assume you've got either the first name, last name, or the company name, okay? And if anyone wants to see that third option, I've got videos on my website for nested ifs. Here's a video where I show nested ifs, for example. I put a link to this down below.
So now that we got this set up, now we can use this as the record source for our report. So close this, save changes, yes. Let's go back to our customer report design view. Go up to the report's properties. Let's go to the data tab, change CustomerT to the CustomerQ, that query we just built.
Okay, close that. I'm going to get rid of these extra sections in here. We don't need that space in there right now. Just clean this up a little bit and let's slide these fields down just a touch, right about there. Now, if you open up existing fields, you will see there's that prepared for right there. We can drag that over here and for its label, let's say "Statement Prepared For". Slide that over a little bit, right about there. Let's grab this and slide you over right about there so it fits nicely. There we go. Let's make this a little bit bigger. This comes in as gray. I hate that. Let's go to format and change this to black. All right, and now save it and let's print preview.
And there you go, statement prepared for Amicron, for Enterprise, for Beta, for William Riker, for Malcolm Reynolds. See that? It gives you the company name if it has it; if not, it gives you a person's name. And if it's got both, it gives you the company.
But, oh no, we're not done yet. Let's make this look a little better. First of all, let's turn these borders off. I know I wanted to keep them on here for a little bit so we could just see them there, but let's go back to design view. All right, I'm going to select everybody, go to format, go to shape outline, and pick transparent. That way we don't have to see those borders. You wouldn't see those on a printed report.
Okay, now let's bring this stuff together. Instead of having these two fields, just like the first name, last name. I hate that; that looks dumb. Let's bring them together, right? Let's use this little string concatenation here. So I'm going to get rid of that label and slide you over, maybe bold it right. Here, all right, let's bring up its property to close the field list, open up the property sheet, click on that guy, and what we're going to do is I'm going to make this a calculated field. So I'll change the control source, but I'm also going to change the name. All right, because I only want the name to be the same if it's exactly bound to that control source, if it's the same thing, right? I'm going to change it. So we're going to call this preparedForText because now I'm going to change this control source. Shift+F2, zoom in, = [statementPreparedFor] & [preparedFor], and that's a field name. Okay, there we go. And now if we look at it, save it and preview it, look at that. It looks a lot better, right? It's right next to each other.
Let's do the same thing for first and last name. Delete last name. Let's make first name bigger. Okay, click on it. I'm going to change this to let's call this personName. You don't want it to be the same, and this is now going to be = [FirstName] & " " & [LastName]. Hit OK. Let's save it and preview it. Okay, looks good. See, looks good.
And oh, I'm still getting that blank line there. Why is the CanShrink not working? Well, because what's actually in there? There's a space there. A space is not null, is it? Now, there are a couple of things you could do. You could trim this whole thing. All right, let's do this. Say Trim([FirstName]) & " " & Trim([LastName]). Trim gets rid of leading and trailing spaces, and if this is blank and that's blank, then you're just going to be left with a space in there. Let's see if that works. Save it, preview it. OK, look, that worked fine. That's one way to do it.
Another way is to use that null math that I mentioned earlier. Instead of using the trim function, if we know that if you add anything to a null value, the result is null, then you could do this too. Put a plus there and a plus there. What this is saying is take the first name, add it to a space. Well, if the first name is null, then the result of this is null, and then if you add another whatever it is to it, null plus anything becomes null. So this whole thing becomes null then, if either one of those fields is blank. All right, and if you do it now, same results.
Now that I'm thinking about it, I really like the null math, but I kind of like the trim option better because this way, if you just have one of those things, you'll get it in there like this. It'll either say just Richard or just Rost. It's better, I think, than having a whole null field there, but either way works, whatever you want, you know, whatever works for you. So now you got your prepared for and you got your address down below it, and now you can use this customer query for anything else too. You could use it in the calculated field in the form or whatever. Whatever you like. So totally up to you.
I just show you the Legos, and you can put them together however you want. If you like learning with me, if you like to get some learning done and you like my style and you have fun, well, I got tons and tons of lessons on my website. This is the kind of stuff, this null stuff with the functions and all that, these are covered on my expert lessons. It's beyond the basics. It's not just building simple forms and doing some formatting. It's working with functions, formulas, if functions, that kind of stuff. If you like all those functions in Excel, you'll love these lessons. I cover all the date time functions and the rest. OK, you name it, it's in my expert lessons. And you don't need programming to build some really great stuff in Microsoft Access. And that's what my expert lessons are all about.
But there you go, that's your TechHelp video for today. I hope you learned something. Live long and prosper, my friends. I'll see you next time.
TOPICS:
Creating a query for report fields
Using calculated fields in queries
Checking for null values using IsNull
Using the if function in queries
Building a prepared for calculated field
Replacing CustomerT with CustomerQ in report
Formatting and cleaning up report design
Using string concatenation in reports
Removing borders from report fields
Using Trim function to remove spaces
Using null math for null value handling
Combining first and last names in reports
COMMERCIAL:
In today's video, we explore part two of 'Is it a company or is it a person?'. We'll look at displaying names professionally using queries, calculated fields, and string concatenation. First, we create a query that checks if a company name is null to display either the company name or the person's name. We'll also cover prerequisites like handling null values with the IsNull function and string concatenation. Next, we design a report, set up proper formatting, and ensure no extra spaces show up using Trim functions and null math. You'll find the complete video on my YouTube channel and on my website at the link shown. Live long and prosper my friends. Intro In this video, we continue our Microsoft Access series by showing how to professionally display either a company or person name in your reports using queries and calculated fields. We'll cover building a query to check for null values with the IsNull function, use the if function to select between company and person, and apply string concatenation to format your results. We'll also show how to improve your report design by combining fields, removing borders, and using the Trim function and null math to handle blank spaces. This is part 2. Quiz Q1. What is the primary goal of the video tutorial?
A. To create a database from scratch.
B. To define different types of businesses.
C. To display the company or person name more professionally.
D. To learn how to use complex mathematical functions.
Q2. Which function is used to check for null values in the tutorial?
A. Len
B. IsNull
C. Concat
D. Nz
Q3. Which mathematical concept is suggested as a useful tool to handle blank spaces in the video?
A. Null math
B. Binary math
C. Complex math
D. Algebra
Q4. What operator is used in calculated fields for string concatenation in the video?
A. +
B. &&
C. &
D. ||
Q5. When creating the "prepared for" field, what does the tutorial recommend displaying if the company name is null?
A. The address
B. The customer's email
C. First name and last name
D. The date of birth
Q6. What should you do first according to the video before changing any fields in the report?
A. Create a backup of the database
B. Close the customer table
C. Create a query with the necessary fields
D. Install new software
Q7. Which function is used to remove leading and trailing spaces in strings?
A. RemoveSpaces
B. Clean
C. StrTrim
D. Trim
Q8. What alternative method to 'Trim' is suggested for handling spaces in null values?
A. Using Nz function
B. Adding null to spaces using the '+' operator
C. Using Format function
D. Removing spaces using Replace function
Q9. How does the video suggest making fields visible in the report?
A. Using Format Painter
B. By adding borders to the fields
C. By using the Transparent option in Shape Outline
D. Printing the report with a high-quality printer
Q10. According to the tutorial, what is essential to understand when using calculated fields?
A. Date and time formats
B. Basic HTML structure
C. Syntax of functions and operators
D. Network security protocols
Q11. If a field is not appearing correctly because it contains a space but no text, what does the video recommend adjusting?
A. The printing settings
B. The CanShrink property
C. The data type of the field
D. The page setup
Q12. What does the presenter emphasize about learning advanced features without programming?
A. Buying additional software
B. Signing up for intensive coding classes
C. Utilizing his expert lessons and resources
D. Reading multiple textbooks
Answers: 1-C; 2-B; 3-A; 4-C; 5-C; 6-C; 7-D; 8-B; 9-C; 10-C; 11-B; 12-C
DISCLAIMER: Quiz questions are AI generated. If you find any that are wrong, don't make sense, or aren't related to the video topic at hand, then please post a comment and let me know. Thanks. Summary Today's TechHelp tutorial from Access Learning Zone will cover how to display either a company name or a person's name using queries, calculated fields, and other techniques in Microsoft Access.
Yesterday, we discussed using the CanShrink property to create a basic report displaying either the company or person. Today, we'll make it more professional by using a query, calculated fields, and a bit more functionality.
First, let's talk about the prerequisites. This tutorial will use calculated fields both in a report and a query. If you're unfamiliar with this, I recommend watching my previous videos on string concatenation, null math, and the IsNull function, as these concepts will be useful. Additionally, we'll use the If function, so make sure you're comfortable with it.
We start by creating a query that contains the fields we want in our report. We'll add a calculated field that determines whether to display the company name or the person's name. If the company name is null, we'll display the person's name; otherwise, we'll show the company name.
To do this, open the query design view and add your customer table. Include the desired fields, like ID, first name, last name, company name, and address. Create a calculated field called "prepared for" using the If function. This function checks if the company name is null. If it is, the function concatenates the first and last names. If not, it displays the company name.
Save the query as "customerQ" and run it. You should see that the "prepared for" field now correctly shows either the company or person based on the data available. If both the company and person's names are missing, consider using a nested If function to handle such cases or display an identifier like the customer ID.
Next, we'll use this query as the record source for our report. Go to your report in design view and update its data source to "customerQ." Remove any unnecessary sections, rearrange fields for better layout, and adjust properties as needed.
When you preview the report, it should now display the appropriate name for each record. If the layout needs further refinement, such as removing borders or merging first and last names into a single field, you can do so by editing the field properties and using string concatenation or other formatting functions. Using the Trim function can help eliminate any extra spaces that might interfere with the layout.
You can choose to use the null math technique or the Trim function to handle any potential null values in your fields, depending on your preference.
This calculated field and query setup allows you to create more professional reports that dynamically display the correct information based on your data. You can apply these techniques to other areas in your Access projects, whether in forms, queries, or other reports.
For a more comprehensive tutorial with step-by-step instructions on everything discussed today, visit my website at the link below.
Live long and prosper, my friends. Topic List Creating a query for report fields
Using calculated fields in queries
Checking for null values using IsNull
Using the if function in queries
Building a prepared for calculated field
Replacing CustomerT with CustomerQ in report
Formatting and cleaning up report design
Using string concatenation in reports
Removing borders from report fields
Using Trim function to remove spaces
Using null math for null value handling
Combining first and last names in reports Primary Topics Access queries, calculated fields, IsNull function, if function, string concatenation, report design, null handling, formatting reports, customer data
Secondary Topics Trim function, null math technique, label adjustments, record source replacement
|