List Items Edit Form
By Richard Rost

 4 years ago
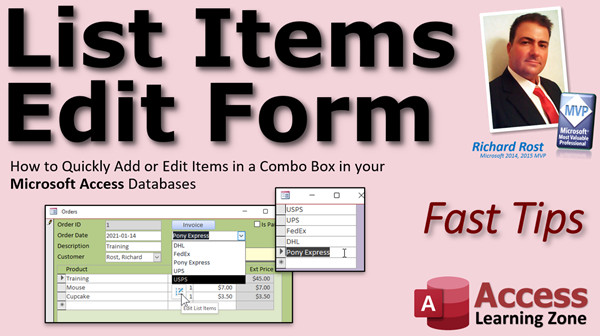
Quickly Add or Edit Items in a Combo Box
In this Microsoft Access tutorial, I will teach you how to set up a List Items Edit Form to quickly add or edit items in a combo box in your Microsoft Access databases
Links
Suggested Courses
Updates
 Keywords Keywords
access 2016, access 2019, access 365, microsoft access, ms access, ms access tutorial, #msaccess, #microsoftaccess, #help, #howto, #tutorial, #learn, #lesson, #training, #database, #fasttips, Adding items to a combo box or list box, how to edit drop down list in access form, add item to combo box, add item to list box, edit list box items, edit combo box items
Transcript Welcome to another Fast Tips video brought to you by AccessLearningZone.com. I am your instructor Richard Rost. In today's video, I am going to show you how to quickly add or edit items in a combo box in your Microsoft Access databases.
This is a popular question that I get all the time. People ask me, well, I have a combo box here. It's got, let's say, my shipping methods, and I want to add something to this. It's not DHL or Pony Express or any of these. I am going to add something like Starfleet Courier. So it would be nice to have a little button you can click that pops up this little menu here where you can just type in whatever you want to and then that appears in the list for you. Otherwise, you have to close this, close that, go back to your main menu or whatever form you used to build it, add it, then go back into the order.
It would be nice to make this little button right there. How do we do that? Let me show you.
Before we get started, a couple prerequisites. If you haven't watched my blank template video, go watch that first. It will explain how I built the blank template that I'll be using to start this class with, so I don't have to reinvent the wheel with every class.
Go watch my invoicing video. These are all free videos, by the way. I'll put links down below. This explains how I built the order form. You'll need to know relationships, so go watch that video. And you'll have to know how relational combo boxes work. That's where you can pick a value to put in one table based on a list from another table. If you don't know how any of those four things work, go watch those videos. They're all free and you'll find links down below.
Here I am in the TechHelp free template. You can download a copy of this on my website as you already know since you watched the other videos. Customer form orders. I don't have any way on here of tracking how I am shipping this order. So let's add a shipping table first.
Create table design. We'll call it Shipping. I can't type today. ShippingID. That's our AutoNumber, and then ShippingName. Remember, not just "Name." Never use just the word "Name." Name is a reserved word. We're going to save this as ShippingT - it's my shipping table - primary key. There we go.
Let's put some data in it. What do we have in here? We have UPS, USPS, FedEx, DHL, and whatever else. Okay, Starfleet Courier. All right. Save that. Close it.
Now, I'm picking a ShippingID, so I need a place to save that data in my order table. Let's go over to the order table, design view. We're going to add that right here. ShippingID. That will be a Number, type Long, and it's a foreign key. It's the primary key in the shipping table, but in the order table it's a foreign key. I like to keep all my keys at the top, so we'll put it right there. Save that.
If you have to go back in here and give everybody that's in here already a ShippingID, you can just type them in if you want to. If you have a lot of them there, you can use an update query to fill them all in. If you want to put a default value in here, you can. ShippingID, make the default value 1, so it starts off with whatever one is, UPS or whatever we made it.
So we've got our tables all set. Now, let's go make a little form so we can edit the shipping information. I have my continuous "F" down here, that's my blank. I'm going to copy that. Copy, Ctrl+C, paste, Ctrl+V. We'll call this ShippingF, my shipping form. Let's edit it, design view.
Really simple little guy. We don't need to see the ID. I don't care what that is. I really don't care about that label. Let's get rid of these sections here. Slide that over, slide this over. Edit the form's properties. We're going to make the record source our shipping table. We're going to set this text box so the control source is ShippingName. Go to All and make it the name of the field too.
ShippingName. Literally, all this is is a simple little form that just does that. That's all it is, and that's what we want. We want a nice simple little form that pops up over our other form.
Now, let's go into the order form and we'll put a combo box here so we can pick our shipping type.
Design view. This is why I wanted you to watch all those other videos. Let's just drop it right here. Find the combo box. There we are. Drop it here. Find the values from another table or query. Where do we get the list of values from? The shipping table. Next. Bring over both fields. Remember, ID is the one we're actually saving. Next. Sort it if you want to. ShippingName is fine. Next. That's what it will look like. Looks good. Next. Store that value in ShippingID. We're picking a shipping ID from a list of the shipping types, and we're saving that in the ShippingID field in the order table. That's how combo boxes work, but go watch that relational combo boxes video if that's confusing to you. Next. What label do you want? Whatever. Ship. Then we're done.
There's a little shipping label. We can stick that there. Move you up next to it. Do a little format paint. Maybe from this guy here. Use the format painter, there we go.
Save it. Close it. Let's open it back up again. Looks good. Our shipping methods are right here.
Now, how do I get that little box down there? Let's say I want to add one, I forgot to put Pony Express in here. I don't want to have to close this and close this and go back and find this and add it in here. I want to add it right on the form.
Open up the properties for the combo box. Hope it's Combo14. Let's give it a good name too, ShippingCombo. Go to the Data tab and find this: List Items Edit Form, right there. This is the form that's going to pop up to let you edit that list. There's our ShippingF right there.
Save it. Close it. Now open it up. Drop it down. There's your button. Click on that. It pops this guy up. It's modal, so you can't click behind it anywhere. You have to do stuff on this box and close it. If it's not in the right spot, just widen that a little bit like that. I'll slide it over here. Save it. Save it in the position you want it to pop up. Modal forms will close the navigation box. I don't like how that happens but you just have to deal with that.
Drop this down again. Pop it open. Look at that. How nice and pretty. I want to add Pony Express. Close it. Now you still have to pick the value in the box, but it's in there. This is nice.
That is how you make a List Items Edit Form. I cover a lot more with List Items Edit Forms in Access Beginner Level 8. We'll do something similar with lead sources, do a very similar shipping example, and then we'll go into even more detail with them in Access Expert Level 4. We'll do some more advanced stuff with family members.
You'll find links to both of those classes down below the video in the description. Go ahead and click on those. If you have any questions, post them in the comments section. I hope you learned something, and we'll see you next time.
How do you become a member? Click on the Join button below the video. After you click the Join button, you'll see a list of all the different membership levels that are available, each with its own special perks.
Silver members and up will get access to all of my extended cut TechHelp videos, one free beginner class each month, and more. Gold members get access to download all of the sample databases that I build in my TechHelp videos, plus my Code Vault where I keep tons of different functions that I use. You'll also get a higher priority if you decide to submit any TechHelp questions to me, and you'll get one free expert class each month after you've finished the beginner series.
Platinum members get all the previous perks, plus even higher priority for TechHelp questions, access to all of my full beginner courses for every subject, and one free developer class each month after you finish the expert classes. These are the full length courses found on my website, not just for Access, too. I also teach Word, Excel, Visual Basic, and lots more.
You can now become a diamond sponsor and have your name or company name listed on a sponsors page that will be shown in each video as long as you are a sponsor. You'll get a shout out in the video and a link to your website or product in the text below the video and on my website.
Don't worry, these free TechHelp videos are going to keep coming. As long as you keep watching them, I'll keep making more and they'll always be free.Intro In this video, I will show you how to quickly add or edit items in a combo box using the List Items Edit Form feature in Microsoft Access. We will build a shipping method table, create the necessary relationships, set up a simple form to manage list items, and connect it to a combo box on an order form for easy editing. This technique is helpful for keeping your lists up to date without having to leave the main form.Quiz Q1. What is the main benefit of adding a "List Items Edit Form" to a combo box in Microsoft Access?
A. It allows users to add or edit items in the combo box without leaving the current form
B. It provides advanced sorting features for combo boxes
C. It changes the combo box to a list box automatically
D. It creates automated backup copies of combo box selections
Q2. Before following the tutorial, which prerequisite topics does Richard recommend reviewing?
A. SQL Server integration
B. Blank template, invoicing, relationships, and relational combo boxes
C. Visual Basic programming only
D. Report design and formatting tips
Q3. Why should you avoid naming a field just "Name" in an Access table?
A. Because it's not descriptive enough
B. Because "Name" is a reserved word in Access
C. Because it slows down the database
D. Because Access does not support the field
Q4. In the example, what field type does the ShippingID field have in the Shipping table?
A. Text
B. Date/Time
C. AutoNumber
D. Currency
Q5. How is ShippingID used in the Order table in this example?
A. As a primary key
B. As a calculated field
C. As a foreign key
D. As an attachment
Q6. Why is it useful to set a default value for ShippingID in the Order table?
A. It reduces the size of the table
B. It prevents deletion of records
C. It automatically selects a default shipping method for new orders
D. It makes all records blank by default
Q7. What is the purpose of creating a simple "ShippingF" form in this tutorial?
A. For tracking order status updates
B. For printing shipping labels
C. For quickly editing shipping method entries in a pop-up form
D. For managing user permissions
Q8. How is the combo box set up on the order form to select shipping methods?
A. It stores the ShippingName directly in the order table
B. It looks up and stores the ShippingID from the Shipping table
C. It sorts orders by shipping method automatically
D. It displays all orders using a particular shipping method
Q9. What does the List Items Edit Form property of a combo box do?
A. Links a button to filter the combo box values
B. Associates a form to let users add or edit items shown in the combo box
C. Automatically sorts the combo box by ID
D. Changes the combo box to a text box
Q10. What is a characteristic of a modal form in Access, as mentioned in the video?
A. It lets you interact with other windows while open
B. It requires closing before you can return to the main form
C. It can be minimized but not maximized
D. It replaces the main Access navigation pain
Q11. What should you do after positioning your modal edit form to your desired location?
A. Use VBA to lock its position
B. Save the form to preserve the position for the next time it opens
C. Change the form's data source again
D. Rebuild the combo box
Q12. Which Access Beginner and Expert classes cover List Items Edit Forms in more detail?
A. Access Beginner Level 8 and Access Expert Level 4
B. Access Developer Level 2 and Access Expert Level 1
C. Access Advanced Level 10 and Level 12
D. There are no further classes on this topic
Q13. What is the benefit of being a Gold member, according to the video?
A. Access to all extended classes for every subject
B. Access to download all sample databases and Code Vault
C. Access to in-person seminars
D. Unlimited one-on-one support
Q14. What happens when you click the small button on the combo box after configuring the List Items Edit Form?
A. A new form opens to allow adding or editing shipping methods
B. The form closes and displays a report
C. The database is compacted
D. Nothing
Answers: 1-A; 2-B; 3-B; 4-C; 5-C; 6-C; 7-C; 8-B; 9-B; 10-B; 11-B; 12-A; 13-B; 14-A
DISCLAIMER: Quiz questions are AI generated. If you find any that are wrong, don't make sense, or aren't related to the video topic at hand, then please post a comment and let me know. Thanks.Summary Today's video from Access Learning Zone focuses on a quick way to add or edit items in a combo box in Microsoft Access databases. I get asked frequently how to manage this, especially when users have a combo box listing things like shipping methods and want to add a new option without navigating away from the main workflow. For example, if you want to add something like 'Starfleet Courier' to your list of shipping options, it is much easier to have a small button that opens a simple form, letting you enter the new item directly. This avoids the hassle of closing forms, going back to your main menu, finding and editing the lookup table, and then returning to your order entry.
To get started, there are some prerequisites. If you have not already watched my blank template video, please do so since I build on that template here. It explains the foundation I use in all my classes. My invoicing video is also important, as it covers the order form... again, links are available for all the videos. You should also understand table relationships and how relational combo boxes work, where one table references values from another. If any of these topics are unfamiliar, make sure to watch the relevant free videos.
Now, let's work through the process step by step. In my free TechHelp template, there is no field on the order form that shows how an order is being shipped. So, the first thing to do is add a new shipping table. Using table design, create a new table called ShippingT, with 'ShippingID' as an AutoNumber field and 'ShippingName' as a text field. Remember, do not use 'Name' by itself for a field name since it is a reserved word in Access. Enter some sample data such as UPS, USPS, FedEx, DHL, and perhaps Starfleet Courier. Save and close the shipping table.
Next, we need a place to store the shipping method for each order. Go into your order table's design view and add a 'ShippingID' field as a Number (Long Integer). This will act as a foreign key, linking each order to the shipping method in the ShippingT table. It is a good practice to keep your key fields at the top of the table. For existing records, you can manually enter a default ShippingID, or use an update query if you have many entries to update. You can also set a default value if you want new orders to start with a specific shipping method.
With the tables ready, now it is time to make a simple form to edit the shipping options. I used a copy of my basic continuous form, renamed it ShippingF, and set its record source to ShippingT. The form only needs one visible field, ShippingName, and you can remove extra sections or labels that are not essential. The goal is to have a lightweight form that simply lets you enter and edit shipping methods.
Switching back to the order form, it is time to add a combo box to select the shipping type. In design view, add the combo box where you want it. Configure it so the values come from the ShippingT table, bringing over both fields (ID and ShippingName). The combo box should store the selected ShippingID in the order table. If you would like, you can sort the dropdown by ShippingName. Label the combo box as you see fit—perhaps 'Ship'— and place it as needed on your form, applying formatting to match your layout.
Once you have your new combo box functioning, the helpful feature is making it easy to add or edit items in the dropdown. This is done using the 'List Items Edit Form' property of the combo box. Assign ShippingF as the form for this property. Now, when a user wants to add a new shipping method, they simply click the button in the combo box dropdown, and the shipping edit form will appear (as a modal window, meaning you can't interact with other windows until you close it). Make sure the form is sized and positioned as you like, since its position will be saved the next time it opens. Now, adding a new option such as 'Pony Express' is quick and easy.
This method for creating a List Items Edit Form streamlines data entry for lookup tables and keeps things efficient. If you want to explore these concepts further, check out Access Beginner Level 8, where I use lead sources as an example and demonstrate a similar shipping setup. For more advanced techniques, refer to Access Expert Level 4, where I cover extended features like handling related family members.
You'll find links to those classes on my website. Feel free to post any questions in the comments section.
Also, if you are interested in supporting the channel and gaining more resources, I offer several membership options. Silver members and above get access to all extended cut TechHelp videos and a free beginner class each month. Gold members can download all sample databases from my TechHelp videos, access my Code Vault, get priority for TechHelp questions, and receive a free expert class after completing the beginner series. Platinum membership includes every previous benefit, even higher question priority, full beginner courses across all topics, and one free developer class per month after finishing the expert material. These are the complete courses I teach on my website, not just Access, but also Word, Excel, Visual Basic, and more.
There is also a Diamond Sponsor level with some extra perks, but no matter what, I will keep making these free TechHelp videos as long as viewers continue to watch and support the channel.
For a complete step-by-step video tutorial on everything discussed here, visit my website at the link below. Live long and prosper, my friends.Topic List Creating a shipping methods table
Adding shipping method records
Adding ShippingID as a foreign key in the orders table
Setting a default value for ShippingID
Creating a simple shipping method form
Designing the shipping method form as a popup
Adding a combo box for shipping type on the order form
Linking the combo box to the shipping table
Binding the combo box to the ShippingID field
Naming and setting properties for the combo box
Using the List Items Edit Form property
Linking a popup form to edit combo box items
Testing the add/edit shipping method workflowPrimary Topics Access combo box, List Items Edit Form, relational tables, modifying rowsource, Access forms design, data entry efficiency, foreign keys
Secondary Topics Access beginner/expert course references, form property settings, modal forms, default field values
|


