Custom List Box
By Richard Rost

 4 years ago
Dynamically Display Fields Based on User Selection
In this Microsoft Access tutorial, I'm going to teach you how to select which fields are displayed in the columns of a list box based on the user selection.
Annie from Pembroke Pines, Florida (a Platinum Member) asks: is there any way for the user to change the columns that are displayed on a form? Sometimes we want to see the customer's phone number. Other times we want to see their address. I don't want to make a giant form with everything on it, and I don't want to have to make lots of different forms. Can this be done?
Members
Members will learn how to get rid of the check boxes and replace them with a multi-select listbox.
Silver Members and up get access to view Extended Cut videos, when available. Gold Members can download the files from class plus get access to the Code Vault. If you're not a member, Join Today!
 Update Update
- Access Developer 37 covers lots more with this database, including changing the record source to any table or query, resizing the form (and having the fields resize too), dynamic labels over each column, and lots more. Check it out!
Suggested Course
Links
Keywords
microsoft access, ms access, ms access tutorial, #msaccess, #microsoftaccess, #help, #howto, #tutorial, #learn, #lesson, #training, #database, user defined List Box Columns, Specify Columns, User Editable, Multiple Columns, Populating a MultiColumn ListBox, column widths, multi-select list box, read settings from table, Display only Selected Fields
Intro In this video, I will show you how to let users customize which fields appear in a list box on a form in Microsoft Access. We will learn how to add check boxes for each field so users can pick and choose which columns they want to display, and use VBA to dynamically update the list box based on those selections. I will walk you through setting up the form, adjusting the list box properties, and writing the necessary code step by step, so you can create a flexible interface without needing to build multiple forms.Transcript Welcome to another TechHelp video brought to you by AccessLearningZone.com. I am your instructor, Richard Rost.
In today's video, I'm going to show you how to customize which fields appear in a list box in Microsoft Access. Today's question comes from Annie in Pembroke Pines, Florida, one of my Platinum members.
Annie asks: Is there any way for the user to change the columns that are displayed on a form? Sometimes we want to see the customer's phone number, other times we want to see their address. I don't want to make a giant form with everything on it, and I don't want to have to make lots of different forms. Can this be done?
Well sure, Annie, what we can do is make a list box and control which fields are displayed as the columns in that list box. You could try to do it with a continuous form, but that would be a lot more complicated. I think a list box is your best bet.
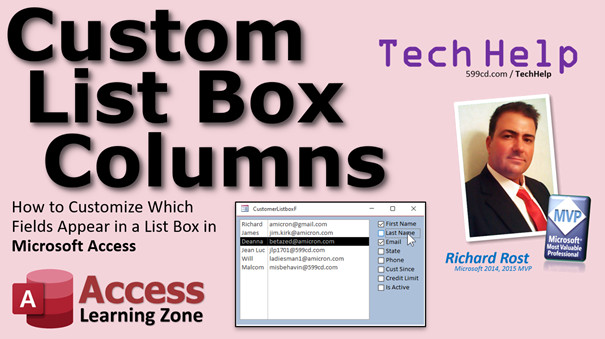
What we'll do is build something like this. Here's a list box in a form. Notice the first name and email address, which I've got selected over here. Let's say you want to see last name. Click on last name, and last name will appear. Don't want to see first name anymore? Click that one off. If you're tired of email, click that one off, and you can pick the fields that you want. This is what we're going to build in this video.
We've got some prerequisites before we get started. Yes, this is a developer-level video. You will need to know a little bit of VBA, but don't worry, I'm going to walk you through step by step everything that you need. However, I strongly recommend that you watch my Intro to VBA video first. Go watch this; it's about 20 minutes long. It's free. It'll take you through everything you need to know to start programming in VBA.
Don't be scared. It's not scary. Just go watch this if you've never done any programming. You'll learn a little bit of programming, and your databases are going to get a whole lot more powerful. So go watch this if you haven't. Pause the video right now and go watch that one.
Also, I want you to watch my video on relational combo boxes. Combo boxes and list boxes are almost exactly the same thing. They behave almost the same way. The only difference is a combo box drops down when you click it, you pick one, and it closes back up again. A list box is basically a combo box that's always open. There's some other differences, but that's basically the difference.
Watch my SQL with Access video. SQL is the query language underneath all the queries in the database. You need to know a little bit of that because we're going to custom select the fields. We have to know how to select first name, last name, active, that kind of stuff from the customer table. So you need to know a little bit of SQL. Go watch that video. Again, these are all free.
Also, watch my After Update video. Should you have an event run when a field is updated? So go watch these four videos if you haven't yet.
Go get yourself a copy of my TechHelp free template. This is free; you can download it from my website. You'll find a link below in the description below the video. Go grab a copy if you want to.
Now, in here, I've got a customer list form. To change these fields in a continuous form would be pretty difficult. But what we can do, like I showed you a minute ago, is make a list box and very easily change the fields that display in that list box. It's easier than doing it with a continuous form and different form fields.
Let's take one of these other forms like my single form over here. Copy and paste it (Ctrl+C, Ctrl+V). I'm going to call this my customer list box F, my customer list box form. We're going to work with this form right there. Right-click, design view. Here it is. Now, it's not going to be bound to anything, so we don't need to worry about a record source. This is where you'd specify the table that it's based on. There will be no actual data in the form itself, but there will be some data in a list box.
Let's drop a list box on here and just display some fields we might be interested in from the customer table. Come up here, find the list box control, drop it right there. This is very similar to a relational combo box. I want the list box to get the value of some table or query. Yep. Which table? The customer table.
Which fields do you want to bring over here? Well, always get the ID. That way, the first bound column is going to be hidden, but the ID will be in there. So when we double-click on this, it will open up the customer form, for example, and go to the right record.
First name, last name, email. Let's skip down, get state, maybe phone number, customer since, and how about is active? Just some different fields to show up in this form.
Next, if you want to sort it, that's fine. We're not going to bother right now. Next, okay. This is what it's going to look like. That key column is hidden, just like with our combo boxes. Resize these to be the width that you think they should be. This is important. You don't have to display maybe the entire email address, but get most of it if you want. The state can be nice and small. Phone number like that. Customer since, is active. Get those fields looking just like you want them to be.
What label? Doesn't matter, we're going to delete it anyway, and then hit Finish. There's our list box, there's the label, get rid of that, delete. Slide that up like that.
Let's see what we got here. Save it. Let's close it and then reopen it again. There we go. Not bad. There's our list of customers.
Some minor cosmetic things: we could turn off the record selectors and the navigation buttons since there are no records in this form. Go to the form properties, go to Format, turn off scroll bars, turn off navigation buttons, turn off record selectors. We don't need any of that stuff. Save it, close it, open it up again. There we go. Looks much better.
Let's take a look at the properties for this list box. First of all, the name: I don't like List4. Let's call this the customer list. That's the name of it. Some other properties to take note of: we're going to drop these in Notepad. I'm going to open up my Notepad. Here's Notepad. Trusty little Notepad. Slide this over like this.
Column Count is eight. That means there are eight columns in this box. Remember, the first one is hidden. I'm going to copy this and put this over here in Notepad so I have all those column widths. You'll find out why in a minute.
My count is eight. There's the widths right there.
Let's take a look at the Row Source property. Go to Data. Here's the Row Source. I'm going to zoom into that (Shift+F2) just so you can see it. There it is. It looks like a big mess. I'm going to clean this up. Since we're only getting data from one table, I can clean this up a lot. I don't need CustomerT everywhere, so we can get rid of that. I don't need all these square brackets because if you followed my naming convention from my Access Beginner 1 class, you don't put spaces in your field names or your table names, so we can get rid of all those brackets.
Get rid of CustomerT, get rid of those brackets, and keep doing all these. It makes it easier to read because we're going to be working with this in just a minute. It's hard to read with all these brackets and all these superfluous table names we don't need. You'll see how it's much easier to read. That's one of the reasons why I have you follow my naming conventions for things like this. Isn't this a whole lot easier to read than that mess that was just on the screen?
I'm going to copy this now to my Notepad. Bring it over here because we're going to use this in our code. That's what I got on my Notepad so far. I've got column width, my count, and my SQL statement. You can hit OK, put that back in the box if you want to. That's fine, it's not going to hurt anything.
So, we've got this stuff here. That's good. Set this aside for now. I'm just going to minimize it.
Now, what I want is for all of the fields that I want to be able to see in my box, I want to make checkboxes over here for those different fields. In fact, I'm going to make this smaller because we're not going to see all of them all the time. But we're not going to be displaying all of them.
Let's go grab a checkbox. Checkbox, drop it on your form. Make this guy look good. I'm going to make this wider and get it on the grid just nice. We're going to set this guy to black so we can actually read it. We'll put the label in here.
Now, we're going to make one for each field. The first one will be first name. Open up the properties for the box itself. I don't want this to be called Check6. I want this to be called whatever the name of the field is with the word show in front of it. So, ShowFirstName. I want to see the first name in this list.
Now we're going to copy this for each of the other fields. So, First Name, Last Name, Email, State, Phone, CustomerSince, IsActive. There's our boxes, and I'll shrink these up a little bit, make a little space here. Make these all look nice and pretty.
In fact, I'm going to align all these guys to the grid. Right-click, align to grid. Right-click, size to grid. Now everyone should look nice and uniform. Except that first one. There's always one that's not perfect. Get it adjusted so everybody looks good.
Now, we'll change these labels. This will be Last Name, and these are just the labels, so you can put whatever you want to display in here. Email. This one will be State. I'm getting this off my Notepad, these fields right here--the same fields we've got in the box right now. After State, we've got Phone. I think I missed one. CustomerSince (I'll just put CustSince in there so it fits), then Active.
Now, we'll set the names of these boxes: ShowFirstName, ShowLastName, ShowEmail, ShowState, ShowPhone, ShowCustomerSince, and ShowIsActive. I'd recommend making these the same as the actual field names.
Now let's select all of these, and we'll set their default values. Go to Data, set the default value to No. So by default, none of them will show up. But I want to see something when the box opens, so let's take First Name and Email Address and we'll make those Yes. Set the default values to Yes for just those two. To do that, click on one, hold the control key down, click on the second one so you can select multiple ones that aren't necessarily next to each other.
Now, when I click these boxes on or off, I want to change what's displayed in this list box by modifying this select statement. I can change what displays in here by changing this statement in the After Update event.
Let's go and do that. Go to ShowFirstName, go to Events, go to After Update, click the ... and that'll bring up the code builder. There's our code builder, our VBA code window. I'm in the ShowFirstName After Update.
What am I going to do in here? I'm going to say, RequeryList. That's it. No, just kidding. But we are going to have to write a RequeryList subroutine because Access doesn't know what this means yet.
Let's go right up here and we'll say Private, so that means only this form can use it. Private Sub RequeryList(). We're going to put some stuff in here that's going to happen when you click on ShowFirstName. Now, there are three properties that we have to change as we add or remove fields, and I put those three properties right here in my box: the column count property, the column widths, and the row source property. Those are all over here. If you look, go to the form, go to Data, and you'll see (oops, sorry, not the form, the list box) the row source property, and if you go over to Format, you'll see the column count property and the column widths property.
Generally, these things are the same in VBA as they are here. You just remove the spaces. So that's .RowSource (no space), .ColumnCount, .ColumnWidths (no spaces).
Back to the code window. So, I'm going to declare three variables to hold these things until I'm ready to set them in the form.
Dim CW As String (that's the column widths property), RS As String (that's going to be my row source property), and CC As Long (that's going to be the column count). I like short variable names, but you can name them whatever you want.
Let's set the default values we're going to start at. CC = 1 (there will always be one field--it'll be the ID, and it's hidden). So you're always going to start at one, and then as we add more, we'll count that up.
CW (the column width) is going to start off looking like this: "0;" Why? That's the first hidden column, and it's zero inches in width. If you take a look over here at the column widths property, that's what it looks like: zero, then something like 0.6146" is the next column (first name), then last name, and so on.
We copied those here. There's all your widths. So yeah, we'll stick a little " after that zero. You got to do that with a double double quote because a double double quote inside of a set of quotes makes it a quote.
Now RS is going to be our row source property; that's our SELECT statement. That's this guy. We're going to start it off with "SELECT CustomerID" and that's it. We're going to add some stuff after that--whatever fields we add. So you SELECT CustomerID, then , FirstName or , Email or whatever fields the user picks.
So that's what we're starting these three things with. Now we're going to look at the different fields and the ones that are checked are going to get added onto this stuff.
Here we go: If ShowFirstName Then (you don't have to say = True or = Yes, it's assumed--True, Yes, -1, 1 are all true values; 0, False, No are all false values) so if ShowFirstName is checked, then CC = CC + 1 (we've added a column), CW = CW & "0.7;" (how wide do you want to make the first name column? I want to go 0.7 inches, then a semicolon). You can use the exact values out of here if you want, like 0.6146, but I'm going to round them off. You don't have to have them exact.
And the reason why we use ampersand is because this is a string value. This CC is a long value, so you have to add it, so it's now two; whereas this becomes 0 and 0.7. See how that works?
Then we have to add FirstName to our row source, so RS = RS & ", FirstName". End If.
See what we did there? We're building this string (row source string); we're building on the column width string.
Let's do the same thing for the next one: If ShowLastName Then (copy most of this, change to last name), and then add ", LastName". Do this for each one of those fields.
If ShowEmail Then (email might be longer; let's go 1.2" in there), and then add ", Email".
If ShowState Then (state is tiny; let's say 0.3"), and then add ", State".
If ShowPhone Then (phone was 0.89; let's go 0.9), and ", Phone".
If ShowCustomerSince Then (CustomerSince is 0.73; so I'll use 0.8), and ", CustomerSince".
If ShowIsActive Then (that was a tiny yes/no field; that's 0.35; I'll keep that as 0.35), and ", IsActive".
There's all my fields. Got all the fields in there. Looks good.
Now, we're all done setting those values. Now, CC, CW, and RS have the final values in them. Let's put them in the form.
We're going to add onto RS: RS = RS & " FROM CustomerT" (because we've got "SELECT CustomerID, FirstName, Email," now we need to put the end of that on there). From CustomerT.
If you want to add an ORDER BY, you can. I'm not going to bother for this. You can always add a sort on there later. Or a WHERE condition, I guess, if you want.
Now we set the properties of the list box:
CustomerList.ColumnCount = CC
CustomerList.ColumnWidths = CW
CustomerList.RowSource = RS
End Sub. That should do it. That'll set all of those fields and the properties based on what we selected.
One more thing we have to do, though, before this will fully work is we set the RequeryList in the ShowFirstName After Update. We have to put the same thing in all the other check boxes. You only have to do it once, though. We got First Name done, we have to do Last Name, Event After Update, paste, Email After Update, paste, State After Update, paste, Phone After Update, paste, CustomerSince After Update, paste, IsActive After Update, paste.
See, you only have to do it once for each box. I just copy and paste; makes it much easier. Once you do it, you're done.
That's like my calendar seminar; you get like 30+ list boxes that you have to put an event in for each day of the month.
There we go. There's all of our RequeryLists.
There's one more place we have to put RequeryList: that's when the form opens. When it opens, we also have to set it. You can use the On Load event or the On Open event. It doesn't matter. I'll use On Load. Then we'll just drop it right in there. (Some of these you copy and paste.)
Save it. Let's shut it down, then open it back up again.
Look at that, it evaluated all these check boxes and displayed the right columns in here.
Let's add phone number. Boom. Look at that. If there is no other column here, this will just show the rest of the width there. Active. If you want to make this guy wider, just change it in the code. Come back in here. Email not wide enough? Okay, show email right there. Let's make this 1.8.
Now let's try it. I'm going to put that on this form. I'm going to make a button for it real quick. Just copy this button, copy paste. We'll call this my customer list box. Right-click, build event. We're going to put in here: DoCmd.OpenForm "CustomerListBoxF". That's all you need.
Close that. Reopen it. There's the main menu; customer list box. Boom. All right, CustomerSince, Active, State. Now I might have to scroll over to see them all. Last Name, Phone Number, there's all of them. You can make this as wide or as narrow as you want.
If you want to make it so you can double-click on one of these to open up that customer form, that's just a double-click event. Design view, go to the list box, open up its properties, go to Events, find the On Double Click, click the ..., and right in here we're going to say DoCmd.OpenForm "CustomerForm", , , "CustomerID=" & CustomerList.
That's how you write that: open the CustomerForm where the CustomerID on that form equals whatever is in CustomerList, which is the value you just picked.
Save it. Close it. Open it up. I'm going to see the phone number. I want to see their last names. Let's open up the Anotroy, double-click. Boom. Close it. Let's see, Malcolm Reynolds. Boom.
So, Annie, I hope that answers your question. That's one easy way that you can make a single form to display multiple fields, whatever fields you want to see. You want just first name and phone number? There you go. You want last name and email address? No problem. So easy to do.
If you want to learn more in the extended cut for the members, we will turn those check boxes into another list box, a multi-select list box. We'll put a list box on that form with a list of all the fields in it that we want to be able to display, and the user can just click on those. That's much easier to update and change than adding more check boxes and adding code for the check boxes. You'll see how that works in the extended cut for the members.
Here's the member list box. See how cool that is? Click on last name--there's last name. Click off first name. Email. A whole lot easier to update this than to make more check boxes. It's a lot more elegant, too. That's covered in the extended cut for the members--Silver members and up get access to all of my extended cut videos; there's like 250 of them now. Tons of hours and hours and hours of stuff to watch.
Gold members can actually download these databases, and you get access to my code vault with all kinds of cool source code in it. So check it out.
How do you become a member? Click on the Join button below the video. After you click the Join button, you'll see a list of all the different membership levels that are available, each with its own special perks.
Silver members and up will get access to all of my extended cut TechHelp videos, one free beginner class each month and more.
Gold members get access to download all of the sample databases that I build in my TechHelp videos, plus my code vault where I keep tons of different functions that I use. You'll also get a higher priority if you decide to submit any TechHelp questions to me, and you'll get one free expert class each month after you finish the beginner series.
Platinum members get all the previous perks, plus even higher priority for TechHelp questions, access to all of my full beginner courses for every subject, and one free developer class each month after you finish the expert classes. These are the full-length courses found on my website, not just for Access. I also teach Word, Excel, Visual Basic, and lots more.
You can now become a Diamond Sponsor and have your name or company name listed on a sponsors page. It'll be shown in each video as long as you're a sponsor. You'll get a shout-out in the video and a link to your website or product in the text below the video and on my website.
But don't worry, these free TechHelp videos are going to keep coming. As long as you keep watching them, I'll keep making more, and they'll always be free.Quiz Q1. What is the main purpose of the video tutorial?
A. To show how to allow users to customize which fields appear in a list box in Microsoft Access
B. To demonstrate creating multiple forms for different field combinations
C. To explain designing complex continuous forms with all possible fields
D. To compare Access with other database software
Q2. Why does the instructor prefer using a list box over a continuous form for this task?
A. List boxes are inherently faster to load than continuous forms
B. List boxes make it much easier to control visible columns dynamically
C. Continuous forms do not support showing data from tables
D. Continuous forms cannot be customized by users
Q3. Which skill is recommended as a prerequisite before following this tutorial?
A. Advanced networking concepts in Access
B. Introduction to VBA programming
C. Building SQL Server databases
D. Web integration in Access
Q4. What is the key difference between a combo box and a list box in Access as explained in the video?
A. Combo boxes display only numbers, while list boxes display text
B. Combo boxes are always visible, while list boxes only appear on click
C. Combo boxes drop down and close after selection; list boxes are always open
D. List boxes cannot be bound to a query
Q5. What is the significance of always including the ID field as the first column in the list box?
A. It ensures alphabetical sorting
B. It allows double-clicking a row to open the relevant customer form
C. It adds an index for better performance
D. It lets users edit the primary key directly
Q6. What does the instructor use Notepad for during the tutorial?
A. To write queries for later import into Access
B. To store and reference properties like column widths and SQL statements while coding
C. For saving customer data entered in the form
D. For developing complex macros
Q7. Why is it recommended to follow a naming convention without spaces and brackets for field and table names?
A. It makes SQL statements simpler and easier to read and maintain
B. It enables integration with Excel
C. It allows larger table sizes
D. It increases database security
Q8. What are the three key list box properties the VBA code manipulates dynamically?
A. Control Source, Format, Font Size
B. Column Count, Column Widths, Row Source
C. Data Type, Filter, Caption
D. Row Height, List Style, Border Color
Q9. Where should the subroutine for rebuilding the list box columns be called from?
A. Only in the form's On Load event
B. In the After Update event of each checkbox and the form's On Load event
C. Only in the Before Update event of the form
D. In the mouse hover event of the checkboxes
Q10. What is the purpose of using checkboxes next to each potential field name on the form?
A. To allow users to edit field values directly
B. To allow users to select which columns to display in the list box
C. To validate user input before submitting the form
D. To enable printing of selected fields only
Q11. What does the subroutine 'RequeryList' primarily do?
A. Updates form record navigation features
B. Rebuilds and sets the list box's properties based on the current state of the checkboxes
C. Sorts the customer list alphabetically
D. Applies formatting to the checkboxes only
Q12. How is the SQL SELECT statement for the list box built in the code?
A. It is statically written and never changes
B. It is constructed dynamically by concatenating field names based on checked boxes
C. It is imported from an external file
D. It only selects fields marked as primary keys
Q13. Why is the first column width of the list box set to zero in the code?
A. To hide the CustomerID field used internally for record identification
B. To indicate there is no data in the first column
C. To make the list box more visually appealing
D. To prevent data entry errors
Q14. What is the benefit of using a multi-select list box (as mentioned for the extended cut)?
A. It eliminates the need to update code for each new field
B. It prevents users from selecting more than two fields
C. It allows direct editing of values in the list
D. It automatically sorts all records in descending order
Q15. What must be done to allow double-clicking a list row to open a detail form for the selected customer?
A. Set the list box's Multi Select property to Simple
B. Add code in the list box's On Double Click event to open the CustomerForm filtered by the selected CustomerID
C. Add an edit button next to each row
D. Add navigation buttons below the list
Answers: 1-A; 2-B; 3-B; 4-C; 5-B; 6-B; 7-A; 8-B; 9-B; 10-B; 11-B; 12-B; 13-A; 14-A; 15-B
DISCLAIMER: Quiz questions are AI generated. If you find any that are wrong, don't make sense, or aren't related to the video topic at hand, then please post a comment and let me know. Thanks.Summary Today's video from Access Learning Zone covers how to customize which fields appear in a list box on a Microsoft Access form. The problem I'm addressing today is a common one: often, you want users to pick which columns to view on a form. Maybe sometimes they need to see a customer's phone number, other times their address, but you do not want to create a large form with every possible field or have to maintain lots of different forms. I will show you how to let users dynamically choose which fields to display in a list box, so they only see the columns they need at any given time.
While it is possible to use continuous forms for this, working with list boxes provides a much simpler and cleaner solution for dynamic field display. I will walk you step by step through how to set up the list box, and how to control which columns are visible, using a combination of VBA programming skills and some basic SQL.
This lesson is geared toward those of you with some developer experience, so if you are newer to VBA or Access in general, I recommend pausing to watch my introductory videos first. There are four free resources I suggest before you start this lesson: my "Intro to VBA" video for programming basics, a guide on relational combo boxes (since combo boxes and list boxes operate similarly), an introduction to SQL with Access (since we will be modifying the Row Source property with custom SQL), and a quick overview of the AfterUpdate event, which will help us refresh the list box when the user changes their selections.
Also, if you haven't already, download my free TechHelp template from my website so you can follow along with the same examples.
We start by setting up a simple form. Instead of trying to make a continuous form that would be hard to adjust dynamically, we use a list box to provide an overview of selected customer fields. The first step is to create a new form, then add a list box control. This list box will be populated from your customer table, always including the CustomerID (so we can refer back to this record easily, even if it's hidden from display), and then potentially adding fields like First Name, Last Name, Email, State, Phone Number, CustomerSince, and IsActive.
Once the list box is in place, you can adjust the column widths to make each column look good on your form. For example, email might need to be a bit wider, while state or the IsActive field can be very narrow. Set these widths according to your preference.
Next, we need to streamline the SQL statement that serves as the list box's Row Source. By following my recommended naming conventions and avoiding spaces in field names, we can write cleaner SQL and not have to worry about excess brackets or table name prefixes. This helps keep things readable and easier to maintain, especially as we modify the SQL in VBA later.
Now, the main feature: letting the user choose which fields appear. To accomplish this, add a series of check boxes, one for each field you want users to be able to display. It's helpful to give each checkbox a meaningful name, like ShowFirstName, ShowLastName, and so on. Adjust the default value of these check boxes based on which fields you want to be visible when the form first loads. For instance, maybe by default we only display First Name and Email, and leave the rest unchecked.
The next step involves using VBA code to respond whenever the user turns one of these check boxes on or off. We use the AfterUpdate event for each check box to call a subroutine (which I named RequeryList), which updates the list box by rebuilding its Row Source SQL, adjusting the column count, and setting the correct column widths, all based on whichever check boxes are checked.
Inside the RequeryList subroutine, I keep track of the fields to display by maintaining string variables: one for the SQL SELECT statement, one for the column widths, and one for the number of columns. I always keep the CustomerID column, even if it is not shown, because this lets us still uniquely identify the record for actions like opening the full customer form.
For each field, the code checks if the corresponding check box is checked. If it is, the field's name and column width are appended to the SQL and widths, and the column count is incremented. After all fields are evaluated, the Row Source SQL is finalized, the properties are updated, and the list box is refreshed to show exactly the fields the user wants to see.
It is important to set this behavior for every check box, so they all trigger the RequeryList subroutine in their AfterUpdate event. Additionally, when the form first opens, call RequeryList from the form's On Load event, so the correct default columns are displayed.
Once these steps are complete, you will have a dynamic list box that shows just the columns the user wants. For example, if a user checks the box for Phone Number and unchecks the box for Email, the list box immediately adjusts to reflect those choices.
If you'd like to provide handy shortcuts, you can make a command button on your main menu to open this list box form. You might also want to let users double-click an entry in the list box to open the full customer form for that record. This can be handled by adding a simple On Double Click event for the list box, using the selected CustomerID to open the appropriate record in your main form.
So, to sum up, with this solution you only need one form and one list box, and the users have full control over which customer columns to view, all without requiring lots of extra forms or bloated layouts.
For those interested in going a step further, in the Extended Cut for members, I explain how to switch from individual check boxes to a single multi-select list box that lets users pick fields from a list instead. This makes it even easier to update the available fields and provides a more elegant solution in terms of interface and maintainability.
Silver members and above get access to all extended cut TechHelp videos as well as other perks like free classes each month. Gold members can download all my sample databases and get access to my code vault, along with higher question priority. Platinum members receive all previous perks plus access to all beginner courses across all my subjects and developer-level classes.
You can find a complete video tutorial with step-by-step instructions on everything discussed here on my website at the link below. Live long and prosper, my friends.Topic List Creating a customer list form with a customizable list box
Adding a list box to an unbound Access form
Selecting and displaying specific fields from a table in a list box
Configuring column widths and column count for a list box
Customizing the Row Source SQL for a list box
Setting up checkboxes to control visible columns in the list box
Naming and labeling checkboxes to correspond with table fields
Writing VBA to dynamically update the list box based on checkbox selection
Building the SELECT statement for the Row Source property in VBA
Setting list box properties using VBA: ColumnCount, ColumnWidths, RowSource
Applying After Update events to checkboxes
Using form On Load event to initialize list box display
Adding a button to open the customizable list box form
Writing code for double-click event to open a related form for the selected record |


