Attendance Series
By Alex Hedley
14 months ago
Tracking Attendance for Students and Employees
Lessons
What's Covered
In this Microsoft Access tutorial I will show you how to build an attendance tracking database from scratch, including setting up tables and queries for your students or employees, creating a form for daily attendance entry, and generating a report to show attendance counts over a date range. This is an expert level lesson that covers continuous forms, appending records for each day, and custom date formatting, all without needing any VBA programming.
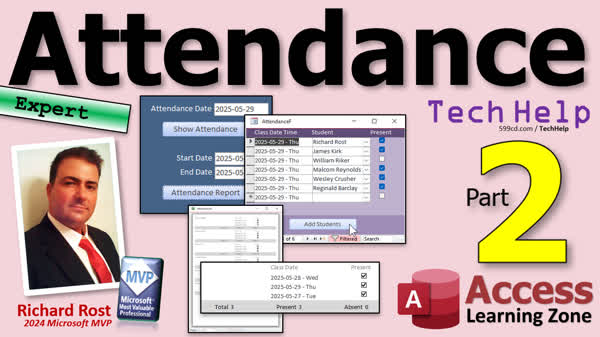
In this Microsoft Access tutorial I will show you how to improve your attendance tracking database by setting default attendance dates, using a main menu to control form defaults, creating append queries to quickly add students to the attendance table, and adding buttons to automate these tasks with and without VBA. This is part 2.
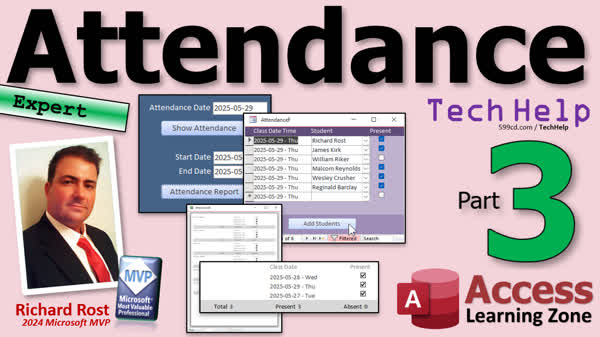
In this Microsoft Access tutorial, I will show you how to create a filtered attendance report that displays each student, their attendance dates, and groups the data to clearly show who was present and when. We will add start and end date filters to the form, build a supporting attendance query, and design a well-formatted report grouped by student. This is part 3.
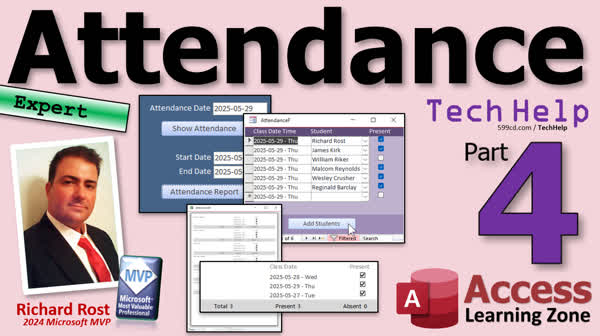
In this Microsoft Access tutorial, I will show you how to add group and report totals to your attendance report, including calculating total count, present count, and absent count using text boxes and functions like Count and Sum. You will learn how to set up these totals in both the group footer and the report footer, format your report for clarity, and add a button to open the report in Print Preview. Basic troubleshooting tips for copying controls and understanding Yes/No fields are also covered. This is part 4.
In this Microsoft Access tutorial, I will show you how to sort and group your attendance report by student name and class date, and then add filtering to your attendance form using VBA so you can easily view records for a specific day. You will also learn how to use VBA to add students for a given date directly from the form and refresh the attendance records automatically. This is part 5.
In the extended cut, we will add code so that first, the button checks if you already have attendance data for the selected date and confirms if you want to add students again, and second, checks if you missed taking attendance for any previous days so it can notify you to catch up. I will show you how to prompt users before duplicating records and how to flag dates with missing attendance, including options to skip weekends and customize the date range checked.
Members
Silver Members and up get access to view Extended Cut videos, when available. Gold Members can download the files from class plus get access to the Code Vault. If you're not a member, Join Today!
Recommended Courses
Up Next
Keywords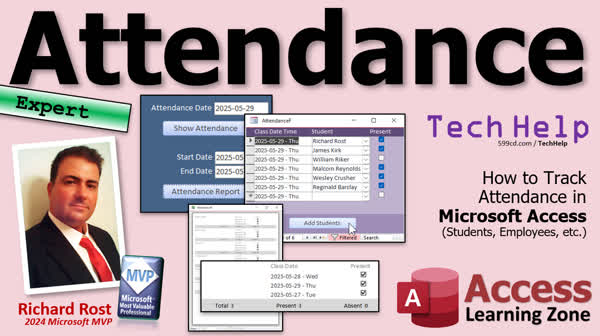
TechHelp Access, attendance database, attendance report, attendance form, class date field, student query, append query, sample attendance data, continuous forms, student combo box, date formatting, ISO date format, relational combo box, active students, attendance table design, present checkbox, main menu form, criteria in query, hide combo box ID, store student attendance, attendance roster, TechHelp free template, report by date range, format date yyyy-MM-dd, count present absent, conditional reports
TechHelp Access, attendance form design, attendance default date, unbound text box default value, =Date() usage, Forms!MainMenuF!AttendanceDate, append query attendance, button to run append query, add students automatically, VBA DoCmd.OpenForm, StudentQ as data source, AttendanceAppendQ, auto-populate attendance records
TechHelp Access, attendance report, attendance form, attendance query, student grouping, class date range, report footer totals, grouping levels in report, class absences, present count, report design view, date criteria, VBA refresh, report formatting, custom report footer, student attendance records
TechHelp Access, attendance report, report totals, design view text boxes, count function, sum function, present count, absent count, report footer calculations, customer ID grouping, yes no field values, report sorting, add sorting level, preview report button, printing reports, formatting totals
TechHelp Access, attendance report sorting, group and sort reports, report design view, sort by student name, sort by class date time, group by customer id, filter property, filteron property, VBA filter attendance, openquery VBA, doCmd.openquery, me.requery, attendance append query, add students button, attendance default date, attendance filter by date, attendance append VBA, requery attendance form, check attendance duplicate, attendance missed dates check, skip weekends attendance, attendance developer tips, barcode reader for attendance, leave of absence attendance, multiple classes attendance
Transcript One of the most popular requests I get is doing attendance, whether it's students or employees or your dogs, making sure they're all home at the end of the day. I don't know. So we're going to do attendance today. I'm going to show you how to set up an attendance database, have a list of students, and then you can add them every day when it's time for class. Then we'll do a report so we can see how many times each student was present or absent.
When we're all done, it will look something like this. You put your attendance date in here, show attendance, and it will show you if you've already done attendance that day. You come over here, check whether or not your student was present.
Now, tomorrow you open the database. This is going to default to tomorrow's date, whatever date you open it. Hit show attendance, and there's no attendance data for this day. Hit add students, and it will bring your students in. You just check which ones are present or not present. You can flip it whichever way you want to do it.
Then when we're all done, we'll make an attendance report. You click on the report, and it brings that up. You can do it between two dates, and you can see each student updates. They were present or absent, and gives you a count of each student. At the bottom, we'll give you a count of everybody. That's pretty cool stuff.
I'm going to walk you through building all of this from the ground up. This is an expert level video. What does that mean? Well, I consider expert the middle ground, basically intermediate between beginner and developer. So it's a little bit beyond the beginners, but you don't need any coding. We can do everything I just showed you with zero Visual Basic programming. It's all intermediate level stuff.
Here are the prerequisite videos that you should watch first before trying to follow this one. First, watch my blank template video, which explains how I build the database that I use for most of my TechHelp videos, including this one. A basic main menu, a customer list, customer form, and so on.
You should know how to concatenate two strings together. You should know how to build basic queries and use query criteria. You should know how to work with continuous forms. It is vital that you understand how to work with relationships between multiple tables. Students and attendance are going to be related. You have to understand that relationship.
You should know how to make relational combo boxes. We're going to make our combo box to pick the student. You should understand how to format your dates properly. I personally like to use the ISO date format. It looks like this: year-month-day, because it's unambiguous no matter what country you're in. So watch this if you're curious about how to use this.
Very important that you understand how to use append queries. We're going to use an append query to copy the students into the next day's attendance roster. Make sure you watch this video and make sure you know how to get a value from an open form. That's how we're going to get the date criteria from our main menu form into our other stuff.
These are all free videos. They're on my YouTube channel. They're on my website. Go watch all of these and then come on back. Don't complain that I didn't show you how to do some of this stuff. It's all in the prerequisite videos. There might be some more later on. I'll mention them if there are.
Let's get started.
Here I am in my TechHelp free template. This is a free database. You can grab a copy off my website if you want one. Since I already have customers in here, we're going to just use customers as students. So when I say students, I'm talking about customers. They're already in here. We're just going to use these guys.
I'm going to use the is active field to indicate which students are enrolled in my class. Yes, if you want to talk about a more advanced database, where you have multiple classes and multiple teachers and students for different classes, we'll talk about that later. For now, let's just focus on one class.
Let's make a student query. Create query design that shows just our active customers. So that's our list of students.
Let's go back to the name in customer T. Let's bring in customer ID. Down here, instead of just first name and last name, let's make a student name field: student name. That's going to be first name and a space and last name. That's string concatenation here.
I'll zoom in so you can see it better. Shift F2. Student name: first name and a space inside of double quotes and last name. We'll need that is active field. Where are you? Way down there in the bottom, and we're going to set a criteria to true, so I only see the active customers. Those are my students.
Let's save this, control S, as my student Q. That's my student query. If you want to sort it, you can. It doesn't really matter. Run it. There we go. We have way too many active students. Let's whittle this down to like six.
I want to see here. We'll get rid of you, you, you, you, you, you, you, you. I want James Kirk. I love James Kirk in there. Let's keep Mr. Spock. We got it. That's good. Mr. Spock. Okay. We got like six too. Good enough.
Now, if I run it, there we go. We have six active small group sessions. That's what I used to do: small group sessions. I had my own computer training. I had a max of eight. I would take eight students at a time. Usually it was six or seven.
Now, we need a table where we're going to store our attendance data. Each class for each student is going to get an attendance bit of data.
Create table design. We have attendance ID. That's our autonumber. Yes, it's attendance. Sometimes I want to put an E here, and I think to myself, okay, for attendance, we're going to the dance. We're going to attend the dance. That's how I remember it. Stupid little thing, I know.
That's our primary key. I always forget to click the thing, but you can click on the thing if you want to. Otherwise, it'll ask you.
Customer ID: that's our foreign key. So this is a number of type long integer, and that'll be set for us automatically.
Let's put a class date. Now, you can do a class date, class date time, whatever you want to do. Generally, I just put the date in here. I'm going to make the default value =Date(). That will use the date function to put the current date in there. If you want the time as well, like if you really care up to the minute when the attendance was taken, some places do. They want to know when this teacher actually did attendance. That's fine. You can store the time in here too. We're going to build the database assuming it's also got times, but I'm just going to work with dates. They're much easier, and they just look more pleasant.
Then we've got present. Was the student present or not? Yes or no. Now, the default value for this is up to you. If you want to default them all to no, and have the teacher check them to make sure that they were in their seats, great. If you want to default that to yes, and that way the teacher just has to check who's not there, again, totally up to you. That's your use case. I'm just showing you how to put the Legos together.
Let's save this as attendance T. That's my attendance table. Close it up.
I always find that stuff is easier when you've got data in the tables to work with, just some sample data. I'm going to open up my student query so I can see who the students are, so I have their IDs.
The attendance table is going to look like this. Let's say we're working with today's date. Today is actually May 30th. I'm recording this for May 29th because I got really busy and didn't get a video out. So this is actually the first retroactive video I've done in a long time. This is going to be published on the 30th, but it's for the 29th.
So, the first day. Let's do it for 5/30. James Kirk, 5/30, was present. Mr. Spock, 17, same date, was present. Mr. Barkley, same date, was not present. Me, I was also playing hooky. Wesley Crusher, he's a good boy, he was present. Finally, Will Riker was also present.
That's how it's going to look when it's all said and done. Every day you'll have another set of six entries, or however many students you have, and you'll just check in these boxes.
Save changes. Yes. Close it. That's really all we need for now for our tables.
Now, let's work on our attendance form. Our attendance form is going to be a continuous form. In the TechHelp free template, I've got a blank one here that I use as basically my template. I'm going to copy and paste that and call it attendance F, my attendance form.
Right click, design view. Open up the properties for the form, set the record source to that attendance table that we just made. I'm going to delete these fields, and I'm going to delete one of these labels up here because I'm in the habit now with small forms like this, I just make one big label going across the top, and I just put the fields in there accordingly.
Now, let's open up the add existing fields box. You don't really need the attendance ID on this form. In fact, generally I only put IDs on forms if I need their value or if I'm doing it like a beginner class to teach my students how IDs work. Usually you don't need them on the forms.
But we do need the customer, but I'm not going to bring the customer ID from here because I don't want it as a text box. I want it as a combo box. We'll use the wizard for that. I do need the class date time. Click, drag, and drop it in the detail section. Get rid of the label that comes in with it, and then slide this guy over here like that. Make it a little bigger like so.
We need a box for present. Drop that over here, and again delete the label that comes with it. Slide you over there. If you're going to put time in here, it needs to be bigger. If not, if you're just doing dates, you can do that. We're going to do date, and then I'm also going to show the day of the week. I'll show you how to do that.
Next, we need our student. For that, we're going to make a relational combo box. That's right there: click, drag, and drop into the detail section.
I want the combo box to get the values from a table or query. Where is the list of students? That's in the student query, right there. That's our list of students.
Next, I need customer ID and student name. You don't need to bring is active into here.
Do you want to sort it? Student name is fine. Next, now since this is based on a query, we don't get the little box that says you can hide the ID fields. We have to manually hide the ID field just by making its width zero. Go past it like that to make sure you're at zero. That's what it's going to look like.
Next, what is the bound field? What is the field that actually has the value that you want in it? Well, that's the ID. Next, do you want to remember for later use or store it in a field? In this case, I want to store it in a field. I want to store that customer ID in the customer ID in the attendance table. I'm picking a customer ID, which is my student ID basically, and I'm storing it in the customer ID field of the attendance table.
Next, what label would you like for it? It doesn't matter. We're going to delete it anyway, and then hit finish. There's that label. Goodbye. Slide this up into place like so. About like that. Looks good.
One thing I don't like about the combo box wizard–this is one of my Access pet peeves–is that it doesn't give you the option to name that box. It calls it combo62. I'm going to call this my student combo. Yes, it's bound to the customer ID. That's fine.
Let's shrink this space up there. Save it. Close it. Let's open it and see what we've got.
Looks pretty good. A couple little things: first of all, let's left-align that date. I hate how the date picker just kind of hangs out there. We really don't need the date picker for this form. We're never going to set that in here; we'll do it somewhere else. I'll show you where.
I'm going to turn off the date picker. It's under Data. Nope, my bad. It's under Format. Sometimes I even forget these things. I don't use this that often. Then turn this guy off to never. See, even me, I use Access all day long, and I still forget where stuff is on menus. That's why people are like, "We're worried." I can't. I don't know.
I'm going to go into the format here. You could just go with short date if you want to, or you could put your own custom date in here. I like to do something like this: yyyy-mm-dd - ddd. I'll zoom in so you can see it better. Shift F2. yyyy-mm-dd - ddd. Anybody know what that is off the top of your head? This is my favorite ISO date format. Year, month, day. The most logical of all date formats. Then I put a space and a dash there, which is a literal space and a dash. This is the three-character abbreviation for the day of the week. That's often very handy to have when you're dealing with calendars or attendance or any of that kind of stuff. You want to know what the day of the week is.
Save it. Close it. Open it. Oh, look at that. For some reason, I forgot to left-align. Let's do that. Click. Format. Left-align. That was what I went in there for.
One more time. Oh, that looks so much better now. You can quickly and easily see it's Friday.
Let's put the labels across the top. What I do is just take this guy, stretch it all the way out as far as you need it like that. This is going to be class date. You can put class date time in there if you want to. Not fancy.
All right, Student, space key, and then Present over here. That's all. I just find that's easier than dealing with multiple little labels and moving them around. That's a big pain.
Attendance. There we go. Beautiful.
So we have this all set up. Now what we're going to do next is use this date field we have over here and make this the default value for the next guy that goes in here, so I can change this. Then the next dates to come in here will be whatever date that is.
We're going to make this button open up this form. Then we're going to make our little button down here to add the students for the date that's in this box. So I can change this to the 31st, and then students come in automatically.
We're going to do all of that in my next video. So tune in to my next TechHelp video, same bat time, same bat channel. Members, you can watch it right now because I'm going to record it in just a minute.
For those of you who are my regular viewers, I know this video is being released for Thursday, the 29th of May, 2025. Tomorrow is Friday. I normally do quick queries on Fridays, but I'm going to do this video tomorrow instead. We got pushed back a day because of Memorial Day. I might do quick queries on Saturday. I might not. If not, I'm going to push it to next week. But I'm definitely going to continue this with part two tomorrow, Friday.
That's going to do it, folks. That is your attendance video, your TechHelp video, part one for today. Hope you learned something. Well, someone's beaming in. Live long and prosper, my friends. I'll see you tomorrow for part two.Intro In this video, I will show you how to create an attendance tracking system in Microsoft Access. We'll start by building a simple database, set up tables for students and attendance records, create a query to list active students, and design a form for entering daily attendance. I'll also cover using relational combo boxes, formatting dates for your records, and generating a summary attendance report. This TechHelp tutorial is aimed at users with intermediate Access skills, and no Visual Basic programming is required. This is part 1.Quiz Q1. What is the main objective of the attendance database discussed in the video?
A. To track grades for each student
B. To record student presence or absence each day
C. To generate salary slips for employees
D. To monitor login times for employees
Q2. Which field is used to indicate enrolled students in the example database?
A. IsGraduated
B. IsActive
C. IsPresent
D. IsEnrolled
Q3. What type of form is used for displaying and editing attendance records?
A. Single Form
B. Datasheet Form
C. Continuous Form
D. Split Form
Q4. Why is it recommended to use the ISO date format (yyyy-mm-dd) in Access?
A. Because it shows the time as well
B. Because it is common in the United States
C. Because it is unambiguous across all countries
D. Because it is required by all Access databases
Q5. Which table acts as the foreign key reference in the attendance table?
A. AttendanceID
B. StudentName
C. CustomerID
D. ClassDate
Q6. How does the video suggest entering student attendance for a new day?
A. Manually creating each record from scratch
B. Copying the previous day's attendance data
C. Using an append query to add students for the selected date
D. Importing from an Excel spreadsheet
Q7. When setting up the 'present' field in the attendance table, what does it represent?
A. Whether the student has graduated
B. If the student paid tuition
C. Whether the student was present or not
D. If the student received an award
Q8. What is the advantage of using a combo box for selecting students in the form?
A. It allows for typing free-form names
B. It pulls directly from the students query and connects IDs correctly
C. It limits data to one student per form
D. It ensures only absent students can be selected
Q9. Which Access concept is considered crucial for building the attendance system, as mentioned in the video?
A. Pivot Tables
B. Macros for automation
C. Understanding relationships between tables
D. Creating navigation panes
Q10. What is the final step shown in this part-one video?
A. Generating printable attendance reports
B. Setting up the attendance form with appropriate formatting and labels
C. Automating attendance with Visual Basic code
D. Deploying the attendance database on the internet
Answers: 1-B; 2-B; 3-C; 4-C; 5-C; 6-C; 7-C; 8-B; 9-C; 10-B
DISCLAIMER: Quiz questions are AI generated. If you find any that are wrong, don't make sense, or aren't related to the video topic at hand, then please post a comment and let me know. Thanks.Summary Today's TechHelp tutorial from Access Learning Zone focuses on building an attendance tracking system in Microsoft Access. Attendance tracking is a common request, whether for classes, employees, or even pets, so today I will show you how to set up a database that lets you manage a list of students and record their attendance each day. We will also create a report so you can see how many times each student has been present or absent.
By the end of this lesson, you will have a database where you can select a date, view attendance information for that day, and check off which students were present. Each time you reopen the database on a new day, it will default to that day's date. If there is no attendance data for that date, you can quickly add your students to the attendance roster and mark each one as present or absent.
Once data is entered, you will be able to generate an attendance report for a range of dates. The report will list each student and their attendance status for those days and provide a count for how many times each student was recorded as present or absent, as well as totals for the entire group.
This tutorial will guide you through the process from start to finish. This is considered an expert-level lesson, which means it falls between beginner and developer. You do not need to know how to write any VBA code. Everything we will do uses standard, intermediate-level Access features.
Before you get started with this lesson, there are some prerequisite skills and videos that you should familiarize yourself with. Watch my blank template video, which explains the database structure I use for most of my TechHelp lessons, including a main menu, customer list, and customer form. You should also be comfortable with string concatenation, building queries, using query criteria, and working with continuous forms.
Understanding relationships between tables is critical for this lesson since the students and attendance records will be connected. You should know how to create relational combo boxes, especially for selecting students, and you should be comfortable formatting dates. I personally prefer the ISO date format, in the form of year-month-day, because it avoids confusion across different countries.
You will need to be familiar with append queries, as we will use them to copy students into the attendance table for new dates. Make sure you also understand how to get values from open forms, because that will help you transfer the selected date into your queries or reports.
All of these prerequisite resources are available for free on my YouTube channel and website. I recommend watching them before proceeding with this lesson. If other prerequisites come up, I will mention them as we go along.
Let's begin.
For this tutorial, I'll be using my TechHelp free template database, which you can download from my website. The sample data in the database uses customers, so for today's tutorial, customers will represent students. The "IsActive" field will indicate which students are currently enrolled. If you're interested in more advanced setups with multiple classes or teachers, we can cover that in a future lesson. For now, we will focus on a single class.
Start by creating a query that lists only the active students. Build a new query with the customer ID and a concatenated student name field (first name and last name joined together with a space). Be sure to include the IsActive field, setting its criteria to True so that only active students appear. Save this query as "StudentQ." You can sort the list if you like, but it's not necessary at this stage.
For demonstration purposes, limit the number of active students to a manageable number (around six to eight works well for small group training sessions). Once you have your list, you're ready to move on.
Next, you need a table to store the attendance data. Each student for each class date will have one attendance record. Create a new table with an "AttendanceID" as an autonumber primary key. Add a "CustomerID" field (which will act as a foreign key), a "ClassDate" field (with a default value set to the current date using the Date function), and a "Present" yes/no field to indicate if the student was present. You can decide whether to default this field to Yes or No, depending on your preference for marking attendance.
Save this table as "AttendanceT." Enter some sample attendance data to see how it will look and function. For example, create records for each student for today's date, marking whether each one was present or absent. Each new day will add a new set of records for all students enrolled on that day.
Now, let's create a continuous form for managing attendance records. Use the blank form template from the TechHelp free template as your starting point and rename it as "AttendanceF." In design view, set the form's record source to the AttendanceT table. You do not need to display the AttendanceID on the form unless you are specifically teaching about IDs.
For the customer selection, we want a combo box, not a simple text box. Use the wizard to add a combo box that pulls values from your StudentQ query, displaying the student name but storing the corresponding CustomerID in the AttendanceT table. If the wizard does not allow you to hide the ID field as a column, simply set its width to zero manually. Make sure to rename the combo box to something meaningful, such as "StudentCombo."
Add fields to show the class date and the present checkbox. For the class date, format the field using the ISO date format (yyyy-mm-dd) and include the three-letter day of the week abbreviation for convenience. Remember to left-align the date for better visibility and turn off the date picker if you do not want users to select the date directly on this form.
For the form's labels, you can use one long label across the top rather than multiple small ones, labeling the columns as Class Date, Student, and Present.
The next step will be to use the date field to set a default value for new attendance records and to add a button that lets you add students for a selected date. This way, you can adjust the attendance date and automatically pull in all active students for that day. We will build that functionality in the next lesson, so stay tuned for part two.
In summary, this lesson taught you how to create the core tables, queries, and forms necessary for an attendance tracking system in Access. In the next video, I will show you how to automate the process of adding students for new dates and refine the functionality further.
You can find a complete video tutorial with step-by-step instructions on everything discussed here on my website at the link below. Live long and prosper, my friends.Topic List Setting up an attendance database in Access
Creating a student list using a query
Filtering active students for attendance tracking
Concatenating first and last names for student names
Designing the attendance table with required fields
Choosing appropriate data types for attendance fields
Setting default values for date and attendance status
Manually entering initial attendance records
Copying and customizing a form template for attendance
Binding the attendance form to the attendance table
Adding fields to a continuous attendance form
Creating a relational combo box for student selection
Connecting the combo box to the student query
Storing selected student ID in attendance records
Formatting the date display on the attendance form
Customizing the date format to include day of week
Arranging and labeling fields on the attendance form
Disabling the date picker for the class date field
Left-aligning form fields for better readability
Assigning appropriate control names for future usePrimary Topics attendance tracking, Access database design, table creation, query design, form creation, student records, relational data, combo boxes, date formatting
Secondary Topics using existing templates, database prerequisites, sample data entry
|


