Event Countdown
By Richard Rost

 4 years ago
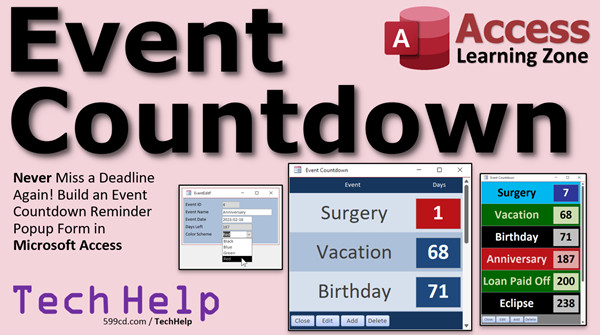
Access Event Countdown Reminder Popup Form
Never miss a deadline again! In this Microsoft Access tutorial, I'll show you how to build an event countdown reminder form. You can add events to a table, and when your database starts up, a form will automatically pop up showing you how many days you have left until each of your events. We'll also make buttons to easily close the form, edit an event, add new events, or delete events - complete with an "are you sure?" prompt. While this database can't help you prepare for these events, at least it will help you to not miss them.
Meghan from Albany, Georgia (a Gold Member) asks: It seems I'm always missing events. Yeah, I put them on my calendar, and I set alarms, but I'm always dismissing them and forgetting about important stuff. Is there any way I could have Access pop a huge reminder in my face that says "you have that conference in 2 days!" It would be nice if I could see the next 3 or 4 things coming up so I know what's going on. Thanks.
Members
Members will learn how to create different custom color schemes using Conditional Formatting and apply one to each event.
Silver Members and up get access to view Extended Cut videos, when available. Gold Members can download the files from class plus get access to the Code Vault. If you're not a member, Join Today!
Recommended Course
Pre-Requisites
Links
 Keywords Keywords
access 2016, access 2019, access 2021, access 365, microsoft access, ms access, ms access tutorial, #msaccess, #microsoftaccess, #help, #howto, #tutorial, #learn, #lesson, #training, #database, OnLoad, SetFocus, Modal, Double Click Event, On Dbl Click, DblClick, Allow Additions, Allow Edits, Allow Deletions, Me.AllowDeletions, Delete Keyboard Shortcut, Buttons to Close Form, Open Form, Add Record, Delete Record, Requery Parent Form, DoCmd.RunCommand acCmdDeleteRecord, MsgBox, vbYesNoCancel, vbCritical, DCount
Intro In this video, we will build an event countdown reminder form in Microsoft Access that automatically pops up when your database starts, showing how many days are left until each of your upcoming events. You'll learn how to create and format tables, queries, and continuous forms, add events, and use buttons for closing, editing, adding, and deleting events with confirmation prompts. We'll also cover calculated fields, a bit of VBA programming to control form behavior, and apply conditional formatting so events approaching soon are visually highlighted. This tutorial is inspired by a viewer's question about staying on top of important dates.Transcript Welcome to another TechHelp video brought to you by AccessLearningZone.com. I am your instructor, Richard Rost.
In today's video, I'm going to teach you how to build an event countdown form. Never miss another deadline again! In this tutorial, I'll show you how to build an event countdown reminder form. You can add events to a table. Then, when your database starts up, a form will automatically pop up, showing you how many days you have left until each of your upcoming events.
We'll also make buttons to easily close the form, edit an event, add new events, and delete events, complete with an "Are You Sure?" prompt. While this database won't help you prepare for these events, at least it will help you not to miss them.
Today's question comes from Megan in Albany, Georgia, one of my Gold members. Megan says: It seems I'm always missing events. Yeah, I put them on my calendar and I set alarms, but I'm always dismissing them and forgetting about important stuff.
Is there any way I could have Access pop up a huge reminder in my face that says, "You have that conference in two days"? It'd be nice if I could see the next three or four things coming up so I know what's going on. Thanks.
Yeah, Megan, that's what I've got in my database. I have something similar to this that pops up so I can say, "Okay, I have this due in one day. I have this coming up in two months," whatever. So I can see just every time I start my database, this guy pops up and I can see what's coming up.
I make little buttons to close this form, edit that item, add a new one, and delete. And some other bells and whistles too, like a little bit of conditional formatting here to say, "This is like tomorrow."
A couple of prerequisites first. If you can, go watch this one first. I already did a video on something similar. It's where you've got reminders for follow-ups for people in your database. It says, "Oh, you've got follow-ups to make. You've got customers you have to call," that kind of thing. It just pops up one little notice. It's not quite as elaborate as what we're going to build today, but go watch this. It's a good starting block for what we're going to do.
You will need to know how to make calculated fields in queries. So go watch this if you don't know what that means. You'll definitely need to know how to work with continuous forms. If you don't know what a continuous form is, go watch this video. We're going to use a tiny, teeny, tiny bit of VBA (Visual Basic programming). Don't be scared of it. Go watch this video. It's 20 minutes long. It's going to be easy to use to start programming in Access. It's not hard. Don't be intimidated.
All of these things are free videos. You'll find them on my website. You'll find them on my YouTube channel. I'll put links down below in the description under the video window that you can click on to go watch these. Go watch them, then come on back when you're done and we'll get started with this database.
OK, so here I am in my blank TechHelp free template. This is a free database. You can download a copy on my website if you want to.
Let's get started by making a table to store our events in. So let's go to Create and then Table Design. This will be our event table. We need an EventID; that'll be our AutoNumber. We'll need an EventName (whatever you want to call it). Don't use the word "Name." Remember, "Name" is a reserved word. Never use just the word "Name" or the word "Date" or something like that.
OK, and that's the next thing: EventDate. That'll be a Date/Time value. Let's make the default value down here equal to "Date+1." That means we're going to default anything we add new to tomorrow. The Date is the current system date plus one. If you don't know how to set a default value, go watch this video.
Alright, so let's save this as "myEventT," My Event Table, Primary Key, we'll say yes, and let's throw some data in here.
OK, all right, it's currently August 15, so tomorrow is August 16. Let's say I've got a conference coming up tomorrow. Let's say I have a birthday coming up in a couple of months. No, I'm not telling you how old I am. Let's say you have surgery next week, so let's say 8/22. Let's say you have an anniversary you want to put in here. A couple of other things: maybe you have a loan that's being paid off, 9/5, whatever. Oh, and the eclipse! Don't forget the big eclipse that's coming up! That's in 2023, April 8, I think it is.
OK, now I just googled it. I'm wrong. It's 2024. We'll change that. By the way, these are the ISO dates. It's a standard that everyone can agree on: year-month-day. I have students all over the world, and a lot of times, stuff that I show doesn't work if you're using USA standards and you try to translate it to a European date format. So I switched everything to ISO dates. If you want to learn more about that, here you go.
OK, so we've got some dates in here. Let's go ahead and close this now.
Now let's make a query with a calculated field in it so we can see, at a glance, how many days are left--how many days are remaining until that event. So let's go to Create, Query Design. Don't need you. Let's just bring in my event table. Close that. Bring in the star that brings in all the fields, and we're going to make a field down here called "DaysLeft." Let me zoom in so you can see that better. Shift+F2 and zoom in.
Alright, it's DaysLeft: EventDate minus Date, like that. That's the event date, which is a larger number because it's further in the future, minus today's date. Remember our date math: a day is equal to one.
All right, hit OK, hit Tab. Make sure your EventDate (because Access is going to put those little brackets around it) has brackets around it, not quotes. Sometimes Access is trying to help you out--if it sees that that's a field name, it'll put brackets around it. If not, sometimes it'll put quotes around it, which you don't want.
And now if I run that query, there you go. There are all of your events. There are how many days left until that event. Let's sort this ascending by DaysLeft so you can see the most recent stuff first. Remember, ascending is nothing to do with the tail end of a donkey.
OK. Let's save that as myEventQ (event query).
All right, let me close that.
Now let's make our continuous form that's got the event name and the days left on it. I want to make that calculated query field. I've already got, on my blank template, a continuous form. I'll copy this guy (Ctrl+C) and paste (Ctrl+V). We'll call this myEventF, and then I'll just modify this guy.
Right-click, Design View. The first thing we have to do is bind this to our data. So we're going to double-click here to bring up the form's properties. Go to the Record Source property, drop that down, and pick eventQ. Now this form is bound to that query, so it's going to get its data from that query.
All right, let's get rid of this. We don't need an ID field on here. All I really want is the EventName and the DaysLeft, so we use this guy first. This will be our GoTo Control Source. Drop this down, we want EventName. I'm going to copy and paste that into the name of the text box, so the text box is also named what the control source is. They're both EventName. That's fine.
OK, I need one more. So copy, paste. Let's slide this over here. This guy is going to be DaysLeft. Drop this down, DaysLeft. Copy, paste. There we go.
All right, let's save that. Take a look at what we have here. Go to Form View. OK, looks good. Conference, Surgery, Loan Paid Off, Birthday. We're getting there. That's a step.
Let's make these things bigger because I want them nice and prominent. So Design View, let's slide this over here. I'm going to make this EventName box bigger. Let's do this--let's slide this out like that, and maybe we'll do, I don't know, let's make this the whole size here. Drop that down like that. And this one here, make these about as big as you think they need to be, like that. Good. Let's select both of them together. You can just draw a box that just touches both of them and selects them both.
Let's go to Format. Let's make them big, maybe like, I don't know, 36 point. That's a little bit--let's make the box bigger. There we go. All right, resize, give it a little bit of that. OK, that's good. Maybe a little bold. Let's center these things in their boxes like that.
I'm scrolling over to the right a little bit here. Let's actually center that--looks right. All right, let's bring this over, bring that edge over like that. Let's center these labels over the tops like so. This is going to be "Days." Just "Days" is fine. That's just a caption. And this guy over here, slide like that. We'll call you "Event," and we'll make that look like that. Let's save it and see what it looks like here. Let's go back to Form View right there.
OK, all right, it's getting there. This didn't center. Sometimes it doesn't center. I'm not exactly sure why Access does it. Sometimes if you click on two things together and you center them both, they didn't both center. That's weird. There it goes. Access can be picky.
Be careful. See what I just did there? I accidentally clicked on the Layout View. Right now, I'm in the Layout View on this guy, which I don't want to be in. I hate Layout View.
All right, let's try this again. Open up the Main Menu, open up the Event Form. There it is. It looks better. OK, I'm going to size that down. There, it's saved. OK, looks good.
I'm going to turn off some stuff. I'm not going to use this form for editing anything. We're going to open up another form to edit the events. So I'm going to turn off the record selectors and the navigation buttons, and I'm going to leave only the vertical scroll bar on.
So let's go into the form's properties. Right here under Format, we're going to turn off the record selectors and navigation buttons, and scroll bars set to vertical only. OK, save that. Let's take a look at it now. All right, looks much better.
Let's put a button to open this guy on the Main Menu, because it's a pain having to go back to the navigation pane all the time. Get it? It's a pain having to go back to the pane. Yeah, you see what I did there? OK, not that funny.
I'm just going to borrow my Hello World button. Actually, I'll just use the Hello World button if I don't really use it for anything. Let's say "Events." And let's name the button (the Hello World button) eventButtonBTN. Right-click, Build Event. That's why I want you to watch that intro to VBA.
Here I am in my eventButton_Click. Now, keep in mind, I renamed it, so the Hello World button code is still in here. You can delete that now if you want to. What I'm going to do is DoCmd.OpenForm "eventF". That's it. See how fast that is? That's a whole lot easier than running through the Form Wizard. You get a nice one line of code here and you don't have to worry about an embedded macro. I love VBA. It's brilliant.
OK, open up the Main Menu. Open up my Events. There it is. Maybe slide it over here later on when we're done building it.
All right, what's next? Let's set up our colors here. Now what I'm going to do is, instead of having these take up the whole space, I'm going to actually make these a little bit smaller than the space that they're in. We're going to make these a little bit smaller so we can actually see the background color. You'll see where I'm going with this in a minute.
I'll take you back to the title slide to show you the look that I want right here. I want this box to be inside the background like that. There's a little bit of space around it. For this, I do want the alternating background colors. Let's turn that on, too. OK, so size this out just like that so you have a little bit of space around it.
Let's set up our color scheme. I'm going to set up the form header first. Let's go dark blue. I like to stick with the standard colors if I can. We'll make that dark blue as well. Let's make this guy in here a lighter blue, maybe like there.
I'm going to set these guys so their background is transparent like that, just so the background color shines through. Let's make this one darker. Shape fill, we'll make this the same dark blue and make the font white like that.
All right, let's save that and take a peek at it. Let's see what we've got. All right, looking a lot better. For this one, you can barely see there's a border around it. Let's turn that border off. For this one, I do want the alternating background colors, which I normally do turn off. So let's click on you, Format, go to Shape Outline, Transparent. I don't want to see the outline at all.
For the detail section, normally under Format, I set the alternating background color to "No Color," but for this one, I want a little bit of color. So let's go to the "..." and let's pick a slightly different blue, like that. All right, close it and open it. There we go. It looks great.
See the alternating colors? We're getting there. Let's set our form's caption so it's not "eventF." We'll call this "Event Countdown" or something. Caption: "Event Countdown." Looks a little more professional.
All right, there we go. Event Countdown.
Is everybody with me? Can you see? Can everyone see? Raise your hand if you can't see. Everybody? I know, the overhead projector. Remember those days? Overhead projectors. I'm old.
Now, next thing is we have the problem of focus. When the form starts up, the focus is going to be on the first text box, and there's not a lot we can do about that without a little bit of VBA code.
Notice if I hit Tab now, they're just going to move between those boxes. I don't want that to start up looking like this. So what I have to do is put a little button down here. We're going to have a couple of buttons down here to open up the event to edit the event or to add a new one. So when this form starts up, we're going to put the focus on one of those little buttons down there so it's not up top.
So let's drop a button down there. Design View. Take one simple button first just to close the form. Drop a button right there. Cancel the wizard. Rename this to Close. Just call it Close. Caption it Close. Slide it over a little bit and make it a little bit smaller.
We're going to give it a name first. It's Command5--no, I don't want Command5, I want CloseButtonBTN. Right-click, Build Event. All you need in here is DoCmd.Close. That's it. That'll close the current object, which is the form.
OK, save it, close it, open it up. Now what happens is if you click on this button, it closes the form. But I want, when this form opens up, to immediately set the focus down here.
Now, yes, there is this thing called the Tab Order, but the Tab Order only affects the Detail section. When the form loads, the focus is always going to start on the first field in the Detail section. So to get it to jump down here, which is in the Form Footer, we're going to need a little tiny bit of VBA.
Are you ready for it? Go to the form's properties, go to Events. Find the On Load property (it works on either On Load or On Open, either one for this particular case; either one's fine). I'll use On Load. What do I want to do when the form loads up? I want to say CloseButton.SetFocus. That's it. When the form loads up, put the focus (where the tab is, where the cursor is, what has the focus) on the close button.
Save it, close that, close that, open it up, and look at that. Notice it's all got little dotted lines around it. It's because the form opened up and it said, "Go right there." So now if I do hit Space, it'll close that, which is kind of desirable. I like that. It opens up, you don't want to see it, hit the Space bar. Whichever button you want to have the focus, you can drop it like that. Now notice this looks normal.
We're getting there. We're learning some things, a couple of new tricks. That's the major benefit of these TechHelp videos. I use them for tricks. Some of this stuff doesn't normally fit in my regular classes.
Now I don't want to do any editing on this form here because I need a place to put the date. I just want to see here, I just want to see the name of what's coming up and how many days left.
So I'm going to use another single form to actually edit and add these items. Let's take my blank single form here, copy, paste. This will be our event edit form--EventEdit.
Right-click, Design View. Once again, we're going to bind this guy to the event table. I'm going to come over here and grab Add Existing Fields. I like to do this. Watch: I grab all three of these, click, drag, drop over here. The only reason I keep these in here is for format painting. Watch: click on that, so the Format Painter (which is normally on the Home tab), click, paste, same. Then this one, click and hold it down, then paste, paste. Then turn it off. That's the only reason I keep these guys around--for their formats.
Slide these up here. You can make these look a little nicer because these are just labels: Event Name, Event Date. The ID, that's good. The event name can be larger. The event date, that's fine too. Let's slide them up in the corner a little bit more, like so, get them right up snug. Select them all, right-click, Size to Grid. That's one of my pet peeves. These should all be snapping on the grid.
Oh, you know what we could do? We could put our DaysLeft in here too. That'll show there. Instead of the table, let's make the data source the eventQ (it's got all the same fields), and now we can add in there the DaysLeft right there. We're going to stick you right down on the bottom of there. Since this is a calculated field, I'll make it look grey. Format paint like that. We can say "Days Left" like so.
Let's save that, close it, open it up again. OK, it looks good. Let's do some left justify. Design View, select all of that, Format, Left Align. I always say "justify"--it's "align." That looks a lot better. Conference, surgery. We're going to use this guy to edit this stuff, and we're going to do so one record at a time. So I don't want the user running through these like this.
We're going to basically click a button to open this or double-click on this, and it'll pop this guy up.
So let's modify this guy. Design View, go into its properties, go to Format. Again, we're going to turn off the record selectors and navigation buttons. We don't need any scroll bars, so neither. I just saw it--there it is. I want this to pop up. I don't want the user to have to do something and close it and not be able to sneak around behind it and change things. So we're going to go to Other and set this to Modal. Modal means you have to close this form before you can do anything else. You can't click on a form behind it. Want to learn more about modal and pop up? There you go.
Now, when I close this, save changes: yes. If I'm working on one of these and I double-click on "Surgery," for example, it's going to pop this guy up. One of the things that happens with modal is it disables your navigation pane and most of the things up here in the menu. Some things still work, like sorting, but a lot of the things up here are disabled. So you can't say, "I'm trying to click behind it." You can't go anywhere until you close that form, which is what we want.
Now we need a way to open up that form from this one. I'm going to close this guy because it's closed. What we're going to do is put a button right next to the close button. I'm just going to copy and paste. Ctrl+C, Ctrl+V. We're going to go "Open." We're going to call you the openButtonBTN. I've been much better with naming my buttons lately.
Right-click, Build Event, DoCmd.OpenForm. What form are we opening? The eventEditF.
But I want to open a specific record. I want to open whatever record the focus is currently on up top. So comma, comma, comma--that's going to be where EventID equals the EventID of the current form. Now, even though EventID isn't a field on the form, it's still a field in the record source underneath the form, so Access can still work with it. So whatever record you're on, that's the one that's going to get opened.
That's all you need--one line of code. Most of the things you're going to do with your beginner VBA are one line of code. You just have to learn a couple of commands.
Now, open it back up again. Let's go back to myEventF. Every time you edit this, by the way, it's going to snap back down to the smaller size. That's a pain. I'll show you a way later you can fix it.
Click on "Loan Paid Off," hit Open--well, there's your "Loan Paid Off" record. You can just close it, because in your final database, you're going to leave this minimized anyway. I show you how to minimize this in one of my other videos. Click on "Anniversary," hit Open--well, there's your anniversary record.
Now, easier than using this button would be if you could just simply double-click on that guy. So, let's use an on double-click event. Click on this, go to Event, find the On DblClick event right there, dot-dot-dot, and then put the same command in there. Copy this and paste it up here. That's it. Since it's only one line of code, it's OK to duplicate it. If you had a block of code in here, I wouldn't recommend copying and pasting multiple lines of code; you'd make a separate subroutine for that. But one line of code is just fine.
Close that. Let's go back to our event form. Now watch--double-click, boom, there's your "Loan Paid Off." Close it. "Birthday," boom, birthday. See? That's how you can open up whichever one you want.
It's getting there. Now, the next one's up to you. If you want to allow them to edit the name here, that's up to you. I don't see a problem with that. You could do something like this, and that'll get saved in the table. No big deal. If you don't want to allow them to edit that, I would suggest going into the form and then going into the form's properties under Data and just set Allow Edits to "No." I'm going to leave that on, though. If you want to change the name of what's here, that's OK.
Another problem we have is if someone comes down to the last record here and tries to open that, you get an error message. It says "EventID equals" and it's null because there's no record there, because there's nowhere to put the date in here.
To prevent that, you could do it in code, but the easiest solution is not to allow additions on this form. Design View, go to the properties, go to Data, Allow Additions--set that to "No." So they can't add new records, and watch--when they open this up, they can scroll down to the bottom and there's no record down there. Not to click on open--it has to be on a record.
Also, there's the issue of deletions. Now, you'd think that you can't delete any records on here because there's no record selector. But if the person knows the keyboard shortcut to delete a record, they can still delete. Let me show you. Let me go to the event table and put something bogus in here. "Bogs," today's date. Open up the event form, we got "Bogs." If I know the delete shortcut key, which is Ctrl+Hyphen--oops, it's gone. See that? I discovered that by accident several years ago, by the way. I always thought if you turned off the record selector, you can't delete. But no, not if you know the keyboard shortcut.
So, Allow Deletions: No. We'll handle deletions in a minute. That takes care of those two things. Let's try now: Ctrl+Hyphen--nothing.
So we've got an Open button to open one of those. We can edit it here. "Loan Paid Off." I got my surgery; I can still do that here. I was goofing around off-camera, that's why I deleted that.
Now we need a way to add a new one. So let's make a button to add a new event. Right-click, Design View, copy, paste, slide that over here. Let's caption this one "Add." Give it a name: addButtonBTN. Right-click, Build Event.
What's this one going to do? We're going to open that same form we're using to edit, but we're going to open it in Data Entry mode. Data entry mode allows you to just add new records. DoCmd.OpenForm, what's the name of the form? Again, eventEditF. Comma, comma, comma, DataMode is acFormAdd.
The other default options in here, by the way--let me get it back so I can explain. You have "Add," "Edit," "Property Settings" (means whatever the default property set in that form is, because you can set the property of the form called Data Entry to "Yes," and then that's only a data entry form). If you don't want to do it with VBA, you can do it in the form's properties. That's what "Property Settings" means. And then there's "Read Only," which means you can only open it up and look at records.
We're going to go with acFormAdd for this guy. See, that's it--again, one line of code is all you need half the time.
Save it, close it, close that. Open it back up again. I like to close everything down and open everything back up again.
All right, let's Add. Here's a new one. Let's put in here, "We're going to the beach." Let's just pretend that it was supposed to be yesterday. All right, so it shows up on top: minus 1 days left. This was yesterday, and you're just going to have to come in here and delete stuff when you're done with it. You know, you can automatically have stuff purged, but I kind of like it that it'll be like, "Oh, wait a minute, you were supposed to do this two days ago, you forgot." If you're doing deadlines for projects, for example.
Now, when I close this, notice it doesn't pop back up on here. What I'd like is, when I close that form, to requery this form. Now, I'd have to close this and open it back up again to see the list. It'd be nice if the other form would requery this one. Well, that's another benefit of making this guy modal: we can put something in this guy's close event. So when this form closes, it does something else. And if the only way you can get to this form is from that one, we know this one has to be open. We don't want our users to poke around the navigation pane.
So, Design View this guy. Go to his properties again, Events. We're looking for the On Close or On Unload event. Again, both will work just fine for this example. On Close, dot-dot-dot. What am I going to put in here? Again, one line of code: When this form closes, I want to say Forms("eventF").Requery. That is issuing the Requery command of that form. Requery says, "Go out to the table, pull all the new records in or all the changes or whatever. Refresh the records in you." If on that other form you said Me.Requery, this is "refresh my records." You can have one form tell another form to refresh itself.
Again, one line of code. Save it, close it, close it.
All right, let's open up the beach. Let's say I got the beach day wrong. The beach day is actually coming up on Friday. All right, then close that, and there it is. It refreshed right there.
It would also be nice if, when that form closes, it drops the focus down here maybe, so it's not sitting up there. Let's force the focus down here on the Add button, in case you're adding stuff.
Let's go back to our code window. I put a button up here on my quick launch toolbar that takes me back to it so I don't have to go back to the Design View and all that stuff. So we're going to requery that form, and then we're going to say Forms("eventF").addButton.SetFocus. Another one-line command. That's two lines now, but you get it. Save that.
If you're not familiar with all this notation and how I'm using it to get a value from another form or to call on other forms' properties and methods, just check this video out.
All right, close this. Close that. Let's start over from scratch. All right, Events, open up "Beach," close "Beach," and the focus is moved right back down here to that button. See, when I double-click on something and come back, it puts the focus down here, much cleaner than the other way.
Looking good.
How are we doing, everybody? Next comes the hard--the button, the Delete button, because we're going to add some stuff to it. So it's going to work like this: You're going to pick the one you want, select it, then hit Delete down at the bottom.
So, Design View, we're going to copy one of these buttons, paste, slide it up here. We're going to change the caption to "Delete," and give it a name over here: deleteButtonBTN.
Right-click, Build Event. Now, you could just put the delete command in here, but I like to wrap that around an "Are you sure?" You never want to let someone delete something without asking them, "Are you sure? Did you really mean to click on that delete button?"
Honestly, personally, I prefer not deleting anything; I just mark something inactive. That's a better way to handle it. I have a whole video on that. Generally, this applies to customer records, orders, things of that nature--you don't want to delete stuff. If a customer dies and you're never going to get a sale from him again, just mark him inactive. You don't want to delete all of this information so you have it for the history. But for something like this, for your little upcoming events, if the event is over, I guess it's fine, delete it. Again, this is your call, totally up to you.
So before we get to the delete command, I want to ask the user, "Are you sure?" So I'm going to use the MessageBox dialog, and I'm going to put on there Yes, No, Cancel buttons. I'm going to get the return value from that, and if they don't say yes that they're sure, it's going to exit out.
I covered this in detail in this video, so I'm just going to type in the code and let you see it. But if you want to learn more about how this works, watch this video.
This is going to be:
If MsgBox("Delete " & EventName & "?" & vbCrLf & "Are you sure?", vbYesNoCancel + vbCritical, "Delete") <> vbYes Then Exit Sub
So if they click Yes, it'll continue on. Otherwise, if they say No or Cancel, it's going to exit.
Now it's time to actually do the delete.
DoCmd.RunCommand acCmdDeleteRecord
Do not use just "Delete"; that deletes objects like tables and stuff--you don't want to do that.
That's it. It's really one line of code, plus an "Are you sure," that's a second line of code.
Save it, close it, close it.
Let's put another bogus record in here: "Bogus," today's date. Close it. Go back to our event form, "Bogus," delete--Are you sure? No, not sure. Delete--Are you sure? Yes. Oh, hang on. The command or action DeleteRecord isn't available now.
Why is that? Well, that's because earlier with this form, we set it so that the Allow Deletions property is "No." But since we know a little VBA, we can fix that. We can overcome that problem.
Let's hit the bug. It'll take you right to the spot in the code where the problem is. What we have to do here is allow deletions, do the delete, and then disable deletions again.
Are you ready? So it's:
Me.AllowDeletions = True
DoCmd.RunCommand acCmdDeleteRecord
Me.AllowDeletions = False
Because you don't want your users messing with stuff with the keyboard shortcut.
Save it, back out here. Let's try it again. Ready? Delete, Yes, and there it's gone. Maybe put the focus back down on the Add button. I don't like putting the focus back on the Delete button--that gets dangerous.
Let's add one more line at the end:
addButton.SetFocus
So it looks better.
Let's do that again. Let's go to myEventT, put some garbage in here. Close it. Open it. Delete this. Are you sure? Yes, and there we go. That's kind of cool. You can manipulate the properties; you just have to know what's causing that problem. I've been doing this for 30 years, so I know what to expect every time I do something.
The alternate way, if you don't want to play with the form's properties, is you could put one line of SQL there. You could say something like:
CurrentDb.Execute "DELETE FROM eventT WHERE EventID=" & EventID
That's an option. That's using SQL, goes right to the table and deletes it, then requery the form. Either one of these things works fine. We'll stick with that one.
There's usually two or three different ways to do stuff in Access. I love it.
Another thing--let's do one more thing. Let's say if this is less than two days away, let's make this red instead of blue so it pops.
You can't change the properties of a textbox in a continuous form without changing all of them. If I say "NumberBox.BackgroundColor = Red," it'll change all of them. So you can't change it with VBA code, but you can change it with Conditional Formatting. Conditional Formatting is changing the properties of something based on a value of something else.
In Design Mode here, click on this guy, go to Format, Conditional Formatting, Add a New Rule. We'll say if the Field Value is less than or equal to what value? Let's say 2. We're going to change the background color to dark red. Let's do the foreground color in white, and we'll also go bold. Then hit OK.
These rules are applied in order, so we want to add a second one. New Rule: the Field Value is less than or equal to 5. Then we'll set it equal to yellow with black text, and we'll also bold. So, in order, if it's less than 2, go red; less than 5, go yellow; otherwise, it'll keep whatever formatting it has now.
Apply, hit OK, close it, save changes, open it back up again. Look at that. Isn't that cute? This guy's less than 2, this guy's less than 5. We got our colors. I think I like this one better than the one I had on the title slide; I'm going to change it.
This is my run-through database. I usually run through this once quickly so I have these pictures for the slides. Because I hate doing the video and then putting the slides on afterwards at the beginning, I just like to do it all. But I like to run through sometimes just one time quick to make sure I know what I'm doing. But I think the new one looks better than this one. What do you guys think? Yeah, that's better. I like that one better. That one looks nice.
OK, so there you go. There's your event countdown form. And when you do--oh, you know what, I think we're going to do--you want one more thing? One more thing? It's time for a bonus. Ready? Some bonus footage. Actually, it's not technically a bonus because this is the whole point--to pop this thing up when the database starts, so the bonus is going to be the main feature.
Are you ready? Here we go. I don't want this thing just opening up if there's nothing in it--if you haven't put any events in here. So there have to be events in here. To do that, we're going to count how many events are in here, and if that count is greater than zero, we're going to open this form when the database opens up. We're going to specifically do it when the main menu loads.
Now, in my blank database template, which is a prerequisite for all of the other videos you were supposed to watch, you should have watched this one. I teach you how to create a startup form for your database. It's in the settings, but watch this video if you want to learn how to do that. That's where my Main Menu comes from, and that's why it opens up when the database starts. But now, since this guy is going to open when the database starts, I can have him check to see if other stuff needs to load too.
Right-click, Design View, look for his On Open event (or On Load, either one). Yes, there's a difference between the two of them. In a nutshell, On Open can be canceled; On Load cannot. I have a whole video coming out that teaches the difference between those things. I cover it in my Developer Series if you're curious now.
Here, I'm going to count the number of items in the event table. So:
Dim x As Long
x = DCount("*", "eventT")
That's it. So, a number as a long integer from zero to however many records are in that table. If x is greater than zero, then:
DoCmd.OpenForm "eventF"
If there are no events, don't bother opening it. In other words, if all your events are gone, there's no reason to open this form.
Save it, close it, close it. Now I'm going to simulate the database opening by just opening up the main menu form, and there it is. Now it opened in the background, so what I'm going to do is slide this over here and save it. Slide it over there, save its position however you want it to look when you open it up. Now save it (Ctrl+S on the keyboard), close that, close that. It should save its position now. Open it up, and there it is.
This is a little button here that runs a macro that's right down here--that opens up the Main Menu. That's covered in the template video as well.
Now you'll notice if you have nothing in your event table, it won't open that up. So if I--let me just copy this for example, copy, paste, we'll copy the structure and data. I'll delete this now. Now there's no records in that table. Now we will open up the Main Menu and that guy did not load.
I can just take those records now, put them back. I'll just copy this, come over here, paste them all back in there. Do those event IDs matter? No, because nothing's related to this table. So these IDs don't matter. AutoNumbers are not for you--you should not care what they are. It doesn't matter if there are gaps. Unless you've got something else related to eventT, then, yeah, those numbers matter.
So there you go. There's your event countdown form. I know: You've got 1 day to your conference, 4 days to the beach, 7 days to surgery, 69 days to your birthday. I'm not 69. In 69 days. Not 69 yet. I've got a couple of years until I hit that number.
Now, one thing I was thinking--oh, I didn't give you some links. I'll make some of the links. Hang on. I used DCount and I used an If-Then statement.
There's DCount--go watch that if you want to learn more. And here's an If-Then statement--go watch that one too.
So there you go. There's your TechHelp video for today. I hope you learned something.
Now, for the members: We're going to do some more fun stuff. We are going to do custom color schemes. So instead of just blue, dark blue, light blue, dark blue, light blue, you're going to be able to pick what color you want each of those items to be. We'll do black, blue, green, and red, and then you can change it so you can say, "OK, I want vacation to be green. I want my surgery blue. I want anniversary to be red," and so on. We'll do some customization with that Conditional Formatting so whatever color scheme we pick is the one that gets displayed.
Sometimes, when I'm doing these TechHelp videos, I come up with all kinds of crazy ideas, and I put those ideas in my Developer class for my Developer students because some things involve a lot of programming, and I save a lot of the programming stuff for my VBA students.
So, instead of a simple color scheme, which we're going to do for the members of the TechHelp video, where you just basically pick green, red, black, whatever and you have a set certain amount of colors, for the Developer students, we're going to actually make custom color schemes where the user can actually pick the exact colors they want by using these little buttons right here--click on this and pick the color. Then the Windows dialog will pop up and say which color you want--that's going to get saved in here. That will build the custom color scheme for each record.
Yeah, it's the TechHelp video, the extended cut, and then Developer 40 has a lot more stuff in it if you want to get into colors and programming conditional formatting in VBA. We're going to actually modify the conditional formatting settings with VBA code so you're not just locked into the ones you programmed into Design View.
But if you just want to take the next step, check out my TechHelp video. Silver members and up get access to all of my extended cut videos, and Gold members can download all of these databases that I build in the TechHelp videos.
It's basically like the cost of a cup of coffee every month to be a Silver member. What are you waiting for? Join today! All the cool kids are doing it.
Hope you learned something. We'll see you next time.
How do you become a member? Click on the Join button below the video. After you click the Join button, you'll see a list of all the different membership levels that are available, each with its own special perks.
Silver members and up will get access to all of my extended cut TechHelp videos, one free beginner class each month, and more. Gold members get access to download all of the sample databases that I build in my TechHelp videos, plus my code vault where I keep tons of different functions that I use. You'll also get higher priority if you decide to submit any TechHelp questions to me, and you'll get one free expert class each month after you finish the beginner series.
Platinum members get all the previous perks plus even higher priority for TechHelp questions, access to all of my full beginner courses for every subject, and one free developer class each month after you finish the expert classes. These are the full-length courses found on my website, not just for Access too. I also teach Word, Excel, Visual Basic, and lots more.
You can now become a Diamond sponsor and have your name or company name listed on a sponsors page. They'll be shown in each video as long as you're a sponsor. You'll get a shout out in the video and a link to your website or product in the text below the video and on my website.
But don't worry, these free TechHelp videos are going to keep coming. As long as you keep watching them, I'll keep making more, and they'll always be free.Quiz Q1. What is the primary purpose of the event countdown form discussed in the video?
A. To automatically prepare for upcoming events
B. To show the number of days remaining until each upcoming event as a reminder
C. To create and send email notifications about events
D. To share the event list with other users online
Q2. What database object is used for storing the events?
A. A form
B. A report
C. A table
D. A macro
Q3. Why should you avoid using words like "Name" or "Date" as field names in Access tables?
A. They are difficult to type
B. Access automatically deletes them
C. They are reserved words and may cause errors
D. They require special formatting
Q4. What is the default value set for the EventDate field in the event table?
A. Now()
B. "Date"
C. Date+1
D. EventDate-1
Q5. What is the purpose of the calculated field "DaysLeft" in the event query?
A. To display the event name
B. To determine the number of records in the table
C. To show the number of days remaining until each event
D. To format the event date
Q6. Why is the continuous form used for displaying the events?
A. It allows multiple event records to be shown in a list format
B. It enables editing multiple records at once
C. It is required for using VBA
D. It is the only form type in Access
Q7. What lines of VBA code are used to open the event form from the Main Menu button?
A. DoCmd.CloseForm "eventF"
B. DoCmd.OpenTable "eventF"
C. DoCmd.OpenForm "eventF"
D. DoCmd.LoadObject "eventF"
Q8. How do you make the form focus go to a specific button when it loads?
A. Change the Tab Order
B. Use the SetFocus method in the On Load event
C. Use Macro Actions
D. Move the button to the top of the form
Q9. Why is the form set to Modal when editing events?
A. To prevent any changes to records
B. To force the user to close the edit form before doing anything else in the database
C. To make the form always appear minimized
D. To enable automation from reports
Q10. What is the purpose of using Data Entry mode when adding a new event?
A. To restrict editing to existing records
B. To allow the user to view all existing events
C. To open the form ready to enter a new record only
D. To prevent the form from opening
Q11. What is accomplished by setting Allow Additions and Allow Deletions properties to "No" on the events form?
A. Users can only view, not add or delete, records directly
B. Users can add records but not delete them
C. Users can only edit EventIDs
D. It enables automatic record updates from external sources
Q12. What technique is used to confirm deletion before actually deleting a record?
A. Error handler
B. Automatic script execution
C. MessageBox with Yes/No/Cancel options
D. Save As prompt
Q13. How does the video suggest handling the deletion of records to prevent accidental removal?
A. Mark the record as inactive instead of deleting
B. Auto-archive deleted records
C. Sync with a backup system
D. Lock out users from deleting records
Q14. Why is conditional formatting applied to the DaysLeft field in the continuous form?
A. To hide overdue events
B. To visually highlight events that are soon or overdue
C. To auto-correct dates
D. To display only even-numbered events
Q15. What does the DCount function do in the startup code?
A. Counts the number of queries in the database
B. Counts the number of controls on the form
C. Counts the number of events in the event table
D. Deletes records with no date
Q16. How does the main menu automatically display the event countdown form upon database startup?
A. Via a scheduled job
B. By linking to an external scheduler
C. By checking the event table for any records and opening the form if present
D. Through a web service connection
Q17. What is one benefit mentioned for using VBA instead of embedded macros to open forms?
A. Macros run faster than VBA
B. VBA allows for more concise, one-line code
C. Macros are required for conditional formatting
D. VBA disables database security
Q18. What property adjustment ensures the user cannot use keyboard shortcuts to bypass form limitations after manually allowing deletions for a code-triggered delete?
A. Set Record Source to blank
B. Enable all navigation controls
C. Set AllowDeletions back to False after deletion
D. Reset AutoNumber field
Q19. What additional functionality is discussed for members in the extended cut of the video?
A. Sending email reminders to users
B. Customizing color schemes for event types
C. Integrating the event countdown with online calendars
D. Printing event reports automatically
Q20. What is the primary advantage of using calculated fields in queries, as highlighted in this tutorial?
A. They allow reports to be created without VBA
B. They let you compute and show dynamic values like DaysLeft without altering the underlying data
C. They replace all need for tables
D. They only work with form controls
Answers: 1-B; 2-C; 3-C; 4-C; 5-C; 6-A; 7-C; 8-B; 9-B; 10-C; 11-A; 12-C; 13-A; 14-B; 15-C; 16-C; 17-B; 18-C; 19-B; 20-B
DISCLAIMER: Quiz questions are AI generated. If you find any that are wrong, don't make sense, or aren't related to the video topic at hand, then please post a comment and let me know. Thanks.Summary Today's video from Access Learning Zone focuses on building an event countdown form in Microsoft Access so you never miss another important deadline. I walk you through creating a system where you can add events to a table, and every time your database starts, a form automatically appears to display how many days remain until each event.
This project is perfect for anyone who wants reminders that can't be easily ignored or dismissed. You'll be able to manage your events simply, not only by viewing them, but also by editing, adding, or deleting entries right from the form itself. To make things user-friendly and foolproof, I also show how to include prompts like "Are You Sure?" before deleting, helping guard against accidental data loss.
This topic was inspired by a question from one of our members, Megan, who struggled to keep track of her events despite using calendars and alarms. Like many of us, she wanted reminders that are front and center when she opens her database, not hidden away where they're easily missed.
The solution we'll build gives you just that—a form that pops up right when the database starts, so your most pressing events are always in sight. You'll know what's coming up, whether it's a meeting, a conference, a birthday, or anything else you want to track.
If you're new to some of the concepts involved, I recommend reviewing a few preparatory lessons first: building basic reminder systems, creating calculated fields in queries, understanding continuous forms, and a brief introduction to VBA programming for Access. All these resources are available for free on my website or YouTube channel, and you'll find the links listed below the video.
Starting with a blank template, the first step is to create a table to store your events. The key fields are EventID as an AutoNumber, EventName for the name of the event (being careful not to use reserved words as field names), and EventDate, set as a Date/Time field. You can even give EventDate a default value of "tomorrow" so new events are always scheduled at least a day ahead by default. Once the table is set up, you can begin adding some sample events to test the system.
With your data in place, we then move on to building a query that adds a calculated field to show how many days are left before each event. This involves some straightforward date math within the query, subtracting today's date from the event date to give a positive count of days remaining. Sorting the events by DaysLeft ensures the most pressing events always appear at the top.
Next, you'll create a continuous form to display your events. This form pulls data from your query so that the event name and number of days left are always up to date. The format is adjusted for readability, with larger text, centered alignment, and bold formatting so each event stands out. Labels and colored backgrounds help organize the presentation and improve usability.
For navigation and a more refined user experience, the form incorporates several buttons at the bottom: one to close the form, one to open a specific event for editing, another to add a new event, and finally, a button to delete an event. Special attention is given to the default focus so users can quickly act with keyboard shortcuts if needed. There's a small amount of simple VBA used for these button actions, making the form both responsive and efficient.
Editing and adding events are handled on a separate single-record form, keeping things clean and avoiding mix-ups when working with continuous data. This edit form is set as "modal" so the user must close it before returning to the main list, preventing confusion or unwanted background clicks.
To ensure stable data handling, options like Allow Edits, Allow Additions, and Allow Deletions are carefully managed in the form properties. For example, record deletions in the main form are disabled except through the Delete button, which brings up an "Are you sure?" confirmation to help prevent mistakes. I show you how to handle deletion cleanly with VBA, temporarily enabling deletions just for that action, and immediately locking them down again afterwards.
Another quality-of-life enhancement is conditional formatting within the DaysLeft field. Events coming up soon (within two days, for instance) are highlighted in red, those less urgent (up to five days away) in yellow, with the rest keeping their normal look. This helps you quickly scan for what's most important at a glance.
A key feature of this system is that the event countdown form can be set to automatically appear only when there are events in the table. This is accomplished by counting the number of records in the table on startup, using DCount within the main menu form's Open or Load event, and only showing the countdown if needed.
Throughout the tutorial, I offer suggestions for best practices, such as why it's usually better to mark records inactive rather than deleting them (though for this event system, deleting is acceptable), and I point out alternative ways to handle common operations in Access, encouraging you to pick the method that suits you best.
For those interested in taking these concepts further, the Extended Cut of today's lesson will cover custom color schemes for events, allowing each type of event to have its own highlight color. For more advanced users, my Developer series expands on creating completely flexible, user-driven color schemes via VBA, teaching how to open color pickers and store selections dynamically.
If you want to go beyond today's video, become a member for access to extended lessons, download databases, and priority support. Membership options are available at several levels, each with extra perks like sample databases, code vault access, and complete course libraries across multiple Microsoft Office products.
But whether or not you join, you can always rely on these TechHelp videos to provide practical, effective Access solutions for everyday challenges.
You can find a complete video tutorial with step-by-step instructions on everything discussed here on my website at the link below. Live long and prosper, my friends.Topic List Creating the event table to store upcoming events
Setting default values for event dates
Entering sample data into the event table
Using ISO date formats to avoid regional issues
Building a query to calculate days left until each event
Sorting events by days left in the query
Designing a continuous form to display events and countdowns
Binding the form to the event query as a record source
Formatting form controls for better visibility
Customizing form layout and appearance
Adding and naming buttons for form operations
Using VBA to open forms with a button click
Setting form header and detail colors for visual clarity
Adjusting tab order and control focus on form load with VBA
Adding a close button and coding it to close the form
Creating a single form for editing event details
Binding the event edit form to the event query
Displaying the calculated days left on the edit form
Setting the event edit form as modal to prevent background edits
Opening the event edit form for a selected record with VBA
Enabling double-click to open the edit form for a record
Disabling form edits, additions, or deletions as needed
Preventing unintentional record deletions with property settings
Adding a button to open the edit form in add mode
Using acFormAdd to open the edit form for new records
Requerying the event list form after editing or adding records
Moving focus between buttons with VBA after form operations
Creating a delete button with confirmation prompt
Using MessageBox with Yes/No/Cancel for delete confirmation
Temporarily enabling deletions in code to allow safe record removal
Refocusing on the Add button after deletion
Applying conditional formatting to highlight imminent events
Highlighting events based on days left thresholds
Automatically popping up the countdown form at database startup
Counting event records to determine if the form should open
Opening forms conditionally on database startup via VBA
Saving and restoring form position preferences |


