Option Group
By Richard Rost

 3 years ago
Creating an Option Group for Tracking Steps
In this Microsoft Access tutorial, you will learn about using an option group. Option groups have many uses, including selecting an option from a list. In today's example, we're going to use it to track which step we're on in a series of procedures for a medical patient.
Emily from Southaven, Mississippi (a Platinum Member) asks: I have a series of forms and procedures that need to be performed for each of my patients, in order. How can I keep track of the current step I'm on? Right now, I use a notes field but it isn't very efficient, especially when I might not see the patient for weeks and need to figure out where I left off. Is there a way to have some sort of indicator or system that will automatically help me keep track of where we're at?
Members
Members will learn how to automatically set the option group value when the button is clicked. We'll use just a little bit of VBA code.
Silver Members and up get access to view Extended Cut videos, when available. Gold Members can download the files from class plus get access to the Code Vault. If you're not a member, Join Today!
Prerequisites
Recommended Courses
Keywords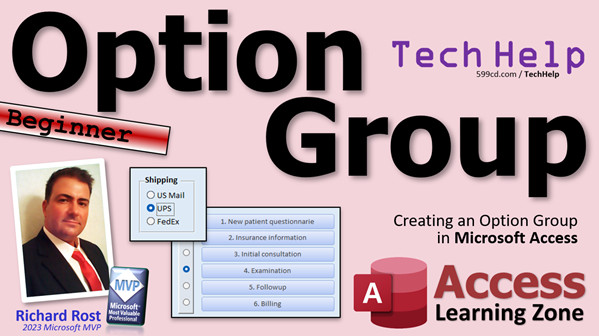
access 2016, access 2019, access 2021, access 365, microsoft access, ms access, ms access tutorial, #msaccess, #microsoftaccess, #help, #howto, #tutorial, #learn, #lesson, #training, #database, option group, track progress, procedure tracking, option buttons, shipping method, option group wizard, default choice, store value, option group appearance, option group captions, step tracking, step number field, option button copying, option value, option group formatting, option group border, step tracking example, Microsoft Access tutorial
 Subscribe to Option Group
Get notifications when this page is updated
Intro In this video, we will talk about how to create and use option groups in Microsoft Access. You will see how to set up an option group to track the current step in a multi-step process, such as patient procedures, with just a single field in your table. We'll cover when to use option groups versus check boxes or list boxes, and walk through building and formatting an option group on a customer form, including how to add or modify the options to fit your workflow.Transcript In today's video, we're going to talk about creating option groups in Microsoft Access.
Today's question comes from Emily in South Haven, Mississippi, one of my Platinum members. Emily says, I have a series of forms and procedures that need to be performed for each of my patients in order. How can I keep track of the current step I'm on? Right now, I use a notes field, but it isn't very efficient, especially when I might not see the patient for weeks and need to figure out where I left off. Is there a way to have some sort of indicator or system that will automatically help me keep track of where we're at?
Yes, Emily shared some screenshots of her database with me, and she essentially has a series of buttons. She clicks on this button. This is on the customer form or her patient form. She clicks on this and then the new patient questionnaire comes up. She clicks on this, the insurance information, and she has to follow these in order. It's kind of neat how she got a look of V like that.
Now, if this was a situation where she could do these things out of order, like this came before that, then we could use a series of check boxes. When you finish this step, check that box off. When you finish this step, check that box off, etc. But this would require a separate field in her database for each one of these things. Instead, we could use an option group and this is one value right there.
Alright, so you finish part one, you click here. Finish number two, click there, and it will tell you at what step you're on. This tells me I'm on step four, and this only requires one field. It's one field with, in this case, six different options.
Now, normally you see option groups like this. We'll build this one first. For tracking something like shipping method or gender or favorite sports team or whatever, so just a list of options. Generally with an option group, it's a list that doesn't change that often because this is not easy to update. You can't easily add another option to this, like with combo boxes where you click and drop this down, there's a list of options there or even list boxes. You can very easily add items to this list. You can add them to a table or you can add them right in the box.
With an option group, you're stuck with those three options unless you make a design change to the database. This is why I personally don't use option groups that much, but if this is the look and feel you're going for, then it works well.
For what Emily wants, and we've discussed this in email, this is it. These are the only six steps and she hasn't changed this in her practice for like 10 years. She just wants one value, it goes one to seven, just to keep track of where they're at in that procedure.
Let's get started.
Couple of prerequisites first. As I mentioned, this is a beginner lesson. This is for the beginners in the group. You don't need any programming or any extra crazy Access stuff. We're going to start from the beginning.
I do however strongly recommend you watch my Access Beginner Level 1 class first. If you have not spent a lot of time with Access, it's about four hours long, but it covers everything you need to know to get started using Access. Also go watch my blank template video. This shows you how I set up my databases from scratch. So you know all the options that I like and how to set up a basic customer form and a customer list in the main menu and stuff like that.
So go watch this too. These are free videos. They're on my website. They're on my YouTube channel. Go watch them and come on back.
Here I am in my TechHelp free template. This is a free database. You can download a copy from my website if you want to. In this database, I've got a customer form. Let's say we want to add an option maybe right over here for their preferred shipping method. We ship with, let's say, US Mail, UPS, and FedEx. That's it.
The first thing we have to do is put a field in the customer table to hold this value. Let's go over here, find our customer table, right-click, Design View. Now at the bottom, we're going to add Shipping Method. That will be a number. This will just be a number represented by one, two, three. We'll leave zero down here as the default value. That way a new customer doesn't have a value starting off. You can set that to a default value if you want to. If, let's say, 99 percent of your customers are always US Mail, you can make one the default. But I'm going to leave it as zero. Zero tells me we haven't picked one for this customer yet.
Save it. Close it.
Let's open up that customer form. Right-click, Design View. Let's come on over here. We're going to put our list box or, excuse me, our option group right down here in this corner.
Go to Form Design. Find the option group. It's this guy right there. Now there's an Option Button, which is that guy. Option buttons by themselves don't do anything. They have to be part of an option group. Usually you pick this option here for the option button if you want to add a button to an existing group.
So I'm going to pick Option Group. Click down here anywhere. The wizard starts up. This wizard's okay. I like this wizard. Some wizards are good. Some wizards are bad. This is a good wizard. You can use this if you want to.
The label names are what are the names for the labels. These things. The labels that go next to your buttons. So we'll put in here US, Mail, UPS, and FedEx. Just like that.
Next. You want a default choice. In this particular case, I'm going to say no. I don't want a default choice. We'll leave it at the zero. We pick one for our customer. You can set one if you want to. That's up to you.
Next. Labels and their values. If you want to give specific values, if you want like zero, one, two, or ten, twenty, I don't care. Whatever. One, two, three is fine.
Next. Do you want to save this value for later use, in which case it's not stored in the table? Or you can store the value in a particular field. Let's find that Shipping Method that we just set up.
So we're going to pick that value and save it in this field.
Next. Now, this is all how you want it to look. Option buttons, checkboxes. I don't like checkboxes. Checkboxes, to me, tell you you can pick more than one. Toggle buttons, I'm not a big toggle button fan. We're going to leave it in option buttons, and then you're down here. You got etched. You got flat. You got raised. You got shadow. Whatever you want it to look like. I'll go with shadow. We'll keep it more deep because I got the notes box. It's shadow.
Next. What caption do you want? That's this thing up top here. We'll just put in Shipping. And then Finish.
There we go. Option group down here. I'm going to make it a little bit bigger because it comes in kind of small like that. I'm going to slide this label up just a touch like that. That looks better. Bring the whole thing down a bit, like that. There you go.
Of course, give it some color if you want. It comes in looking kind of pale. Go to Format. I'll give it a little background color, maybe that guy. Shipping, make it a little bit darker like that. Of course, these all came in as gray. So I'm going to go click, Shift click, click, click. And then we're going to make that readable. So I'll make it black. And that looks a lot better. You can make the label across the top bigger. I spend a lot of time covering how to format this stuff in my Access Beginner 1 class. If you want to learn more about that, go watch that.
Save it. Close it. Open it. And there you go. It's pretty good. Maybe put a border around that top label. Let's see. Look on you. I am going to shape outline black and center the text. Let's see what that looks like. Save it. Close it. Open it. That looks a little better.
So now if I pick a value and then leave the record and come back to it, you can see that value stuck. And if you take a look in the table underneath, over here you got number one in there. So that saves that value in that field. No matter how many options out here you got, there you go. One, two, three. That's the value in that field.
That's a standard option group. Now if you do want to add an option later, you have to go into Design View. You have to make the design changes to the form.
Let's make this bigger. Let's make the option group, this frame around it, that's the group, make that a little bit bigger to accommodate your new item. Now, there's a couple ways you can do it. You can copy and paste an existing button or you can add a new one off the toolbox. Both ways work.
If you pick the toolbox, make sure when you come down here, you hover over this. Let's turn the blocks. See that? That makes sure it adds it to the group. If you just drop it over here, it's not attached to that group at all and that value is going nowhere. So don't do that. Pick it out of here and make sure you drop it inside that group like I just did.
Then open up the properties for it. Go to Data and then it should put the next option value in there automatically. In this case, it put a four in there. If you don't do it that way, if you don't like that method, usually what I do is just copy and paste another one of these buttons. Copy, paste. It puts the button in there. But you get this little thing here. It says duplicate option value. You just have to go in here and change it yourself. Option Value put four. That's all. Then you can change the label. I don't know. Coney Express.
So that's the tough part with option groups. You have to manually make design changes to the form in order to put that new value in there. But now you got it, and there it is. Coney Express.
Option groups look pretty, but personally, I find list boxes a little more useful.
So that's your basic list box. Let's talk about Emily's specific situation here. Now, let's go into Design View. Just for the purposes of class, I'm going to get rid of some stuff we don't need here. We don't need this stuff. Let's move the shipping box over. Let's move you over here.
We're going to pretend these buttons are Emily's buttons. She's got step one is Do Stuff. She's got other forms that open up where they have to type in some stuff, and it can print a report and so on. You know how it is when you go to the doctor. New patient questionnaire, and give me your insurance stuff. I'll just put four items, I think. Probes, watch the one South Park, and four, Go Home, whatever.
These options have to be done in order. Like I said in the intro, if this was a situation where you could do these in any order whatsoever, we'd have to add a check box here. We check it off when you're done. But that would involve a step in the table - four more fields in the table: Is number one done, is number two done, is number three done. Or ideally, you could do this with a sub form, but I'm not going to get into all that. That's more advanced.
So for here, we can use an option group with just some buttons to track which one of these steps we're on.
Save this. Close it. Let's go back to our customer table. We need to put a field in here to track what step we're on. Let's call it the Step Number, not Sleep Number, Step Number.
Save that. Go back in here, Design View. Now we're going to add a series of option buttons in April. We don't need the labels to go with them because these buttons kind of serve as labels. We'll just put a set of empty buttons right next to it.
Again, come in here, find your option group, drag it like so. The label names, we don't need label names, but just put four in there anyway. We've got four buttons. One, two, three, four. That's all you need. We're going to get rid of them in a minute.
Next, default choice. Let's say we check on each one of these things once we're done with that step. So I'm going to say no, I don't want a default. Next.
All right. This looks good. Fine. Next. Store that in the new field we just created, which is the - you, you sit in here, there it's got to scroll down - Step Number.
Next. What do you want it to look like? I don't care. Let's do raised. Next. Caption, we're going to get rid of it anyway, doesn't matter. And then finish.
There is my box, option group. Now we can get rid of all these labels. Watch. Delete. Make sure you click on the label, not the option button. Just like that. Slide this into here. So grab that, move it down here like that. Maybe line these buttons up next to their little whatchamacallits there.
I'm on, get in there. Close enough. I know it's not perfect, but I'm not going to spend a ton. Maybe I will. Get over there.
So there is one for each step. Save it. Close it. Open it. We do number one. We click the button. We fill out the form. We do whatever we have to, and then when we're done, we check that as number one. We're finished with step one. Go to another patient.
A week later, we come back to this patient. We see we already got your Do Stuff. Let's do your insurance paperwork. Click that button. Go to the insurance paperwork. That's all finished. We finished step two. Go away. Come back. Close it. Whatever. Come back to this patient. Oh, I see we've already finished your insurance. But you just check whichever option you're on, and it gets a value from one to four, which then gets saved in that field in the customer table right there.
That is how you use an option button, option group, whatever you want to call it. These are option buttons inside of an option group.
If you like this kind of stuff and you want to learn more, in my Access Expert Level 4 class - yes, I know it's an expert level class, but the expert basically just means we're past learning about relationships and how multiple tables work together and all that - we start getting into more detailed stuff about forms. I don't usually cover option groups in my beginner classes because, like I said, I don't use them that often, so I kind of stuck them in later.
But we cover option groups, the tab control, toggle buttons, some enhanced formatting stuff. We do all kinds of cool stuff, a little more relationships. Here you go. Here's an option group, a list box, a series of toggle buttons. We make something called a customer extended form. This is information that you might not get for every customer, but you want the option. Show you how to put a picture in there, that kind of stuff.
So lots of stuff covered in this class. Access Expert Level 4.
For the members today, a little extended cut. We're going to automatically set the option group value when this button is clicked. So when you click the button for probes, it opens up the form and you can do that stuff, and automatically we'll set that to a three, so you don't have to remember to check that button. We'll do that with a little bit of VBA code in the extended cut.
Silver members and up get access to all of my extended cut videos, and Gold members can download these databases and get access to the code vault if you want programming-type cool stuff.
That is going to be your TechHelp video for today. I hope you learned something.
Live long and prosper, my friends. I'll see you next time.Quiz Q1. What is the primary advantage of using an option group in Microsoft Access for tracking the current step in a process?
A. It allows tracking multiple steps using only one database field
B. It automatically generates reports for each step
C. It lets users assign multiple values to the same record at once
D. It enables the list of steps to be easily modified by users at runtime
Q2. In which scenario is an option group NOT the best choice for tracking progress?
A. When steps must be completed in a specific order
B. When the list of steps rarely changes
C. When steps can be completed in any order and tracked individually
D. When a single field should represent the current status
Q3. How does an option group in Access typically store the user's selection?
A. As a text value describing the selected option
B. As a numerical value corresponding to the selected option
C. As a combination of text and number
D. It does not save the value unless specially programmed
Q4. What must you do in Access to allow the option group to store the selected value in the database?
A. Link the option group to a specific field in the table
B. Use a special macro to save the value
C. Save the selected value in a hidden text box
D. Rename the option group each time a change is made
Q5. Why is it more difficult to add a new option to an option group than to a combo box or list box?
A. Because the labels are not editable in an option group
B. Because option groups do not allow any changes after creation
C. Because adding an option requires manual design changes to the form
D. Because option groups are linked to macros only
Q6. If you need to add more steps to an existing option group, what should you make sure to do?
A. Drop new buttons outside the group so they act independently
B. Add new buttons inside the option group frame to ensure proper value storage
C. Only increase the form size and the group will automatically expand
D. Change the field type to text to store new values
Q7. Which is a major visual difference between option buttons and checkboxes in Access option groups?
A. Option buttons allow multiple choices, while checkboxes allow only one
B. Option buttons are typically circular, indicating a single choice among many
C. Option buttons must be used with subforms, while checkboxes stand alone
D. Option buttons display as drop-down lists, while checkboxes are always visible
Q8. Why might you choose checkboxes instead of an option group for a series of steps?
A. If the steps do not have to be completed in order and can be done independently
B. If you need to synchronize values with external tables
C. If your database does not support option groups
D. If you want to store the step as a text value
Q9. What is a drawback of using an option group when the list of options needs frequent updates?
A. It automatically deletes all previous values in the field
B. It requires modifying the form design every time an option is added or changed
C. The database will not allow any new entries
D. Users can unintentionally select multiple options at once
Q10. For Emily's scenario, with a set of six fixed steps that have not changed in years, why is an option group appropriate?
A. The steps are never updated, so manual changes are not necessary
B. It lets each patient have multiple steps selected simultaneously
C. It displays all patient data in a single dropdown menu
D. It automatically generates new steps when needed
Q11. What happens if you drop a new option button outside the existing option group frame in Design View?
A. It will not be connected to the group and its value will not be saved in the group field
B. It will become the default selection for the group
C. It will replace one of the existing buttons
D. It will create a duplicate field in the underlying table
Q12. When choosing a default value for an option group, what benefit might there be to leaving it set to zero?
A. Zero indicates a selection has not yet been made
B. Zero ensures the value is automatically set to the first option
C. Zero allows users to pick multiple options at once
D. Zero makes the field required in the table
Q13. Which statement about option groups and list boxes is correct, according to the lesson?
A. Option groups are easier to update with new options than list boxes
B. List boxes are often more flexible for frequently changing choices
C. Option groups save multiple values for the same record
D. List boxes cannot be linked to database fields
Q14. What extra step is necessary if you use the wizard to create an option group but do not want labels for each option?
A. Delete the option buttons
B. Delete the automatically created labels in Design View
C. Convert labels to text boxes
D. Change the form to Continuous Form view
Q15. Which feature is NOT typically covered in Access beginner classes as per the video?
A. How to set up customer forms and lists
B. Use of option groups in forms
C. Formatting and coloring forms
D. Basic table creation and design
Answers: 1-A; 2-C; 3-B; 4-A; 5-C; 6-B; 7-B; 8-A; 9-B; 10-A; 11-A; 12-A; 13-B; 14-B; 15-B
DISCLAIMER: Quiz questions are AI generated. If you find any that are wrong, don't make sense, or aren't related to the video topic at hand, then please post a comment and let me know. Thanks.Summary Today's TechHelp tutorial from Access Learning Zone is all about creating and using option groups in Microsoft Access.
Emily from South Haven, Mississippi, wrote in to ask how she can keep track of which procedure or step she is currently on with each of her patients. She currently uses a notes field, but that has proven to be inefficient, especially if she has not seen a patient in weeks and needs to remember where she left off. Emily wondered if there is a way to have a simple system to automatically track her current step for each patient.
Looking at Emily's database, she has a series of buttons on her patient form. She follows each button in order to bring up a different procedure or form, such as a new patient questionnaire or insurance information. The workflow is linear, so she needs to complete the steps in order.
If this were a situation where these tasks could be completed in any order, using a set of check boxes would be a logical choice. Each check box would represent a procedure, and you could simply check off steps as you complete them. However, this would require a separate field for each step in the database, which is not always practical.
Instead, an option group offers a great solution when you have a defined sequence of steps. With option groups, you can have one field in your table with different numbered values, each corresponding to a specific step or procedure. As you move to the next step, you simply change the selected option. For Emily's needs, this is perfect. She has a fixed set of steps that have not changed in many years, so there is no need to regularly add or remove steps, making an option group ideal.
Let me begin by emphasizing that this is a beginner-level lesson. You do not need any programming or advanced Access skills to follow along. However, I do recommend you watch my Access Beginner Level 1 class if you are new to Access, as it covers the foundations such as setting up tables, forms, and the general interface. My blank template video is also useful to learn how I structure my databases from scratch, including setting up customer forms and menus. Both videos are free and available on my website as well as my YouTube channel.
Now, let us create an example. Suppose you want to add an option group to your customer form to let you track the preferred shipping method for each customer: US Mail, UPS, and FedEx. The first step is to add a field in your customer table. Open your table in Design View and add a new field called Shipping Method. Make this a Number type. This field will store values such as 1, 2, or 3, each representing one of the available shipping options. You can leave the default value as zero, meaning no selection has been made yet, or set the default to the most common choice if you prefer.
Once the table has been updated, open the customer form in Design View. Use the Form Design tools to insert a new option group on the form. The wizard will prompt you for the labels, which in this case are US Mail, UPS, and FedEx. Enter these, and let the wizard guide you through setting up the default value (if any), associating the group with the table field you just created, and choosing how the group should look. I generally prefer option buttons rather than check boxes or toggle buttons for this use. Customize the appearance as you like to match the rest of your form by adjusting background colors and fonts.
After finishing the setup, you will have an option group on your form saved to one field in your table. When you select an option on the form, Access will store the corresponding value automatically in the table. If you ever want to add a new option, for example a new shipping carrier, you will need to go into Design View, resize the option group, and insert a new button. Be sure to add the button within the group so that it connects properly, and assign it the next value in the sequence. You can copy an existing button or use the toolbox to add one, but double-check that it gets the correct option value.
In practice, option groups are visually appealing, but in databases where you need the flexibility to change options often, a list box or combo box might be easier to maintain, since you can update their lists without going into form design.
Going back to Emily's scenario of tracking patient procedures, the steps have to be completed in sequence. Rather than creating separate fields for each possible step or using subforms (which would be more advanced), you can use an option group to represent the current step. Add a field in your customer table (for example, Step Number) to hold the current step value. Then, on your form, create an option group with a button for each step. You can adjust the layout and labeling so it matches the flow of steps, and place the buttons alongside whatever actions or forms need to be performed at each step.
With this setup, whenever you advance to the next step, just update the value using the option group. The form will always show you where you left off with each patient, even if a lot of time has passed since their last visit.
If you want to explore more advanced ways of using option groups, list boxes, toggle buttons, and custom form layouts, I cover all of this in my Access Expert Level 4 class. This class digs deeper into forms, enhanced formatting, and managing information you may not collect for every customer, including tips for adding pictures and more. In that class, you will see how to add a variety of controls beyond just the basics.
For those of you who are members, in today's Extended Cut we will look at how to automatically set the value of the option group using VBA code. For instance, when you click a button to open a form related to a specific procedure, we can automatically update the option group to reflect the new step without manual intervention. This is a nice touch to make your forms more user-friendly and efficient.
That wraps up today's TechHelp tutorial. You can find a complete video tutorial with step-by-step instructions on everything discussed here on my website at the link below.
Live long and prosper, my friends.Topic List Creating an option group in Microsoft Access
Using an option group to track sequential steps
Adding a field to a table for an option group value
Differentiating between option buttons and option groups
Using the Access option group wizard
Assigning values to option group choices
Saving option group values to table fields
Setting a default value for an option group
Formatting and customizing option groups on forms
Adding new options to an existing option group
Properly attaching new option buttons to an option group
Removing labels from option group controls
Positioning option buttons next to relevant steps
Tracking patient procedure steps with an option group
Saving the current step number in the table
Navigating and updating option group values on forms |


