Access Developer 51
Pop-Up Over Control and Drag-and-Drop Files
Welcome
Welcome to Microsoft Access Developer Level 51, brought to you by Access Learning Zone. I'm your instructor, Richard Rost.
This course focuses on building smarter, more professional user interfaces in Microsoft Access by creating pop-up forms that open directly over the active control and return a value right back where it belongs. You'll learn how to position modal forms properly, handle real-world form layouts, and build reusable code that works across your database with minimal setup.
We will also build the foundation for a drag-and-drop file management system, allowing users to drop documents directly onto a form so Access can copy, store, and track those files with linked records. Along the way you'll add useful developer toolbox functions like LeftMost and RightMost, learn safer techniques for tasks like deleting records in a loop, and pick up real-world workflow improvements you can apply immediately in your own databases.
Resources
Topics Covered
In Lesson 1, you will learn how to open a modal pop up form directly over the active control in Microsoft Access and position it correctly every time. I'll walk you through setting up a system where you can click on any field and have a custom pop up form appear above it, laying the groundwork for returning values to that control. We'll cover how to determine screen coordinates, use VBA to automate the process, and make the solution reusable for multiple controls with minimal code changes.

In Lesson 2, we continue working with Microsoft Access to enhance our pop-up over control feature. I will show you how to store calling form and control information using TempVars, set up your modal form to return a value back to the original control, and convert the functionality into a reusable public function for use across multiple forms and fields in your database. We'll also cover best practices for naming controls and discuss how to make this process more efficient throughout your Access applications.

In Lesson 3, I will show you how to handle subforms when working with pop-up controls in Access forms. We'll walk through improvements to the code, how to find a control's position on both main forms and subforms, and deal with issues like continuous forms and multiple subforms. You'll learn some key techniques for calculating control coordinates and see how the logic changes depending on where the control is located. This lesson builds on previous videos, focusing on the challenges unique to subforms.

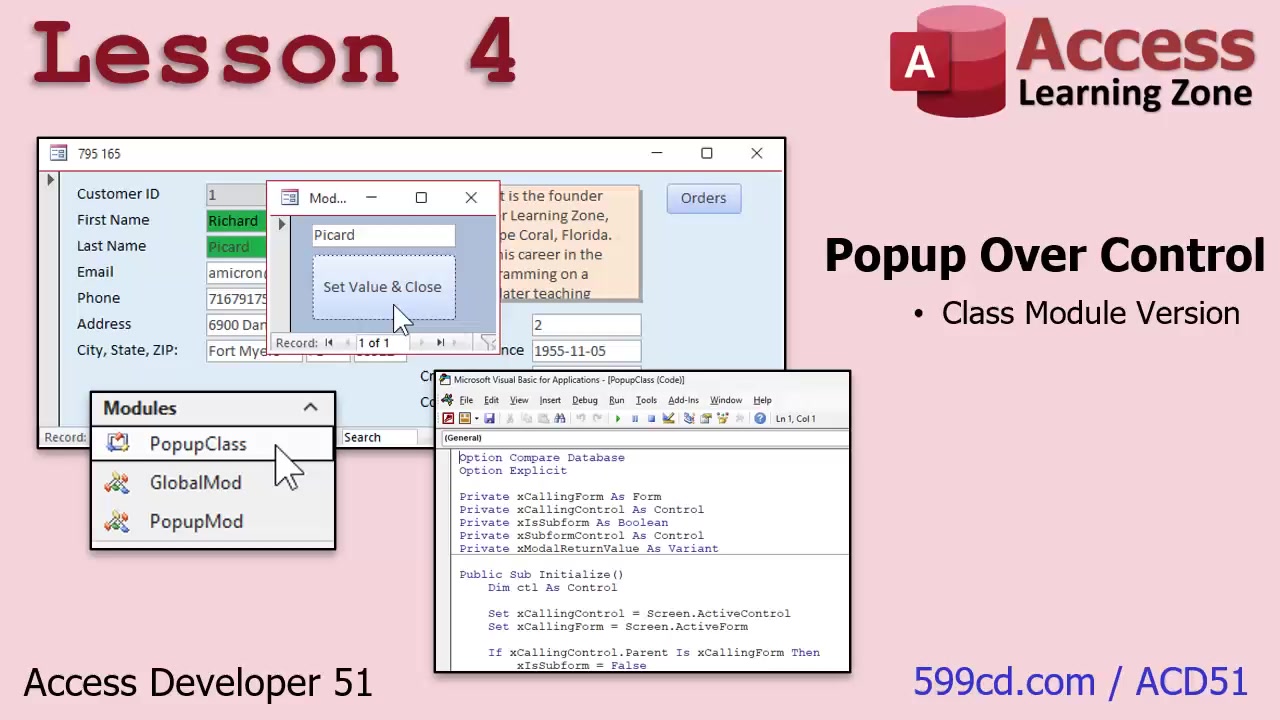
In Lesson 4, we will review a real-world example of using class modules in Microsoft Access to simplify working with forms, controls, and pop-up logic. You'll see how to set up properties, encapsulation, and methods in a class module, determine if a control is in a subform, calculate pop-up form coordinates, and use a helper module to streamline your code. This lesson brings together concepts from Developer 50 and shows how everything integrates, providing a practical demonstration of building and using class modules for forms in Access.
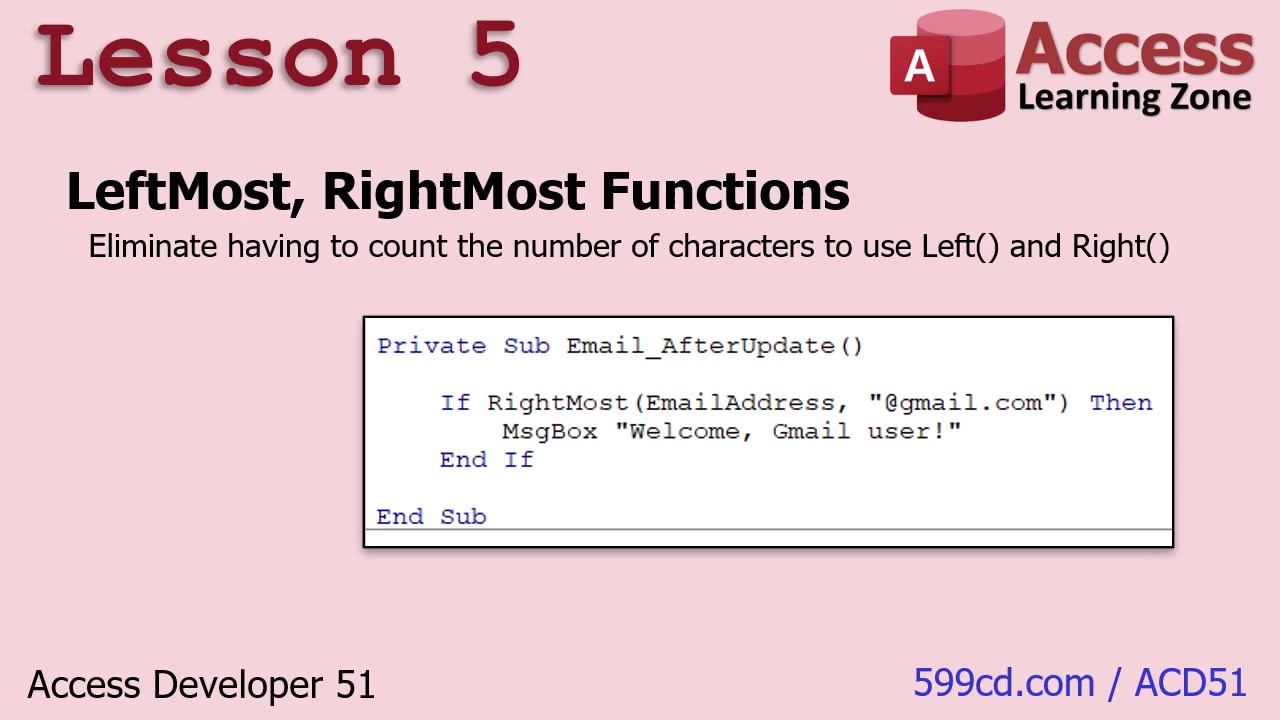
In Lesson 5, you'll learn how to create two helper functions, LeftMost and RightMost, in Microsoft Access to simplify working with strings without needing to manually count characters as with the standard Left and Right functions. I'll show you how to build these functions step by step, handle common issues like nulls and empty strings, and discuss practical use cases such as checking email domains, file extensions, and name prefixes in your applications.
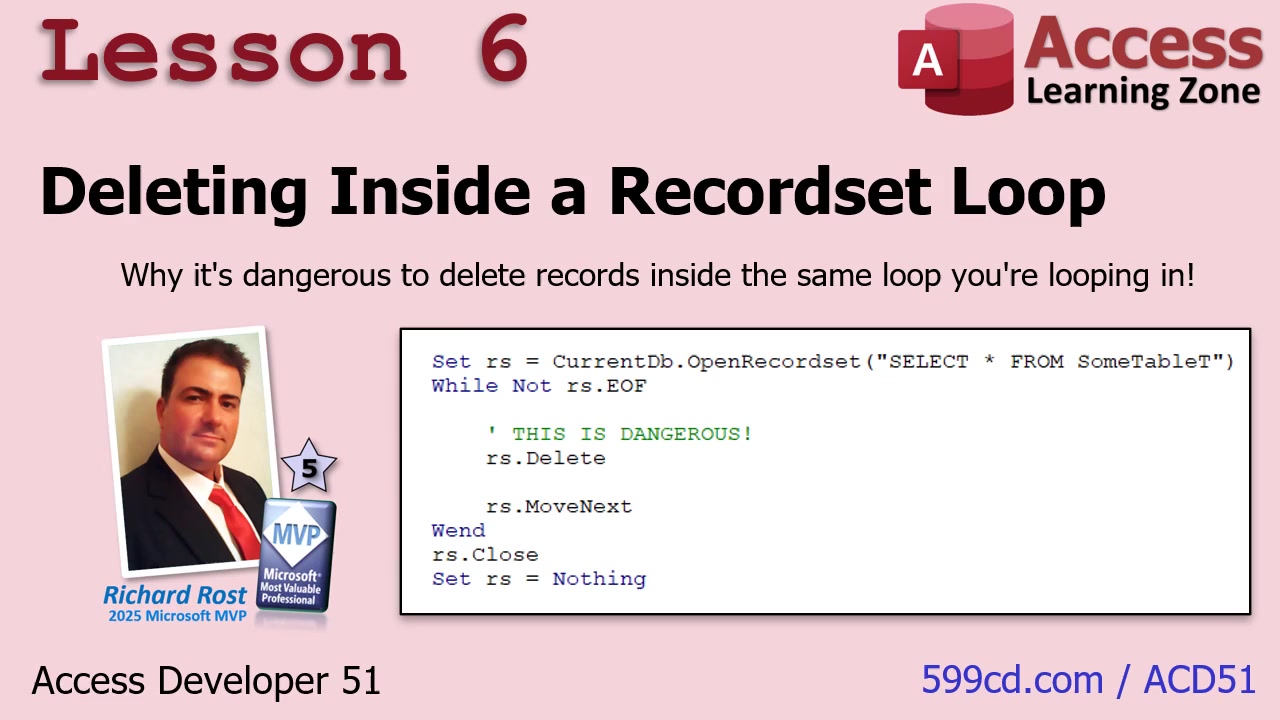
In Lesson 6, you will learn the safe and recommended way to delete records from a table inside a record set loop in Microsoft Access, and why deleting directly within the loop can cause problems such as skipped records and cursor issues, especially when working with SQL Server or ODBC connections. I will show you how to process each record through a separate SQL delete statement after checking it with custom business logic, how to archive records efficiently, how to pass the record set to a function for cleaner code, and discuss important best practices like transactions, logging, error handling, and multi-user considerations.
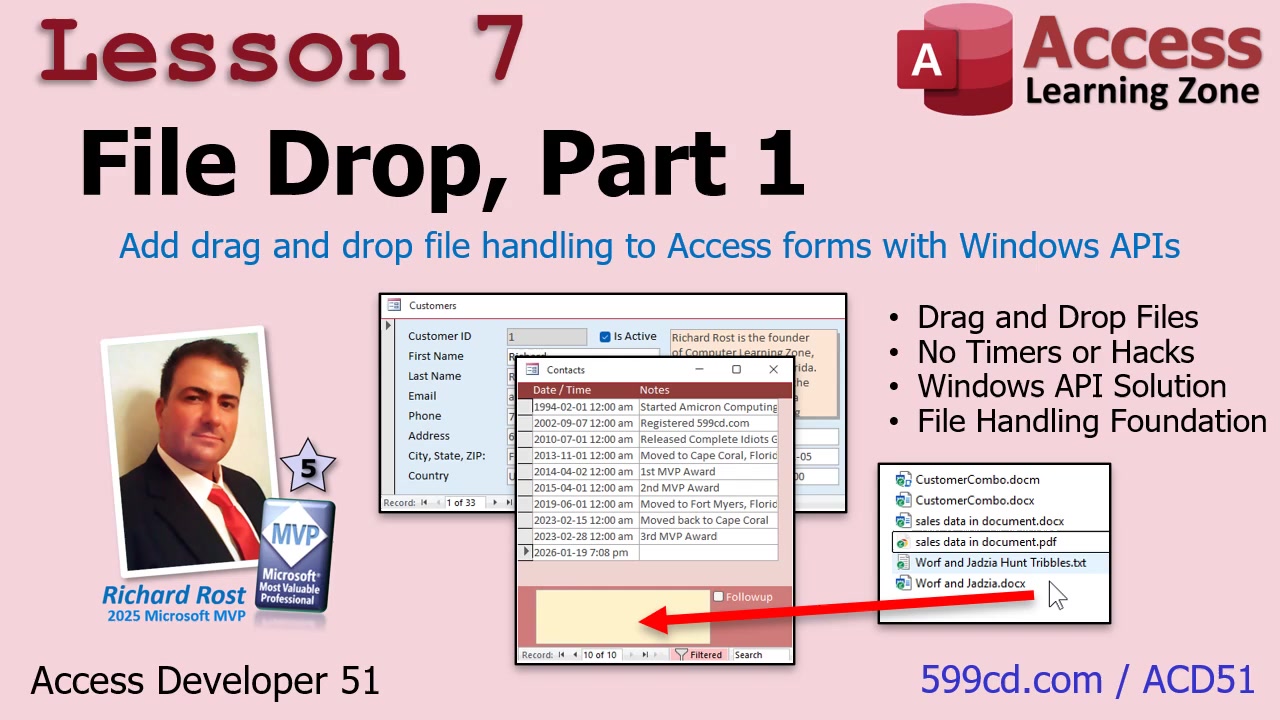
In Lesson 7, we will start building a drag and drop file system in Microsoft Access. I will show you how to let users drop files directly onto a form, set up a listener using Windows APIs to detect dropped files, and capture the file paths for use in your VBA code. You will learn how to wire the listener to a specific form and confirm file drops are being received, laying the groundwork for creating a more complete file management system in future lessons.
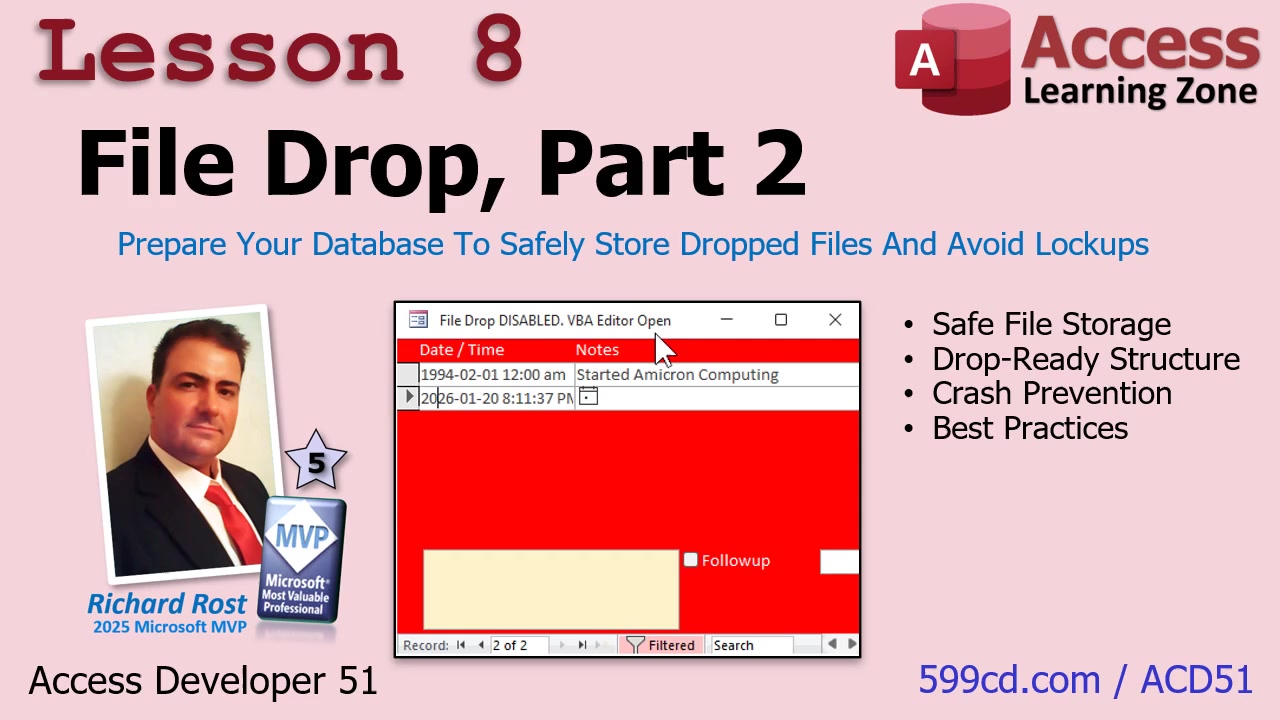
In Lesson 8, we will prepare the file drop system in Microsoft Access for real-world use by organizing the folder structure, setting up subfolders for storing dropped files, and adding safety checks to prevent Access from locking up. You'll learn how to ensure the file drop feature only works when it is safe, such as verifying a customer ID is present and making sure the VBA editor is not open. These steps will help get your database ready to reliably handle file drops before we move on to saving and managing files in upcoming lessons.
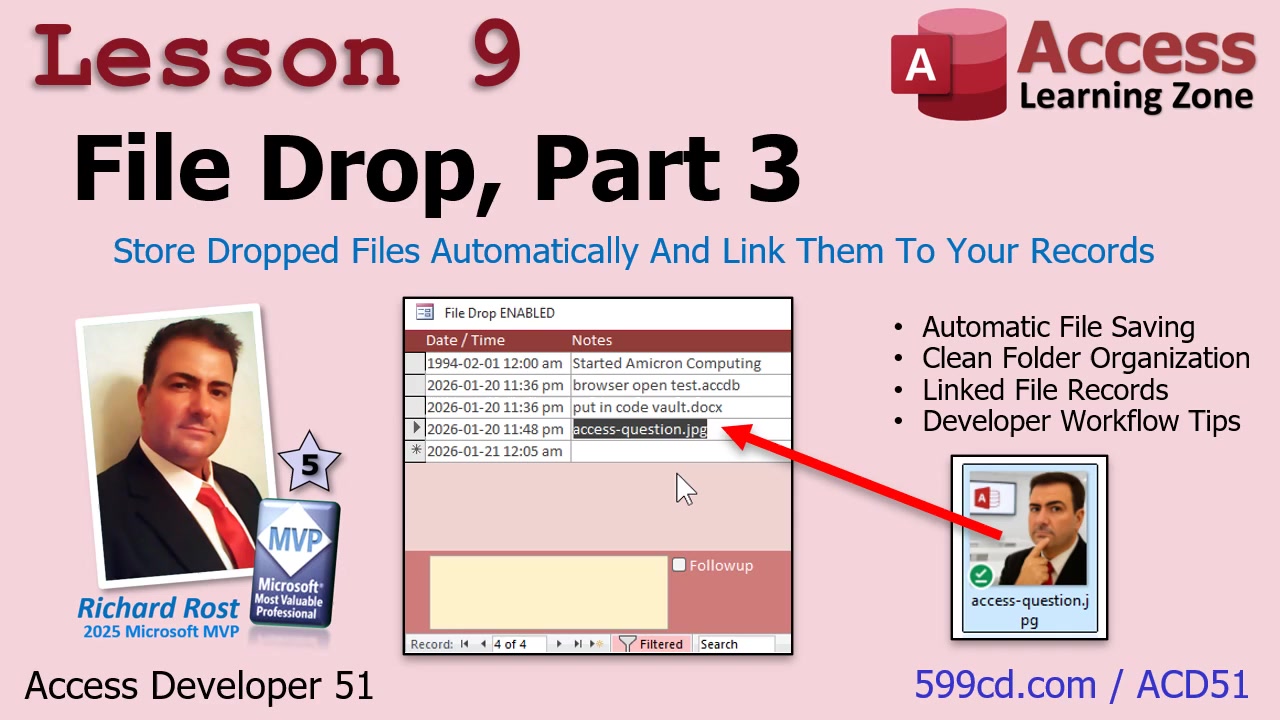
In Lesson 9, we will take the Microsoft Access file drop system we have been building and make it fully functional by copying dropped files into a structured folder system, generating unique file names, ensuring the necessary folders exist, and saving these files as linked records in the database. I will show you how to improve the user experience by refreshing the form and setting the focus to the newly added file, making the file drop feature practical and seamless to use inside Access.
Enroll Today
Enroll now so that you watch these lessons, learn with us, post questions, and more!

Questions?
Please feel free to post your questions or comments below. If you are not sure as to whether or not this product will meet your needs, I'd rather help you before you buy it. Remember, all sales are final. Thank you.
Keywords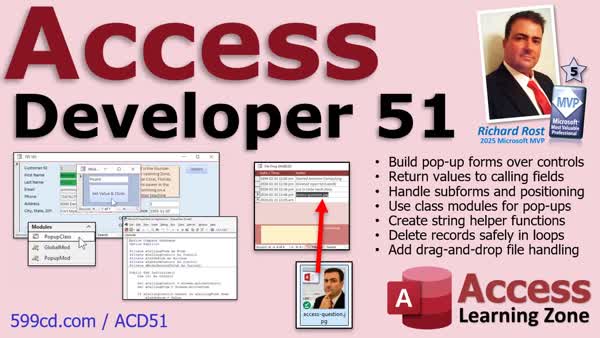
microsoft access, access 2016, access 2019, access 2021, access 365, ms access, #msaccess, #microsoftaccess, #help, #howto, #tutorial, #instruction, #learn, #lesson, #training, #database, reusable pop up form system, modal form over active control, return values to calling field, subforms, continuous forms, control coordinates, class modules, string helper functions, recordset loop delete records, drag and drop file management, Windows API file drop, unique file naming, database file linking
Transcript What if your users could drag and drop files directly onto a Microsoft Access form and your database automatically handles everything?
In Microsoft Access Developer Level 51, we start building a real drag and drop file management system where users can drop files onto a form and Access handles the boring stuff for you. It files the document away in the right place, gives it a clean, unique name, and automatically links it to the correct record. You can do this with Word documents, PDFs, images, Excel sheets, you name it.
And no, we do not store documents inside the database. We know better.
But that is not all. You will also build a slick, reusable pop-up form system that opens a modal form directly over the control you click on, returns values to the calling field, and even handles subforms and continuous forms without breaking your brain.
Then we take it up a notch by wrapping the whole pop-up system into a clean class module so it is easier to maintain and expand and even drop into a different database.
Plus, if you have ever had RS Delete Skip Records inside a loop, I will show you the safe, professional way to archive and delete records without cursor chaos.
That is all covered in Access Developer Level 51. You can find more information on my website at the link shown. I will also put a link in the description down below.
Live long and prosper, my friends.Intro In Lesson 51, we will build a reusable pop-up form system in Microsoft Access that opens a modal form directly over the active control, returns values back to the calling field, and works smoothly across different forms with minimal code changes. You will learn how to handle subforms, calculate control coordinates, and use class modules to simplify and organize your form logic. We will create handy string helper functions, cover best practices for safely deleting or archiving records inside a recordset loop, and begin developing a drag-and-drop file management system that lets users drop files directly onto a form and links them in your database.Quiz Q1. What is the main goal of the reusable pop-up form system covered in this class?
A. To display pop-up forms sorted in alphabetical order
B. To open a modal form directly over the active control and return values to it
C. To replace all subforms with pop-up windows
D. To enable Access to send emails automatically
Q2. How does the pop-up system handle different types of forms in Access?
A. It requires separate code for each form
B. It works only on the main forms, not subforms
C. It calculates control coordinates and adapts for subforms, continuous forms, and main forms
D. It only works with datasheet views
Q3. What programming concept is used to encapsulate the pop-up logic for easier maintenance and reuse?
A. Recordsets
B. Macros
C. Class modules
D. Queries
Q4. When deleting or archiving records inside a recordset loop, which practice is recommended?
A. Delete records directly inside the loop
B. Archive records only after closing the recordset
C. Process each record through a separate SQL statement to avoid skipped records or cursor issues
D. Only use Make-Table queries
Q5. What feature is introduced in this class for file management within Microsoft Access?
A. File compression utility
B. Drag-and-drop file system allowing users to drop files directly onto a form
C. Automatic emailing of files stored in Access
D. In-database file storage for all attachments
Q6. What kind of additional helper functions are built during this class?
A. Functions for parsing XML data
B. String helper functions, like leftmost and rightmost, to simplify string manipulation
C. Functions for encrypting databases
D. Functions for converting file formats
Q7. What is the main benefit of using temp vars in the pop-up over control feature?
A. They allow static storage of data unrelated to forms
B. They help store the calling form and control info for return value assignment
C. They prevent forms from being resized by users
D. They change the appearance of all pop-ups
Q8. Why does the file drop system store file links instead of the files themselves in the database?
A. Storing files directly in the database is not supported by Access
B. It frees up database space and prevents performance issues
C. It is illegal to store files in Access databases
D. Access automatically converts dropped files to links
Q9. What technique is demonstrated to position a pop-up form directly over the active control?
A. Using static form coordinates for all controls
B. Calculating screen coordinates dynamically with VBA
C. Placing the pop-up form in the center of the screen regardless of the clicked control
D. Setting coordinates manually for each control
Q10. When managing files dropped onto a form, what safety check is implemented before accepting the file?
A. Verifying the computer's operating system version
B. Checking if VBA editor is not open and confirming necessary context, like a customer ID, is present
C. Confirming the file is less than 1MB
D. Ensuring the database is not opened in shared mode
Q11. Which best practice is discussed for deleting records, especially with SQL Server or ODBC databases?
A. Deleting records while looping through the recordset cursor
B. Deleting all records at once using a single delete query
C. Processing each qualifying record using a separate SQL statement outside the loop
D. Making backup copies of tables before running delete queries
Q12. Why is it important to make your code reusable and modular as shown in the lessons?
A. It increases code complexity for security reasons
B. It makes maintenance and expansion of the system easier
C. It allows Access to generate code comments automatically
D. It reduces the number of clickable controls in the database
Answers: 1-B; 2-C; 3-C; 4-C; 5-B; 6-B; 7-B; 8-B; 9-B; 10-B; 11-C; 12-B
DISCLAIMER: Quiz questions are AI generated. If you find any that are wrong, don't make sense, or aren't related to the video topic at hand, then please post a comment and let me know. Thanks.Summary Today's video from Access Learning Zone covers everything included in Microsoft Access Developer Level 51. In this class, I will show you how to build a flexible and reusable pop-up form system for Access. This system is designed to open modal forms directly over the active control, return values to the calling field, and function cleanly across different forms with only minor adjustments to your code.
We will address some of the more complex aspects, such as handling subforms and continuous forms, and accurately calculating control coordinates regardless of where a user clicks. You will also see a complete, practical demonstration of how to use class modules to organize your pop-up logic, helping you keep your code professional, simple, and easy to expand.
We will also create a couple of convenient helper functions for working with strings, and I will demonstrate the safe way to delete or archive records as you loop through a recordset, avoiding problems like skipped records or cursor errors.
Toward the end of the course, we will begin building a drag-and-drop file management system within Access, enabling users to drop files directly onto a form. I will walk you through wiring the folder structure, adding safety checks, managing unique file names, and linking dropped files to your database, ensuring that your implementation will be robust and practical in a real-world Access setup.
This class picks up where Access Developer Level 50 left off. You should definitely complete that course first, especially since the first four lessons in this level depend on your understanding of class modules. In fact, I recommend finishing all previous lessons through the beginner, expert, advanced, and developer tracks before starting with Developer Level 51. My lessons are meant to be taken in order, and skipping ahead could leave gaps in your understanding. I encourage you to see my website for a complete list of course prerequisites and the reasons why following the course sequence is best.
I recorded this class using the Microsoft 365 subscription version of Access, and I strongly recommend using this version. It is currently January 2026, so if you are using the retail edition, this is similar to Access 2024. Although everything shown here will work with earlier versions going back to 2007, if you are still using Access 2007, it is definitely time to consider an upgrade.
If you have questions about anything in this class, just scroll to the bottom of the class page on my website and post them there. I encourage you to check other posted questions first, since yours may have already been answered. Be sure to subscribe so you will be notified when anyone replies to comments or posts new questions for this class. For general Access topics not related to this lesson, please make use of the general Access forum on my site so that the wider community can join in.
Here's what we will cover in detail:
In the first lesson, you will discover how to open a modal pop-up form right on top of the active control in your Access forms, ensuring it is always positioned correctly. I will show you how to set up a system where clicking any field can trigger a customized pop-up that appears directly above, which is essential groundwork for returning values to the originating control. We will explore methods for determining screen coordinates, automating the process in VBA, and making the solution reusable across multiple controls with just a few changes.
The second lesson expands the pop-up over control feature by demonstrating how to store the calling form and control information in temporary variables. You will learn how to return a value to the original control from your pop-up and turn this into a flexible system of public functions that work across different forms and fields within your database. I will cover best practices for naming controls and making the process more consistent across your application.
Lesson three focuses on handling subforms within your pop-up logic. I will show you improvements to the code that let you find a control's position whether it is on a main form or a subform. We will address challenges such as continuous forms and structures where multiple subforms are in use. You will learn critical skills for calculating control coordinates and see how your approach needs to adjust depending on the control's location. This lesson builds on previous material and focuses specifically on the unique hurdles presented by subforms.
In lesson four, I will provide a real-world example showcasing how you can use class modules to simplify your work with forms, controls, and pop-up logic. You will see how to define properties, encapsulate functionality, and use methods in a class module to check if a control is inside a subform, calculate pop-up positions, and clean up your form code using a helper module. This lesson draws on what you learned in Access Developer 50 and demonstrates how different components fit together into a practical, maintainable system.
Lesson five is dedicated to building two string helper functions, leftmost and rightmost, which make it easier to work with text without manually counting characters as you do with Access's standard left and right functions. I will take you through building these functions step by step, dealing with issues such as handling null values and empty strings. We will look at realistic examples you might face, like working with email addresses, file extensions, or name prefixes.
In lesson six, I'll share the recommended method for deleting records from a table inside a recordset loop. You will see why removing records directly within the loop is risky and may lead to skipped records or cursor mistakes, especially when you use SQL Server or ODBC data sources. Instead, I'll show you how to process deletions safely using individual SQL statements, how to archive records, and how to pass the recordset to a function for better organization. We will discuss vital topics such as transactions, logging, error handling, and strategies for multi-user environments.
Lesson seven marks the beginning of our drag-and-drop file system in Access. I will show you how to let users drop files directly onto a form, set up a listener using Windows APIs to detect the files, and capture the full file path for use in your VBA code. You will learn how to link the listener to a specific form and verify that your system recognizes file drops. This lesson sets the stage for more advanced file management features in the next sessions.
In lesson eight, we continue enhancing the file drop capability by organizing your file storage structure. This includes creating the right subfolders for dropped files and adding safety checks to make sure Access does not freeze up. You will see how to restrict the file drop feature so it only works when appropriate, such as when a customer ID is present and the VBA editor is closed. These precautions ensure your database can handle file drops reliably before moving ahead to automated saving and record management.
The ninth lesson wraps up the file drop process by making everything fully functional. We will copy dropped files into a structured folder system, create unique filenames to avoid overwriting, verify that all necessary folders exist, and save links to the files in the database rather than embedding the files themselves. I'll teach you how to refresh the form automatically and set the focus on the newly added item, delivering a seamless experience for your users right inside Access.
That is the full curriculum for Access Developer Level 51. When you are ready, start with lesson one and follow along. You can find a complete video tutorial with step-by-step instructions on everything discussed here on my website at the link below.
Live long and prosper, my friends.Topic List Opening a modal pop-up form over the active control
Positioning pop-up forms using screen coordinates
Automating pop-up positioning with VBA
Making pop-up forms reusable across controls
Storing calling form and control info with TempVars
Returning values from pop-up forms to calling fields
Creating reusable public functions for pop-ups
Naming controls efficiently for pop-up systems
Handling subforms with pop-up control features
Calculating control coordinates on subforms and main forms
Managing pop-ups on continuous and multiple subforms
Using class modules for pop-up form logic
Setting up properties and methods in class modules
Detecting subform controls in VBA
Creating a helper module to streamline pop-up logic
Building leftmost and rightmost string helper functions
Handling nulls and empty strings in string functions
Checking file extensions and name prefixes in strings
Deleting records safely inside a recordset loop
Archiving records efficiently using VBA
Passing recordsets to functions for cleaner code
Using transactions, logging, and error handling in deletes
Building a drag-and-drop file system in Access forms
Using Windows APIs to detect file drops
Linking the file drop listener to a specific form
Organizing folder structure for dropped files
Setting up safety checks before enabling file drop
Creating subfolders for storing files
Verifying customer IDs before saving files
Copying dropped files into a structured folder system
Generating unique file names for dropped files
Saving file links as records in the database
Refreshing forms and setting focus after file dropPrimary Topics drag and drop file management, Access forms, linking files to records, pop-up modal forms, class modules, safe record deletion, file naming
Secondary Topics subforms, continuous forms, code reusability
|


