|
Excel 2010-Now Excel 2007 Excel 2003 |
Tips & Tricks Excel Forum Course Index CIG Excel Book |
|
|
|||||
|
|||||
|
Excel Beginner 2 Cut, Copy, Paste, AutoFill, Formatting, Sort Welcome to Excel Beginner 2. In this course you will learn how to use the cut, copy, and paste commands with the clipboard, effectively work with AutoFill, and apply different cell formatting options like numbers, currency, and dates. We'll discuss managing rows, columns, and worksheets, organizing and sorting data, and using conditional formatting to highlight information. You will also see how to use the Find and Replace feature, along with tips for navigating the course, choosing the right Excel version, and taking part in interactive forums to enhance your learning. Lessons
ResourcesLesson SummaryWelcome! Cut, Copy, Paste, Fill, Sort, Find, Replace - Welcome to Excel Beginner Level 2. In this course we will cover using cut, copy, and paste commands and the clipboard, working with AutoFill, cell formatting, managing rows and columns, working with sheets, sorting data, conditional formatting, and using Find and Replace. This course builds on topics from Level 1 and is aimed at novice users ready to expand their skills. We will discuss which Excel versions are best for following along, detail the content for each lesson, and offer tips for getting the most out of your learning experience, including using the interactive student forums.
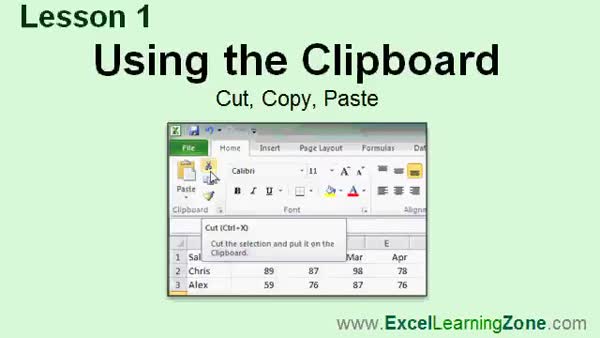
Lesson 1: Cut, Copy & Paste Shortcuts - In Lesson 1, we will walk through how to use the Cut, Copy, and Paste commands in a spreadsheet by recreating a simple sales rep spreadsheet. I will show you how the clipboard works, how to copy and paste both data and formulas, and how to use Cut and Paste to move information. We will also discuss the keyboard shortcuts Ctrl C, Ctrl X, and Ctrl V for these commands, and see how Excel updates formulas when copying across columns.
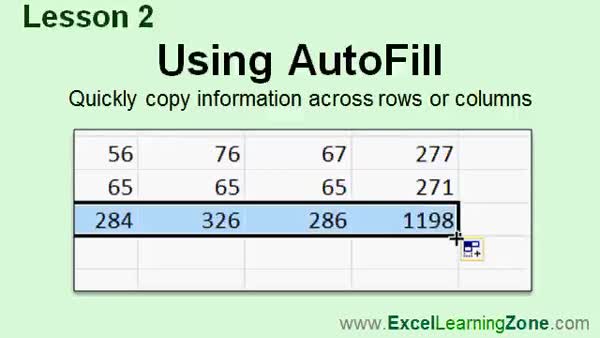
Lesson 2: AutoFill: Copy Formulas Fast - In Lesson 2, we will walk through how to use the AutoFill feature to quickly copy formulas and information across multiple columns or rows in Excel. I will show you step-by-step how to use the AutoFill handle, explain the common mistakes people make, and demonstrate how AutoFill can automatically fill in series such as months, days, and dates. We will also discuss that there are advanced AutoFill tricks, which will be covered in expert level classes.
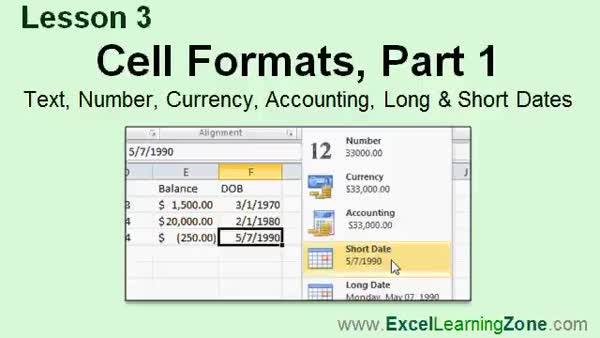
Lesson 3: Format Text, Numbers & Dates - In Lesson 3, we begin learning about cell formats in Excel, including text, number, currency, accounting, and date formats. I will show you how data is displayed in cells based on format, how to change a column to store information as text (such as zip codes with leading zeros), and how to properly format numbers, currency, and dates. We will also discuss the difference between currency and accounting formats, how to handle date formats like short and long dates, and how Excel tries to automatically detect data types but sometimes requires manual adjustment.
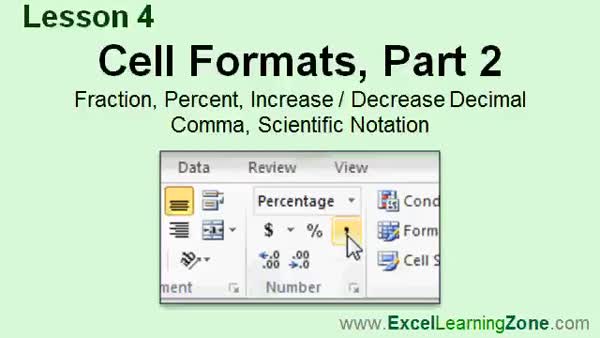
Lesson 4: Fractions, Percents & More Tips - In Lesson 4, we continue working with cell formats by exploring how to properly display fractions, percentages, decimal adjustments, the comma style for thousands separators, and scientific notation in Microsoft Excel. I will show you how to set up columns to display fractions correctly, convert between formats, and use features like increase and decrease decimal points. We'll also discuss the use of the Format Cells dialog box for additional number formatting options, although most needs can be met using the standard menu options.
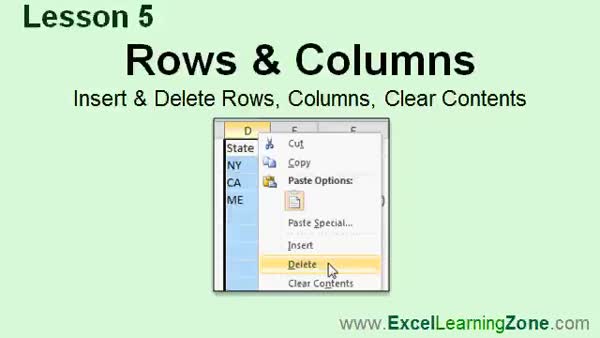
Lesson 5: Insert, Delete vs. Clear Excel Rows - In Lesson 5 we will learn about rows and columns in Microsoft Excel, focusing on how to insert and delete rows and columns as well as how these actions differ from simply clearing their contents. We will walk through selecting and removing data, deleting entire rows or columns, using shortcuts and right-click menus, and discuss the effects of each method on your spreadsheet. I will also show you how to insert new rows or columns and demonstrate how to work with multiple selections at once, along with some tips to avoid common mistakes while managing your spreadsheet structure.
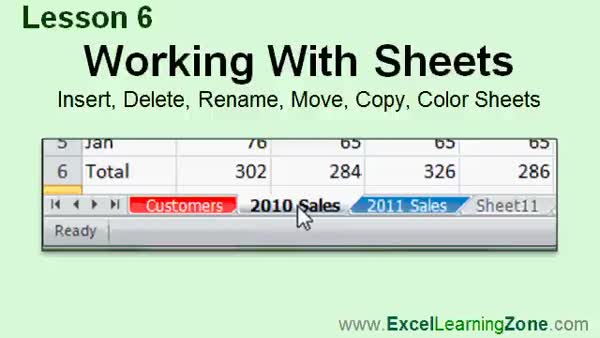
Lesson 6: Insert, Delete & Edit Sheets - In Lesson 6, we will walk through how to manage your worksheets in Excel. You will learn how to insert, delete, rename, move, copy, and change the color of your sheets. We will discuss multiple ways to perform these tasks, including shortcuts and menu options, as well as how to better organize large workbooks using sheet tabs and tab colors. Throughout the lesson, we will focus on making your worksheets easier to use and navigate.
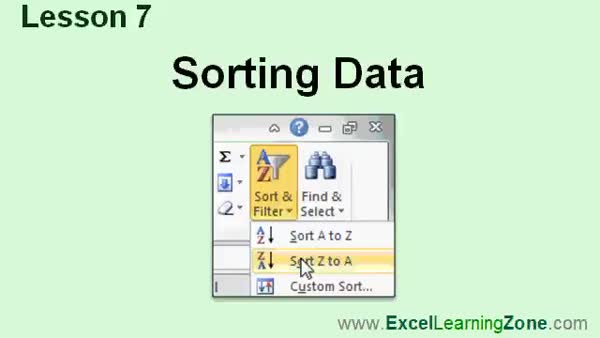
Lesson 7: Sort Data & Avoid Mistakes - In Lesson 7, we will walk through how to properly sort data in your spreadsheet using Excel's Sort and Filter options. I will show you how to perform simple ascending and descending sorts, explain what happens when totals are included, and demonstrate how to carefully select the correct range of cells to avoid sorting errors. We will also cover sorting by different columns, such as totals or specific customer fields, and discuss some sorting issues to watch out for. More advanced options like custom sorts and multi-field sorting will be discussed in intermediate classes.
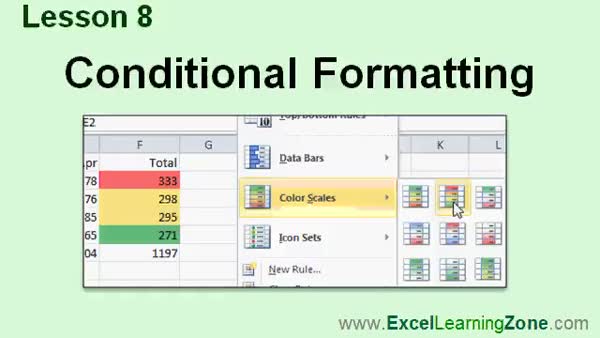
Lesson 8: Visualize Trends with Conditional Formatting - In Lesson 8, we will walk through how to use conditional formatting in Microsoft Excel to change the appearance of cells based on their data, such as highlighting cells with values above or below certain thresholds. We will explore highlight cells rules, including greater than and less than, as well as quickly how to apply multiple rules to the same range. We will also discuss data bars, color scales, and icon sets, and I will show you how to clear conditional formatting from your sheet. Some advanced features will be mentioned but are reserved for future, more detailed lessons.
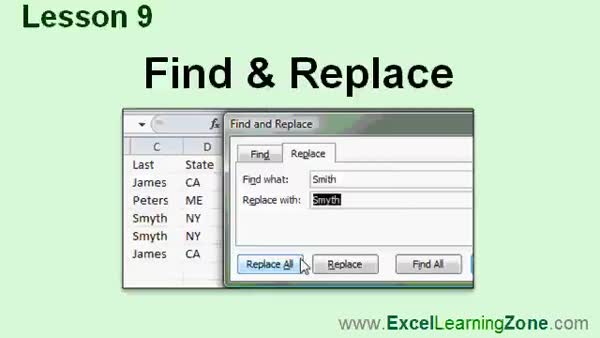
Lesson 9: Find, Replace, Sort & Edit Sales - In Lesson 9, we will walk through how to use the Find and Replace features in Microsoft Excel to locate and modify data in your spreadsheets. I will show you how to find specific entries, such as all sales records for a particular customer, and how to use Replace and Replace All to correct information quickly, such as fixing a misspelled last name throughout your sheet. We will also discuss additional options available in Find and Replace, and why it is important to be careful when replacing common terms.
Lesson 10: Cut, Copy, Paste, Sort & Tabs - In this course we learned how to use the clipboard with cut, copy, and paste, work with the AutoFill handle, and apply different cell formats such as currency and date. We covered adjusting decimal places, inserting and deleting rows and columns, managing sheet tabs, and sorting data. We discussed conditional formatting, find and replace, using functions like SUM and AVERAGE, and applying styles and themes to change the spreadsheet's appearance. We also talked about page layout options and introduced adding illustrations such as pictures and SmartArt. For further help and resources, we covered how to get support and where to provide feedback.
NavigationKeywordscut copy paste Excel, AutoFill, Excel cell formatting, sorting data, conditional formatting, find and replace, insert delete rows columns, format cells, worksheet tabs, sheet color, keyboard shortcuts Excel, data bars, color scales, icon sets
IntroIn lesson 2 of my Microsoft Excel 2010 Beginner series, we will learn how to use the clipboard with cut, copy, and paste, work with AutoFill to quickly copy data, apply various cell formats, manage rows and columns, work with worksheets, sort data, use conditional formatting, and find and replace data in your spreadsheets.TranscriptWelcome to Excel 2010 Beginner Level 2, brought to you by ExcelLearningZone.com. I am your instructor, Richard Rost.Today's class will cover using cut, copy, and paste and the clipboard; working with AutoFill; cell formatting; using rows and columns; working with sheets; sorting data; conditional formatting; and using the Find and Replace feature. Before taking this course, I strongly recommend that you take my Excel 2010 Beginner Level 1 course. That course covers using the Excel interface, entering and editing data, basic cell formatting, basic math, and how to save, load, and print your documents. If you are using Excel 2007, you should have little difficulty following along, as most of the topics covered in this course are the same. If you are using Excel 2003 or earlier, you really should either upgrade to Excel 2010 or purchase a tutorial for your version of Excel, which you can find on my website. All of these concepts are essential for understanding the topics in today's class. If any of these things sound unfamiliar to you, visit my website at ExcelLearningZone.com and look for Excel 2010 Beginner Level 1. This class is designed to be used with Microsoft Excel 2010, a part of Microsoft Office 2010. If you are using an older version of Excel, you should visit my website at ExcelLearningZone.com and look for my older tutorials covering Excel 2000 through 2007. My courses are broken up into four groups: beginner, expert, advanced, and developer. My beginner courses are for novice users who have little or no experience with Microsoft Excel. They are designed to give you an overview of the basic features of Excel and cover just what you need to know to be productive. This is the Beginner Level 2 course for Microsoft Excel 2010. This class is designed for the novice user who has little or no experience with Excel, aside from my Beginner Level 1 course. Our goal for today is to expand on some of the concepts from Level 1 and to teach you some new Excel features. When you finish the basics, it is time to move up to the expert series, which is designed for users who are already comfortable with Excel. Expert classes are designed to teach you more about all the standard features of Excel that people use from day to day, and will go into more depth about each topic than the beginner classes. You will learn all about the options, alternatives, shortcuts, tips and tricks, and extra features that we might have skipped over in the beginner lessons. When you have mastered the expert classes, the advanced lessons are for Excel power users. You will learn how to record macros, build user forms, create your own templates, and many more advanced features that not everyone will use, but they really add enhanced functionality and professionalism to your spreadsheets. Finally, my developer-level courses are designed to teach you how to program in Visual Basic for Applications with Microsoft Excel. This will allow you to create Excel-based programs for your users, automate your spreadsheets, and integrate Excel tightly with other Microsoft Office applications. Each of my series are broken down into different levels. For example, the beginner series started with Level 1, which you should have taken previously, and is followed by Level 2, which is this class, through Level 5. Each level teaches you new and different topics in Excel, building on the lessons learned in the previous levels. When you have finished all the beginner classes, move up to the expert series, then advanced, and finally developer. Now, let's take a more detailed look at what's covered in today's class. In Lesson 1, we are going to learn how to use the clipboard, including the cut, copy, and paste commands. In Lesson 2, we are going to learn how to use AutoFill to quickly copy information across multiple rows or columns. In Lesson 3, we are going to begin learning about cell formats, including text, number, currency, accounting, long, and short dates. In Lesson 4, we are continuing our work with cell formats. You will learn about fractions, percentages, increase and decrease decimal points, comma, and scientific notation. In Lesson 5, we will learn about rows and columns, specifically how to insert and delete rows and columns, and how that's different from just clearing their contents. Lesson 6 is all about working with your worksheets. You will learn how to insert, delete, rename, move, copy, and change the color of your worksheets. In Lesson 7, we will learn how to properly sort data in our spreadsheets. In Lesson 8, we are going to learn about conditional formatting, which is changing the format of your cell based on the data in the cell, for example, making higher numbers look red and lower numbers green. In Lesson 9, we are going to learn how to find and replace data in our spreadsheets. If you need help with the topics covered in today's lessons, please feel free to post your questions in the Excel Interactive Student forums. If you are watching this course using my custom video player software or online in my web theater, you should see the student forum for each lesson appear in a small window next to the class videos if you have an active internet connection. Here, you will see all of the questions that other students have asked, as well as my responses to them, and any other comments that other students have made. I encourage you to read through these questions and answers as you start each lesson and feel free to post your own questions and comments as well. If you are not watching your lessons online, you can still visit the student forums later by visiting ExcelLearningZone.com/forums. To get the most out of this course, I recommend you sit back, relax, and watch each lesson completely through once without trying to do anything on your computer. Then replay the lesson from the beginning and follow along with my examples. Actually create the same spreadsheet that I make in the video. Build a spreadsheet with me step by step. Do not try to apply what you are learning right now to other projects until you have mastered the sample spreadsheet. If you get stuck or do not understand something, watch the video again from the beginning or tell me what's wrong in the student forums. Most importantly, keep an open mind. Excel might seem intimidating at first, but once you get the hang of it, you will see that it is really easy to use. QuizQ1. What is one of the primary topics covered in Excel 2010 Beginner Level 2?A. Using the clipboard with cut, copy, and paste commands B. Creating pivot tables C. Writing VBA code for automation D. Importing data from Access Q2. Why should you complete the Beginner Level 1 course before taking Beginner Level 2? A. It covers more advanced features than Level 2 B. It covers the fundamentals that Level 2 builds on C. It contains templates not available in Level 2 D. It is required for certification Q3. Which feature is NOT specifically mentioned as being covered in this Level 2 course? A. Sorting data B. Cell formatting C. Inserting formulas with nested IFs D. Conditional formatting Q4. Which Excel versions are compatible with the content of this course, according to the transcript? A. Only Excel 2010 B. Excel 2007 and 2010 C. Excel 2013 only D. All versions since 2003 Q5. What is AutoFill used for in Excel, as explained in this video? A. To check for spelling errors B. To quickly copy information across rows or columns C. To increase font size automatically D. To generate random numbers Q6. What is the difference between deleting rows/columns and clearing their contents, as will be covered in Lesson 5? A. Deleting removes formatting, clearing does not B. Deleting only hides the data, clearing erases it permanently C. Deleting removes the entire row or column, clearing only removes the data inside D. There is no difference between the two actions Q7. What is conditional formatting in Excel? A. Formatting based on cell address B. Formatting cells according to their comments C. Changing the format of a cell based on its data D. Formatting that applies only when printing Q8. What should you do to get the most out of this course, according to the instructor? A. Skip examples and work only on your own spreadsheet B. Watch each lesson once, then follow along while replaying it C. Memorize every shortcut key D. Only complete the quizzes Q9. What should you do if you have questions about the topics covered in the lessons? A. Send an email to customer support B. Post your questions in the Excel Interactive Student forums C. Wait until the end of the course to ask questions D. You cannot ask questions Q10. What is the recommended action if you are using a version of Excel earlier than 2007? A. Proceed as normal B. Upgrade to Excel 2010 or find a tutorial for your version C. Skip to the advanced tutorials D. Use only online Excel Q11. What is the main objective of the Beginner Level 2 course? A. Teach advanced programming concepts B. Expand on Level 1 concepts and introduce new Excel features C. Focus on printing and exporting spreadsheets D. Teach web-based Excel collaboration Q12. Into how many groups are the instructor's Excel courses divided? A. Two: Beginner and Advanced B. Four: Beginner, Expert, Advanced, Developer C. Three: Beginner, Advanced, Expert D. Five: Basic, Intermediate, Expert, Advanced, Developer Q13. What is a good way to master each lesson, as advised in the video? A. Take notes on the video and do not practice B. Build the same spreadsheet step by step along with the instructor C. Only read the book version D. Search for similar lessons online Answers: 1-A; 2-B; 3-C; 4-B; 5-B; 6-C; 7-C; 8-B; 9-B; 10-B; 11-B; 12-B; 13-B DISCLAIMER: Quiz questions are AI generated. If you find any that are wrong, don't make sense, or aren't related to the video topic at hand, then please post a comment and let me know. Thanks. SummaryToday's video from the Excel Learning Zone focuses on Excel 2010 Beginner Level 2. I am Richard Rost, your instructor for this course.In this class, I will be covering the essentials of using the cut, copy, and paste commands, getting familiar with the clipboard, working with the AutoFill feature, applying and modifying cell formatting, handling rows and columns, managing worksheets, sorting data, using conditional formatting, and utilizing the Find and Replace function in Excel. Before you start with this course, I highly suggest you complete my Excel 2010 Beginner Level 1 class. The first level covers foundational skills such as navigating the Excel interface, entering and editing data, basic cell formatting, simple calculations, and managing your files. If you find any basic topics unfamiliar, head to my website and check out the Beginner Level 1 course first. If you are working with Excel 2007, you should be able to follow along without any issues since most of the material in this class is similar. However, for users with Excel 2003 or earlier, I recommend upgrading to Excel 2010 or finding a tutorial appropriate for your version on my website. The features discussed today are fundamental for progressing with Excel. This class is intended for those using Microsoft Excel 2010, which is part of the Microsoft Office 2010 suite. If you have an older version, I recommend seeking out tutorials that fit your version, which you can also find on my website. My Excel courses are organized into four major levels: beginner, expert, advanced, and developer. Beginner courses like this one are meant for those just starting out, aiming to introduce you to the essential functions you need for productivity. Once you become comfortable with the basics through Level 1, Level 2, and up to Level 5, you can move on to the expert series. The expert series explores more detailed features, tips, tricks, and commonly used options that help you get more from Excel than just the fundamentals. The advanced series goes even further, covering topics like recording macros, building user forms, creating templates, and other powerful features for advanced users looking to enhance their spreadsheets. Developer courses are intended for users interested in programming with Visual Basic for Applications (VBA), which allows for automating tasks and deep integration with other Office applications. Each group of courses is divided into levels. This is Excel 2010 Beginner Level 2, which builds directly on everything you learned in Level 1. Each subsequent level introduces new topics, always building on your previous skills. After completing all the beginner courses, you should feel comfortable moving up through the next levels as you become more proficient. Let me walk you through what we will work on in this class in more detail. Lesson 1 covers the clipboard functions, including the practical use of cut, copy, and paste. Lesson 2 demonstrates how to use AutoFill for quickly copying information along rows or columns. In Lesson 3, we start exploring different cell formats, like text, number, currency, accounting, and date formats. In Lesson 4, you will extend your understanding of cell formats to include fractions, percentages, adjusting decimal places, comma formatting, and scientific notation. Lesson 5 focuses on working with rows and columns. You will see how to insert and delete them, along with an explanation of how that differs from simply clearing content. Lesson 6 moves into worksheet management, where you will learn to insert, delete, rename, move, copy, and recolor worksheets. Sorting spreadsheets is the focus of Lesson 7, ensuring you know how to properly organize your data. Lesson 8 teaches you about conditional formatting, a powerful tool for visually highlighting data in your spreadsheet according to specific rules or values, such as coloring higher numbers red and lower numbers green. In Lesson 9, you will see how to use Find and Replace to efficiently update or locate data throughout your worksheets. If you have questions about the topics discussed in this course, please join the Excel Interactive Student forums. When you are following along using my video player software or watching in the web theater, you should have access to a small forum window displaying relevant questions and answers from other students. I encourage you to look through these discussions at the start of each lesson and contribute your own questions and comments. If you are viewing these lessons offline or through another method, you can always visit the student forums later by going to the ExcelLearningZone.com forums. For the best learning experience, I recommend watching each lesson straight through without pausing to try anything on your computer the first time. After you have watched, replay the lesson and work alongside me, creating the same sample spreadsheets as shown in the video. Master the example before trying to apply the concepts to your own projects. If you get stuck or need clarification, watch the lesson again or reach out with specific questions in the student forums. Most important of all, approach Excel with an open mind. While it may look daunting at first, you will find it becomes much easier with a bit of practice and patience. You can find a complete video tutorial with step-by-step instructions on everything discussed here on my website at the link below. Live long and prosper, my friends. Topic ListUsing cut, copy, and paste commandsWorking with the clipboard Using AutoFill to copy information Text, number, currency, and accounting formats Long and short date formatting Applying fraction and percentage formats Increasing and decreasing decimal points Applying comma and scientific notation formats Inserting and deleting rows and columns Clearing row and column contents Inserting and deleting worksheets Renaming worksheets Moving and copying worksheets Changing worksheet tab colors Sorting data in spreadsheets Applying conditional formatting Using Find and Replace in Excel |
||||||||||||||||||
|
| |||
| Keywords: cut copy paste Excel, AutoFill, Excel cell formatting, sorting data, conditional formatting, find and replace, insert delete rows columns, format cells, worksheet tabs, sheet color, keyboard shortcuts Excel, data bars, color scales, icon sets PermaLink How To Use Cut Copy Paste Autofill Cell Formats Sorting Find Replace In Microsoft Excel 2010 |