Password Manager
By Richard Rost

 3 months ago
Password Manager & Generator Step by Step Tutorial In this video, we will walk through building a password manager in Microsoft Access. I will show you how to create a table and form to store passwords, add a show/hide password button using input masks, and set up a copy-to-clipboard function with VBA. We will discuss security considerations for storing passwords in Access and some ideas for keeping your data more secure, as well as the limitations of Access security. PrerequisitesLinksRecommended CoursesUp Next
Keywords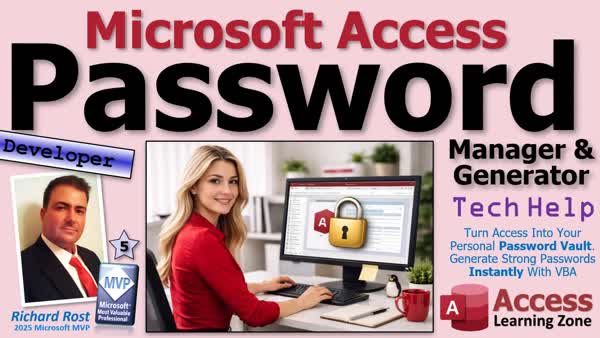 TechHelp Access, password manager, strong password generator, VBA password storage, store passwords securely, input mask, show hide password button, copy password to clipboard, RU Sure function, Access form design, on current event, bind form to table, username field, password table structure, SQL Server backend, encrypt passwords
More InformationTranscript Still using a spreadsheet or sticky notes for your passwords when Microsoft Access can do it for you?
Welcome to another TechHelp video brought to you by AccessLearningZone.com. I'm your instructor, Richard Rost.
Today we've got one that a lot of you have been asking for for a long time. We're going to talk about building a password manager and generator right inside Microsoft Access. I'm going to show you how to generate strong passwords automatically using a little bit of VBA, and we'll talk about how to store them securely in your Access database.
Now, this is a developer-level video. What does that mean? Well, that means we need to use some VBA, so if you've never done any VBA programming before, go watch this video. It'll teach you everything you need to know to get started in about 20 minutes.
You should know how to use the on-current event that fires when you move from record to record, or when you open the form up. You should know what an input mask is. You should know how to write an if-then statement. We're going to use VBA to copy to the clipboard, and I'll be using my RU Sure function, which is basically a yes-or-no message box.
Go watch any of these videos if you're not familiar with any of this stuff. They're all free. They're on my website. They're on my YouTube channel. There's a link right there. You can scan a little QR code, or however you want to do it. Go watch all of those and then come on back.
Now, before we get started, a couple of warnings up front: the database I'm going to show is going to be good for storing your passwords, and we're going to generate passwords automatically with a click of a button. But keep in mind that Microsoft Access by itself is not super secure, even if you put a database password on it.
I do have this other video where I teach you how to put a password on your Access database, and people will need that password to get into the database, which is how you secure all of your other passwords. So this one you're going to want to remember or write it down on a sticky note and stick it to your monitor so everyone else can see it. I'm just kidding.
But even with your database password protected, Access's security is not top-notch military grade, so just be warned. It will keep most people out. It will keep your neighbor out. It will keep your nephew out. It will keep out your coworkers. Someone who really knows what they are doing and has a copy of your database, it is not impossible to crack. Just putting it out there.
For best security, you want to use something like SQL Server as your backend. You have a whole free Level 1 course that you can watch right there that teaches you how to get Access connected to SQL Server, which SQL Server itself is also free. So check that out.
Now, personally, I use Google Password Manager to track all of my passwords, and Google is about as secure as it gets. But of course, then there is also that problem: if someone gets your Google password, they've got all your other passwords. And a lot of people that I've talked to say they don't like using cloud-based password services. I get it. You want to keep all that under your own control.
Obviously, make sure you have two-factor authentication turned on wherever possible. I use passkeys, fingerprint readers, all that good stuff. You can also encrypt or obfuscate, which means to scramble the passwords inside Access in the table. So someone would have to get your database password, but basically, they are getting gibberish. I am going to cover how to do that in the extended cut.
Here I am in the Metahelp free template. This is a free database. You can grab a copy up on my website if you want.
The first thing we're going to do is create a table to store all of our passwords in. So, Create - Table Design. Right here, we're going to start with the password ID. That'll be our autonumber, our primary key. We've got a description, short text. We've got maybe the website URL, short text. I'm not going to cover how to launch that automatically; I've got lots of other videos on that. I'll put a link down below. We've got the password. That'll also be short text.
You might be tempted to put an input mask here to hide it. I prefer putting it at the form level because you might have multiple different places where you want it to display different ways. So I just leave input masks to the forms. That's just me personally. We're going to be changing it with some code and make a little button that shows it, so it's just easier if you deal with it in the form.
Then we've got notes, long text. You might want to put notes about the website or whatever you want in there. It doesn't matter. Optionally, you can put anything else you want related to this password, like maybe a last changed date. Put in here = Now. Of course, then you've got to make sure you maintain that. We're not going to bother with all that in this class. I'm just showing you some different ideas of things you can put in here. We're going to keep it pretty streamlined for today.
Save this as PasswordT. Yes. Save it and then close it.
It's usually easiest to put some sample data in here. I'll put in here 599CD, and the website is 599CD.com. The password is going to be... I'll tell you what my password is... Let's see. Just kidding. Oh, we want a username in here. Before we go too far, let's put a username in here as well. Almost forgot that one: Username.
You could put in here things like security questions - what are the three security questions? I usually use different security questions on websites. I have my own that I've made up in my head. When they ask what your first job was or your dog's name, I don't give them the real ones, because anybody who knows me or public information, like what street I grew up on, could find those. I never use those. But if you want to put that stuff in here, you can.
So let's go back in here. Username is Rick. Password is ABC123! Of course, that's my password. And there's the date changed.
So we got our table built. Save it. Close it.
Now let's build a form for that.
We're going to start with a single form. You can make a continuous form later, just like I got a single form for customers here. You can make a customer list. You can make a password list form like this if you want to. Again, we're not going to do that today.
But I'm going to copy this single form: Copy, Paste. We're going to call this the PasswordF. My password form, which is now down here. Right click, Design View.
There we go. First thing to do, we're going to bind this guy to that password table. I'm going to go here, click on that, make sure we get the properties. Go to All. So we've got the record source for this form - where does this guy get his data from? Drop that down, pick PasswordT.
Now that it's bound, I can go to Form Design, Add Existing Fields. Click on the first one, Shift-click on the last one, and then let it go. Then click and drag and drop them all right there.
I keep these guys around for format painting, so I'm going to click on this, hit the Format Painter and paste over the password ID - that's my autonumber. Then this guy, I'm going to double-click on the Format Painter. If you don't have it up here in the Quick Launch toolbar, it's on the Home tab. Double-click, and then go click, click, click, click, click. There we go. Now turn it off.
Now I can get rid of you guys. Now I can do this and slide everybody up right there. Description, website, username, password can be a little bigger. Let's go out to maybe there. That's fine. Description, the website, the username, the password. We're going to leave some space there for some buttons. Looking pretty good so far.
Save it. Close it. Open it. There it is. We've got that going on down there.
If you care about the time, that's great. If you don't care about the time, just open up the property sheet and change the format to Short Date. I don't really care about what time I change my password.
There we go.
Just for the purposes of class, we're going to make this button here, my Hello World button, open up my password form. So right-click, Design View. We're going to change this to Passwords. Right-click, Build Event. That's going to bring up my code editor. I keep my code editor in dark mode. We're going to just do this and go to Command.OpenForm "PasswordF". That way I don't have to keep hunting it down on the navigation bar.
Close it. Close it. Open it. And Passwords. There we go. Looking good so far.
Now we want to hide that password. I'm not just going to set the password in the box because lots of things can happen. You might make a change later and then it's visible, whatever. So I'm going to make a button on here that's going to show or hide it.
The first thing that I want to do is make sure whenever the form is opened or whenever you move from record to record, this guy gets hidden. So rather than just simply put it in the design properties for this text box, I'm going to put it in the code.
The on current event runs when you move from record to record or when the first record is loaded. So we're going to go to Events. We're going to find On Current for the form, form events, my bad. Right here, On Current... and right in here we're going to say Password (that's the name of the field).Password.InputMask = "Password". I can't type today - equals the word "Password". It's a special input mask that echoes asterisks.
Save it. Close it. Close it. And now when you open up the password form, you'll see your password is in asterisks.
Now I need a button to view it. Come in here, we're going to grab a button, drop it right there, cancel the wizard. We're going to change the caption to Show.
We're going to give this button a good name. Come over here, go to All. Instead of Command11, let's call this the ShowPWBtn - Show Password Button. So when I'm referring to it, we know what button I'm talking about.
Right-click, Build Event. Now when the user clicks on this, we're going to show or hide the password. When the user clicks on it, I'm going to say: OK, if the password's input mask is currently set to "Password", then we're going to turn it off. Otherwise, we're going to turn it back on again.
If Password.InputMask = "Password" (the thing that I just set a second ago in the form current event), then we're going to say Password.InputMask = "" (blank). Turn it off. Let the user see what's in there. While we're at it, let's change the caption on the button too, so it flips from Show to Hide. Password.Caption = "Hide".
Otherwise we're going to reverse all that. So this basically turns into a toggle button, kind of. If it's anything but "Password", change it to "Password" and put "Show" in the button caption. That's how you basically flip it.
Save it. Debug compile once in a while.
Oh, what did I do? Password.Caption... password is the name of the text box, so that's my fault. I goofed because I was talking to you. "Method or data member not found" simply means that this guy here does not have a caption property. That's the method or data member. So that's my fault. This should be the name of the button - the button has the caption - so it should be this guy.
See, I love when these little mistakes creep in here, because if I make these mistakes, chances are you're going to make these mistakes. It's good that you see what they look like. That's also why we debug compile once in a while, because we catch the silly errors before we try to click on the button.
Looks good. Close it. Close it. Open it. Ready? Show. Click. There we go. And Hide. And Show. And Hide. Curly. Straight. OK.
That's our show/hide button. That was good. We're off to a good start.
If I show it and I move to the next record, so if I go back again, we've got to have more in here to see it working.
Let's put a second one in here: PCResale.net. That's also PCResale.net. Username is Jim Kirk. Password is Enterprise.
Now, see, now the button's not changing its caption there, if I move from record to record. So we've got to do that as well. Back to our code editor. In this guy now, we need to put this default - so change the button caption as well. We didn't have the button when we first put that in there.
Save it. Debug compile once in a while. Come back out here, and now it should work just perfectly. Move from record to record, show it, then move off of it. OK, we're good.
Next, I know I'd like a button to copy that password to the clipboard. It's really simple to do. If you watched my copy-to-the-clipboard video, you'll know it's just a single call.
So we're going to type this button - copy, paste. We're going to slide it over here. We're going to type in "Copy". That will copy the password to your clipboard, and just go over to your web browser and paste it in.
Right-click, Build Event. Command12. Sometimes, I give this button a good name because I'm referring to it in a couple of different places, including its own code. This button I'm probably not going to refer to from anywhere else, but I always put in here what it is so at a glance I know this is the copy password button.
Now, this is going to be Password.SetFocus because you've got to move to that field. Then it's DoCmd.RunCommand acCmdCopy.
I like to throw a beep on the end of there so you know that it did something. Otherwise it just shows nothing.
Save it. Debug compile. Now it compiles. But you can probably tell from the tone of my voice something's going to happen.
Close it. Open it. Copy. BAM. The command or action Copy isn't available right now. Why not? Why can't I copy it? I set focus. I move to the field. Anybody? When the password input mask is visible like that, you can't copy it. That's just a security thing or whatever. It's trying to copy the text anyway. If it did copy the text in there, you'd just get a bunch of asterisks.
The trick is you have to turn it off real fast and then turn it back on again. I know it's kind of silly. So, this is the line we need here. We're going to put that after it, to hide it again. Right here, we're going to say make it visible, copy it, and then hide it again.
You could put a whole bunch more logic in there, and say if it's already visible, you do not have to do that and blah, blah, blah. I don't care. I'm going to copy it and then hide it, so we don't leave it sitting on the database on the form. If you copy it and you go over and you're playing on the website and you forget that it's visible on your screen, and Joe from Accounting walks by and it's like, oh, there's your password. So we're going to hide it after we copy it.
Debug compile. Close it. Save changes. Open it. Now we're going to copy it. I'm just going to paste it here to see if it copied right, and there it is. That millisecond that it's visible - human eye is not going to see that. No one's going to see that happen. But you've got to do it. You've got to do it.
Next is the button to actually generate the password. We're going to say, OK, I want a password that's 10 characters long. I want it to include at least one uppercase character, a lowercase character, a number, and one of the special characters, asterisk or exclamation point or whatever. We can specify that list.
We're going to do that in tomorrow's video. Tune in tomorrow, same bat time, same bat channel.
Members, you can watch it right now, because I'm still working on it. If you're watching this the day it releases, yes, I'm releasing this on Thursday, the 16th of... what is it... April 2026. Normally on Fridays, we do Quick Queries Fridays, but we're going to do Quick Queries on Saturday this week, and then we're going to do tomorrow part two of this one.
So, tune in tomorrow for part two of this.
That's going to do it for your TechHelp video for today. I hope you learned something.
Live long and prosper, my friends. I'll see you tomorrow for part two. Intro In this video, we will walk through building a password manager in Microsoft Access. I will show you how to create a table and form to store passwords, add a show/hide password button using input masks, and set up a copy-to-clipboard function with VBA. We will discuss security considerations for storing passwords in Access and some ideas for keeping your data more secure, as well as the limitations of Access security. Quiz Q1. What is the primary goal of the video tutorial?
A. Demonstrate how to create a password manager and generator in Microsoft Access
B. Teach advanced Excel spreadsheet techniques
C. Explain how to connect Access to Google Password Manager
D. Compare different cloud storage solutions
Q2. What skill level is this video best suited for?
A. Complete beginners
B. Developer-level users familiar with VBA
C. Intermediate Access users with no coding experience
D. Advanced SQL Server professionals only
Q3. Which programming language is used to automate features in this Access password manager?
A. SQL
B. Java
C. VBA
D. Python
Q4. What is recommended if you need better security than Access offers by default?
A. Use Excel instead
B. Use an Access password only
C. Use SQL Server as your backend
D. Do not store passwords electronically
Q5. What is the purpose of the On Current event in Access forms?
A. Fires only when the database is opened
B. Fires when moving from record to record or opening the form
C. Fires when the user clicks a button
D. Fires when any field is updated
Q6. Why does the instructor prefer to put the password input mask on the form rather than the table?
A. It is more secure at the table level
B. To allow different display options in forms
C. Input masks only work on tables
D. Tables cannot store input masks
Q7. Which property is set to "Password" to show asterisks in the password field?
A. DefaultValue
B. InputMask
C. ControlSource
D. ValidationRule
Q8. Why is it necessary to hide the password after copying it with the clipboard button?
A. To improve database performance
B. To prevent leaving the password visible on the form
C. To ensure the clipboard works
D. To meet Access table restrictions
Q9. What does the Copy button do in the password form?
A. Copies the entire record
B. Copies asterisks to the clipboard
C. Copies the actual password text to the clipboard
D. Copies only the notes field
Q10. Why might you want to use custom answers to security questions rather than real answers?
A. It saves time
B. Security questions are never asked anymore
C. Real answers may be publicly available and are less secure
D. Websites do not store security questions
Q11. What should you always do after making code changes in VBA, especially as shown in the video?
A. Restart Access
B. Debug and compile the code
C. Delete old forms
D. Create a new database
Q12. What type of form is initially created for password storage in the video?
A. Datasheet form
B. Continuous form
C. Single form
D. Modal dialog form
Q13. What additional field did the instructor realize should be added to the password table?
A. User's address
B. Username
C. Fax number
D. Email address
Q14. What is one optional additional field mentioned for the password table?
A. Social Security number
B. Last changed date
C. Bank account number
D. Phone number
Q15. What will be covered in the next video (part two)?
A. Generating passwords with specific requirements
B. Encrypting backup files
C. Exporting data to Excel
D. Color-coding your forms
Answers: 1-A; 2-B; 3-C; 4-C; 5-B; 6-B; 7-B; 8-B; 9-C; 10-C; 11-B; 12-C; 13-B; 14-B; 15-A
DISCLAIMER: Quiz questions are AI generated. If you find any that are wrong, don't make sense, or aren't related to the video topic at hand, then please post a comment and let me know. Thanks. Summary Today's video from Access Learning Zone covers how to build your own password manager and generator inside Microsoft Access. Many people still rely on spreadsheets or sticky notes to keep track of their passwords, but Access can make password management far more organized and secure.
This lesson responds to a frequent request from viewers: how to automate the creation of strong passwords and store them safely in an Access database. I'll walk you through generating robust passwords using VBA and discuss secure storage methods within Access.
This is a developer-level session, so expect some VBA programming. You should already be comfortable with concepts like the On Current event for forms, input masks, writing basic If-Then logic, using VBA to copy items to the clipboard, and how to use a custom yes-or-no message box function. If any of these are unfamiliar, I recommend checking out the prerequisite tutorials available on my website and YouTube channel. These resources are free and will get you up to speed before you proceed with building your password manager.
Before we get into the construction phase, it's important to consider the security limitations of Microsoft Access. The setup I demonstrate is suitable for securing your passwords, and the password generator makes it easy to create complex keys at the press of a button. However, even if you password protect your database, Access does not provide military-grade security. Adding a database password will block most casual snoopers, such as coworkers or relatives, but a skilled individual with access to your database could eventually defeat Access's protections.
For those needing stronger security, connecting Access to a backend such as SQL Server is the best option. I have a free introductory course that will show you how to set up Access with SQL Server, which is itself free.
Speaking of password management, I personally use Google Password Manager, which offers excellent security. But using a cloud-based service comes with its own risks, since gaining access to your Google account could expose all your passwords. If you'd rather keep your passwords off the cloud and remain in full control, building your own Access database is a great solution. No matter what you use, I highly recommend enabling two-factor authentication and additional security measures like passkeys or biometric readers. You can also take extra steps to obfuscate passwords in Access so that even if the data is accessed, the passwords are scrambled and unreadable. I cover techniques for encrypting or obfuscating password data in the Extended Cut.
For this demonstration, I'm working within the Metahelp free template, which you can download from my website.
Let's start by creating the table for password storage. Using Table Design view, begin with an AutoNumber primary key called PasswordID. Add fields for a description, website URL, username, password, and notes. You might consider adding fields like security questions or date last changed as well. When it comes to input masks for hiding the password, it's best to handle that at the form level rather than in the table, since you might want different display behaviors across your application. Save your table as PasswordT.
Once the table is set up, it's helpful to populate it with some sample data. For instance, you might enter a test account with fields for description, website, username, password, and any relevant notes. Security hints or custom questions are optional, but I prefer not to use real answers for security questions that someone could research about me.
Now let's create a form based on this table. Start with a single-record form for simplicity. Copy an existing single-record form if you have one, and rename it PasswordF. Bind this form to the PasswordT table via its record source property. Add all the table fields to the form, lay them out as desired, and adjust the size of the controls, especially the password textbox which may need more space.
If you prefer not to display the time for fields like date last changed, you can change the format to "Short Date" in the property sheet.
For easier navigation, you can create a button - such as from your Main Menu - to open this password form programmatically.
Now, let's address password visibility. Rather than relying solely on the input mask property of the textbox, use VBA in the On Current event of the form to ensure that the password field always shows asterisks or remains hidden whenever you move between records or open the form. Set the input mask to "Password" using VBA.
To allow users to reveal the password if needed, add a button labeled "Show" next to the password field. Give the button a meaningful name like ShowPWBtn. Use VBA so that clicking this button toggles the visibility of the password - if the input mask is set to "Password," it will be cleared to show the plain text password, and vice versa. You'll also want to change the button's caption between "Show" and "Hide" based on the current state.
If you find that the button caption does not update when moving between records, make sure to reset the caption in the form's On Current event as well.
It's also helpful to provide a one-click way to copy the password to the clipboard. Add a button labeled "Copy" with code that sets focus to the password field and uses VBA's built-in copy command. However, remember that copying from a masked field (with the input mask set to "Password") will only copy asterisks. To solve this, briefly remove the input mask before copying, then restore the mask instantly afterward. This way, there is minimal risk of someone glimpsing your password on-screen after the operation.
The next step will be to automate password generation. This will involve having a button that creates a password of your chosen length incorporating uppercase, lowercase, numeric, and special characters. We'll handle the specifics of the password generator in the next lesson.
With that, we've covered the basics of constructing a password manager in Access, including how to securely store and view passwords, hide them as needed, and quickly copy them for use elsewhere. You can find a complete video tutorial with step-by-step instructions for everything discussed here on my website at the link below.
Live long and prosper, my friends. Topic List Creating a password table in Access
Adding relevant fields to the password table
Configuring form input for passwords
Using VBA to hide or show password fields
Setting an input mask for password fields in forms
Creating toggle buttons to show or hide passwords
Updating button captions dynamically with VBA
Copying password values to the clipboard using VBA
Ensuring password visibility resets between records
Populating the password table with sample data
Linking forms to the password table
Arranging and formatting form controls for passwords
Adding a button to copy the password to the clipboard
Handling input masks during copy operations Article If you are still using spreadsheets or sticky notes to track your passwords, it is time to consider a better solution. Microsoft Access offers a way to manage and generate strong passwords in a secure, centralized location. In this tutorial, I will guide you step by step through the process of building a simple password manager in Access, complete with a password generator, a way to copy passwords to your clipboard, and controls to show or hide them as needed. This will help you avoid common security pitfalls and keep your credentials organized.
To get started, you need to construct a table that will securely hold your password data. Open Access, and create a new table in Design View. Set up the following fields: PasswordID as an Autonumber (Primary Key), Description (Short Text), Website (Short Text), Username (Short Text), Password (Short Text), Notes (Long Text), and optionally a DateChanged field set to Now as the default value (Date/Time). You can also add other fields like security questions if you wish. Save this table as PasswordT. After saving, open it in Datasheet View and enter a few sample records for testing, such as a fictitious account with a sample username and password.
Next, you need a form for user-friendly interaction with your password data. Create a new single form. You can copy an existing form layout if you have one and reuse it. Open the form in Design View, bind its Record Source property to your PasswordT table, then use the Add Existing Fields button to add all the fields to the form. Arrange and resize them as needed so they are easy to read and access.
One of the most important considerations for password managers is hiding the passwords from view. Even though you might be tempted to use an input mask at the table level to obscure passwords, it is often better to apply this at the form level for flexibility. In your form's VBA code, use the form's On Current event (which fires whenever the current record is loaded or changed) to automatically apply a password input mask to the password textbox. For example, if your Password textbox is named Password, your On Current event code would look like this:
Password.InputMask = "Password"
This ensures that every time you navigate to a record, the password appears as a row of asterisks, hiding its true value from anyone looking over your shoulder.
Next, add a button to your form that lets you temporarily show or hide the password. Drop a button onto your form and cancel the command wizard. Name the button ShowPWBtn and set its caption to Show. In its Click event, enter the following code:
If Password.InputMask = "Password" Then
Password.InputMask = ""
ShowPWBtn.Caption = "Hide"
Else
Password.InputMask = "Password"
ShowPWBtn.Caption = "Show"
End If
Also, make sure the On Current event resets the button caption to Show when switching between records:
ShowPWBtn.Caption = "Show"
This way, users can reveal the password when needed and easily hide it again when done.
Now, add another button to copy the password to your clipboard for easy pasting into a login form. Add a new button, name it CopyPWBtn, and caption it Copy. Paste the following code into its Click event:
Password.InputMask = ""
Password.SetFocus
DoCmd.RunCommand acCmdCopy
Password.InputMask = "Password"
Beep
This code momentarily reveals the password, copies it, and then hides it again before anyone could see it. The beep confirms the action completed.
When using Access to store passwords, keep in mind that while it will protect your data from most casual snoops with a database password, it is not suitable for top-security requirements. Truly skilled attackers could still break into an Access database if they got a copy of your file. For the best security, use Access with a secure backend like SQL Server and always use strong database-level passwords, along with two-factor authentication for your own logins where possible.
If you want even better security inside your database, you can take the extra step of encrypting or obscuring stored passwords so that even if someone does break in, the password data itself is unreadable. Implementing this does require a bit more VBA and code, but the basics outlined here will work for the majority of users who simply want to keep personal or business passwords in a safe, organized place and avoid accidental leaks.
With your password database set up, your form in place, and your show/hide and copy controls working, you now have a working personal password manager in Access. You can extend this by creating more advanced forms or using my password generator code in VBA that will automatically pick random, complex passwords for you (including uppercase, lowercase, numerals, and special symbols). This step can be added later as an enhancement.
Managing passwords in Access gives you a lot of control, letting you keep vital credentials under your own watch rather than in the cloud. However, it is critical that you remember your Access file password and back up your data regularly. Losing access to this file could mean losing all your passwords.
In summary, with some basic table design, form creation, and small snippets of VBA, you can quickly build a practical, easy-to-use password manager in Microsoft Access. Use the techniques above to hide passwords, reveal them on demand, and copy them safely when you need to log into your applications and websites. This approach is more secure and more efficient than sticky notes or spreadsheet lists, especially if you take regular security precautions and store your database in a safe location. Primary Topics
Access table design, password storage, VBA programming, input masks, form design, show/hide password, clipboard copy, security considerations
Secondary Topics
security questions management, username fields, database security, form event handling
|


