Organizing Inventory 2
By Richard Rost

 3 days ago Inventory Management Tracking System Part 2 In this lesson, we will continue organizing inventory in Microsoft Access by creating table relationships and enforcing referential integrity. We will discuss cascade deletes, build an inventory search query with a wildcard parameter prompt, and create nested continuous subforms for locations, areas, subdivisions, and items so you can browse and enter inventory records within the hierarchy. MembersIn the extended cut, we will learn how to build a dedicated inventory entry form using reverse cascading combo boxes. I'll show you how to use Access's built-in cascading combo box features, use a small amount of VBA to reverse-cascade from an item's subdivision to its area and location, and use the older SQL-based method for manually filling the combo boxes. We will also keep the selected location and area values when entering multiple items in the same place. Silver Members and up get access to view Extended Cut videos, when available. Gold Members can download the files from class plus get access to the Code Vault. If you're not a member, Join Today!
PrerequisitesLinksRecommended Courses
Keywords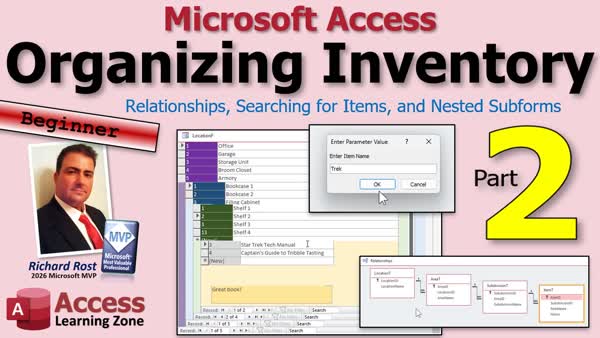 TechHelp Access, inventory database relationships, referential integrity, nested subforms, inventory search query, parameter query wildcard search, continuous forms, cascade deletes, one-to-many relationships, cascading subforms, inventory data entry form
More InformationTranscript Welcome to part two of my organizing inventory series in Microsoft Access, brought to you by Access Learning Zone.
I'm your instructor, Richard Rost.
In part one, we planned out our inventory database, built our tables, put in some sample data. We've got locations, areas, subdivisions, and items, and everything is organized into a nice, simple hierarchy.
If you haven't watched part one yet, what are you doing here? Watch part one first, and then come on back.
Today we're going to connect those tables together with proper relationships, turn on referential integrity to make sure our data stays nice and organized. We'll also talk briefly about cascade deletes and why I generally don't use them in a database like this.
Then we're going to build a query that brings our four tables together so we can see exactly where everything is stored. We'll make a simple parameter query so you can type in an item name and Access will tell you where to find it.
And finally, I'm going to show you one of my favorite tricks: nested subforms. We'll build a form where you can pick a location and see all the areas in that location, pick an area, see its subdivisions, and then see all the items stored there. You can even add new inventory items and new areas and new subdivisions and all that right inside this big, nice, cascaded form thingy, whatever you want to call it.
All right, you ready? Here we go.
Before we get started today, I've got some videos you should go watch first. Referential integrity is one of them. I'm going to explain it briefly, but if you want more details, go watch this video first.
You should know how to create a basic parameter query. You should know how to do a wildcard search with the Like keyword. You should know what continuous forms are. And you should know how to work with subforms.
If you've never used any of these things before, go watch these videos first. They're free. They're on my YouTube channel. They're on my website. Go watch those and then come on back.
All right, here we are back in our database. The first thing I want to do is set up relationships with referential integrity. Why? Well, that way you can't take an item and just add something in here like, you know, a GI Joe figure and not have a valid subdivision, which doesn't have a valid area, which doesn't have a valid location.
So all of these items need to be properly in their places. So we're going to get rid of that. Actually, let's put, I want to keep GI Joe. We're going to hide him in the broom closet.
So how do we do that? Well, let's go to Database Tools and then Relationships.
Now, in this Relationships window, you're going to see other tables that are in here right now. I've got my customers and orders in there. I'm going to delete these.
Now, when you delete stuff from the Relationships window, does that delete the relationships themselves? No, it does not. Those relationships stay in the system. This is just showing you the layout that you want to see.
There's a button right here that says, "Show Me All Relationships," and it puts all the tables back on there. But we don't want to see all these right now. So I'm going to select them all and hit Delete. This way, you can only work with the tables that you want to see at this time.
All right, so I need Location, and locations go to Areas, and Areas go to Subdivisions, and Subdivisions have Items in them.
Now we're going to grab Location ID, click and drag it on this Location ID, and it's going to say, "Do you want to enforce referential integrity?" Yes, I do. That way I can't have an area that doesn't have a location.
Now, cascade updates, don't worry about it. Cascade deletes. What does that mean? Well, that means if I delete a location, it deletes everything underneath it. Well, at least in the next table. So you'd have to have cascade deletes on through this entire chain.
I don't recommend that for most databases because that's dangerous. Especially with customers and orders. If you delete a customer, you lose all his orders. There goes all your accounting history. So be very, very careful with that.
We're not going to turn on cascade deletes. So there you go. Simple one-to-many relationship. Referential integrity is enforced. We'll do the same thing with Area to Area, enforce referential integrity, and then Subdivision down here to Subdivision, and then enforce and hit Create.
And we're done. Let's save it and then close it. And now we're all set.
Now, if I go back in here and try to do the same thing with Optimus Prime, oh, we can't do it. Need a related record in the Subdivision T. And we'll stick him in whatever to it. He's on his shelf.
All right. What's next?
Next up, we need a way to be able to find something. I want to make our queries so that I can say I want to search for, "Where is Optimus Prime?" I want to be able to type in Optimus, and it shows me, "Oh, it's on shelf two in bookcase one in the office." Oh, okay, great.
Let's create a query. Go to Query Design. And we've got way too much stuff on here. Let me turn some of this stuff off. There we go. There's our query window.
And again, I'm going to bring in stuff. I'm going to bring in Location. Then I'll bring in Area, and notice it sees the relationship. Now, it's not just a normal ad hoc join. Access will make that relationship if it sees that you've got two Location IDs. But this one is the actual relationship. You can see the one in the menu there. That's an actual enforced relationship.
Same thing. We'll bring in the Subdivision, and we'll bring in the Item.
Now, I want enough information in this query so that I can tell where my item is, but I don't want too much. I'm not going to bring down all the stars because I don't want duplicate fields then. We'll have a Location T Location ID and then an Area T Location ID.
So I'm going to bring in Location ID, Location Name, then Area ID and Area Name, not doubling up, then Subdivision ID and Subdivision Name, and then Item ID and Item Name. If you want the Notes in here, you can bring the Notes in. But I'm just using this to find where my items are, so I don't need the Notes in here.
I'm going to save this as my, let's call it my Inventory Search Q, Inventory Search Query.
Now, if I run it now, look at that. There's all my items, all the locations, all the areas, all the subdivisions, and all the items.
Now all I have to do is put a search on this guy, and then it'll tell me exactly where it is. Let's go back into Design View. Find the Criteria row underneath Item Name.
Now I'm going to hit Shift+F2 so that zooms me in. I'm in the Zoom window now.
Now I could put a simple criteria in here in brackets and to Item Name like that. But if I do, it's got to be exact. Then I have to type in exactly what the item is.
Well, I don't want to have to type it in exactly. I want any part of it. So for that, we'll use a wildcard search. We'll start off with Like and then, in quotes, an asterisk and then ampersand. That's a little concatenation there. And then an asterisk on the end.
This says whatever I type into here, if I type in Joe, it'll put an asterisk in front of it and an asterisk after it, and it'll find words like Joseph with a J-O-E added. I guess if I type in J-O, I'll get Joseph. I'll get Josephine. I'll get Juan Joe. I'll get whatever.
Hit OK. Save it, and let's run it.
All right, enter item name. Let's type in Optimus, or just Optim. Ready, go. There we go. Nice search. I know Optimus Prime is on shelf two, bookcase one, in the office. Beautiful.
Let's run it again. How about I need a broom, or I need a mop. I need a mop. Give me a mop. Where's the mop at? Who put the mop where? Okay, it's in the broom closet. Same.
Access, I love Access. You could do so much stuff with Access with zero programming. It's a wonderful tool. I love it.
All right, now moving on. Now, this lets us easily search for stuff that's in the database already. How do we get stuff in the database? Well, we're going to use some nested subforms.
All right, we're going to build a continuous form for each of our tables and then we'll nest them inside each other like little Russian nesting dolls. Just like this. We'll have the locations, and then we'll have the areas. Then we'll have the subdivisions, and then we'll have the items.
So you click on this, it'll show you those, and then you click on this, it'll show you those, and so on. It's a nice little trick and, again, it involves zero programming.
All right, you ready?
Now, first up is the boring part. We got to make little continuous forms for each of our tables. Now, I have a little template here. I've got a continuous and a single form. These are part of my TechHelp free template. They're just basic little continuous forms with two little fields in them.
You can build these yourself if you want to, or you can grab a copy of my template if you want. I am going to copy this.
Let's start with the innermost ones and work our way out. We'll start with the items. So I'm going to copy and paste, Control+C, Control+V. We're going to call this Item F.
All right, Item F, Design View. Now, I keep these fields in here just for formatting, but let's go ahead and change. I'm going to change my colors around. Let's make this guy, like, let's go brown. Brown. And we'll make this yellow. Keep everybody a slightly different color.
Now, I'm going to get rid of the labels in the header because we're going to run out of room if I don't. On my screen, you can make yours whatever you want.
Then we have to open up the properties, go to Data, change the Record Source to Item T. Now, we can change these. We'll make this guy here, I'll go to All now. We'll change this to the Item ID and its name. This guy can be the Item Name.
And if you want to put the Notes down below, you can here. I'll slide that out like that. If you want to drop Notes down here, you can go to Add Existing Fields, grab Notes. We'll stick Notes in the footer. I'll get rid of its label. Slide this over here like that. Make this a little smaller because, again, we're going to run out of room. Bring this over like this, like so.
Maybe make this guy yellow. I like to make my Notes field yellow. Preference.
All right, save it. Close it. Open it. There's my little Item form. It's all the items in the system now.
We don't have the Subdivision in here. That's okay, we don't need it. Why? Because it's going to be a subform and its parent will control that subform ID. That's covered in my subforms video.
All right, who's next up the chain? We got Items, then we got Subdivision. So we're going to go Continuous Forms, copy, paste, Subdivision F.
Okay, right-click, Design View. Get rid of the labels. Get rid of the Form Header. Let's open up the properties, go to Data, Record Source, Subdivision T. This guy, go to All. This will be the Subdivision ID, copy, paste. This guy is going to be the Subdivision Name, copy, paste.
Do we need the Area on here? No, because of the parent.
All right, so make this, actually, let's make this guy green. We'll do that green and maybe a little bit darker in the footer like that. And then make this nice and wide. And I'm going to make this guy dark green, right here. Dark green and white. It'll show up better. It just makes it easier to see what group you're in. Unless you've got a really, really big form and you can make it bigger, but I like the colors. I don't want to hear anybody complaining about my colors.
All right, save it. Make this bigger. Now we're going to make the Form Footer larger. Why? Because this is where our subforms are going to go, in the footer.
Grab your Item F, click, drag, drop. You get this. It says, "A form with a subform object can't have its Default View property set to Continuous Forms." Why? Because Access is a liar. It's a liar. It lies. You liar.
Hit OK, delete that label. I'm going to resize this guy to fit this entire space. Maybe, well, how many items do you want to see? Let's go about that big. That's about it. Like five items.
Then you have to go into the properties for the parent form and put this back to Continuous Forms because Access is a liar. Now this is about the only thing that it lies about, but that dialog needs to go.
All right, save it, close it. Now open up Subdivisions, and look at it. There you go. Click on Shelf Two and it goes to that. That's kind of cool. Go to the broom closet, there's just stuff in the broom closet. See, and it's easier to see with it being color-coded. Yellow, green.
Okay, who's next? Same thing, we got to do this two more times. I know, I told you, this is the boring part.
All right, copy, paste. But by the time you're done, you should get this after doing it four times. What's next? We've got Area. Area is next, Area F.
Okay, we're going to right-click, Design View. We're going to get rid of the labels. We're going to get rid of the Form Header. We are going to change the properties. We're going to go to Data first, change this to Area T.
Then this guy, go to All. This is going to be the Area ID, copy, paste. This is going to be the Area Name, copy, paste. Let's make this, what do I do? Blue with this one.
Okay, so we're going to make this, let's go with this blue. This will be a little bit darker down here. Maybe that blue. Whoo, that looks nice. We'll make this nice and big. We'll make this dark blue and white. And then make this bigger so we can stick our subdivisions in here.
Deal with the layer, delete the label. Slide this all the way up and then bring it down. How big do you want it? That's good right about there.
It's not easy to make the subforms variable-sized. You can, but it involves some programming. That's one thing people always ask me. Because the subform itself, the continuous form itself, you can resize it pretty easily. Where are we at? Area now.
But that subform is the tricky part. So you've got to deal with how big do you want this to be in here. We got to make that a little bit bigger so we can see it.
This outer one needs to be about yay big. And there's an art to this too. It's not just, well, see, there we go.
Okay, and then this can get bigger. Okay, we got to fit one more on the outside too now. Oh, we forgot to flip this back to Continuous Form. I do that all the time. Because of the layer, you got to go in here and change this back. Now it'll start to look normal. There we go.
Okay, Bookcase One, Bookcase Two, Filing Cabinet. Where is the broom closet? There we go.
All right, one more. Continuous Forms, copy, paste. This is going to be the Location F, Location, Design View. You could stay purple.
We're going to get rid of this. Get rid of that. Open up here, go to Data, Record Source is Location. You are the Location ID. You are the Location Name.
And we're going to set your values here. I always copy the Control Source into the Name because later on, you don't want to refer to that as Text One.
All right, okay. This goes like this. You can be purple and white. All right, how big do you want this to be now? Let's make it big. Maybe about, well, this one needs to be really big to fit everybody else inside it.
So now grab Area, drop it here, deal with the layer, slide that up. Let's see here, what do we got? Go like that. Go like that. It gets easier on a bigger screen. I have a really small window that I record in. I could make it bigger, but it's just a pain.
Oh, and we got to turn off the Single Form one more time.
Okay, should be just about done. Let's see, Location F. There we go.
Okay, let's turn off this and you can see, we got to make this one just a wee bit bigger. Now that we turned off the ribbon, we got some more room. We can take this. Oh, hang on, let's see if we can get it. There it is right there.
Okay, don't want to make it too big because then you'll crowd everybody else out. All right, about there. Save it, close it, open it. Perfect. Well, not perfect, but good enough. Close enough for government work.
And now you can easily browse through all of your locations. You want to add something to the armory? All right, what's in the phaser cabinet? Top locker is a phaser. Phaser Type A or whatever. And then you've got the phaser battery.
Okay, what else is in the phaser cabinet? All right, well, how about the bottom locker? We've got socks. And so on.
Photon torpedo launcher, whatever. You get the point. Storage unit. Shelf Three, Box 12345 is my Rubik's Cube. And this is how you can go through and store all your inventory.
Now later on, where's my Rubik's Cube? Well, we've got a query we can run right here where I type in cube. Boom, there it is. It's in Box 12345 on Shelf Three in the storage unit. Oh, okay.
See how easy this is? Once you get it set up. No programming at all. Zero coding. That's how good Access is. It's understanding how to build your tables, how to build your queries, how to do a little searching with your queries, and how to get your forms.
These forms are all set for doing your data entry or for browsing through them. And yeah, you could filter and search and stuff. And there's all kinds of tricks. I could spend hours making this pretty. But this gives you the basics.
Now you've got enough to go play with some Legos and see how you like all that stuff.
Now, in the extended cut for my Silver members and up, we're going to take this inventory database one step further. I'm going to show you how to build a dedicated inventory entry form with what I like to call reverse cascading combo boxes.
Reverse, huh? Yeah. Based on the item, we reverse cascade up. Because the subdivision is stored in the item, but then we can, from that, figure out the area and, from that, figure out the location to put in those boxes up top.
Now, I'm going to show how to use the new built-in cascading combo box features in Microsoft Access. So we don't need a ton of VBA code to make everything work. We need a little bit, a couple lines of code, but I'll also show you the old-school code too, in case you have the older versions of Access.
I'll show you how to do it where you've got to manually fill the combo boxes using SQL. So I'll show you both methods.
And we'll set things up so that if you're entering a bunch of items in the same location, those two values in the top box have stayed the same, we left them. So you don't have to keep picking the same boxes over and over again.
Here's what we're going to build. Now, if you go through this, it'll show you the items you've got, and then it'll change these based on what's down here. Gotta use some code, look some stuff up, set those values.
And then whatever you ended up on, if you're in Office One, Bookcase One, you want to add some items, just go to a new record and it leaves those alone. So now what you've got to do is say, okay, Shelf Three, my Time Sawyer DVD. And you go to the next one. You add the next item and so on.
And that involves a little tiny bit of code, but I'm going to show you all about it in the extended cut for the members.
Silver members and up get access to all my extended cut videos. Gold members can download these databases, and everybody gets some free training classes every month. And it's a big party. So click that blue Join button to find out more information right now.
And as I mentioned in the last video, check out my asset management seminar. If you've got a whole bunch of assets under management and you want to keep track of where they are and who's got them and transactions and all that stuff, check this one out.
And if you want to be able to scan and print barcodes and track inventory in and out and all that good stuff, check out my barcode and inventory seminar as well. You'll find more information on my website. Links will be down below.
But there you go. Now you've got the beginnings of a nice little inventory organizing management database. You've got a nice search query, some data entry forms. I'm happy.
That was, I had a lot of fun building that with you guys. Post some comments down below. Let me know what you thought. Do you want to see more stuff like this? Do you have any questions? Post them down below.
But that's going to do it for your TechHelp video for today. I hope you learned something. Live long and prosper, my friends. I'll see you next time, and members, I'll see you in the extended cut. Intro In this lesson, we will continue organizing inventory in Microsoft Access by creating table relationships and enforcing referential integrity. We will discuss cascade deletes, build an inventory search query with a wildcard parameter prompt, and create nested continuous subforms for locations, areas, subdivisions, and items so you can browse and enter inventory records within the hierarchy. Quiz Q1. What is the main purpose of enforcing referential integrity between related tables?
A. Prevent records from referring to nonexistent parent records
B. Automatically create duplicate records in every table
C. Allow any value to be entered into foreign key fields
D. Hide primary key fields from users
Q2. In the inventory hierarchy shown, which table is directly related to the Item table?
A. Location
B. Area
C. Subdivision
D. Inventory Search Query
Q3. What can happen if cascade deletes are enabled throughout an inventory hierarchy?
A. Deleting a location can delete its related areas, subdivisions, and items
B. Deleting a location only changes its name
C. Deleting an item automatically creates a new location
D. Deleting a location removes only the relationship line from the Relationships window
Q4. Why is cascade delete generally not recommended for many business databases?
A. It can accidentally delete important related history and records
B. It prevents new records from being entered
C. It makes all tables read-only
D. It disables primary keys
Q5. If tables are removed from the Relationships window layout, what happens to the actual relationships?
A. The relationships are deleted permanently
B. The relationships remain in the database
C. Referential integrity is automatically turned off
D. All related records are deleted
Q6. What type of relationship is created between Location and Area when one location can contain many areas?
A. One-to-one
B. Many-to-many
C. One-to-many
D. Unrelated
Q7. What is the purpose of the Inventory Search Query?
A. To find an item and display its location hierarchy
B. To delete unused inventory records
C. To automatically create new locations
D. To print barcode labels
Q8. Why should a query include only the needed ID and name fields from each table instead of using all fields?
A. To avoid unnecessary duplicate fields and clutter
B. To disable table relationships
C. To prevent parameter prompts
D. To make all records editable
Q9. What does the Like keyword allow in a parameter query?
A. A partial-text search using wildcard characters
B. A required exact match only
C. A search for numeric primary keys only
D. A search that ignores all criteria
Q10. What does the criteria expression Like "*" & [Enter Item Name] & "*" do?
A. Finds records where the item name contains the entered text anywhere
B. Finds only records whose item name exactly matches the entered text
C. Deletes item names that contain the entered text
D. Sorts items alphabetically by the entered text
Q11. If a user enters "Optim" into the item-name parameter prompt, what kind of item name can be found?
A. An item name containing "Optim", such as "Optimus Prime"
B. Only an item named exactly "Optim"
C. Only items with an Item ID of Optim
D. Only items in the first location
Q12. What is the purpose of using nested subforms in the inventory database?
A. To browse and enter records through the location, area, subdivision, and item hierarchy
B. To replace all tables with one large table
C. To prevent users from adding inventory items
D. To eliminate the need for relationships
Q13. In the nested form design, where is a child subform placed on its parent continuous form?
A. In the Form Footer section
B. In the Report Header section
C. In the Page Footer section
D. In the Navigation Pane
Q14. Why does the Item subform not need to display the Subdivision ID for normal use?
A. The parent subform supplies the related subdivision context
B. Item records cannot have a Subdivision ID
C. The Subdivision ID is automatically deleted
D. Items are related directly to Locations instead
Q15. What form type is used to display multiple records such as areas, subdivisions, or items?
A. Continuous Form
B. Modal Dialog Form
C. Pivot Chart Form
D. Navigation Form
Q16. What should be checked after adding a subform causes Access to change the parent form view?
A. Set the parent form Default View back to Continuous Forms
B. Set the parent form Record Source to blank
C. Delete the child subform control
D. Turn off referential integrity
Q17. What is a practical benefit of color-coding levels in nested forms?
A. It helps users visually distinguish locations, areas, subdivisions, and items
B. It automatically validates foreign keys
C. It creates relationships between tables
D. It replaces the need for field names
Q18. What is the basic order of the inventory hierarchy used in the tutorial?
A. Location, Area, Subdivision, Item
B. Item, Location, Area, Subdivision
C. Area, Item, Location, Subdivision
D. Subdivision, Location, Item, Area
Answers: 1-A; 2-C; 3-A; 4-A; 5-B; 6-C; 7-A; 8-A; 9-A; 10-A; 11-A; 12-A; 13-A; 14-A; 15-A; 16-A; 17-A; 18-A
DISCLAIMER: Quiz questions are AI generated. If you find any that are wrong, don't make sense, or aren't related to the video topic at hand, then please post a comment and let me know. Thanks. Summary Today's video from Access Learning Zone continues our inventory database project. In the first part, I planned the database structure, created the tables, and entered some sample records. We now have tables for locations, areas, subdivisions, and inventory items. Each item belongs in a subdivision, each subdivision belongs to an area, and each area belongs to a location.
If you have not completed part one, I recommend doing that before continuing. This lesson builds directly on the tables and sample data created previously.
In this lesson, I will connect the tables with proper relationships and enforce referential integrity. This prevents invalid records from being entered into the database. For example, I do not want someone to enter an item that is assigned to a subdivision that does not exist. Likewise, I do not want a subdivision assigned to an invalid area or an area assigned to an invalid location.
I will also create a search query that lets you find an item and see exactly where it is stored. Finally, I will build a set of nested subforms that allow you to browse and enter inventory data through the complete location hierarchy.
Before working through this lesson, you should have a basic understanding of referential integrity, parameter queries, wildcard searches using Like, continuous forms, and subforms. I will cover the main ideas as we go, but these subjects are important enough that you may want to review my separate lessons on them if they are new to you.
The first task is to establish relationships between the tables. Open the Relationships window from the Database Tools tab. If there are unrelated tables displayed in the Relationships window, such as customer or order tables from another project, you can remove them from the layout. Removing a table from the Relationships window does not delete the table or any existing relationships. It only changes what is displayed in that particular layout.
Add the four inventory tables to the Relationships window: LocationT, AreaT, SubdivisionT, and ItemT.
The hierarchy should be set up as follows:
A location can contain many areas.
An area can contain many subdivisions.
A subdivision can contain many items.
Create the first relationship by joining LocationID from LocationT to LocationID in AreaT. Enable Enforce Referential Integrity. This ensures that every area record must be assigned to a valid location record.
Next, join AreaID from AreaT to AreaID in SubdivisionT and enforce referential integrity.
Finally, join SubdivisionID from SubdivisionT to SubdivisionID in ItemT and enforce referential integrity.
Each of these is a one-to-many relationship. One location can have many areas, one area can have many subdivisions, and one subdivision can have many inventory items.
When creating relationships, Access also offers Cascade Update Related Fields and Cascade Delete Related Records. In most situations, I do not recommend using cascade deletes. Cascade delete means that deleting a parent record automatically deletes all related child records. For example, deleting a location could delete all of its areas, all of the subdivisions in those areas, and all of the inventory items contained in those subdivisions.
That can be extremely dangerous. The same principle applies to customer and order databases. If deleting a customer also deletes all of that customer's orders, you could lose important accounting and historical records. In most databases, I prefer to prevent deletion of records that still have related child records rather than automatically deleting everything underneath them.
Once the relationships are saved, Access will prevent invalid data from being entered. If someone tries to assign an item to a subdivision that does not exist, Access will display an error explaining that a related record is required. This is exactly what we want. It keeps the inventory database organized and prevents orphaned records.
Next, I will create an inventory search query. The purpose of this query is to let me search for an item by name and see its complete storage path. For example, I should be able to search for "Optimus" and learn that Optimus Prime is on Shelf Two, in Bookcase One, in the Office.
Create a new query in Design View and add LocationT, AreaT, SubdivisionT, and ItemT. Because the relationships have already been defined, Access should display the joins between the tables automatically.
For this query, include only the fields needed to identify the item and its location. I recommend including LocationID and LocationName from LocationT, AreaID and AreaName from AreaT, SubdivisionID and SubdivisionName from SubdivisionT, and ItemID and ItemName from ItemT.
You can also include the Notes field if you want to see item descriptions or additional details. However, if the main goal is simply to find where an item is located, the Notes field is optional.
Save the query with a meaningful name, such as InventorySearchQ.
When you run the query without criteria, it displays all items along with their location, area, and subdivision. This provides a useful inventory list, but we can make it much more useful by adding a parameter search.
Return to Query Design View and add criteria under the ItemName field. Use a parameter prompt that asks the user for an item name, combined with a wildcard search using Like. The wildcard characters before and after the entered text allow Access to find the entered text anywhere within the item name.
This means you do not have to enter the exact item name. Searching for "Optim" can find "Optimus Prime." Searching for "cube" can find "Rubik's Cube." Searching for "mop" can find an item such as "Mop and Bucket."
The query now serves as a simple item locator. Enter part of an item's name, and Access displays the item's location, area, subdivision, and name. This is a very useful feature, and it requires no VBA programming.
The next task is to build a data-entry and browsing interface using nested subforms. This lets us view the inventory hierarchy in one form. I can select a location, see the areas within that location, see the subdivisions within a selected area, and then see the items stored in a selected subdivision.
The forms will be nested like a set of Russian nesting dolls:
Location form
Area subform
Subdivision subform
Item subform
The key to making this work is creating a continuous form for each table. A continuous form displays multiple records in a repeating list. I will start with the innermost form and work outward.
Begin by creating ItemF, a continuous form based on ItemT. Include ItemID and ItemName. You can optionally include Notes beneath the item information. Since this form will be used as a subform, it does not need to display SubdivisionID. The parent subdivision form will automatically filter the item records based on the selected subdivision.
I prefer to use different colors for each form level. This is not required, but it makes it easier to see which records belong to which level of the hierarchy. For example, you might use yellow or brown for items.
Next, create SubdivisionF as a continuous form based on SubdivisionT. Include SubdivisionID and SubdivisionName. This form does not need to display AreaID because the parent area form will control which subdivision records appear.
Make room in the Form Footer section of SubdivisionF for the ItemF subform. Place ItemF in the footer area. When Access adds a subform control, it may automatically change the parent form's Default View property away from Continuous Forms. This is one of those odd behaviors in Access that you will need to correct manually. Open the properties for the parent form and set its Default View back to Continuous Forms.
Once this is done, each subdivision record can display its related inventory items directly beneath it.
After that, create AreaF as a continuous form based on AreaT. Include AreaID and AreaName. Again, AreaID does not need to be displayed if space is limited, but it should still be part of the form's record source and controls.
Place SubdivisionF in the footer section of AreaF. Make sure the parent form remains a continuous form after adding the subform control. You will need to size the subform control carefully so that it displays a reasonable number of subdivisions and their related items.
Nested subforms can take some trial and error when it comes to sizing. The subform controls do not automatically expand and contract perfectly based on the number of records. You have to decide how much space each level should have. It is possible to create more dynamic resizing behavior, but that generally requires VBA programming. For this project, a fixed size is sufficient.
Finally, create LocationF as a continuous form based on LocationT. Include LocationID and LocationName. Place AreaF in the footer section of LocationF and make sure that LocationF is also set to Continuous Forms after adding the subform.
At this point, the form hierarchy is complete. When you open LocationF, you can browse through locations. Under each location, you see its areas. Under each area, you see its subdivisions. Under each subdivision, you see the inventory items stored there.
For example, you might have an Office location containing Bookcase One and Bookcase Two. Bookcase One might contain Shelf One, Shelf Two, and Shelf Three. Each shelf can then display the items stored on it.
You can also enter new data directly within this form structure. Add a new location, then add areas within that location, subdivisions within those areas, and items inside those subdivisions. Because referential integrity is enabled and the forms are properly linked, Access automatically keeps the relationships organized.
This setup gives you a practical inventory system with no programming. You can browse your inventory visually, add new records where they belong, and use the search query whenever you need to locate a specific item.
For example, if you need to find your Rubik's Cube, run the InventorySearchQ query and enter "cube." Access can tell you that it is in Box 12345, on Shelf Three, in the Storage Unit. That is the value of organizing the data properly from the beginning.
Also, in today's Extended Cut, we will build a dedicated inventory data-entry form using reverse cascading combo boxes. Normally, cascading combo boxes work from the top down. You select a location, then the available areas are filtered based on that location, and then the available subdivisions are filtered based on the selected area.
In the extended lesson, I will work in reverse. Since ItemT stores the SubdivisionID, I can determine the appropriate area and location from the selected subdivision. The form will update the location, area, and subdivision combo boxes automatically as you move from one inventory item to another.
I will demonstrate the newer built-in cascading combo box capabilities available in Microsoft Access, which reduce the amount of VBA required. I will also discuss the older method of manually filling combo boxes with SQL statements for those using older versions of Access.
The extended form will also remember the current location and area when you begin entering a new item. This is helpful if you are entering a group of items from the same location. Instead of selecting the same location and area repeatedly, you can keep those values in place and simply choose the next subdivision and enter the new item name.
If you need a more advanced system for tracking equipment, property, assets, assignments, transactions, or inventory movement, take a look at my asset management and barcode inventory training materials. Those lessons cover more advanced features such as tracking who has an item, recording inventory transactions, printing barcodes, and scanning items in and out.
At this point, however, you have the foundation of a solid inventory organizing database. You have normalized tables, proper relationships, referential integrity, a flexible item search query, and nested forms for data entry and browsing.
You can find a complete video tutorial with step-by-step instructions on everything discussed here on my website at the link below. Live long and prosper, my friends. Topic List Creating table relationships in Access
Enforcing referential integrity
Why cascade deletes can be dangerous
Building a multi-table inventory query
Creating wildcard parameter searches
Creating continuous forms for data entry
Building nested subforms
Browsing inventory by location hierarchy Article A useful inventory database needs more than tables and sample records. The tables must be connected properly so that every item belongs to a valid subdivision, every subdivision belongs to a valid area, and every area belongs to a valid location. Once those relationships are in place, you can search for an item and immediately see exactly where it is stored. You can also build forms that let you browse and enter inventory through the entire storage hierarchy.
Assume the database contains four tables: LocationT, AreaT, SubdivisionT, and ItemT. Each table should have its own primary key, such as LocationID, AreaID, SubdivisionID, and ItemID. The AreaT table should also contain LocationID, the SubdivisionT table should contain AreaID, and the ItemT table should contain SubdivisionID. This creates a hierarchy:
A location contains areas.
An area contains subdivisions.
A subdivision contains items.
The first step is to create relationships between these tables. Open the Relationships window from the Database Tools tab. Add the LocationT, AreaT, SubdivisionT, and ItemT tables to the window.
Create a relationship by dragging LocationID from LocationT onto LocationID in AreaT. In the relationship dialog, select Enforce Referential Integrity. This prevents Access from allowing an area record to reference a location that does not exist. For example, you cannot create an area with a LocationID of 99 unless LocationID 99 already exists in the LocationT table.
Next, drag AreaID from AreaT onto AreaID in SubdivisionT and enforce referential integrity. Then drag SubdivisionID from SubdivisionT onto SubdivisionID in ItemT and enforce referential integrity there as well.
These relationships create three one-to-many relationships. One location can have many areas. One area can have many subdivisions. One subdivision can have many items.
In most inventory databases, it is safer not to enable cascade deletes. Cascade deletes mean that deleting a record in the parent table automatically deletes all matching records in the related child table. For example, if cascade deletes were enabled from LocationT to AreaT, deleting a location could delete all of its areas. If cascading were enabled through the entire chain, deleting one location could remove every area, subdivision, and inventory item stored beneath it.
That can be useful in limited situations, but it is usually too dangerous for inventory or business data. You generally want to prevent accidental deletion of records that still have related data. Referential integrity without cascade deletes gives you that protection.
Once the relationships are in place, try entering an item with a SubdivisionID that does not exist. Access should reject the record and display an error explaining that a related record is required in the SubdivisionT table. This is exactly what you want. It ensures that every item has a valid place in the hierarchy.
The next step is to create a query that shows the complete location of every item. Create a new query in Design View and add LocationT, AreaT, SubdivisionT, and ItemT. Because the relationships have already been established, Access should display the joins between the tables automatically.
Add the following fields to the query design grid: LocationID and LocationName from LocationT, AreaID and AreaName from AreaT, SubdivisionID and SubdivisionName from SubdivisionT, and ItemID and ItemName from ItemT. You can also include a Notes field from ItemT if you want descriptions or additional details to appear in the results.
Save the query with a meaningful name, such as InventorySearchQ.
When you run this query, it should show each item along with its full storage path. For example, an item might be listed as being in Shelf Two, inside Bookcase One, in the Office location. This is already useful as a general inventory report, but it becomes even more useful when you add a parameter prompt.
Return to Design View and locate the ItemName field. In the Criteria row, enter a wildcard parameter expression that searches for any text entered by the user. The basic idea is to use the Like operator, surround the user's entered value with asterisks, and prompt the user with a message such as Enter item name.
The asterisks are wildcard characters. They mean that Access should match any characters before or after the text entered by the user. If you search for Optim, Access can find Optimus Prime. If you search for cube, Access can find Rubik's Cube. This is much more flexible than requiring the user to type the exact item name.
Save the query and run it. Access will prompt for an item name. Enter part of an item name, and the query will display its location, area, subdivision, and item name. This creates a simple but effective item finder without requiring programming.
The next improvement is to create forms for browsing and entering inventory records. A particularly useful design is a set of nested continuous forms. This allows you to select a location, see the areas within that location, see the subdivisions within the selected area, and see the items within the selected subdivision.
Start with the innermost form, which is the Item form. Create a continuous form based on ItemT. Include controls for ItemID and ItemName. You can also include Notes if you want to store descriptions, serial numbers, condition details, or other information about the item.
The Item form does not need to display SubdivisionID. That field is still part of the table and is required for the relationship, but when the form is used as a subform, the parent form can supply that value automatically. This is one of the main benefits of subforms and linked fields.
Save this form with a name such as ItemF.
Next, create a continuous form based on SubdivisionT. Include SubdivisionID and SubdivisionName. Make room in the form footer for the ItemF subform. Add ItemF as a subform control in the footer of the Subdivision form.
Set the subform control's Link Master Fields property to SubdivisionID and its Link Child Fields property to SubdivisionID. This tells Access to display only the items whose SubdivisionID matches the current subdivision. It also means that when you add a new item through the subform, Access can automatically assign the correct SubdivisionID.
Save this form as SubdivisionF.
When placing a subform inside a continuous form, Access may temporarily change the parent form's Default View setting. After adding the subform, check the parent form's properties and make sure its Default View is set back to Continuous Forms. Otherwise, the form may display as a single form instead of showing multiple subdivision records.
Open SubdivisionF and test it. Each subdivision should display its own matching items beneath it. If you select a subdivision such as Shelf Two, the item subform should show only the items stored on Shelf Two. Another subdivision, such as a broom closet, should show only the items stored there.
Next, create an Area form based on AreaT. Include AreaID and AreaName. Make room in the footer and add SubdivisionF as a subform. Link the forms using AreaID as both the master and child field.
Save this form as AreaF. When you open it, each area should display its subdivisions, and each subdivision should display its related items. You now have a three-level hierarchy visible on one screen.
Finally, create the outermost Location form based on LocationT. Include LocationID and LocationName. Add AreaF as a subform in the footer, linking LocationID in the parent form to LocationID in the child form.
Save this form as LocationF.
When you open LocationF, you should be able to browse the full hierarchy. Select a location and see its areas. Within each area, see its subdivisions. Within each subdivision, see its inventory items. This gives you a structured view of where everything is stored.
You can also enter data directly through the nested forms. To add an item to an existing subdivision, move to the correct subdivision and enter a new item in the item subform. To add a subdivision, enter it under the correct area. To add an area, enter it under the correct location. Because the forms are linked properly, Access can populate the related foreign key values automatically.
Nested subforms can require some layout adjustment. Each subform control needs enough height to show the number of records you want visible. If you make the controls too short, users will need to scroll frequently. If you make them too tall, the outer form can become difficult to navigate. There is no single perfect size, so adjust the layout based on how much information you expect to store at each level.
Using different colors for each level can make the hierarchy easier to read. For example, locations might have one color, areas another, subdivisions another, and items another. This is optional, but it can help users quickly recognize which level of the hierarchy they are viewing.
For more focused data entry, you may eventually want a dedicated Item Entry form. Instead of making users navigate through several nested forms, the form can provide selection boxes for location, area, subdivision, and item information. The item itself would store only the SubdivisionID, but the form can use cascading selection boxes to guide the user through the hierarchy.
In a standard cascading setup, selecting a location limits the available areas. Selecting an area limits the available subdivisions. Selecting a subdivision determines where the new item will be stored.
A reverse cascading setup can also be useful when viewing existing records. Since the item record already has a SubdivisionID, the form can determine the related AreaID and LocationID by looking up the parent records. This lets the form display the correct location, area, and subdivision whenever you move from one item to another.
For a more polished item entry form, a small amount of code may be helpful. The code should update the available choices in each selection box when the user changes a higher-level choice. It should also identify the correct location and area when an existing item is loaded. Finally, when the user creates a new item record, the form can preserve the most recently selected location and area so that entering several items in the same place is faster.
Even without programming, however, the relationships, search query, and nested forms provide a strong foundation for an inventory database. Referential integrity protects the hierarchy. The parameter query helps you find items quickly. The nested forms make it easy to browse and enter data. Together, these features turn a few basic tables into a practical system for organizing equipment, collections, household storage, office supplies, or other inventory. Primary Topics
referential integrity relationships, one-to-many table hierarchy, inventory search query, wildcard parameter criteria, continuous forms, nested subforms, inventory data entry
Secondary Topics
relationship window layout versus saved relationships, cascade updates, cascade deletes, form record sources, subform parent-child filtering, form color coding and layout sizing
|