|
|
Free Lessons Courses Seminars |
TechHelp Fast Tips Templates |
Topic Index Forum ABCD |
|
||||||
|
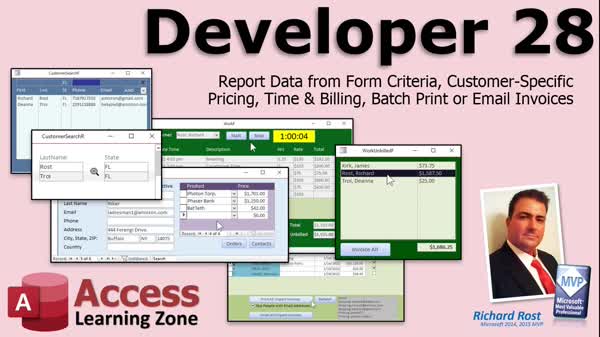
Access Developer 28 Filtered Reports, Custom Pricing, Billing, Invoices Welcome to Access Developer 28. In this course you will learn how to get report data from form criteria, set up customer-specific pricing, create a time and billing system with start and stop timers, and manage batch printing or emailing invoices. We will discuss pulling filtered data from a search form into a report, assigning custom product prices per customer, tracking billable hours and unbilled work, and automating invoice generation. Basic knowledge of recordsets is recommended as we build on previous levels to enhance your Access applications. Lessons
Database FilesResources
Lesson SummaryWelcome! Report Data & Custom Pricing Setup - Welcome to Microsoft Access Developer Level 28. In this course we will cover getting report data from form criteria, setting up customer-specific pricing, creating a time and billing system with start and stop timers, and batch printing or emailing invoices. We will discuss how to pull filtered data from a search form into a report, create and maintain custom pricing for individual customers, track billable hours and manage unbilled work, and generate or send invoices in bulk. This class builds on previous levels, and familiarity with concepts like recordsets is recommended.
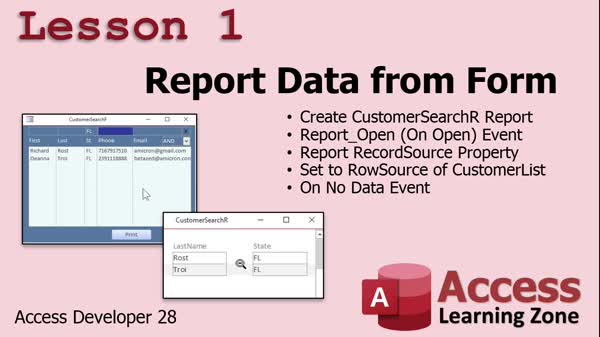
Lesson 1: Print Filtered List Box Results - In Lesson 1, we are going to learn how to report data from a form in Microsoft Access by creating a report that pulls its record source directly from a form's list box row source. We will walk through how to set up a button to open the report with the filtered data, show where to place the necessary code, and discuss handling scenarios where there are no records to display. This lesson also covers best practices for keeping your databases manageable as you add features.
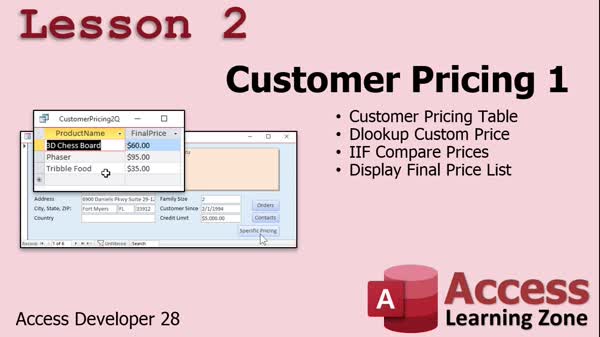
Lesson 2: Customer-Specific Pricing Tables - In Lesson 2, we will begin working with customer-specific pricing in Microsoft Access. I will show you how to set up tables and use queries to assign unique prices for certain products to specific customers, rather than applying a blanket discount. We will create a cross-reference table for customer pricing, enter sample data, and build a query to check for and display custom prices for each customer, using functions like DLookup and Immediate If to handle default and custom pricing. We will also discuss displaying customer pricing on forms and working with related queries and buttons.
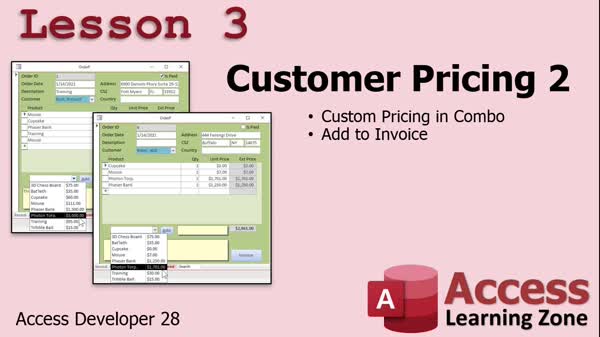
Lesson 3: Custom Customer Pricing in Combos - In Lesson 3, we continue building on custom customer pricing by adding customer-specific pricing to the product selection combo box on the order form. We will walk through updating tables and queries, especially focusing on using "unit price" instead of "price," making sure the combo box displays the right information, and troubleshooting common issues such as field name mismatches that can cause errors in Access. We will also discuss how to further modify the setup, such as using subforms to view or manage customer pricing.
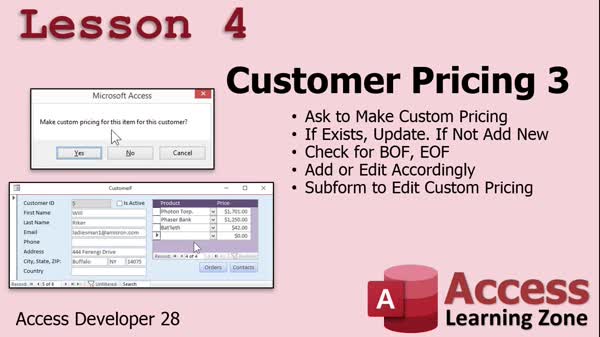
Lesson 4: Customer Pricing & Subforms - In Lesson 4, we are finishing up customer pricing by showing how to prompt users to make custom price changes permanent for specific customers. I will walk through using a recordset to check if a customer-product pricing record exists, then either update or add it as needed. We will also check for valid ProductID values to prevent errors. Finally, I will show you how to create a subform on the customer form to edit and view custom pricing for each customer, making customer pricing management more flexible and accessible.
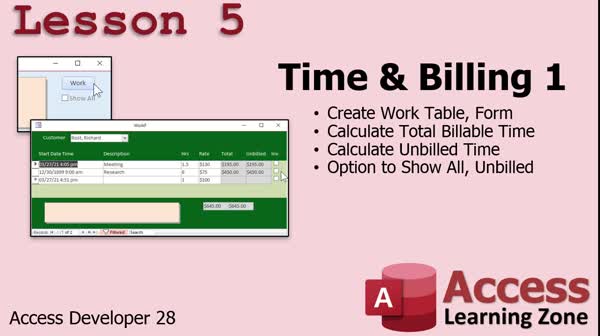
Lesson 5: Track Time & Billing Using Tables - In Lesson 5, we will start building a time and billing system in Microsoft Access to track the hours and rates for client work alongside an existing invoicing setup. I will show you how to create a work table to log activities, hours spent, billable rates, and whether items have been invoiced. We will walk through making a query to calculate line totals and unbilled amounts, designing a user-friendly form for data entry, adding footers for totals, and using VBA to improve form interactivity. We will also discuss filtering to view only unbilled items and some layout customization options.
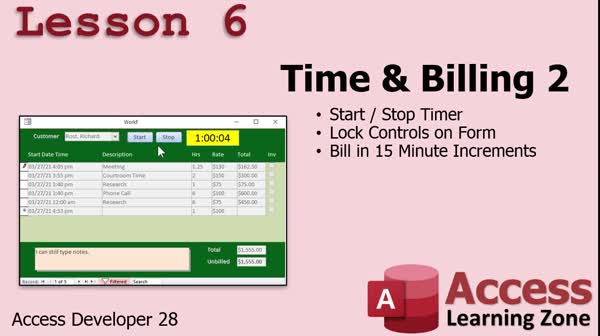
Lesson 6: Start/Stop Timer w/ 15-Min Billing - In Lesson 6, we continue building the time and billing system by adding start and stop timer buttons to the work form, allowing you to track billable seconds for each job. I will show you how to display a running clock, update billable hours in 15-minute increments, and lock the form controls while the clock is active to prevent editing. We will discuss handling timer events, converting seconds to hours, and rounding up billing values, as well as how to update values manually and ensure the timer behaves correctly when moving between records.
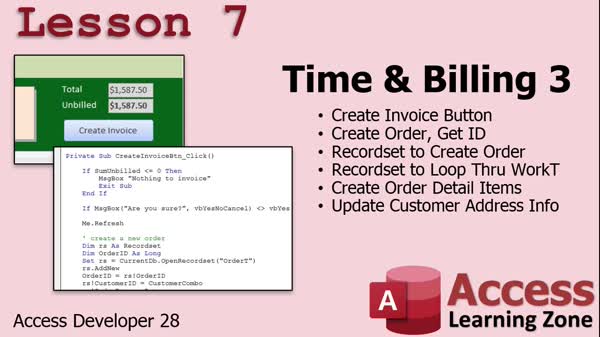
Lesson 7: Generate Customer Invoices - In Lesson 7, Time and Billing Part 3, we will walk through creating a button to generate an invoice from all time and billing details for a customer. I will show you how to use recordsets to create an order entry, loop through work table items to add detail records, update the customer address using a public subroutine, and open the order form. We will discuss billing rates, managing default values, and ensure the process only invoices the current customer. At the end, we will talk about preparing to show unbilled hours for each customer and future steps for batch processing.
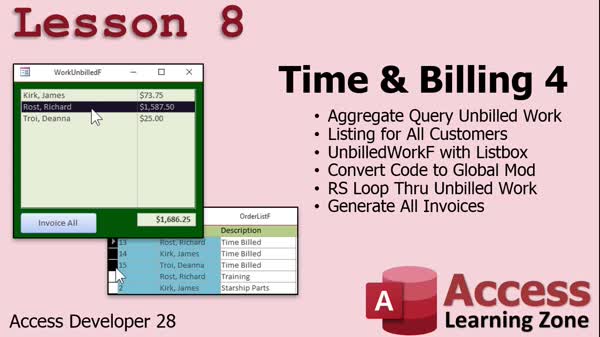
Lesson 8: Batch Invoice Unbilled Work - In Lesson 8, we will build a process in the Time & Billing 4 database to invoice all customers with unbilled work. We will walk through creating an aggregate query to list customers and their total unbilled amounts, display this in a list box on a form, and add functionality to invoice customers individually or all at once with a single button. We will also discuss updating our process to use global code for invoice creation, display a total unbilled amount, and ensure the interface refreshes properly after billing actions.
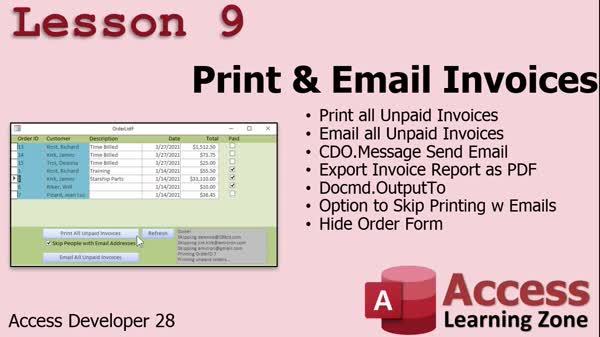
Lesson 9: Email & Print Unpaid Invoices - In Lesson 9, we will learn how to print and email all unpaid invoices from our system. I will show you how to batch print invoices, email invoices as PDF attachments using Access and your email server's SMTP settings, and explain how to skip printing for customers with email addresses. We will walk through setting up the necessary code, managing status updates, and configuring options so you can efficiently send invoices by email or print only those that need to be mailed. We will also discuss organizing credentials and best practices for managing your invoice workflow.
Lesson 10: Recap & What's Next - In this course we learned a variety of topics in Access Developer 28, and now we will review what has been covered and discuss what is coming next in Developer 29. I encourage you to keep submitting questions and topic requests, and mention that lessons may be organized into seminars or templates on the website, specifically related to time and billing material already included in this course. We will also talk about the TechHelp series, which offers additional content outside the main lessons. If you see a time and billing seminar available, you will not need to purchase it since it duplicates material you already have.
NavigationKeywordsreport data from form criteria, customer specific pricing, filtered list box report, cross-reference pricing table, custom product pricing, order form combo box pricing, time and billing system, start stop timer, batch invoice creation, email invoices pdf
TranscriptWelcome to Microsoft Access Developer Level 28 brought to you by AccessLearningZone.com. I am your instructor Richard Rost.Developer 28 is going to cover getting report data from form criteria, customer-specific pricing, time and billing, and batch printing or emailing of invoices. Report data from form criteria: We are going to take the customer's search form that we made before, where we can put in some different criteria like state or email address, and use that to populate a report based on those selections. Customer-specific pricing is where we can take a particular customer and say for this product they pay this price, for this product they pay this price, and so on. We can do that for each customer. Time and billing will allow us to track the time that we spend working for a client. We will have a little stopwatch here, a little clock. We can click on start and stop, and you will see the time go up. From there we will see the total work unbilled. We will be able to generate invoices for all of our customers where the actual work items become items in the order. Then we will batch print or email all of the invoices out - email if we have their email address and print them on paper, 1990 style, if we do not. This class covers Access Developer 27. I strongly recommend you take this and all the previous classes before taking this class. You should definitely know all the material in the beginner, expert, advanced levels, and developer up to level 1. Specifically, I would recommend taking up to Developer Level 16, when we start covering recordsets. We will use a lot of recordsets in this class. If not, make sure at least you watch my Access VBA Introduction class. I will be using Access 365, roughly equivalent to Access 2016 or 2019. The material in this class should work all the way back to about Access 2007. As always, if you have questions pertaining to the material covered in today's class, post them down below at the bottom of the page. If you have other questions about Access that do not pertain to today's class, feel free to post them in the form. Let's take a look in more detail at what is covered in today's class. In lesson one we are going to learn how to get data in a report from a form. In Developer 26 we built that really cool customer search form where we can pick some criteria and then have the list of customers filtered by that criteria. What if you want to print that stuff out? In this lesson I will show you how to make a report that gets the same set of data from the row source of that list box by just clicking one button. In lesson two we are going to start working with customer-specific pricing. We are going to set it up so that if you have a customer that you want to have special pricing for certain products, we will set up a table for that. Instead of a blanket discount across the board, if you have this product, this product, this product for this particular customer, then you can set up a customer price. We will start doing it in lesson two. In lesson three we are continuing with the customer pricing and we are going to add the customer pricing to the product selection combo box on the order form. In lesson four we are finishing up customer pricing. If the user changes the price on an order, it will ask them if they want to make this custom pricing permanent and put it in the table. If it exists, we will update it. If it does not, we will add it new with a recordset. We will check for BOF or EOF to see if that record exists. Then we will make a subform on the customer form so we can edit the custom pricing for each customer. In lesson five we are going to begin working with time and billing. We already have invoicing built, so now we are going to build a system where we can track the time that we spend working for a client. We will create a work table and form. We will track what was done, how many hours, and at what billable rate. Then we will be able to see the total amount of time and the total amount of unbilled time. We will make a checkbox so we can indicate when something has been invoiced or not. Later on, we will go through and click a button to send all our invoices out. In lesson six we are continuing with time and billing. We are going to add start and stop timer buttons to the work form. You will see a little clock counting up for each second that you are billing this customer for. It will then update the billable hours for that record, and I will show you how to round it up so that you bill in 15-minute increments. I will also show you how to lock all of the controls on the form so they cannot be edited while the clock is running. That is sometimes important. In lesson seven, time and billing part three, we are going to create a button to take all of our time and billing details for the customer and generate an invoice. We will do it with a couple of different recordsets. We will create a recordset to create an order entry. We will then loop through all of the work table items and create detail items for them. Then we will update the customer address and open up the order form. In lesson eight, we are going to bill everybody who has unbilled work. We are going to make an aggregate query so we can see all of the customers and the total amount that they have to be billed for. We will put that in a form with a list box. You can double click to open any particular customer, or click the invoice all button. Then we will take the code that we generated in the last lesson, loop through all of these records, and automatically generate all of those invoices at once. In lesson nine, we are going to learn how to print and email all of the unpaid invoices in our system. We just added a bunch of invoices based on our time and billing. I do not want to have to open them all up individually and send them. This lesson will show you how to print all the invoices. First, we will learn how to email all of the invoices out that we have email addresses for for that customer. Then I will show you how to print first. We will have to print first. We will print them all out. Then we will learn how to email. Then I will show you how to skip the people with email addresses when you print. So you can email everybody weekly - here is your invoice, here is your invoice, here is your invoice. Then, once a month or whenever you decide, you can print out invoices and mail them for people who you do not have email addresses for. Here we go. Lesson nine. IntroIn lesson 28 of the Microsoft Access Developer series, you will learn how to generate report data from form criteria, set up customer-specific pricing, create a time and billing system with stopwatch functionality, and batch print or email invoices for multiple customers. Each topic is covered step-by-step, including building forms for tracking work done, adding timers, generating and managing invoices based on billable hours, and automating the process of sending invoices either by print or email.QuizQ1. What is one of the main topics covered in Developer 28?A. Securing databases with passwords B. Creating tables for inventory tracking C. Getting report data from form criteria D. Generating charts with macros Q2. What does the customer-specific pricing feature allow you to do? A. Apply a universal discount to all customers B. Assign custom prices for specific products for each customer C. Only show products with default prices D. Restrict product availability by region Q3. In time and billing, what new tool is introduced to assist with tracking work? A. A barcode scanner B. A calendar selector C. A stopwatch to track work time D. A reminder notification system Q4. How can you generate invoices for time and billing using the new features? A. Manually entering all time logs into a separate spreadsheet B. Automatically converting work items into invoice order items C. Linking with an external billing service D. Printing work logs and mailing them Q5. What function does the batch print and email of invoices serve? A. Ensures only printed invoices are sent B. Sends invoices by fax and SMS C. Automates sending invoices by email if available, printing otherwise D. Requires users to manually select each customer Q6. Why is it recommended to have completed up to Developer Level 16 before taking this class? A. Because earlier lessons cover VBA recordsets extensively B. Because Level 16 covers barcode integration C. Because Level 16 introduces charting D. Because Level 16 is the only way to learn Access Q7. What will the new time and billing system allow you to do regarding tracking? A. Track how much inventory is sold per day B. Track what was done for a client, hours worked, and billing rate C. Track incoming support emails D. Track total company revenue in real time Q8. What is the purpose of the start and stop timer buttons in the time and billing system? A. To limit the time users can spend on a form B. To automatically update customer contact information C. To accurately log and bill for work in increments D. To pause email sending Q9. How does the system handle editing form controls while the timer is running? A. The controls are locked so they cannot be edited B. The controls turn red for a warning C. The controls are automatically cleared D. The controls duplicate values Q10. What is the goal of creating an aggregate query in lesson eight? A. To summarize all work done in a single day B. To analyze which products sell best C. To display all customers with unbilled work and total amounts to be billed D. To compare revenue to expenses Q11. When batch printing or emailing invoices, how does the system decide whether to print or email? A. By revenue size B. By whether the customer has an email address on file C. By customer region D. By invoice payment status Answers: 1-C; 2-B; 3-C; 4-B; 5-C; 6-A; 7-B; 8-C; 9-A; 10-C; 11-B DISCLAIMER: Quiz questions are AI generated. If you find any that are wrong, don't make sense, or aren't related to the video topic at hand, then please post a comment and let me know. Thanks. SummaryToday's video from the Access Learning Zone presents Microsoft Access Developer Level 28. I'm Richard Rost, your instructor for this course.In Developer Level 28, I'll be covering several advanced topics, including how to generate report data based on form criteria, how to handle customer-specific pricing, implementing time and billing tracking, and conducting batch printing or emailing of invoices. Starting off with report data sourced from form criteria, I'll demonstrate how to use the customer search form we've built previously. This form allows you to enter selection criteria such as state or email address. Now you'll learn how to use these criteria to generate a report, displaying precisely the same filtered data you see in the form. Next, the course moves on to customer-specific pricing. This feature lets you set up individual pricing for each product and customer combination. For example, one customer might pay a different price for a given item compared to another customer. I'll show you how to manage these pricing details on a per-customer and per-product basis. Time and billing is another major part of this class. You'll learn to track the time spent working for a client by using a stopwatch feature—simply start and stop the timer, and the application will record elapsed time. We'll also see how you can keep a running total of unbilled work and then generate invoices from these entries, turning each work record into an itemized order. Finally, I'll cover how to handle batch actions for invoices. You'll learn to print or email invoices for all customers—if you have their email addresses, invoices will be sent electronically, and otherwise, you can print them for mailing. This class builds on material from Access Developer 27, and I strongly encourage you to complete all prior courses before taking this one. It's especially important to be familiar with recordsets, which are covered in Developer Level 16, since I'll be making extensive use of them in this session. If you're not comfortable with those concepts, I recommend watching my Access VBA Introduction class as a refresher. While I'll be using Access 365 for the demonstrations, the lessons are compatible with versions as far back as Access 2007. If you have any questions that relate directly to today's topics, you can post them at the bottom of the page. For broader Access questions, feel free to use the general form. Now, let's examine the lessons of this course in more detail: In the first lesson, I'll show you how to pull report data directly from the search criteria in a form. In Developer 26, we created a customer search form with a dynamic filter—now you'll see how to print your selected data by creating a report that uses the list box's row source. The second lesson begins our work with customer-specific pricing. Here, I'll demonstrate how to create a dedicated table where you can specify unique pricing for certain products and customers, rather than applying a global discount or pricing rule. In the third lesson, we'll further refine this feature by incorporating the customer-specific pricing into the product selection combo box on the order form. This way, when you place an order, the correct pricing appears for each customer. Lesson four completes the customer pricing setup. When a user changes an order price, you'll have the option to permanently save this new price for that customer and product combination. If a record already exists, it will update the price; if not, it will add a new record using a recordset. We'll check for the presence of records using BOF and EOF and then create a subform within the customer form for easy editing of each customer's custom prices. Starting in lesson five, we develop the time and billing system. Since invoice functionality already exists, we'll now add features to track client work. We'll create appropriate tables and forms to record details like hours worked, the tasks performed, and applicable billing rates. You'll also be able to see the total hours and unbilled amounts and mark work items as invoiced. Lesson six advances the time tracking tool by adding start and stop timer buttons to the work form. You'll watch the clock count up as you track billable time for a customer. I'll explain how to round billing to the nearest fifteen minutes and prevent editing the form while the timer is running, which is important for data integrity. Lesson seven ties time and billing into invoicing. You'll learn to take all work records for a customer and quickly generate an invoice. We'll use a combination of recordsets—one for the order header and others for work item details. I'll also cover updating customer addresses and launching the order form automatically. In lesson eight, we shift focus to automating the billing process for all clients with unbilled work. I'll guide you through creating an aggregate query to summarize unbilled totals, displaying this information in a form with a list box. You can open individual customer records or invoice all customers at once by looping through the results and generating invoices. The ninth and final lesson demonstrates how to batch print and email unpaid invoices. After generating multiple invoices through time and billing, you won't need to send them one by one. I'll walk you through the process of emailing invoices to customers with available email addresses, printing invoices for those who require paper copies, and making sure no duplicate notifications are sent. This setup allows you to email invoices on a weekly basis and handle printing and mailing for everyone else as needed. You can find a complete video tutorial with step-by-step instructions covering everything discussed here on my website at the link below. Live long and prosper, my friends. Topic ListGetting report data from form criteriaCreating a report based on list box selections Setting up customer-specific pricing tables Adding customer pricing to order form combo box Making custom pricing changes permanent Editing customer-specific pricing via subform Building a time and billing tracking system Creating a work table and entry form for billable hours Adding start and stop timer buttons to work form Rounding billable time in 15-minute increments Locking form controls during active timing Generating invoices from time and billing details Using recordsets to create order entries and details Aggregating unbilled work by customer Batch generating invoices for all unbilled customers Batch printing all unpaid invoices Batch emailing invoices to customers with email addresses Skipping customers with email addresses during invoice printing Primary Topicsreport generation from form, customer-specific pricing, time and billing system, invoice batch processing, Access VBA recordsets, form-driven data filtering, order entry automation, aggregate queriesSecondary Topicssubforms for pricing management, form control locking, rounded billable hours, email integration |
||||||||||||||||||||||||||||||||||||||
|
| |||
| Keywords: report data from form criteria, customer specific pricing, filtered list box report, cross-reference pricing table, custom product pricing, order form combo box pricing, time and billing system, start stop timer, batch invoice creation, email invoices pdf PermaLink How To Use Form Criteria for Reports, Customer Pricing, and Time Billing Automation in Microsoft Access |