Fitness 73
By Richard Rost

 4 months ago
Build a Dynamic Menu System Using a List Box, Part 2 In this lesson, we continue building a data-driven, multi-level menu system in Microsoft Access for the fitness database. We expand on the initial menu system introduced in the previous video by adding the ability to navigate through multiple menu levels and return to the main menu. I walk through how to update menu labels, manage parent-child relationships using hidden text boxes, modularize code with subroutines, and test dynamic submenu creation. We also discuss label formatting, error handling, and design considerations for customizing and maintaining the menu system. MembersIn the extended cut, we will add features to colorize each menu with its own foreground and background colors. I will also show you how to add the ability to run queries, open tables and reports, refresh the list, and run code such as functions or subroutines from your menu items. Silver Members and up get access to view Extended Cut videos, when available. Gold Members can download the files from class plus get access to the Code Vault. If you're not a member, Join Today!
PrerequisitesRecommended CoursesUp Next
Keywords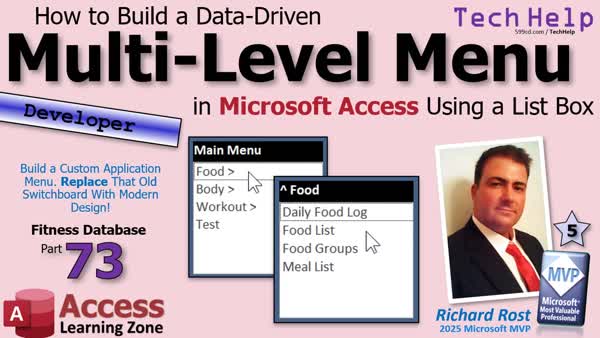 TechHelp Access, data-driven menu system, multi-level menu, hierarchical menu, list box navigation, menu table structure, parent ID, submenu, dynamic menu, label caption update, DLookup, row source, modular VBA code, parent-child relationship, menu navigation error handling, reload list subroutine
 Subscribe to Fitness 73
Get notifications when this page is updated
Transcript Still using that clunky old switchboard system or old menu forms with tons of buttons on them? Well, we're building a data-driven multi-level menuing system in Microsoft Access.
Welcome to another TechHelp video brought to you by AccessLearningZone.com. I'm your instructor, Richard Rost.
If you landed on this video on YouTube or elsewhere, this is part 73 of my fitness database series, but you don't have to watch all the previous videos. We started the menuing system in part 72, the last video. So just go watch that first if you're not following the whole series. But this is basically part two of the menuing system videos. Today, we're going to add that multi-level part to it.
We built part one where we got the main menu built. Now we're going to make it so you can click on one of these items and go to a menu underneath it, and then click on the top and go back to the main menu and all that cool stuff.
All right, are you ready? Let's get back to it.
Yesterday, we got the basics of our menu built. Now we just have to do the open menu subroutine, this guy right there. So that if we're going to go to a different level of the menu, then our system knows what to do with it.
So, private sub open menu, and we're going to send into it a menu ID as long. If we click on number one, it's going to send a one, and if we click on ID two, it will send a two in there.
Now, the first thing I want to do is change the label. It just says description now. In fact, let's change that label so it says main menu. Actually, let's not do it that way. Remember, if you do it like that, it'll resize the label on you. So when I click on the label, you want to go to format and change it here, main menu.
Another thing I want to do is I want to decouple this from this guy. Right now they're attached. So I'm going to cut it and paste it. That way, it's not attached to that list box below.
The reason why is sometimes the events are linked as well. We want to avoid that. So now it's a free-standing label and let's call this the parent label instead of description label, parent label.
All right. Save it, close it, open it.
Now, what I'd like to do is when I click on, let's say, food, and it switches to the food menu, what I'd like to happen is this label now changes to say food. We're also going to put a little up thing, either like a caret symbol, so that the user knows they can go up to the previous menu.
So in our code, let's do that first. Let's say set the menu label, and I'm going to say that the parent label.caption equals a little up arrow thing, either and a space. And then that description, where's the description? 0, 1, 2, 3, column three. So it's going to be menu list.column(3), description description description.
I usually only throw these things in a variable if I'm going to use them multiple times, and I think we're just going to use that once here. But I always put a comment after it, so I know what column three is, so I don't have to keep constantly going back to the SQL. I keep this around when I'm designing so I can quickly refer to it, and then in my code, I'll put that's the description.
Let's see if that works. Save it. Come back out here. Let's click on body.
All right, perfect. See, we've got body and then a little whoo whoo doohickey here, whoo whoo doohickey, whoo whoo doohickey, so the user knows they can click here to go back up to the previous menu. We'll do that eventually. Just hang on. Be patient.
Workout, food. Okay. Now the next thing we need to do is we need to go to this menu. Now we're going to need a place to store what menu we're on. You could store it in a variable. You could store it in a tempvar. For this, I'm going to put a little hidden text box up here so we know what the parent of this guy is.
You could do a lookup every time. It's just easier. This is one of the things that's easier to throw in a text box.
So, form design. Grab me a text box. Drop it here. Get rid of that label that comes in with it. When I usually plan on hiding stuff, I'm going to make it red so I can see it in design view. Let's just call this guy the parent ID. Default value is zero. The parent of zero is zero.
Now, in our code, when we switch, we're going to set the parent ID. So we're going to say parent ID equals menu list or menu ID, the menu ID, whatever we send into the menu ID.
Now, we're going to reload the list. So it's going to be menu list.row source equals that whole SQL statement. Copy the whole thing. Paste it in here. We gotta fix it, though. All right, quotes around this. Move this so you can see it better.
Menu. Next line. Don't forget to put a space in front of that from. You can either have it here or here, either way or both. It doesn't hurt to have too many spaces, but I like to always put them here so you don't forget them.
Now, what we want to do is say, all right, load up the menu items where the parent ID equals the one that I just clicked on. Down here, you can put either menu ID or parent ID because at this point, it's the same thing. This becomes more handy in a minute when we have to go up to the previous menu. We wouldn't know what the parent was, but at this point, it's the same value. I think it makes more sense if you put in parent ID.
We need an end up from that. That will reload the list box with the next menu.
All right, save it. Debug, compile once in a while. Back over here. Let's close it and open it. Now, if I click on food, look at that. I'm on the food menu and it says one, and I've got no way to go back up to the previous menu, so just close it and reopen it. If I click on body, now I'm on the body menu and it says parent two.
We're getting somewhere. Workout, there's the workout menu. Exercises, there's my menu. There's my form. That's working good. Everything's working good so far.
You could make an up button if you want. I prefer it this way. It's the same thing. You could put a little button over here with an up arrow in it. Whatever you want.
Speaking of whatever you want, it's time to do what I want. Go click that like button and if you're not subscribed, hit subscribe. It helps me out. It helps the channel out. It lets YouTube know you like my video, so go do it. Thanks.
Now, let's make it so when we click on this label, it goes up to the previous menu.
So, back to design view. This guy here. Event. On click. Yes, labels have events too. We've got some extra blank lines in there.
The first thing we're going to do is reset the parent ID to whatever the parent of the current parent ID is. If we know we're on menu one, which is the food menu, I want to look up what menu one's parent is, which should be zero, and then set that to zero. Now I know what menu to load. That's why I want to save that parent ID there. So that will use the DLookup for.
Reset the parent ID, parent ID = Nz(DLookup("parentID", "menuT", "menuID=" & parentID), 0).
If you're on item one, if you're on menu one, the parent ID is currently one. We're going to look up the parent ID from the menuT where the menu ID equals one. So that's going to go out here to the table to the menu table. It's going to say, OK, find me the item where the menu ID equals one, this guy, and then bring back his parent ID, which is a zero.
Now we need to reload the list again with this parent ID. That's going to be the exact same code that I have here, and I don't like duplicating code in my database. So, now we're going to make another subroutine: private sub reload list. We're going to take this, and move it into here. We're going to send into it a parent ID as a long. Here, we're going to say reload list parent ID. And now down here, we can just say reload list parent ID. We don't duplicate code.
This looks up the parent ID, sends it into here, reloads the list. This one, same thing here too, sets the parent ID, loads the list. Let's see if that works. Save it. Debug, compile once in a while. Let's come out here. Open it. Let's test it. Food. All right. We're good. Back up to the main menu. Perfect.
Now, we still have to redo the label, but the list is loading properly. Body. There's the body menu. Back up to the main menu. Good. Workout. There's the workout menu. Back up to the main menu. Perfect.
Let's refresh that label now. Refresh the label.
So the label, if the parent ID is zero, then parent label.caption equals main menu. Otherwise, it's any other menu. We're going to set it equal to this thing, but you know what? Again, we've got some duplicated code here. Why don't we make another subroutine to handle that? We'll send in the ID and just look it up. How does that work? Let's do that instead.
Let's come down here. Sub set parent label, and we'll send in a menu ID as a long. Then this whole thing can go in here. We'll do this: set parent label. We're keeping our code modular and reusable.
Now, it's menu ID. If menu ID is zero, then put in there main menu. That's the menu we're on. Otherwise, we got a menu ID. We have to look up that guy's description. So, parent label.caption = Nz(DLookup("description", "menuT", "menuID=" & menuID), ""), but we need the little caret thing because we're on a submenu now.
Here, we can say set parent label parent ID to look up that label. Up here, we can get rid of this and say set parent label menu ID there, and it'll call the same code. We could look it up out of the box like we did before or since we've got this, we might as well use this.
Save it. Debug, compile. Whoop. Debug, compile. Come back out here. Let's close it, open it. Food. Up. Body. Up. Workout. Up. Isn't that cute?
Now, one thing I'd also like to do is use our code to set the properties for this box and label in the main menu when it opens, because what can happen sometimes is let's say you're in the food menu. You go into design view and now if you look at the row source, it's got the row source in there and sometimes this will get changed. If you come in here and make a design change, sometimes that ID will get modified because you modified it in code. That happens sometimes.
So, what I'm going to do is get rid of that row source. We're going to set it in code. You can leave that main menu label, that's fine. Go to here, go to events. We already have an on load event. After we do all this stuff (load the API key, check settings, etc.), here's where we're going to set those values. I already forgot what they're called. Reload list and then set parent label.
So, we're going to say set parent label zero, and we're going to reload list zero. This will be to set main menu parent label and load list.
Save it. Debug, compile. Close it, open it. There we go. Zero, which turns out to be the main menu, loads this to zero. So if any changes sneak in in your design, it won't matter. This guy is going to always be reset.
And the next thing I need to do is, not the last thing, but one of the last things, we can hide this guy now. We don't need to see it. Come over here, go to format, make the visible property No. Usually, to save space, I'll just kind of stick it here. Oh, nope. See, it's behind. That's right, everything goes behind list boxes. Over the label. List boxes have a weird thing where their Z-order is always on top. I don't know why they designed it that way, but they did.
Save it. Now, we can get rid of all of this stuff. But first, before you do that, I like to clear out the code. So, before you go wiping out buttons, build event, delete the code. Move this over here for now. Now we can delete this guy. Right-click, build event. I can get it. Otherwise, you get all these button codes left over in your project, and that's just messy. Delete, goodbye, delete, delete. Doing some house cleaning, some spring cleaning. This guy, goodbye.
Workouts. We never named that button. Look at that. Oh, that's bad. Alex didn't yell at me. I got away with it. Hi. Oh, wait a minute. I'm recording this on... damn it.
Now, this can slide right up into there, and you can make this as big as you need it to be. I don't think we're going to have any items more than like five or six levels deep there. Then we can do like so. You know what? Let's make it so that this is all the same width, make it look professional. There's all kinds of stuff you can do.
Now, in the extended cut, for the members, what we're going to do is coloring. We're going to get out our crayons and color this stuff, so every menu can have its own foreground and background color.
We're also going to add the ability to run queries, open tables, open reports, refresh this list, and you can even have it run code. You can have it open a function, run a subroutine, all kinds of extra stuff in the extended cut. There, I've got my slide. Am I supposed to? I haven't recorded it yet, so I can't show any pretty pictures yet. But we're going to do some cool stuff.
You can put items on the menu for them to launch an import, which you can run your own custom code with and all that stuff. Lots of cool stuff in the extended cut for the members. Silver members and up get access to all of my extended cut videos, not just this one. I think there are 20 extended cuts for just the fitness series alone, so you get more than your money's worth for $5.99 a month. Yeah, you get a lot of training.
Of course, gold members can download these databases that I build in the TechHelp videos. Everybody gets a free class every month. There's lots of stuff. I just realized this is fitness 73. My bad. I'm not recording all that again. So yeah, fitness 73.
The next thing I know that a lot of people are going to ask is, do you need to make a form-based tool to modify this thing? Well, you could if you really wanted to. You could give your users the ability to modify this stuff, set their own custom menus, store that in a preferences table. There's so much you could do with it.
I'm not going to bother putting together a way to customize this because this is really more of a developer feature for you, the person building the database. If you want to modify the menus, just go into the table, do it in here. If you want to build yourself a nice menuing system, sure, knock yourself out.
In fact, here, let me show you. We didn't really test doing a submenu. Let's do a submenu. Here's workout. Let's put another menu under workout. The workout menu is menu three. These parent IDs are three. Let's make another one here. It'll be on three. It's going to be the workout submenu. I'm going to make it really big just so you can see - submenu.
Under that menu, notice its menu ID is 12. The next item's parent ID will be 12, order one. Submenu item one 12, two, submenu item two. This is how you can make multiple menus go deep. It's in the table, so you don't have to worry about the design of this.
Watch, I can go up, go back to workout. See, workout submenu. Click on that. Now we're in the workout submenu: submenu item one, submenu item two, and so on. Now it's completely dynamic.
I guess if you really wanted to, you could do a lookup inside here when you load this and put a dot here to indicate it's a menu item versus - well, honestly, that would be something you could put in here in the description. Then just when you feed the label, get rid of that. Like food, for example. You could put food, body, and workout in there. Why didn't it update that one yet? Food, food, body, workout.
Then when you go to that one, just don't display it when you update the label. So let's find the label code. Where's that parent label? Ok, and then right here, see, now we're looking it up. So let's do this: dim description as a string. Actually, let's just make it S. S as string. We're going to say S = this. Cut that out, make that S.
Now we're going to say if the right of S, 3, equals "...", then S = the left of S, len(S) minus 3. That will get rid of the "..." on the menu header.
Save it. Debug, compile. Come back out here. Let's go up, down to body. No, it's not working. Hold on. What happened? Oh, I know what happened.
I'm glad this came up. This has bitten me before. That's not "...". You know what happens? See this little autocorrect thing? I hate this thing. What it does is look - I just hit backspace once, "...". It autocorrected that to a single ellipsis. That's one character. It's a high-ASCII character ellipsis.
You have an option: you can live with the ellipsis if you like it, or you can turn off that autocorrect. Let's try keeping it because it is a little more compact, or let's get rid of that altogether. That thing is a pain.
Let's do this: We're using a little caret to go up. Let's do a little right arrow to mean that this is a menu. How's that sound? We'll do that instead. That's a menu. Or if you want to do three of them, you can do three of them. That's a bit too much, though. Let's do that.
Now our code is just going to be if right(len(S),2) is " »" (or the ASCII character), and workout log... submenu, like that. We'll do sub item one, sub item two, whatever those are.
Now let's see what it looks like. Main menu. All right. That looks better. I like that. Workout. Oh, that looks so good. Workout submenu. You could even do it so that if you have exercises or submenu items that don't have anything in them, like I don't think we put anything in the weight plates, that's going to generate an error.
You could even do it so that it checks to see if that form exists before it opens it. Not a bad idea to make sure that you don't get a crash. You could do IsLoaded in here - well, no, you get to check this. You need to check to see if it exists. It's a whole different block of code. Maybe we'll talk about that next, but just make sure it doesn't throw an error. Put On Error Resume Next in there for now, at least so you won't get an error message.
In fact, we might as well wrap this properly if we're going to do it. On Error GoTo FormError, then On Error GoTo 0 to turn the error handling off. Exit Sub here, and then we'll say FormError: MsgBox "Error opening form: " & Err.Description. Resume Next.
OK, that's properly done now.
Exercises looks good. Weight plates: Error opening form. The form name is misspelled or refers to a form that doesn't exist. That's better than just getting a compile error or whatever that was.
I'm done. So yeah, extended cut, check it out: colorizing the menus, opening more stuff, tables, queries, forms, reports (we already did forms), and the ability to run code - that's pretty cool. You can have them launch your backup event or whatever.
Don't forget, if you like this stuff, if you like learning with me, I've got hundreds of hours of developer-level training on my website. Check it out. There's the link or use the QR code over there.
So there you go. That is your TechHelp video for today. Now we've got a fully functional multi-level menuing system, a hierarchical menu for our database. You can plug and play this into any database system you want. Just copy the list box and the parent objects and then drop the table in and boom, there you go.
Post a comment down below. Let me know what you thought about it. If you enjoyed today's video, make sure you hit like and subscribe. Don't forget.
That's going to be your TechHelp video for today. I hope you learned something. Live long and prosper, my friends. I'll see you next time, and members, I'll see you in the extended cut.Intro In this lesson, we continue building a data-driven, multi-level menu system in Microsoft Access for the fitness database. We expand on the initial menu system introduced in the previous video by adding the ability to navigate through multiple menu levels and return to the main menu. I walk through how to update menu labels, manage parent-child relationships using hidden text boxes, modularize code with subroutines, and test dynamic submenu creation. We also discuss label formatting, error handling, and design considerations for customizing and maintaining the menu system.Quiz Q1. What is the main goal of the video tutorial?
A. Building a clunky old switchboard system in Access
B. Creating a data-driven multi-level menuing system in Microsoft Access
C. Designing a table for storing fitness data
D. Using VBA to manage user logins
Q2. In the multi-level menu system, what happens when you click on a menu item with sub-menus?
A. It opens a form directly
B. Nothing; the menu does not allow sub-menus
C. It navigates to a lower-level menu showing only items under that parent item
D. The database closes automatically
Q3. How does the menu system track which menu level the user is on?
A. By using a lookup every time the menu loads
B. By storing the parent menu ID in a hidden text box on the form
C. By storing the menu level in a label caption
D. By hardcoding the menu structure in VBA
Q4. What is the purpose of the "parent label" in the menu form?
A. To store the SQL statement for reloading the menu
B. To display the current menu name and provide an up navigation indicator
C. To hold the list of menu item IDs
D. To open external reports
Q5. How can you allow users to go back up to a previous menu?
A. By double-clicking on the list box
B. By clicking on the parent label, which runs code to go up one level using DLookup
C. By closing and reopening the form
D. By pressing the Escape key
Q6. Why is code modularity and reuse emphasized with subroutines like reload list and set parent label?
A. To make code longer and more complex
B. To make sure different versions of code operate independently
C. To avoid duplicating code and enhance maintainability
D. So that users can create their own subroutines
Q7. Why is the menu structure stored in a table instead of hardcoded in VBA or form controls?
A. To enable dynamic updates and unlimited menu levels without redesigning forms
B. To prevent users from changing the menu
C. Because VBA does not support arrays
D. To save disk space
Q8. In the video, what is suggested for providing visual feedback that a submenu exists for a menu item?
A. Changing the font size
B. Displaying a right arrow or caret symbol next to the menu label
C. Adding an asterisk (*) to all menu items
D. Coloring all menu items red
Q9. What simple error handling method is demonstrated for opening forms that may not exist?
A. Using GoTo statements
B. Wrapping the open form code in On Error Resume Next and a message box on error
C. Ignoring the error completely
D. Automatically creating missing forms
Q10. What benefit is mentioned for moving the row source setup for the menu list box from the property sheet to code in the On Load event?
A. It makes the form load faster
B. It ensures the row source is always reset to the correct query when the form loads
C. It makes it impossible to change the menu during runtime
D. It disables the menu for untrained users
Q11. Why is it important to clean up event procedures and unused buttons from the form?
A. To make the database larger for backup purposes
B. To avoid clutter and prevent confusing leftover code
C. To impress users with a complicated interface
D. To keep legacy artifacts for future use
Q12. According to the instructor, what could you do to allow users to customize menu items themselves?
A. Give them access to the VBA editor
B. Let them edit the menu directly in the table or build a form to edit menu entries
C. Instruct them to email changes to the developer
D. Hardcode user names in the menu system
Answers: 1-B; 2-C; 3-B; 4-B; 5-B; 6-C; 7-A; 8-B; 9-B; 10-B; 11-B; 12-B
DISCLAIMER: Quiz questions are AI generated. If you find any that are wrong, don't make sense, or aren't related to the video topic at hand, then please post a comment and let me know. Thanks.Summary Today's video from Access Learning Zone is focused on building a data-driven, multi-level menu system in Microsoft Access. If you've been relying on the old switchboard system or cluttered forms with endless buttons, it's time to upgrade to a dynamic menu that is both easier to manage and much more flexible. This is the 73rd part in my fitness database series, but if you're just interested in creating this menuing system, you should watch part 72 first since that's where we started with the design. Today, we are taking what we built previously and enhancing it with a true hierarchical structure.
In the previous lesson, we put together the basic menu form, so now the next step is to make those menu items interactive. We want to be able to click on an item and have it open a submenu specific to that item, and then provide an easy way for the user to navigate back up to the previous menu or the main menu as needed.
To handle this, I'm going to update the menu label at the top to indicate which submenu the user is currently viewing. Rather than simply having "Description" as a static label, I'll programmatically change it to show the current menu, for example, "Main Menu" or the name of a submenu. I'll also add a visual indicator, like a caret symbol or up arrow, so users know they can click to return to the previous level.
Next, I want to store what menu we're currently on. For this, I'll add a hidden text box (I like to color these red in design view so they're visible while designing but can be hidden at runtime). This text box will keep track of the current parent menu's ID. Every time the user navigates, I'll update this value to reflect which menu level is being displayed.
Updating the menu list itself involves reloading the menu items based on the parent ID. The SQL query that populates the list box will use this parent ID to fetch the relevant menu items for that level. I always recommend being careful with your SQL statements and including appropriate spaces so the query doesn't break when they're concatenated in code.
For clear organization and to avoid duplicating code, I'm wrapping the list reloading logic into its own subroutine. This makes it much easier to manage, ensuring that whenever we want to update the menu list, we just call this one sub. The same goes for the logic that updates the label to reflect the current menu level.
To allow users to move up one level, I'll set an OnClick event on the menu label itself. When it's clicked, the code will use DLookup to find the parent of the current menu, reset the parent ID accordingly, and then update the menu items and label to reflect the previous level. Again, encapsulating this logic in routines keeps everything tidy and ensures we don't have repeated blocks of code everywhere.
I also make sure to initialize everything properly when the form loads. By setting the label and loading the list based on the main menu each time the form opens, there's no confusion caused by lingering changes if you modify the form in design view.
Once the core navigation is set up, the hidden parent ID field can be made invisible to clean up the form. Any unused or leftover buttons and events from earlier designs can be deleted to avoid clutter in your project. Always remove obsolete event code before deleting buttons to keep your database clean.
As a demonstration, I show how to add a deeply nested submenu by just editing the tables - no need for redesigning the form each time you want to add another level. This approach is powerful because it's completely dynamic; you can have as many levels as you like, and each submenu just points to its parent via its parent ID field in the table.
When it comes to visually distinguishing menu items, I discuss options like adding custom characters or icons to indicate which items will open more submenus. For example, you can append a right-arrow symbol to submenu items in your data table. I remind you to watch out for AutoCorrect features that sometimes convert standard characters into special ASCII versions, potentially causing coding issues.
For a more robust user experience, I recommend adding basic error handling to the code responsible for opening forms or other objects. This way, if a referenced form doesn't exist, the database will display a helpful message instead of just failing silently or crashing.
In today's Extended Cut for members, I'll take things further by demonstrating how to customize the foreground and background colors for each menu, as well as methods for adding menu options that can open queries, tables, reports, refresh the list, or even execute custom code (such as running a backup operation with the click of a menu item). There's a wealth of possibilities for creating very polished, flexible menu systems.
If you're wondering whether you need to build a user-facing tool to edit or customize this menu, you certainly can, although for many developers, it's simplest just to manage menu items directly in the related tables. However, the system is robust enough that you could certainly extend it with user-friendly editing features or store custom user preferences if you like.
In summary, you've now got a fully functional hierarchical menu system for your Access database, and this design can easily be adapted and dropped into any database project you're working on. If you want to see all the programming details and step-by-step instructions, I have a complete video tutorial available on my website at the link below.
Live long and prosper, my friends.Topic List Creating a multi-level menu system in Microsoft Access
Implementing the open menu subroutine with menu IDs
Changing label captions dynamically based on menu selection
Decoupling labels from list boxes in Access forms
Storing parent menu IDs using hidden text boxes
Reloading list box rows based on parent IDs
Filtering menu items based on parent-child relationships
Navigating up to previous menu levels programmatically
Using DLookup to retrieve parent IDs from a menu table
Refactoring code to eliminate duplication with subroutines
Dynamically updating label captions based on current menu
Initializing form states and setting row sources in code
Managing visibility and layout of form controls
Adding and testing submenu entries in the menu table
Handling ellipsis and special characters in labels
Using custom symbols to indicate submenus in descriptions
Implementing error handling when opening forms from the menu
Testing multi-level navigation functionality in Access
Cleaning up unused controls and code in forms
Ensuring code modularity and maintainability in Access VBAArticle If you are still using the old Microsoft Access switchboard or menu forms filled with hard-coded buttons, you may find them inflexible and difficult to update. A more powerful alternative is to build a data-driven, multi-level menu system directly within Access. This approach allows you to manage your menu structure through tables, making it easy to add, remove, or reorganize items without redesigning forms.
The core idea is straightforward: create a Menu table where each record represents a menu item, with fields to define its ID, description, parent menu, and any associated action (like opening a form). Using a form with a listbox tied to this table, you can display the relevant menu options depending on where the user is in the hierarchy. When a menu item is clicked, the form updates to show the submenu for that item, or takes the appropriate action if it is a terminal menu item.
Start by designing a table named menuT with at least these fields: menuID (autonumber primary key), description (text), parentID (number), and any additional fields you may want, such as the form or report name to open.
On your form, create a list box to display the description field from menuT. The initial row source for the list box can be set to display items where parentID equals zero, representing the main menu. Add a label at the top of your form to show which menu the user is currently viewing; for clarity, call this label parentLabel.
When a user clicks a menu item, you want to determine whether it leads to another submenu, or whether it should execute an action like opening a form. For handling submenus, you need to track the current parentID. To do this, use a hidden text box named parentID on your form (set the visible property to No).
Now add the VBA code to manage menu navigation. The main routines you need are as follows:
1. openMenu: Accepts a menuID as a parameter, sets the parentID text box to that menuID, reloads the list box with items whose parentID matches, and updates the parentLabel caption.
2. reloadList: Given a parentID, sets the list box row source to show only the items under that parent.
3. setParentLabel: Given a menuID, sets the parentLabel's caption to display either "Main Menu" for the root, or the specific description for submenus, optionally with an arrow or caret to indicate navigation.
Here is how you might implement these in VBA:
' Set Parent Label Caption Based on Current Menu
Private Sub setParentLabel(menuID As Long)
If menuID = 0 Then
parentLabel.Caption = "Main Menu"
Else
Dim S As String
S = Nz(DLookup("description", "menuT", "menuID=" & menuID), "")
parentLabel.Caption = "↑ " & S ' Using an up arrow to indicate you can go back
End If
End Sub
' Refresh the List Box Based on the Given Parent ID
Private Sub reloadList(parentID As Long)
menuList.RowSource = "SELECT menuID, description, parentID FROM menuT WHERE parentID = " & parentID & " ORDER BY sortOrder;"
End Sub
' Handle Menu Item Click to Navigate Down
Private Sub openMenu(menuID As Long)
parentID.Value = menuID
reloadList menuID
setParentLabel menuID
End Sub
To allow users to go back up one level, add a click event on the parentLabel. In the event handler, use DLookup to retrieve the parent of the current parentID, set this new parentID in your hidden text box, then reload the list and refresh the label, like this:
Private Sub parentLabel_Click()
Dim newParentID As Long
newParentID = Nz(DLookup("parentID", "menuT", "menuID=" & parentID.Value), 0)
parentID.Value = newParentID
reloadList newParentID
setParentLabel newParentID
End Sub
When your form loads, be sure to initialize it to display the main menu:
Private Sub Form_Load()
setParentLabel 0
reloadList 0
End Sub
By keeping all list loading and label setting in these separate, reusable subroutines, you avoid unnecessary duplicated code and make maintenance easier.
If you want to distinguish between submenu items and terminal actions, you might add a field or a visual cue in the description to indicate if a menu item leads to deeper levels (for example, by placing a right arrow or "..." after the description). When retrieving descriptions for the label, you can use string functions to trim off these visual cues as needed to keep the label tidy.
Handling errors when a user selects a menu item that is supposed to open a form that does not exist is also a good idea. You can use simple error handling in your code, such as:
On Error GoTo FormError
' Your code to open the form here
On Error GoTo 0
Exit Sub
FormError:
MsgBox "Error opening form: " & Err.Description
Resume Next
This prevents your menu system from stopping with cryptic errors and instead shows a helpful message.
You now have a data-driven, multi-level, hierarchical menu that is easy to extend: simply add or modify records in menuT. Adding a new submenu or nesting menus several levels deep is just a matter of updating the parentIDs in the table - no form redesign is needed. If you ever want to allow users to manage their menus, you could build a custom form for menu maintenance, but for most developer use cases, working directly in the table will suffice.
With this system, you can plug dynamic navigation into any Access database. Copy over your listbox and label, import your menuT table, adjust any form names or actions as needed, and you have a flexible, maintainable menu ready for use.Primary Topics
Microsoft Access, dynamic multi-level menus, VBA form code, hierarchical navigation, storing state in forms, DLookup usage, list box row source, modular subroutines, menu item table structure
Secondary Topics
debugging, error handling, form event handling, UI cleaning, menu customization concepts
|


