Eclipse Timer 2
By Richard Rost

 2 years ago
Create Real-Time Eclipse Timer in MS Access, Part 2
In this Microsoft Access tutorial, I will show you how to build an interactive real-time Eclipse Timer, featuring the animation of the moon's transit over the sun. We'll cover creating a dynamic form, drawing celestial objects on a report, and step-by-step navigation through the eclipse's progression. This is part 2 of 3.
Prerequisites
Links
Recommended Courses
Eclipse Timer Series
Keywords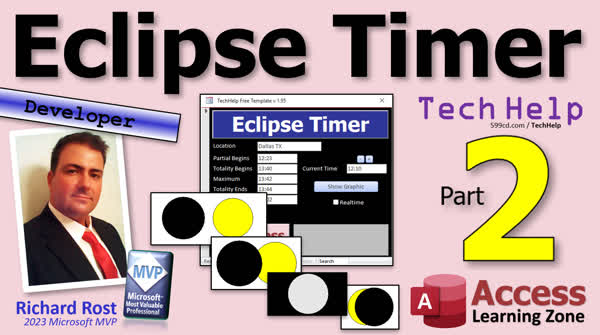
TechHelp Access, interactive real-time eclipse timer, VBA code tutorial, Access reports design, Me.Circle method, drawing circles Access, Access VBA programming, eclipse timer report, Access form buttons, customizing Access forms, Eclipse R report, report design Access, database skills project, totality calculation, annular eclipses, adjust circle radius Access, eclipse visualization Access, simulate eclipse Access
Intro In this video, we continue building the Eclipse Timer project in Microsoft Access by creating a report to visually represent the solar eclipse. I'll show you how to set up and adjust the report layout, use VBA to open and position the report, and add circles to draw the sun and moon using Me.Circle. We'll discuss filling shapes with color, fine-tuning their placement, and introduce a bit of astrophysics to explain the visual effects. This is part 2.Transcript Today is part two of my "TechHelp" series called Eclipse Timer. I'm teaching you how to build a little Eclipse Timer where we can watch the moon go right over the sun in our Access database. It's pretty cool. Here we go.
If you haven't watched part one yet, watch part one first and come on back. All right. So yesterday we set up our form. We got our table built so we can put our different locations in. One thing I forgot to mention, if you want, come in here and turn back on, under format, the navigation buttons and the record selectors so you can switch between different locations if you want. So you can put Dallas there, you can go to the next one, you can put Buffalo in here, and so on.
All right, I'm just going to work with the one location. If you want to put multiple locations, then go right ahead. They're your Legos; put them together however you want.
Now, since we can't draw circles in a form, we got to make a report. So let's just make a blank report. I've already got a blank report R here. I'm going to copy that guy, copy, paste, or you can just create a blank one if you want to. I'll call this my Eclipse R, my Eclipse report. Let's open her up, design view. Now there's some stuff in here that I put in here. Oops, wrong thing. There's some stuff in here that I put in here that I don't need. I don't need that. We don't need a page header footer. We don't need a report header footer. We're literally just going to work with this detail section and it's about what, eight inches across? Okay. What are my margins set to? Page setup, I think I got a little tiny margin. That's good. That's perfect. In fact, you can make these smaller, but you can't get that much smaller. You can set up custom size reports and all that, but again, that's way beyond what I want to go over today. We're just going to work with this little region right here.
So when we open up the Eclipse report in print preview, it's going to look like that, but we're going to move it over here and we're going to resize it and we're going to zoom it in because one of my pet peeves with the reports is they don't keep their size and dimensions like forms do. All right. Can you get back where I put you? That was a goof.
Okay. So first let's open up the report where we want it. Okay, how do we do that? Well, let's go in here, design view, and our hello world button is now going to be called the show eclipse button. Okay, right click, build event. What are we going to put in here? Well, we don't want to say hello world anymore. What are we going to say? We're going to say show eclipse, just like that. No, seriously, though. I'm going to make this its own sub, because we're going to call it from other places too in a minute. So private sub show eclipse.
Now, the first thing I want to do is if this report's already open, I want to close it. Because as we click on our little button to add a minute, we want to watch the little moon move across the sun. We have to close the report and open it. Yeah, you can try to re-query and redraw the report. It's just easier to close it and open it back again. But I don't want to have to go through too much craziness to try to determine if the report's already open. So I'm just going to try to close it and ignore any errors that pop up because if it's not already open, it'll generate an error. And the way we get around that is really simply on error resume next. Then we do Docmd.Close acReport, "Eclipse R", and then acSaveYes. And then when we're all done, we turn that error handling off. On error go to 0. That's the easiest, simplest way to say, hey, close that report if it happens to be open without going through a ton of code to try to programmatically determine if the report's open. Can you do it? Yeah. But this works. This is fine. I'm all about practical solutions, and this is simple.
All right, now we're going to do Docmd.OpenReport "Eclipse R", acViewPreview. Okay? And let's see what that looks like. Come back over here, and we'll do one of these jobs. Show it. Cool. Okay, but I don't want it there. I want it over here. Okay, so we can issue a move size command after we open it. We're going to say Docmd.MoveSize. Where do you want to move it? You can write down height width. So you can move it and size it. This is just, you've got to kind of set this up based on your preferences. I'm going to guess; let's go 7,000 pixels from the left. Maybe 100 pixels down from the top because we don't want it right up against the top. And then let's go 10,000 wide by 5,000 tall. That's just a guess. Let's see what it looks like. Save it. Hit the button. Oh, okay. All right. That's not too bad. I'm going to close my navigation pane. Okay. That's about where I want it. Let's move it a little bit more to the right. So I'll say maybe 7,500. That will be based on the size of your main menu. 7500. Let's see what that looks like. Okay, that's better. I like that. The width is good.
Okay, let's now what I want to do is I'm going to be working just with this top portion of the report. So I want it like just like there so I can see that much of it. So now we're going to zoom in. Okay, come back over here. Next command is going to be Docmd.RunCommand acCmdZoom. And there's different zoom levels. I'm going to zoom into 100 percent. Okay, save it, close it, and let's open it back up again. And boom, oh, that looks good. That's right where I want it to be. And we're going to put the little sun and the moon in here. OK? OK.
Let's start out by drawing the sun. All right. Let's go to Design View of the report. Detail section. Right click. Build event. We are now in the detail format section. OK. How do you draw a circle? Well, we're going to say Me.Circle. Me.Circle, and then you've got in parentheses, you've got the X and Y locations right in pixels, and then comma, the radius in pixels. So for example, let's say you want to go 2,000 pixels from the left, 1,000 from the top, comma, 1,000 radius, comma 1000 radius. Okay, so it's X Y radius. Why the parentheses out. That's just how they did it. All right, let's see what that looks like. Come back over here, hit show eclipse. And boom, there's your circle. See, that's pretty cool.
All right, so it's 2000 pixels in from the margin, 1000 pixels down, that's where the center of the circle is, and then 1000 pixels for the radius. All right, you can make it bigger, smaller, whatever. How do we fill it in and make it yellow for the sun? Let's come back over here. Before you draw the circle, you're going to set those parameters. I'm going to put in here, draw sun. We're going to say Me.FillColor equals, you can use RGB if you want, or you can use one of the named constants like vbYellow. And then Me.FillStyle equals 0 is filled in versus transparent. All right, save it. Back over here, show eclipse. Remember, it's going to close the report and reopen it. And look at that. Now we've got a yellow little sun guy there. I'm going to move it over more though because I want to have room for the moon to move over and the sun is going to be pretty much static. So let's come over here and up top here, I'm going to say let's put a spot for where we want totality to be. So we're going to make a constant. Constant totality equals, let's try 6,000 pixels. That's the X location for totality, and then I'll replace that down here. Okay, we're going to be moving things around in a minute. All right, let's save that. Let's see what that looks like. And okay, that's good. I picked that because it's in the center of the page kind of. And if you, you know, want to print this out or if your screen is bigger, I'm working in a little video window here, so you'll see the moon come over here and start to slide across. So we'll work with that. That looks pretty good.
All right, let's draw our moon next. All right, so let's come down here and we're going to draw the moon. Now we're going to say Me.FillColor equals vbBlack. That means the next object that gets drawn is going to be black. Okay? And the Me.FillStyle should still say 0, so you don't have to reset that. You can if you want to, that's okay. Now let's move the X back to like, let's see, we're at 6,000 now for the center. Let's bring it back to like maybe 4,000 or 3,000. So let's say Me.Circle, we're going to go back, let's go to 3,000. 1,000 is we want the same Y, right, the same distance from the top, so it slides over the other one, right and the same radius. Although later we're going to tweak it and make the sun just a little bit teeny tiny smaller because one of the reasons why we have total eclipses is that the moon is a little tiny bit bigger than the sun and it can cover it for more than a few minutes. And also since the moon's orbit is an ellipse, it can also be a little further than necessary so that it doesn't quite cover the sun. That's when we get annular eclipses. You can still see the ring of the sun around the moon. Because the moon can go further and closer away by many, many miles, and that's what determines how long of totality we get. So we're going to cheat later and make the sun just a little bit smaller. In fact, we'll do it right now. Let's make it 940. I was playing with these numbers earlier. 940 is about right. That's where you don't quite see a sliver of it, and you get like four minutes of totality. So this value here can actually change based on how far away the moon is from the earth. Astrophysics. That's my other backyard passion. I'm a backyard astronomer. I love this stuff. Star Trek and astronomy. All right. So let's see what our black circle at 3000 X, Y, and then there's the radius. Let's see what this looks like. Come back over here, hit the button, and oh, there's our moon. All right? Okay. Now we just have to work on sliding that guy across to the right. And we're going to tackle that, guess what? In tomorrow's video.
So you know the drill. Tune in tomorrow. Same bat time, same bat channel. Or if you're a member, you can watch it right now. So sign up and become a member, and you can get all this in. But that's going to do it for part two. I hope you enjoyed. I hope you learned something today. Live long and prosper, my friends. I'll see you tomorrow for part three.
TOPICS:
Building an Eclipse Timer in Access
Watching Part One before continuing
Setting up a form for location inputs
Turn on navigation buttons and record selectors
Adding multiple locations versus working with one
Creating an Eclipse report for visual representation
Removing unnecessary elements from the report
Adjusting report size and margins
Opening and positioning the report with VBA
Closing and reopening the report via VBA
Implementing error handling with On Error Resume Next
Using DoCmd.Close and DoCmd.OpenReport commands
Moving and resizing the report with DoCmd.MoveSize
Setting up custom zoom levels with DoCmd.RunCommand
Drawing circles in Access reports using Me.Circle
Adjusting circle parameters (X, Y, radius)
Setting colors and fill styles for shapes
Creating a constant for totality reference point
Drawing and positioning the sun in the report
Using VB color constants (e.g., vbYellow, vbBlack)
Drawing and positioning the moon in the report
Adjusting moon radius for visual effect
Astrophysics explanations related to eclipses
Preparing to animate the moon's movement across the sun
Continuation to part three of the seriesQuiz Q1. What is the purpose of the Eclipse Timer being created in the Access database?
A. To enter different locations into a table
B. To track inventory changes
C. To display real-time weather conditions
D. To simulate the moon passing over the sun
Q2. What was added to the form to allow switching between different locations?
A. Record selectors and navigation buttons
B. Conditional formatting
C. Data validation rules
D. Scroll bars
Q3. Why is a report used instead of a form to create the Eclipse Timer in Access?
A. Because circular calculations cannot be performed in forms
B. Because reports can handle more data
C. Because forms do not allow graphical elements
D. Because you can't draw circles in forms
Q4. Which method is shown in the video to open and position the Eclipse Report?
A. Using SQL queries
B. Using Macros
C. Using VBA code and the DoCmd object
D. Using linked tables
Q5. Which statement is true regarding error handling when trying to close the Eclipse report?
A. It uses complex error handling to check if the report is open
B. It uses "On Error Resume Next" to bypass errors if the report is not open
C. It uses a message box to alert users about the error
D. It updates the status bar with an error message
Q6. What VBA command is used to draw the sun in the Eclipse report?
A. Me.DrawSun
B. DoCmd.Draw
C. Me.Circle
D. DoCmd.Sun
Q7. What color is the sun set to be in the Eclipse Timer simulation?
A. vbWhite
B. vbRed
C. vbBlue
D. vbYellow
Q8. How is the position of totality designated in the VBA code?
A. With a variable
B. With a constant
C. With a function
D. With a subroutine
Q9. How did the video tutorial suggest to handle the moon's drawing to simulate an eclipse?
A. By setting its FillColor to vbBlack and overlapping the sun
B. By animating it across the screen with motion effects
C. By using a transparency effect
D. By changing the size of the sun instead
Q10. What aspect of astronomy did the video's presenter associate with the size adjustment of the sun in the simulation?
A. The Moon's phases
B. The distance of the Moon from the Earth
C. The position of other planets
D. The solar system's alignment
Answers: 1-D; 2-A; 3-D; 4-C; 5-B; 6-C; 7-D; 8-B; 9-A; 10-B;
DISCLAIMER: Quiz questions are AI generated. If you find any that are wrong, don't make sense, or aren't related to the video topic at hand, then please post a comment and let me know. Thanks.Summary Today's TechHelp tutorial from Access Learning Zone continues our Eclipse Timer project in Microsoft Access. In this session, I will show you how to take the foundation we built previously and move into constructing a visual simulation of an eclipse, where the moon passes in front of the sun within your Access database.
If you did not already complete part one, make sure you review that before coming back to this lesson, since we are building directly on what was covered previously. So far, we set up the basic form and created a table to store different locations. If you want the ability to switch between several locations, I suggest re-enabling the navigation buttons and record selectors on your form. That way, you could enter Dallas, flip to a new record for Buffalo, and so on. For this tutorial, I will keep things simple and work with just one location, but you are welcome to configure yours however you prefer.
Since Access forms do not provide a native way to draw circles, we need to transition to using a report for the visual side of this project. Start by creating a new, blank report. You can duplicate an existing blank report if you have one, or just start fresh. Give this report a name like "Eclipse R" to keep everything organized. Now, open the report in design view and clear out any unused elements. For our purposes, we do not need page headers, footers, or report headers and footers. We are going to focus entirely on the detail section, which is about eight inches wide by default. If you want more granular control over margins or report dimensions, you can make those tweaks under page setup, but we will keep things simple for now.
The next step involves controlling how and where our report appears when you view it. Unlike forms, reports do not remember their position and size, so we will handle this with VBA. Over in our form, replace the old "Hello World" button with a "Show Eclipse" button and set up its click event. To keep things organized and reusable, I will make a private subroutine called "show eclipse" to handle everything. Each time we want to show an updated visual, we need to make sure the report closes first if it is already open. The cleanest way to do this without a lot of elaborate checks is to simply try to close it and suppress any error if it happens to not be open. Use straightforward error handling for this. After closing it, open the Eclipse report in print preview mode.
Next, we want to move and resize the report window to a spot on the screen that works best for our demonstration. That's accomplished in VBA by issuing a move size command, specifying how far from the left and top you want the window, and how wide and tall it should be. These values are in twips, and you may have to experiment to find the settings that suit your workspace. Once you are happy with the window position, you can set the zoom level so the report appears at 100 percent for a clear view. You might have to tweak values a few times to get everything just right.
Now, we are ready to draw the sun. Switch to design view in the report, go to the detail section, and start working in the section's format event. Drawing a circle in Access can be done by specifying the X and Y coordinates of the center and a radius. For example, you could put the center two thousand pixels from the left, one thousand from the top, and use a one thousand pixel radius. After drawing your circle, you might want to set the fill color and style. Use vbYellow for the sun and set the fill style so the circle is filled in rather than transparent. Position the sun wherever you would like the eclipse to be centered—using a constant for the X location can help if you want to reference this totality position throughout the rest of the project.
Next, we will add the moon. Before you draw the moon's circle, set the fill color to vbBlack. Place the moon somewhere to the left of the sun so it can "move" across the sun as the simulation progresses. In this lesson, I explain how the apparent sizes of the sun and moon vary—due to the elliptical orbit of the moon, sometimes it appears just large enough to cover the sun, sometimes not, which produces different types of eclipses. To reflect that, you can adjust the radius of the moon or sun as needed. For our demonstration, I make the sun slightly smaller than the moon so the simulation matches what happens in a total eclipse.
At this stage, you will see a simple version of the eclipse with a yellow sun and a black moon, each drawn as a circle, ready for animation. Tomorrow, we will work on animating the movement of the moon so it slides across the sun, giving a more realistic simulation.
You can find a complete video tutorial with step-by-step instructions on everything discussed here on my website at the link below. Live long and prosper, my friends.Topic List Building an Eclipse Timer in Access
Setting up a form for location inputs
Turning on navigation buttons and record selectors
Adding multiple locations to the form
Creating a blank Eclipse report
Removing report headers and footers
Adjusting report size and margins
Opening the report in print preview with VBA
Positioning the report window using DoCmd.MoveSize
Closing the report via VBA before reopening
Implementing error handling with On Error Resume Next
Opening reports with DoCmd.OpenReport
Zooming the report to 100 percent with DoCmd.RunCommand
Drawing circles in an Access report using Me.Circle
Setting circle position and radius parameters
Setting fill color using VB constants
Setting fill styles for solid or transparent circles
Creating a constant for totality position
Drawing and placing the sun in the report
Drawing and placing the moon in the report
Adjusting sun and moon radii for visual accuracy
Preparing to animate the moon's movement in the report |


