|
|
Free Lessons Courses Seminars |
TechHelp Fast Tips Templates |
Topic Index Forum ABCD |
|
||||||
|
Access Developer 49 Transactions, Temp Tables, Nav Subforms Welcome to Access Developer 49. In this course you will learn how to use transactions in Microsoft Access to ensure groups of related database actions are completed reliably, how to speed up split database forms with dynamic temporary tables, and how to build a reusable navigation subform. We will cover starting, committing, and rolling back transactions, using composite keys to prevent duplicate records, optimizing combo box performance with local temp tables, and creating a custom navigation bar for your forms. Lessons
Database FilesLinks
Resources
Lesson SummaryWelcome! Transactions, Temp Tables & Subforms - Welcome to Microsoft Access Developer Level 49. In this course we will discuss transactions, dynamic temporary tables for speeding up split databases, and creating a drop-in navigation subform. Lessons 1 and 2 will cover how to use transactions to ensure multiple related SQL operations run reliably, such as inserting, deleting, or rolling back records, and will include an example with orders and inventory checking. In Lesson 3, we will talk about optimizing form performance by using table-agnostic temp tables. Lesson 4 focuses on building a reusable navigation subform that can be used to control record navigation on your forms.
Lesson 1: Transactions: Begin, Commit, Rollback - In Lesson 1, we will introduce the basics of transactions, discuss what DBFailOnError is and how to use it, and explain the difference between RunSQL and Execute in Access. I will show you how to initialize and use a workspace, begin a transaction, commit it, and roll it back if an error occurs. We will walk through inserting records with error handling, and demonstrate how transactions ensure that multiple related database actions are completed together or not at all, using practical examples like bank transfers and customer records.
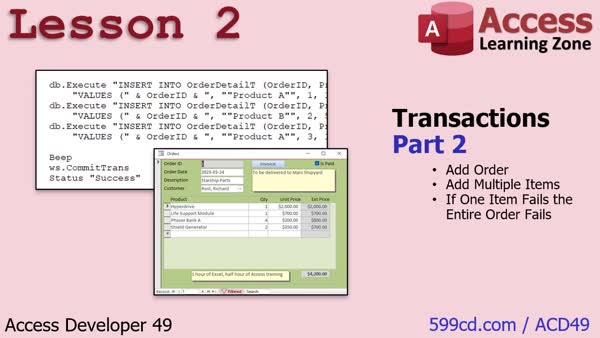
Lesson 2: Transactions & Duplicate Prevention - In Lesson 2, we will work through a more advanced transactions example using orders in Access. We will create an order and add multiple items, demonstrating how to ensure that if any item addition fails, the entire transaction is rolled back. We will set up a composite key in the order detail table to prevent duplicate items on the same order, show how to add orders and items using recordsets, and test the transaction process to confirm that rollback occurs if a duplicate is detected. We will also briefly discuss using transactions with SQL Server.
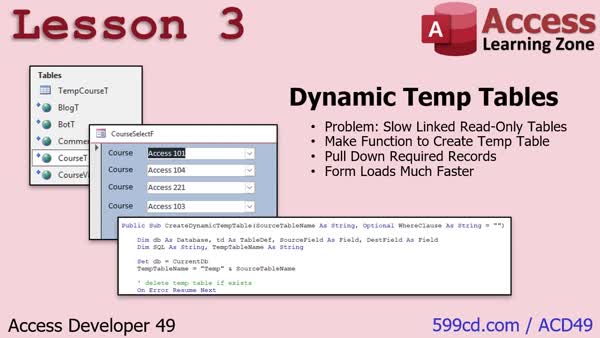
Lesson 3: Faster Combo Boxes with Temp Tables - In Lesson 3, we address slow form load times in split databases, especially when combo boxes depend on large, linked tables. I will show you how to use dynamic temp tables to pull down read-only reference data from the server into a local temporary table, dramatically improving performance. We will walk through creating a table-agnostic VBA function that copies table structure and data, with optional filters, using TableDefs and SQL. We will also discuss handling specific field properties like AllowZeroLength, and demonstrate how to integrate this process into form events for faster, more efficient form loading.
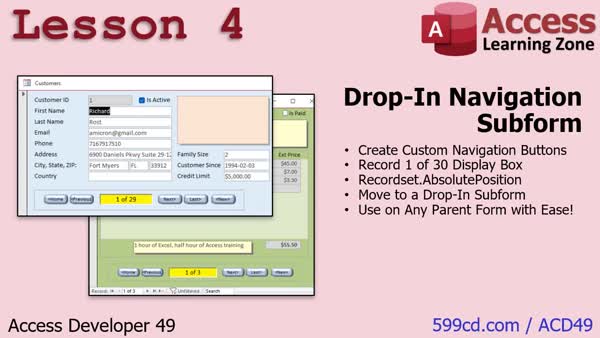
Lesson 4: Custom Subform Navigation Controls - In Lesson 4, we will walk through creating a drop-in navigation subform in Microsoft Access. I will show you how to build a reusable navigation bar with First, Previous, Next, Last, and New buttons, along with a record position display, and how to place it into any parent form with minimal setup by adjusting just two properties. We will discuss how to use the AbsolutePosition and RecordCount properties of a form's recordset, handle event updates between parent and subform, address record counting issues, and ensure the navigation subform matches the parent form's appearance.
Lesson 5: After Course: Next Steps - In this lesson, we will discuss what is next after finishing Access Developer 49. I will talk about future topics I plan to cover in upcoming lessons, the importance of sending in course surveys and questions, and how I handle and respond to your feedback. We will also look at different ways you can search for Access topics using the search box, outline page, and chatbot, and I will mention the TechHelp video series and member options.
NavigationKeywordstransactions, rollback, commit, DBFailOnError, dynamic temp tables, composite key, navigation subform, split database performance, recordset, temporary tables, tabledefs, allowzerolength, parent child form, record navigation, combo box speed
TranscriptWelcome to Microsoft Access Developer Level 49, brought to you by AccessLearningZone.com. I am your instructor, Richard Rost.Today's class is going to focus on three topics: transactions, dynamic temporary tables to speed up your split databases, and a drop-in navigation subform. Lessons 1 and 2 are all about transactions. A transaction is where you can issue multiple SQL statements, like insert some records, delete some records, copy some records, whatever - a whole bunch of them. If any one of those fails, all of them fail. That's a transaction. Think of it like bank transactions. You are transferring money from one account to another - out from one, in to another. If either one of those fails, the whole transaction fails. That is what we are going to be doing in Lessons 1 and 2. In Lesson 1, we are going to keep it simple. We will do some simple transactions with customer records. I will teach you how to start the transaction, commit the transaction, and roll it back if you need to. Then in Lesson 2, we will do something a little more complicated. We will add an order with a bunch of detail items. Of course, we will check the inventory level on each of those items as you add it, and if it is too low, we will cancel the whole order. That is the power of transactions. In Lesson 3, we are going to focus on dynamic temp tables. What is this? If you have got a split database, whether it is on the network or on the internet, whether you use an SQL server or just a back-end Access database, if you have got forms that pull a lot of data in from other tables, like a list of customers, orders, products, or whatever, you probably notice that maybe some of those combo boxes or other controls on your forms are running slowly. So in this lesson, I am going to teach you how to make them faster. When the form loads, or even when the database loads, you are going to copy that data down to a temporary table. We are going to make it table agnostic, so it is not going to matter what fields are in your table. You just give it the table name and it will create the back-end table copy for you, and you will just use that. In Lesson 4, we are going to make a drop-in navigation subform - this little guy right here. You know how to make buttons to go to the first record, go to the next record, go to the last record - that is all easy stuff. That is beginner stuff. But in this video, I am going to show you how to manipulate the recordset of the main form, display what record you are on, the total number of records using the recordset properties, the AbsolutePosition property, which I really have not covered yet. Then we are going to take that and make that navigation bar a subform. In the future, if you want to use it on a different form, you just drop that subform in, make a change to the properties, and you are done. No VBA has to go in the parent form at all. The subform does all the heavy lifting. This is a great solution. You will see how this works in Lesson 4. This lesson, of course, follows Access Developer 48. Do you have to have watched 48? Not really. Once we get up to this level, there is some core stuff that you really should know. Definitely the Beginner and Expert material, Developer 15, error handling, 16, recordsets, table defs are important. These are designed so that I assume you understand everything from the previous ones. So, yes, kind of. If you come across a topic that you do not know, you can always look it up on the website and find out what other lesson covers that. Or just do not skip levels and you will not have to worry about it. It is currently March of 2025. I am using an Access 365 subscription. My version of Access is roughly equivalent to Access 2024. Get a subscription - it is not that expensive. It is like eight bucks a month, and it is worth it if you are running your business on Access. If you have questions, post them down below the page you are watching this video on. You will see you can post questions at the bottom, and we will do our best to answer you. Alright, so sit back, relax, and enjoy Access Developer 49. IntroIn this lesson, you will learn about transactions in Microsoft Access, including how to start, commit, and roll back transactions to ensure data integrity, with practical examples using customer and order data. We will also cover how to create dynamic temporary tables to boost performance in split databases and show you how to build a reusable drop-in navigation subform that lets you easily display and control record navigation on any form.QuizACCESS DEVELOPER 49 QUIZLESSON 1 Q1. What is a transaction in the context of databases? A. A transaction is a single SQL command that updates a database. B. A transaction is a sequence of database operations that either all succeed or all fail. C. A transaction is a set of SQL commands that are executed without error handling. D. A transaction allows for user input to be logged within the database. Q2. What key feature of a transaction ensures data integrity in operations such as bank transfers? A. Transactions require the use of VB constants. B. Transactions ensure that data modifications remain in the database permanently. C. Transactions execute independently and do not affect each other. D. Transactions ensure that multiple operations either all succeed or all fail together. Q3. What is the purpose of using DBFailOnError in a transaction? A. To execute SQL commands with a lower priority. B. To ensure that SQL errors generate a specific error message and stop execution. C. To allow continuous execution of SQL statements even after failures. D. To handle data within transactions asynchronously. Q4. Which command starts a transaction within a workspace in Access? A. db.BeginTransaction B. StartTransaction C. ws.BeginTrans D. StartTrans Q5. What is the default workspace created by Access when initiating a transaction? A. Workspace(1) B. Workspace(0) C. DefaultWorkspace D. MainWorkspace Q6. How do you properly commit a transaction once all operations are successful? A. ws.CommitTrans B. db.CommitTransaction C. Execute.Commit D. CommitTransact Q7. What happens if an error occurs during a transaction? A. The transaction continues, but logs the error. B. The transaction completes only the parts without errors. C. The transaction is rolled back, undoing all changes. D. The transaction automatically fixes the error and continues executing. Q8. Why is it suggested to avoid letting end users encounter Visual Basic errors directly? A. End users are usually given database access to fix errors. B. Visual Basic errors present critical information that should be shared. C. Visual Basic errors could allow users to debug and alter the code. D. It is not suggested. Allowing users to see errors helps in quick error resolution. Q9. In the lesson, why is the command db.Set = CurrentDB used before executing transactions? A. To reduce overhead by avoiding initiating multiple instances of the Database object. B. To allow access to the external database server. C. To lock the database, preventing other users from making changes. D. To backup transaction data into a temporary file. Q10. What role does the Workspace object play in a transaction? A. It stores user credentials for authentication. B. It manages connections to different database servers. C. It organizes and manages multiple SQL commands as a unit. D. It logs each database operation performed during the transaction. Answers: 1-B; 2-D; 3-B; 4-C; 5-B; 6-A; 7-C; 8-C; 9-A; 10-C DISCLAIMER: Quiz questions are AI generated. If you find any that are wrong, don't make sense, or aren't related to the video topic at hand, then please post a comment and let me know. Thanks. --- LESSON 2 Q1. What happens if any item in an order fails in the transaction process described in the video? A. The entire order is canceled B. Only the failed item is removed from the order C. The system attempts to replace the failed item with a substitute D. The order is processed without the failed item Q2. Why is a composite key used in the order detail table in this example? A. To allow duplicate items on an order B. To enforce unique combinations of order ID and product name C. To increase the speed of search queries D. To automatically assign order IDs to new entries Q3. What action is taken to prevent duplicate products from being added to the same order? A. Duplicates are automatically merged B. A composite key is created to ensure uniqueness C. Duplicates are allowed and adjusted later D. Duplicates cause a warning but do not stop the order Q4. What is the purpose of using a record set in this transaction process? A. To store completed orders permanently B. To retrieve and store the order ID during the transaction C. To backup orders before processing D. To encrypt order details for security Q5. What indicates that a transaction was successful after adding items to an order? A. A log file is updated B. The GUI displays a confirmation message C. The order appears in the order table and order detail table D. A receipt is automatically printed Q6. How are transactions typically rolled back if an error occurs during the process? A. By manually deleting the records B. Using pre-set rules that allow changes only under certain conditions C. Through a built-in database rollback feature D. By notifying an administrator to intervene Q7. Which SQL concept related to error handling is mentioned for future SQL server courses? A. Cross join B. Commit-rollback C. Try-catch blocks D. Inner join Q8. What was demonstrated about the advantages of using transactions in database management? A. Makes data retrieval extremely fast B. Allows for complex operations to be safely attempted in one go C. Automatically increases storage capacity D. Simplifies user input requirements Answers: 1-A; 2-B; 3-B; 4-B; 5-C; 6-C; 7-C; 8-B DISCLAIMER: Quiz questions are AI generated. If you find any that are wrong, don't make sense, or aren't related to the video topic at hand, then please post a comment and let me know. Thanks. --- LESSON 3 Q1. What is the major issue addressed in the tutorial when using split databases with forms in Access? A. Converting forms into reports B. Reducing load time of forms with combo boxes C. Improving user interface design D. Syncing databases with mobile devices Q2. How does the tutorial propose to improve load times for forms with combo boxes in Access? A. By optimizing SQL Server settings B. By using temporary tables to load data locally C. By reducing the number of combo boxes D. By increasing hardware specifications Q3. What is suggested as the best practice for naming temporary tables in Access? A. Using the prefix 'temp' to indicate they can be deleted B. Including the date and time in the table name C. Naming them based on the user who created them D. Using entirely numerical names to avoid conflicts Q4. What is one key benefit of using temporary tables according to the tutorial? A. Allowing users to edit records directly in the temp table B. Copying only data that is frequently updated C. Pulling data down locally to improve form load speed D. Enabling automatic data sync with the backend Q5. How does the tutorial suggest handling fields when creating temporary tables from source tables? A. Manually typing out each field's properties in code B. Copying the field types and sizes directly from the source C. Only copying fields with fewer than 10 characters D. Skipping all fields except indexed ones Q6. What does the tutorial advise about the 'Allow Zero Length' property for text fields in temporary tables? A. It should never be set to true B. It should be set to false to avoid errors C. It should be set to true to allow for blank entries D. It should be ignored as it is not important Q7. What is the role of the 'Where' clause in the SQL statement used for creating temporary tables? A. It is used to specify which database server to connect to B. It enables filtering records pulled from the server C. It guarantees the table is always temporary D. It is used to format the output as a report Q8. What cleanup steps are suggested after creating temporary tables and fields in Access? A. Deleting the database B. Shutting down the Access application C. Setting object variables to nothing to free resources D. Rebooting the computer Q9. How is SQL used in the process of creating temporary tables in the tutorial? A. To delete records from the source table B. To update the Access application settings C. To insert records into the temporary table D. To run macros automatically Q10. According to the tutorial, when should you refresh the temporary data in your Access forms? A. Only when Access crashes B. Every time the database opens or a form loads C. Once a month to reduce server load D. Never, the temporary data is static Answers: 1-B; 2-B; 3-A; 4-C; 5-B; 6-C; 7-B; 8-C; 9-C; 10-B DISCLAIMER: Quiz questions are AI generated. If you find any that are wrong, don't make sense, or aren't related to the video topic at hand, then please post a comment and let me know. Thanks. --- LESSON 4 Q1. What is the primary purpose of creating a drop-in navigation subform? A. To require extensive coding in parent forms B. To create a unique set of buttons for each form C. To enable the navigation buttons to be easily reused in multiple forms with minimal configuration D. To eliminate the use of record sets entirely Q2. Which property is used to determine the current record in a form's recordset? A. Current Position B. Absolute Position C. Record Index D. Record Number Q3. Why might you experience issues with the record count not updating when the form loads initially? A. The form's design is outdated B. The recordset is not closed properly C. It is based on a query that does not refresh automatically D. The database is too large Q4. What must be modified in the navigation subform code to make it function as a subform? A. Changing 'me.recordset' to 'form.recordset' B. Changing 'me.recordset' to 'parent.recordset' C. Changing 'me.recordset' to 'child.recordset' D. Changing 'me.recordset' to 'sub.recordset' Q5. What is the standard method to navigate to the first record using code? A. DoCmd.GoToRecord , , acFirst B. me.recordset.First C. me.recordset.MoveFirst D. DoCmd.MoveRecord , , acFirst Q6. How is the new record button functionality different from other navigation buttons? A. It uses a different method, because there is no MoveNew method B. It navigates to a previous record instead C. It requires linking to an external file D. It must be coded using the MoveNext method Q7. Which method is used to reliably get an accurate record count when the form loads? A. Move to the middle record, then back to the first B. Use a wizard to set the record count C. Move to the last record, then back to the first record D. Disable and re-enable the recordset Q8. What is used to trigger the on current event of a subform without adding code to the parent form? A. Creating a fake field in the parent form B. Using link master and child fields to bind the subform to the parent form C. By accessing the database management system and adjusting settings D. By creating an entirely new subform link script Q9. How is the background color of the navigation subform set dynamically to match that of the parent form? A. Using a color picker tool B. By manually entering the hexadecimal color code C. Through matching the parent's detail section's background color in the form load event D. By setting each button individually in the color property window Answers: 1-C; 2-B; 3-C; 4-B; 5-C; 6-A; 7-C; 8-B; 9-C DISCLAIMER: Quiz questions are AI generated. If you find any that are wrong, don't make sense, or aren't related to the video topic at hand, then please post a comment and let me know. Thanks. SummaryToday's video from Access Learning Zone is Microsoft Access Developer Level 49. My name is Richard Rost, and I will be your instructor for this class.In this lesson, we are going to tackle three important topics: transactions, dynamic temporary tables that can boost the performance of your split database, and a drop-in navigation subform that you can easily reuse. The first two lessons are all about transactions. A transaction allows you to execute several SQL statements in such a way that if any part of the process fails, the entire set of actions is undone. Think of it as similar to managing money transfers between bank accounts. If you move money from one account to another, but one part of that process fails, the whole transfer should not happen at all. That is exactly how transactions work in Access. In Lesson 1, we will start with the basics. I will show you how to create a simple transaction using customer records, how to begin a transaction, commit it if everything goes as planned, or roll it back if there is a problem. Lesson 2 builds on that foundation with a more complex example. We will look at adding an order that includes multiple detail items. Each time you add an item, the system will check its inventory. If any item is out of stock or does not meet the minimum requirement, the entire order will be canceled. This demonstrates the true value of using transactions in your database. Moving on to Lesson 3, we will focus on creating dynamic temporary tables. If you are working with a split database – whether it is hosted on a network, online, using SQL Server, or just an Access back-end – you might notice that some of your forms are slow to load, especially when they rely on large datasets like customers, orders, or product lists. This is common when combo boxes or other controls need to pull in a lot of information from linked tables. To solve this, I will show you how to make these operations much faster by copying the data you need into a temporary table when your form loads, or even when your database first opens. We will develop a system that does not depend on the specific structure of your tables. Just tell it which table you want to copy, and it will handle the rest automatically. In Lesson 4, we will develop a drop-in navigation subform. Most people already know how to make simple navigation buttons such as moving to the first, last, next, or previous record. That is entry-level work. In this lesson, I will take you a step further and demonstrate how to control the main form's recordset, show the user exactly which record is being displayed, and present the total number of records using the recordset's properties, like AbsolutePosition. We will then encapsulate all of this into a subform, so in the future, you can just insert this navigation bar into any form, make minor property adjustments, and you are ready to go. There is no need to add any VBA to the parent form. All the heavy lifting is done by the subform, making this a great, reusable tool for your projects. This class builds on what was covered in Access Developer 48. Do you need to watch the previous lesson first? Not necessarily, but by this stage in the Developer series, there are important core topics you should already be comfortable with. That includes material from the Beginner and Expert levels, and key developer lessons like 15, 16, and anything covering error handling, recordsets, and table definitions. Each lesson builds on the last, so it is best not to skip around unless you are confident in your knowledge. If you run into something unfamiliar, you can always look up which other video covers that topic on my website. For reference, I am recording this in March 2025 using Access 365, which at this time is equivalent to Access 2024. If you are running your business on Access, I recommend getting a subscription; the cost is reasonable, and it keeps you up to date. If you have any questions, you can post them at the bottom of the page where this video is hosted. I make it a priority to answer questions and help you out. So get comfortable and enjoy Access Developer 49. You can find a complete video tutorial with step-by-step instructions on everything discussed here on my website at the link below. Live long and prosper, my friends. Topic ListIntroduction to SQL transactions in AccessStarting, committing, and rolling back transactions Implementing transactions with customer records Transaction handling with complex orders and detail items Inventory validation within transactional operations Creating dynamic temporary tables in split databases Copying backend tables to temporary local tables Using table-agnostic temp table creation methods Optimizing form controls with local temp tables Designing a drop-in navigation subform Manipulating main form recordsets in subforms Displaying current and total record counts with AbsolutePosition Integrating reusable navigation subforms into other forms Primary TopicsSQL transactions, commit and rollback, handling orders with inventory checks, dynamic temporary tables, form performance optimization, drop-in navigation subform, recordset properties, AbsolutePosition propertySecondary Topicstable agnostic code, split databases, subform reuse, none |
||||||||||||||||||||||||||||||||||||||||||||||||||||||||||||||||||
|
| |||
| Keywords: transactions, rollback, commit, DBFailOnError, dynamic temp tables, composite key, navigation subform, split database performance, recordset, temporary tables, tabledefs, allowzerolength, parent child form, record navigation, combo box speed PermaLink How To Use Transactions Dynamic Temp Tables and Navigation Subforms in Microsoft Access |