Organizing Inventory
By Richard Rost

 12 minutes ago Flexible Inventory Management Tracking System In this lesson, we will begin organizing inventory in Microsoft Access by designing a flexible four-level location hierarchy: locations, areas, subdivisions, and items. We will walk through creating the related tables, assigning primary and foreign keys, entering sample records, and using one-to-many relationships to track where items are stored without repeating location information for every item. Michael from Nottingham, England (a Silver Member) asks: How can I organize the tables and relationships to track exactly where each item is stored without creating separate tables for every type of storage furniture? MembersThere is no extended cut, but here is the file download: Silver Members and up get access to view Extended Cut videos, when available. Gold Members can download the files from class plus get access to the Code Vault. If you're not a member, Join Today!
PrerequisitesLinksRecommended CoursesUp Next
Keywords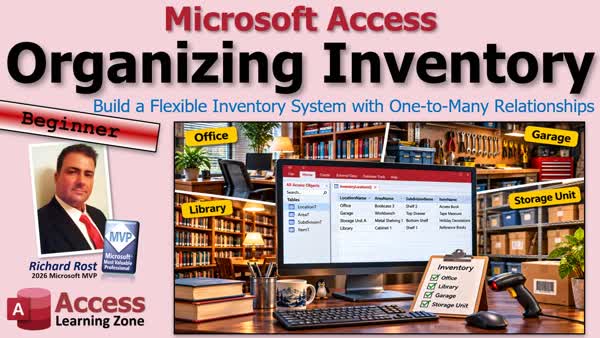 TechHelp Access, inventory location database, item location tracking, inventory database design, hierarchical storage locations, location area subdivision item, inventory table relationships, one-to-many relationships, asset location tracking, storage location management, relational combo boxes
More InformationTranscript You ever put something away in a nice, safe place and then, six months later, you can't remember where the heck you put it?
Maybe it's a book in your office, a tape measure in your garage, or a box of Christmas decorations in a storage unit.
You know you've got it. You just have no idea where it is.
Wouldn't it be nice to type in what you're looking for and have Access tell you exactly where to go?
Well, that's what we're going to start building today.
Welcome to another TechHelp video brought to you by Access Learning Zone. I'm your instructor, Richard Rost.
This is a beginner lesson. We're going to build a simple, flexible inventory database using tables, relationships, queries, and some forms. No VBA, no SQL programming, no coding required. If you know the basics of making tables in Access, you can follow along.
And for my members and more advanced students, don't worry. We've got some optional programming extras coming up in the extended cut, so stick around. But for now, everybody's going to get a useful beginner foundation.
Here's the kind of problem I hear about all the time. Let's say you're keeping track of equipment, and today's question comes from Michael in Nottingham, England, one of my Silver members.
Michael says, "I'm building an Access inventory database for our school district. We have classrooms, offices, libraries, maintenance rooms, and storage buildings with bookcases, cabinets, desks, and shelving. I need to know exactly where each item is stored. How can I organize the tables and relationships without calling everything a bookshelf or shelf?"
Yeah, and I get questions like this all the time. It doesn't matter what kind of equipment you're storing or trying to track. I've had people create a table for each shelf, or they create a table for each bookcase, or a table for each storage room.
So the key here is to break it down into multiple levels based on the hierarchy of what you're storing.
Do you need a separate table for bookcases, a separate one for cabinets, a separate one for desks, and another one for shelving? It gets out of hand pretty quickly.
So the trick, I think, is to think about a location of an item and not a particular piece of furniture that it happens to be sitting in.
Now, after having done a million of these types of databases, and I built one like this for myself a few years ago, in fact, I broke it down into four different levels. I think most items can be stored in a four-level system.
And I picked location, area, subdivision, and item.
For example, office could be the location. Bookcase three is an area in that office, and then shelf two is a subdivision of that bookcase. My Access book is an item on that shelf, on that bookcase, in that location.
And yes, I picked subdivision for an obvious reason. And those of you who know me know what it is.
Now, each level points to the one above it. That means I don't have to go type office, and then bookcase three, and then shelf two for every single book. Access can follow the relationships and figure out the whole path.
So let's start in the office. You've got a few bookcases, a desk, and a filing cabinet. If I tell you the book is in the office, that narrows it down a little bit, but you still could be looking for a while.
Now I tell you it's in bookcase three and shelf two. Ah, that's the actual address you can use. Office, bookcase three, shelf two, Access book. Perfect.
Now we're describing where to find the thing one step at a time. And that's the whole idea behind this database.
For this, I would create four separate tables. Can you do it with fewer? Yeah, you could. There's some more advanced things. You could do things like self-join relationships where you can make things nested inside of other objects. But again, this is a beginner database, and I think this works really well for people of all skill levels.
Office goes into LocationT. Bookcase three goes into AreaT. Shelf two goes in SubdivisionT. And the book goes in ItemT.
Now, each record will have its own ID number, and the child record will store the ID of its parent. Simple one-to-many relationships.
You've got item one, which is the Microsoft Access book, and it's in subdivision two. So subdivision two is shelf two, and that's in area one. Area one is bookcase three, and that's in location one. And location one is the office.
So if you search for this, you could figure out where it is.
Now let's go out to the garage. I've got a workbench with a bunch of drawers. Where's my tape measure? Garage, workbench, top drawer.
See what happened there? The furniture changed completely, but our four levels didn't. You still use the same four levels. I don't need a special garage table or a drawer table. Location, area, subdivision, item still works.
And this is why I like general names for these levels. You could put almost anything in them.
Could you use three levels? Sure. Could you use five? Yeah. Use as many as you want. I picked four.
And here's the same stuff in the same tables. Garage is another location. Workbench is an area that belongs to garage. Top drawer belongs to workbench. And then the tape measure belongs to top drawer. Same hierarchy. Same four tables. We just added different records.
Now, here's an important point. The tape measure doesn't need to store garage and workbench and top drawer as three separate answers. It only needs the ID of its subdivision. Access can follow the chain back up.
I've seen people try to put everything in the item table. No, you just need its parent. And the parent needs the grandparent. And the grandparent needs the great-grandparent.
Let's head out to the storage unit. We've got metal shelving, boxes, plastic totes, probably a box in the back that you haven't opened in three years. It's got all your Christmas decorations in it.
Now, what are the holiday decorations? Where are they? Well, storage unit A, metal shelving one, bottom shelf.
There you go, same pattern again. Even though this looks nothing like an office or garage, it's the same hierarchy.
A location can be an office, a garage, a storage unit, a room number, a broom closet. It doesn't matter. You decide what the top level means. It could even be a building. Whatever you want to call your locations.
Once again, we don't change the table design. The same four tables. Storage unit A is a location record. Metal shelving one is an area. Bottom shelf is a subdivision, and then holiday decorations are the item.
We can also add fields to this. You could give items a quantity. Maybe you've got three similar boxes of decorations on that shelf. So I'd enter a quantity of three if you want.
No need to track each individual box separately, unless you want to. You can. You could make box four, for example. But we're going to keep this beginner project focused on where things are stored. We're not building a full warehouse management system or an accounting system today.
Do I have other videos that talk about all that stuff? Oh yeah, you bet. And we'll talk about that later.
So let's put the whole thing together. One location can have many areas. One area can have many subdivisions, and a subdivision can have many items. That's three one-to-many relationships.
Think about an office with five bookcases. Each bookcase might have six shelves, and each shelf might have a whole bunch of books on it. We don't need to repeat the office name on every book. We connect the records with the ID numbers.
And here's a nice side benefit. Let's suppose I rename office to main office. I change the name in one record, and then we run our inventory query. All the books show the new location name. You don't have to edit every book one at a time.
And we can leave shelves empty. An empty shelf is still a shelf. And then later we can even make a query to find empty storage spaces. Where can I put this?
So that's our plan. Four tables: location, area, subdivision, item.
The same structure works for a book in an office, a tool in the garage, or holiday decorations in a storage unit. And the reason we're taking a few minutes to plan this is simple. It's a whole lot easier to get everything right now, the relationships and all that, than to build a dozen forms later and realize that not every new cabinet needs a table.
Take your time. Plan this stuff out first.
Enough looking at slides. Let's open up Access and actually build this thing.
And remember, this is beginner-level stuff. No coding required.
But before we get started, this is a beginner-level video, but I strongly recommend you watch my Access Beginner Level One course first. It's about four hours long, but it'll teach you all the basics about building tables and Access. And it's completely free. It's on my YouTube channel, it's on my website. Go watch that if you've never built a database with Access before, because this is all the fundamentals you could need to get started.
You should also understand basic relationships. Now, I consider relationships to be more of a higher-level topic, but I do cover them a little bit in my Access Beginner One class toward the end, especially one-to-many relationships. One driver to multiple cars. That's your basic relationship.
Go watch this if you're not sure about that.
And we're also going to build some relational combo boxes. That's where you can pick something from a list from a different table. For example, if you were trying to put the subdivision and the item together, you're going to pick from a list from a relational combo box.
These are all free videos, again, on my website and on my YouTube channel. Go watch those and then come on back.
Alrighty, so here I am in my TechHelp free template. This is a free database you can grab off my website if you want to, but we're not going to use most of this.
I'm going to actually close that main menu. We're going to create our own new tables.
Let's start with Create and then Table Design. We'll start from the top and work our way down.
So we've got a location table. LocationID, that's our AutoNumber, our primary key. LocationName.
Do I want to call it just Name? No, you do not. Why? Because Name is something called a reserved word. It'll get you in trouble later on.
Can you call it Name? Yeah. Do you want to call it Name? Absolutely not. There are certain words you just don't want to use as field names. Name and Date are a couple of them. There's lots of them. I've got a separate video on reserved words.
So let's save this as my LocationT, my location table.
Do you want to set a primary key? Of course we do. Say yes.
What does that mean? Well, LocationID is an AutoNumber, so Access takes care of giving you one, then two, then three. And that way, no two locations have the same ID.
Let's put some sample data in here. What do we have? We have the office. We've got the garage. We've got the storage unit. We've got the broom closet. We've got the armory and the phaser room. Whatever.
So there's our locations.
Now I'm going to leave this open and just kind of move it out of the way so I can still see what these locations are. This is a step that I always do while I'm setting up the tables. I want to see the sample data.
Later on, we won't need to work with these tables because we'll be able to pick them from combo boxes. But when I'm making the next table, the area table, I want to be able to see the locations.
Create, Table Design. This will be our area table.
So we've got AreaID. That's our AutoNumber.
Now, this is the second level. It needs a LocationID. LocationID. This is a Number of type Long Integer. This is a foreign key. That LocationID is going to point to this LocationID, so you know which area belongs to which location.
Then you've got the AreaName.
Save it. This is the AreaT primary key. Yes.
And now we can put some data in this table.
What are some areas in the office location? So what do we have in the office? So one for LocationID. We've got bookcase one. And maybe you'll just have to know which bookcase is which. Like in my office, I know bookcase one starts on the left and then it goes around. I've got like seven bookcases. Or you can put numbers on them if you want. I don't care.
Location one, we've got bookcase two, and so on. Location one still, I've got the filing cabinet. Location one, I've got my desk, and we'll do one more. Location one, I've got my supply closet in the office.
Location two, the garage. I've got a workbench, I've got a tool chest, I've got metal shelving, and then maybe a parts cabinet.
And you see how this works.
The storage unit: shelf one, shelf two, shelf three. You might also have a storage rack in the back.
Maybe the broom closet is just a broom closet, so it doesn't have any special divided areas. So for this, I would just put broom closet. It's just one small room, so it doesn't have a separate area or even a subdivision.
So if the broom is in the broom closet, we'll just pick item as broom, and then subdivision, area, and location will all be basically the same thing.
Because of how we're setting up our relationships, you have to have a record for each of these tables to put an item in here.
And then in the armory, we've got our phaser cabinet and our photon torpedo launcher stack. I don't know, whatever.
So there's our areas.
What's next? Subdivisions.
In the high school halls, in the shopping mall. I'm not going to sing. I promised myself I wasn't going to sing.
SubdivisionID. And the subdivision belongs to an area. And then SubdivisionName.
Same changes, yes.
So what are we going to put in for subdivisions? That depends, again, on each area.
Let's take a look at our area. So bookcase one. Area one is bookcase one. What are the subdivisions? Well, for a bookcase, I would go shelf one, shelf two, and you have to decide how you want to number your shelves: from the top to bottom, bottom up, whatever. I go top to bottom. Shelf three.
Let's say bookcase two, area two. Now we're here. If it's a little guy, you could even go top shelf, middle shelf, bottom shelf. That's totally up to you. These are your Legos. Put them however you want.
The desk. Let's go to the desk. So, four. You've got the desktop, you've got the left drawer, and you've got maybe the right drawer. And you just continue. The supply closet, the workbench, the tool chest, all these things, you give them whatever subdivisions they need.
If the tool chest has different compartments in it, that's up to you. I've got that toolbox where the tools go up top and then the thing lifts up and then you've got a big well beneath it. Sometimes it's nice knowing where you've got the Phillips-head screwdriver stored.
Of course, then there's always remembering to put it back in the exact same spot you got it from, which no one ever does.
But then you fill all those out. Here, broom closet, for example, area 14. And that's, again, still just broom closet, and so on.
One more table. Here's our subdivisions.
One more table, we've got to create Table Design. What's next? The items.
So we've got an ItemID. We've got the subdivision it belongs to, Number, and then we've got the ItemName. And then any other details about each item that you want to put in here, depending on what you're tracking.
Its value, a picture of it. Well, don't put the pictures in the database. Store the pictures in the file system, in Windows, and then put the path and file of the image in your database. I've got separate videos on that one.
The date you purchased it, whatever other information you want in here. Notes are always good for items. That can be Long Text. Whatever you want to put in your item table.
Then you put your data in.
What do we have? Subdivision one, which is shelf one of bookcase one in the office. See? Shelf one, bookcase one, office.
And what do we have? We've got the Richard Rost Access book. Also on shelf one, we've got an SQL Server book. Maybe this is my computer books shelf.
Shelf two, what's on shelf two? Well, that's the Star Trek Technical Manual. And then we've got the Captain's Guide to Trouble Tasting. I don't know, that's pretty bad, isn't it?
Shelf three. We've got maybe my albums and CDs on here. We've got Moving Pictures. We've got 2112. A whole bunch of other stuff.
And you get the point. You go down the list here. Let's find broom closet. Subdivision is 10, and there's the broom. You might also have a mop and a bucket. That goes in your broom closet.
Another thing I also want to mention is, be aware that you've got multiple bookcases as your areas. Bookcase one, bookcase two.
Here's bookcase two. Keep in mind that multiple areas can have the same subdivisions. In other words, shelf one. Bookcase two can also have a shelf one.
So I'll come down here. Bookcase two, shelf one. Bookcase two, shelf two.
So just knowing that something's on shelf one, is it that shelf one or is it this shelf one? This is just a common name for you. What's important is the ID.
So if I break this up, if I filter this by shelf, this alone tells you nothing. This is what tells you what subdivision it's part of, and that subdivision then tells you what area it's part of, and that area then tells you what location it's in.
So keep that in mind. Let me unfilter that.
This name here is just a common name to help you out. That ID is what really is important internally. That's all that Access really cares about.
And I just realized I've got broom closet here. What's a broom closer? Closer is the broom. Does a broom close? Does a broom open? I don't even know.
So we've got our tables built, and we've got some sample data in there to work with. And that's something I always recommend.
Whenever you're building a new database, don't just create a bunch of empty tables and then start building queries and forms. Put some sample data in there first. It makes everything so much easier when you've got actual records in there to work with, even if it's just sample records.
And you don't need a ton of data, too. I've had people tell me, "Well, I've got 50,000 inventory records I need to put in." Yeah, that's great, but you don't need all 50,000 records in there right now. Just put a handful of them in, like we did here.
A few locations, a couple of areas, some subdivisions, some items. Enough to test everything and make sure it's working the way you expect.
It's easier to build forms and combo boxes when you can see the sample records in there instead of just blanks.
And you can always delete the sample data later and start fresh with your real data once you've got the database working the way you want it, at least close to finished. Because let's face it, no database is ever really finished.
Then you can start loading in all of your actual data.
So now we've got some tables, we've got some records to play with. We're ready to start building some queries so we can see where everything is, and then we'll start working on some forms to make entering and finding our inventory a whole lot easier.
And we will start covering that in tomorrow's video. So tune in tomorrow, same bat time, same bat channel.
Or, if you remember, you're going to watch it right now because that's one of the benefits of being a member. You can watch stuff as soon as I'm done recording it.
Well, I wouldn't say right now because I'm still recording this right now. But when will then be now? Soon.
As soon as it's done, which will be very shortly, probably after I eat dinner here in a minute, then you'll be able to watch it.
Everybody else, you'll have to wait until tomorrow.
Before you go, I've got a couple things on my website you might be interested in.
First up is my Access Asset Management Seminar. If you want to take what we've been doing here to the next level, this seminar shows you how to build a complete asset tracking database.
We track things like who owns what asset, where it's located, what condition it's in, what it's worth, and its purchase and retirement dates.
And the really cool part is we'll build parent-child relationships so you can track assets in groups together. For example, you can track all the individual components inside a computer, then track that entire computer as an asset itself.
We also build transaction history logs so you can see when assets are moved, reassigned, or changed. We cover all the tables, queries, forms, subforms, and even a little bit of VBA to automate the tracking.
So if you're looking to build a more advanced asset management system, check out my Access Asset Management Seminar. I'll put a link down below.
And if you're interested in barcoding for your inventory, I've got the Access Barcoding and Inventory Seminar.
This seminar shows you how to build a complete inventory management system with barcode scanning, order entry, invoicing, and inventory tracking.
You'll learn how to scan products directly into orders, track inventory coming in and going out, manage rental items, and even track individual units by serial number.
We'll also cover printing your own barcode labels, generating QR codes, and keeping a transaction history so you know exactly what's happening with your inventory.
There's plenty of VBA programming in this one, including working with recordsets to automate everything.
So if you're looking to build a serious inventory system for your business, check out my Barcoding and Inventory Seminar. I'll put links to all this down below.
So now you've got some basic inventory management under your belt as far as tracking where things are stored. We've got our tables built, and we've got some sample data in there.
And that is going to be your TechHelp video for today. I hope you learned something.
Live long and prosper, my friends. I'll see you tomorrow for part two.
If you enjoyed this video, hit that thumbs-up button right now and give me a like. Also, be sure to subscribe to my channel, which is completely free, and make sure you click that bell icon and select All to receive notifications whenever I post a new video.
If you're new to Microsoft Access, check out my Access Beginner Level One course. It's over four hours long and it covers all the basics, like tables, queries, forms, and reports.
It's a great place to start, and it's also completely free.
Members of my channel get extended-cut videos, sample databases, access to my Code Vault, and full training classes every month. Click the Join button for details.
Thanks for watching. I'm Richard Rost with accesslearningzone.com.
Live long and prosper, my friends. I'll see you next time. Intro In this lesson, we will begin organizing inventory in Microsoft Access by designing a flexible four-level location hierarchy: locations, areas, subdivisions, and items. We will walk through creating the related tables, assigning primary and foreign keys, entering sample records, and using one-to-many relationships to track where items are stored without repeating location information for every item. Quiz Q1. What is the main purpose of the database being built in this lesson?
A. Track where items are stored so they can be found later
B. Calculate employee payroll taxes
C. Design product barcode labels
D. Create a school class schedule
Q2. Which four levels are used in the example storage hierarchy?
A. Building, Room, Cabinet, Product
B. Location, Area, Subdivision, Item
C. Warehouse, Aisle, Bin, Invoice
D. Company, Department, Employee, Asset
Q3. In the office example, which level would "Bookcase 3" normally represent?
A. Location
B. Area
C. Subdivision
D. Item
Q4. In the office example, which level would "Shelf 2" normally represent?
A. Location
B. Area
C. Subdivision
D. Item
Q5. Why should an item record store only its SubdivisionID instead of also storing the location and area names?
A. Access can follow the relationships to determine the full storage path
B. Item tables cannot contain text fields
C. Locations cannot have more than one area
D. SubdivisionID automatically stores a picture of the item
Q6. What type of relationship exists between LocationT and AreaT?
A. One-to-one
B. Many-to-many
C. One-to-many
D. No relationship is needed
Q7. Which field should be the primary key in LocationT?
A. LocationName
B. LocationID
C. AreaID
D. SubdivisionID
Q8. In AreaT, what is the purpose of the LocationID field?
A. It identifies the location that the area belongs to
B. It automatically names the area
C. It stores the item's quantity
D. It creates a new location record
Q9. What data type should normally be used for a foreign key such as LocationID in AreaT when the related primary key is an AutoNumber?
A. Short Text
B. Long Text
C. Number with Long Integer field size
D. Date/Time
Q10. Why are general names like Location, Area, and Subdivision useful?
A. They work with different types of storage, such as offices, garages, and storage units
B. They prevent users from entering any new records
C. They eliminate the need for relationships
D. They automatically create reports
Q11. If two different bookcases both have a shelf called "Shelf 1," what distinguishes one shelf from the other?
A. The shelf name alone
B. The SubdivisionID and its related AreaID
C. The item quantity
D. The location name must be different
Q12. What is a benefit of storing a location name only once in LocationT?
A. Renaming the location updates its displayed name everywhere it is used through relationships
B. Every item automatically gets a new ItemID
C. Access prevents areas from being added
D. All item quantities are reset to zero
Q13. Why is it helpful to enter a small amount of sample data before building forms and queries?
A. It makes it easier to test relationships, forms, queries, and combo boxes
B. It permanently locks the table design
C. It removes the need for primary keys
D. It prevents real data from being imported later
Q14. What is a relational combo box useful for in this type of database?
A. Selecting a related record, such as a subdivision for an item
B. Encrypting item names
C. Calculating asset depreciation
D. Printing a barcode automatically
Q15. Which field name should generally be avoided because it is a reserved word that can cause problems in Access?
A. ItemName
B. LocationName
C. Name
D. AreaName
Q16. Where should image files generally be stored when tracking pictures of inventory items?
A. In the Windows file system, with the image path stored in the database
B. Directly inside every item record as a Long Text value
C. Inside the LocationID field
D. Only in the primary key field
Answers: 1-A; 2-B; 3-B; 4-C; 5-A; 6-C; 7-B; 8-A; 9-C; 10-A; 11-B; 12-A; 13-A; 14-A; 15-C; 16-A
DISCLAIMER: Quiz questions are AI generated. If you find any that are wrong, don't make sense, or aren't related to the video topic at hand, then please post a comment and let me know. Thanks. Summary Today's video from Access Learning Zone begins a beginner-friendly project for building a simple inventory database in Microsoft Access. The purpose of this database is to help you keep track of where items are stored, whether they are in an office, garage, storage unit, classroom, maintenance room, or another type of location.
We are going to create a flexible storage-location system using tables, relationships, queries, and forms. No VBA programming, SQL programming, or other code is required for the basic version of this project. If you understand the fundamentals of creating tables in Access, you should be able to follow along.
Also, in today's Extended Cut, I will cover optional programming features for members who want to take the project further.
The problem we are solving is simple. Most of us have put something away somewhere safe and then forgotten exactly where we put it. You may know that you own a particular book, tool, box, piece of equipment, or decoration, but you may not remember whether it is in a cabinet, on a shelf, in a drawer, or inside a storage tote.
The goal is to be able to search for an item and have Access tell you where to find it.
For example, suppose you are tracking equipment and supplies across a school district. You may have classrooms, offices, libraries, maintenance areas, storage buildings, bookcases, cabinets, desks, shelves, and other storage furniture. It would be difficult to create a different table for every type of storage object. You do not want separate tables for bookcases, cabinets, desks, shelving units, storage rooms, and so on.
Instead of designing tables around the type of furniture, I recommend thinking about the physical location of an item as a hierarchy.
For this project, I use four levels:
Location
Area
Subdivision
Item
For example, an office might be the location. Bookcase 3 might be an area inside that office. Shelf 2 might be a subdivision inside the bookcase. Finally, a Microsoft Access book might be the item stored on that shelf.
The full storage address would be:
Office
Bookcase 3
Shelf 2
Microsoft Access Book
This gives you a practical way to identify the exact place where an item belongs.
Each level connects to the level above it. The item does not need to store the words Office, Bookcase 3, and Shelf 2 repeatedly. Instead, it only needs to point to its immediate parent record. Access can follow the relationships upward to determine the full path.
The same structure works in many situations.
In an office, you might have:
Location: Office
Area: Bookcase 3
Subdivision: Shelf 2
Item: Microsoft Access Book
In a garage, you might have:
Location: Garage
Area: Workbench
Subdivision: Top Drawer
Item: Tape Measure
In a storage unit, you might have:
Location: Storage Unit A
Area: Metal Shelving 1
Subdivision: Bottom Shelf
Item: Christmas Decorations
Although the furniture and surroundings are different, the four-level hierarchy remains the same. You do not need a special table for garages, drawers, bookcases, shelves, or storage bins.
A location can represent almost anything at the top level. It might be an office, garage, room number, classroom, storage building, warehouse, closet, or even an entire building. You decide what makes sense for your organization.
The key is to keep the table design general enough that it can handle different types of storage.
The database will use four tables:
LocationT
AreaT
SubdivisionT
ItemT
Each table will have its own AutoNumber primary key field. The child table will store the ID number from the parent table as a foreign key.
The LocationT table contains your main locations. It includes:
LocationID
LocationName
LocationID is an AutoNumber primary key. Access automatically assigns a unique number to each location record.
I recommend avoiding generic or reserved words for field names. For example, do not use Name as a field name. Although Access may allow it, Name is a reserved word and can cause problems later. Use LocationName, AreaName, ItemName, or another more descriptive name instead.
Example location records might include:
Office
Garage
Storage Unit
Broom Closet
Armory
Phaser Room
The exact locations in your database will depend on what you need to track.
The next table is AreaT. This table represents the second level in the hierarchy.
The AreaT table includes:
AreaID
LocationID
AreaName
AreaID is the AutoNumber primary key.
LocationID is a Number field with a Long Integer field size. This is the foreign key that connects each area to a location in LocationT.
AreaName stores the description of the area.
For example, areas in the Office location might include:
Bookcase 1
Bookcase 2
Bookcase 3
Filing Cabinet
Desk
Supply Closet
Areas in the Garage location might include:
Workbench
Tool Chest
Metal Shelving
Parts Cabinet
Areas in a storage unit might include:
Shelf 1
Shelf 2
Shelf 3
Storage Rack
Sometimes you may have a small location that does not need much detail. For example, if a broom closet is very small, you might simply create an area called Broom Closet inside the location called Broom Closet. This may seem repetitive, but it keeps the hierarchy intact.
Because of the relationships we are using, every item needs to have a subdivision, every subdivision needs to have an area, and every area needs to have a location. Even if a location is simple, you should still create the necessary records so the item can fit properly into the system.
The third table is SubdivisionT. This represents the smaller storage sections inside each area.
The SubdivisionT table includes:
SubdivisionID
AreaID
SubdivisionName
SubdivisionID is the AutoNumber primary key.
AreaID is a Number field with a Long Integer field size. It is the foreign key that connects each subdivision to an area in AreaT.
SubdivisionName describes the smaller section where an item is placed.
For a bookcase, subdivisions might be:
Shelf 1
Shelf 2
Shelf 3
For a smaller bookcase, you might instead use:
Top Shelf
Middle Shelf
Bottom Shelf
For a desk, subdivisions might include:
Desktop
Left Drawer
Right Drawer
For a workbench, subdivisions might include:
Top Surface
Upper Drawer
Lower Drawer
Tool Tray
For a toolbox, you might use:
Top Compartment
Lower Compartment
Side Tray
You can define the subdivisions any way that makes sense for your own storage system. The purpose is to identify the exact place where an item should be returned after it is used.
The final table is ItemT. This table stores the actual objects you are tracking.
The ItemT table includes:
ItemID
SubdivisionID
ItemName
ItemID is the AutoNumber primary key.
SubdivisionID is a Number field with a Long Integer field size. It is the foreign key that connects an item to a subdivision in SubdivisionT.
ItemName stores the name of the item.
You can also add other fields to ItemT depending on the information you need to track. For example, you might include:
Quantity
PurchaseDate
Value
Condition
SerialNumber
Notes
ImagePath
If you want to associate pictures with items, I generally recommend storing the image files outside the database in your Windows file system. Then store the path and filename of each image in the database. This keeps the Access database from growing unnecessarily large.
You might also track the quantity of an item. For example, if you have three boxes of Christmas decorations on the same shelf, you could create one item record called Christmas Decorations and set its quantity to 3.
If you need to track every individual box separately, you can certainly do that. For example, you could create records for Christmas Decorations Box 1, Christmas Decorations Box 2, and Christmas Decorations Box 3. However, this beginner project is focused on tracking where items are stored, not building a full warehouse, accounting, or asset management system.
Here is an example of how records relate to each other.
Suppose the Microsoft Access book is stored on Shelf 1 of Bookcase 1 in the Office.
The Office is a record in LocationT.
Bookcase 1 is a record in AreaT that contains the LocationID for Office.
Shelf 1 is a record in SubdivisionT that contains the AreaID for Bookcase 1.
Microsoft Access Book is a record in ItemT that contains the SubdivisionID for Shelf 1.
When you search for the item, Access can follow the chain upward:
Item
Subdivision
Area
Location
This gives you the complete location path.
One important detail is that names do not have to be unique across the entire database. You may have Shelf 1 in Bookcase 1 and another Shelf 1 in Bookcase 2. The name Shelf 1 alone does not uniquely identify the shelf. The ID number is what Access uses internally.
For example, Shelf 1 in Bookcase 1 and Shelf 1 in Bookcase 2 are separate subdivision records with different SubdivisionID values. The names may be the same, but the ID numbers and parent relationships identify exactly where each shelf belongs.
This is why it is important to use the ID fields and relationships properly. The names are primarily there to help people understand the data. Access uses the ID numbers to connect the records.
The relationships in this database are all one-to-many relationships.
One location can have many areas.
One area can have many subdivisions.
One subdivision can have many items.
For example, an office can have several bookcases. Each bookcase can have several shelves. Each shelf can contain many books or other items.
This design prevents you from having to repeat the office name, bookcase name, and shelf name in every item record.
It also makes changes much easier. Suppose you rename Office to Main Office. You only need to update one record in LocationT. When you later run a query that shows your inventory locations, every related item will automatically display Main Office.
You can also keep records for empty storage spaces. An empty shelf is still a shelf. Later, you can create a query to find shelves, drawers, cabinets, or other subdivisions that do not currently contain any items. That can help you locate available storage space.
Before you begin creating queries and forms, enter a small amount of sample data into each table.
Do not create empty tables and immediately begin building forms, queries, and reports. It is much easier to build and test database objects when you have some records to work with.
You do not need to enter all of your real inventory data right away. If you eventually expect to track tens of thousands of records, begin with a few sample locations, areas, subdivisions, and items.
For example, create a few locations, several areas within those locations, a few subdivisions for each area, and a handful of sample items. This will give you enough data to test your relationships, queries, forms, and combo boxes.
Once the database is working the way you want, you can remove the sample records if necessary and begin entering your real inventory data.
In the next part of this project, I will create queries that show the full storage location for each item. We will then create forms to make entering and finding inventory records much easier. We will use relational combo boxes so that, for example, you can choose a location, then choose an area within that location, then choose a subdivision within that area.
If you want to expand this project into a more complete asset tracking database, you may also want to consider an asset management system. A full asset management database can track ownership, condition, value, purchase dates, retirement dates, assignments, movements, and transaction history. It can also track parent-child asset relationships, such as the individual components inside a computer system.
For more advanced inventory needs, a barcode and inventory management system can add barcode scanning, order entry, invoicing, inventory movement tracking, rental tracking, serial number tracking, barcode label printing, QR code generation, and transaction history.
For this beginner project, however, the main goal is simple: create a practical database that tells you exactly where your items are stored.
You can find a complete video tutorial with step-by-step instructions on everything discussed here on my website at the link below. Live long and prosper, my friends. Topic List Planning a hierarchical inventory location system
Using location, area, subdivision, and item tables
Creating primary keys with AutoNumber fields
Using foreign keys for parent-child relationships
Building one-to-many table relationships
Creating the Location table
Creating the Area table
Creating the Subdivision table
Creating the Item table
Using general location levels for flexible storage
Entering sample inventory location data
Understanding IDs versus duplicate descriptive names
Adding item details such as quantity and notes
Using sample data when building a database Article A simple inventory database can help you find almost anything you own or manage, whether it is a book in an office, a tape measure in a garage, or holiday decorations in storage. The key is to store each item's location in a consistent hierarchy instead of creating separate tables for every kind of furniture, room, cabinet, or shelf.
A practical structure uses four levels: Location, Area, Subdivision, and Item. A Location is the broadest place, such as an office, garage, storage unit, classroom, library, or maintenance room. An Area is something within that location, such as a bookcase, workbench, filing cabinet, shelving unit, or desk. A Subdivision is a smaller part of that area, such as a shelf, drawer, compartment, bin, or desktop. Finally, an Item is the actual object you want to find.
For example, a book might be stored in the Office location, on Bookcase 3, Shelf 2. A tape measure might be stored in the Garage location, on the Workbench, in the Top Drawer. Christmas decorations might be in Storage Unit A, on Metal Shelving 1, on the Bottom Shelf. Even though the furniture changes, the database structure remains the same.
This approach is useful because it avoids making a different table for every possible storage type. You do not need separate tables for bookcases, desks, cabinets, drawers, boxes, shelving, or closets. Instead, each of those can be entered as a record in the appropriate level of the hierarchy.
Create four tables named LocationT, AreaT, SubdivisionT, and ItemT. Each table should have its own primary key field, usually an AutoNumber field. Use descriptive names such as LocationID, AreaID, SubdivisionID, and ItemID. Avoid using generic field names such as Name or Date, because those names can conflict with reserved words in Access and cause problems later.
The LocationT table stores your broad locations. It should contain LocationID as the primary key and LocationName as a text field. Example location records might include Office, Garage, Storage Unit A, Broom Closet, Classroom 101, or Maintenance Building.
The AreaT table stores the next level down. It should include AreaID as its primary key, LocationID as a Number field using the Long Integer data type, and AreaName as a text field. The LocationID field is a foreign key. It identifies which Location record each Area belongs to.
For example, if Office has a LocationID of 1, you might create Area records such as Bookcase 1, Bookcase 2, Filing Cabinet, Desk, and Supply Closet, each with a LocationID of 1. If Garage has a LocationID of 2, you could create Area records such as Workbench, Tool Chest, Metal Shelving, and Parts Cabinet, each with a LocationID of 2.
The SubdivisionT table stores smaller sections within an area. It should include SubdivisionID as the primary key, AreaID as a Number field using the Long Integer data type, and SubdivisionName as a text field. The AreaID field connects each subdivision to its parent area.
A bookcase might have subdivisions named Shelf 1, Shelf 2, and Shelf 3. A desk might have subdivisions named Desktop, Left Drawer, and Right Drawer. A workbench might have subdivisions such as Top Drawer, Bottom Drawer, Tool Tray, or Lower Shelf. A storage rack might have Shelf 1 through Shelf 5.
The names used in this table do not have to be unique. You can have Shelf 1 in several different bookcases, because each Shelf 1 record is connected to a specific AreaID. The important value is the ID, not the descriptive text alone. Shelf 1 in Bookcase 1 is a different subdivision record from Shelf 1 in Bookcase 2.
The ItemT table stores the things you are actually tracking. It should include ItemID as the primary key, SubdivisionID as a Number field using the Long Integer data type, and ItemName as a text field. You can add other fields depending on your needs, such as Quantity, Description, PurchaseDate, EstimatedValue, Condition, Notes, SerialNumber, or an image file path.
For example, an item record might be Microsoft Access Book, with its SubdivisionID pointing to Shelf 1. That Shelf 1 record points to Bookcase 1, and Bookcase 1 points to Office. Access can follow those relationships to determine the full location of the book.
The item does not need to store Office, Bookcase 1, and Shelf 1 as separate text values. It only needs to store the SubdivisionID. The subdivision record identifies the area, and the area record identifies the location. This prevents repeated data and makes the database easier to maintain.
If you later change the name Office to Main Office, you only need to update the single Location record. Every related area, subdivision, and item will automatically display the revised location name in queries and forms. You do not need to edit every item individually.
After creating the tables, establish three one-to-many relationships. Connect LocationT.LocationID to AreaT.LocationID. Connect AreaT.AreaID to SubdivisionT.AreaID. Connect SubdivisionT.SubdivisionID to ItemT.SubdivisionID. Each location can have many areas, each area can have many subdivisions, and each subdivision can have many items.
You may want to enable referential integrity when creating these relationships. This helps prevent orphaned records, such as an area assigned to a location that does not exist or an item assigned to a subdivision that has been deleted. Be thoughtful about cascade delete options. In most inventory systems, automatically deleting every item because a location was deleted is usually not desirable.
Enter a small amount of sample data before building forms and queries. You do not need to import or type all of your real inventory immediately. A few locations, areas, subdivisions, and items are enough to test the design. Sample data makes it much easier to verify that relationships work correctly and to build useful combo boxes and queries.
Once the tables and relationships are in place, create a query that joins all four tables. Include ItemName from ItemT, SubdivisionName from SubdivisionT, AreaName from AreaT, and LocationName from LocationT. This query provides a complete path for each item, such as Office, Bookcase 3, Shelf 2, Microsoft Access Book.
You can use this query to search for an item by name and immediately see where it belongs. It can also be used as the record source for forms, reports, and search screens.
When building data-entry forms, use combo boxes for the relationship fields. For example, an Area form can use a combo box to select the Location. A Subdivision form can use a combo box to select the Area. An Item form can use a combo box to select the Subdivision. This is much easier and safer than asking users to type ID numbers manually.
As the database grows, you can improve the forms so that the available choices are filtered by earlier selections. For example, after choosing Garage as a location, the Area combo box can show only areas located in the garage. After selecting Workbench, the Subdivision combo box can show only the drawers and sections of that workbench. The programming behind this kind of form should refresh each dependent list when the user chooses a parent location, preventing invalid combinations.
This design is flexible enough for many practical situations. It can track office supplies, school equipment, maintenance tools, stored documents, household belongings, library materials, spare parts, or inventory in storage facilities. If a particular location has no meaningful divisions, you can still create simple matching records. For a small broom closet, you could create Broom Closet as the location, Broom Closet as the area, and Broom Closet as the subdivision, then store items such as Broom, Mop, and Bucket beneath it.
The important idea is to think in terms of an item's address rather than the type of furniture it is stored in. By using a consistent hierarchy of Location, Area, Subdivision, and Item, you can find objects quickly without making your database unnecessarily complicated. Primary Topics inventory location hierarchy, relational table design, primary keys, foreign keys, one-to-many relationships, sample data entry, normalized storage locations, Access table creation Secondary Topics reserved field names, AutoNumber IDs, Long Integer foreign keys, quantity fields, item notes, empty storage spaces, planning database structure |