Appointments
By Richard Rost

 5 years ago
Access Appointment Database for Scheduling
Build a database in Microsoft Access to track your appointments (calendar, tasks, to-do list items, etc.). We will build the needed table, queries, form, and a printable scehedule report.
Gabriella from St. Petersburg, Florida (a Platinum Member) asks: I need a simple database to track my upcoming appointments. I've been using Outlook, but I'd like to use Access so I can eventually tie appointments to customers. Can you help me?
Members
I'll show you how to set the end time to one hour after the start time, add buttons for add an hour, 15 minutes, or whatever interval you like to the appointment. We'll make a combo box to select what data you'd like to see in the form and report (recent, future, or all appointments). Then we'll add the customer data to the system so you can assign an appointment to a client.
Gold Members & Up
This is the first time I recorded an extra BONUS video for Gold and Platinum members! This video is based heavily in VBA coding and we'll do some really cool stuff. We'll build in conflict resolution, so the system will warn you if you try to add an appointment that overlaps another one. Then, we'll make the database tell you when the next available open appointment slot is! Really helpful!
Silver Members and up get access to view Extended Cut videos, when available. Gold Members can download the files from class plus get access to the Code Vault. If you're not a member, Join Today!
 Links Links
After Update: https://599cd.com/AfterUpdate
Arrange Tabular: https://599cd.com/ArrangeTabular
Format Property: https://599cd.com/FormatProperty
Query Criteria: https://599cd.com/Criteria
Calendar Seminar: https://599cd.com/Calendar
Can Shrink in Reports: https://599cd.com/acb9
SQL Seminars: https://599cd.com/SQL
DateTime Seminar: https://599cd.com/DateTime
Developer 24: https://599cd.com/acd24
Intro to VBA: https://599cd.com/IntroVBA
 Subscribe to Appointments
Get notifications when this page is updated
Intro In this video, I will show you how to build a simple appointment tracking database using Microsoft Access. We will create an appointment table, set up fields for start and end times, add priorities and notes, and set default values for new records. You will learn how to design a continuous form to view and manage your appointments, filter out older records with queries, and set up a printable report of upcoming appointments. I will also demonstrate useful formatting techniques and how to add navigation buttons to your main menu.Transcript Welcome to another TechHelp video brought to you by AccessLearningZone.com. I am your instructor, Richard Rost.
In today's video, we are going to build an appointment database. We will be able to schedule, track, and print our appointments, tasks, to-do lists, all that stuff. We will build the table, related queries, a continuous form, and of course, a printable report.
Today's question comes from Gabriella from St. Pete, Florida, one of my neighbors. She says, I need a simple database to track my upcoming appointments. I have been using Outlook, but I would like to use Access so I can eventually tie appointments to customers. Can you help me?
Of course, Gabriella. Access is actually great as an appointment calendar. You can store all kinds of information in there, have different fields you might want, like due dates and priorities and stuff like that. Building it yourself is a whole lot more flexible than using something like Outlook.
I used to use Google Calendar for the longest time. In fact, I still do for some personal stuff, but for business stuff, I stick to Access. Let me show you how to do it.
Here I am in my TechHelp free template. This database is a free template. You can download it from my website. I will put a link down below. This database has customers, contacts, orders, and order details.
You could go into the customers record, go to contacts, and you could use this table to store information on appointments if you wanted to. I want it to be a little more flexible, maybe a start time and end time, a priority, that kind of stuff.
We will save contacts for just when we talk to people. We will use the appointment table to store our actual physical appointments when we have to be places and stuff like that.
Let's create a new table. Create, and then Table Design. This will be my appointment ID, my appointment table. AutoNumber. We will have a description of the appointment. That will be short text. We will have a start date/time and an end date/time.
You can default these if you want to. This is completely based on your patterns, your business, however you do things. I am going to say for me, hypothetically, let's say whenever I set up an appointment, it's usually for tomorrow at 1 p.m. Personally, I hate morning appointments, and I usually only have maybe one or maybe two a day.
I am going to make my default value equals today's date plus one. I am at tomorrow at midnight, and I want to make it 1 p.m. I am going to go plus, in parentheses, 13 divided by 24. What does that mean? Here I will zoom in so you can get a good look at it.
The date function gives you today's date. Today is what, February 5th. You get February 5th. Add one to it. Now I am at tomorrow, February 6th at midnight. Remember, Date is the date portion only. Now gives you the time. But I want to specify 1 p.m.
Then to that, I am going to add 13. 1,300 hours. 24. It's just 24 hours in a day. Divide it up. That's how you can add a time. There are functions for that, like DateAdd and stuff like that, but this is nice and simple.
OK, let's save that and make sure it works. Control S to save. This will be my appointment T. All right. I am going to close that and open it back up again. Start date/time to 6 at 1 p.m., perfect. Anytime you go to add a new appointment, it will automatically default to tomorrow's date at 1 p.m.
All right, right click, Design View. Now how about the end time? Let's take this guy here, copy it. Let's paste it down here in the default value for this one. Let's say most of my appointments are an hour long. So we will just make that 1,400.
OK, save it. How about some notes? All right, that will be a long text field. Description is good for showing up in your list boxes and stuff and as a little header on your reports if you want to print stuff out. Notes is where you put all the other stuff, like directions, how to get there, and any information that you took down. That is what your notes field is for. I throw a notes field in almost every table, just in case you want to put some extra information in there.
OK, I am going to add one more field. Let's put in here priority, and that will be a number. All right, that way we could put a number in there from 1 to 10. Let's make the default value 1 or 1 through 4, whatever you want. If you want to sort them by priority and see what's coming up that's important, you can.
All right, you have got a number 10 appointment coming up. Make sure you do not cancel that, whatever. OK. All right, so let's save that. I am going to put a couple of sample records in here. Let's switch over to table view.
All right, let's put some appointments in here. Normally, we do not work with the tables. You certainly do not want your end users working with tables if you are building the database for other people. But I like to put a couple of sample records on my tables as I am working just to make sure things are working OK.
All right, so tomorrow I have got an appointment to talk about PC upgrade. OK. And Jim Smith or whatever. OK, priority one. Then the next day, let's say I have got "watch Star Trek" on 2/7 at 1 p.m. All right. Now, you can do event programming. When you get a little more advanced into some VB stuff, you can make it so that if you type in a date/time here, it jumps and makes this an hour after that one. OK, but that involves a little programming. I will do that in the extended cut for the members. OK. That involves what is called an AfterUpdate event. I have got videos on that. If you want to go research it on my website, I will put a link down below to AfterUpdate events.
All right, but I will have to change this one myself to 2/7, and then 2 p.m. All right, and that will be priority five, of course. OK, just want to put a couple of records in here so I have got some data.
Now, I want to make a continuous form so that I can open up my list of appointments. In this template, I have already created a continuous form blank one right there. It's called ContinuousF. So we are going to use that. If you do not know how to do a continuous form, I have got videos on that. Also, go watch how I built the blank template, and it will explain it in more detail.
All right, again, there are links down below in the template section. So I am going to copy and paste this guy. This is going to be the AppointmentF, the appointment form. Right click, Design View. Let's add in the fields from the appointment table.
First, we have to bind the form. Double click on the properties. Go to Record Source, pick appointmentT. Now, this form is bound to the appointment table. I am going to delete the stuff that is in here right now. We are going to bring in the fields from the appointment table. Go to Add Existing Fields, click, shift, drag them all over, drop them in the detail section.
We are going to use a trick that one of my students, Scott, taught me. We are going to right click anywhere on those fields. Go to Layout, and then Tabular. Then adjust them all like that. Slide them over to the left. I am going to click off of them, then click on the text box portions. Make them all smaller like that. They come in all big because the notes field is a Long Text field. That is OK.
Now, let's go up to the Arrange tab and go Control Padding None. That squeezes them all up next to each other. Now, we are going to select everybody and turn off that Layout. Right click, Layout, Remove Layout. We just used it to get them the way we wanted. Now, they are just individual boxes.
This is the way I like them. I do not like leaving layouts on. I will use a Layout, arrange them the way I want, and then I will turn the Layout off. But now we can arrange this stuff the way you want to see it, just ID for the label.
We could have resized this stuff while it was still in my Layout mode, but that's OK. I like to make these guys gray; that indicates that you cannot change that. Description. Do that. Start date and time. Let's change the format of those guys.
Let me give you a preview of what this looks like right now. I am going to bring that detail section up from the bottom. Let's save this. Let's close it and open it up to see what we've got. OK. See, these guys come in really wide. We do not need right down to the second in the time there. Let's shorten that up a little bit. We will get rid of some of this blank space in the second here.
All right, so Design View. What do we want to set for the date/time format for these guys? Select them both, right-click Properties. You have got them selected. You can put the property format in here for them at the same time. I like to see, for appointments, I like to see the date and the time, but only hours and minutes. So let's go mm/dd/yy h:nn and then AM/PM, just like that. Month, day, year, of course. If you are in Europe, you can flip that if you want to. Hours and minutes, remember, n for minute and then AMPM on the end.
OK. Save it. Let's take a peek at what we have got. It's still not fitting in there. Let's make these a little bit wider. Notes can come down here. I will tell you why in a minute. We can make these guys wider. Not you. Move you over here. Make these guys wider like that. Nobody is on the grid, are you? See, that is the one thing I do not like about the layout; it does not put anybody on the grid. So "Align to Grid." Now everyone is lined up on the grid. Right click, Size to Grid. Nobody ever wants to line up on the grid nicely. Priority, you can come back this way now. Notes, you can sit down here and behave yourself. Slide that up, slide that up. You can come over here, do that. You are way over there. Bring that in.
All right, let's make this so we can read it. Format. I spent a lot of time covering this kind of formatting stuff in my Access Beginner 1 class. It's free, three hours long, and it's on my website. There is a link down below. Go watch it if I just did anything that confused you, changing colors and formats and all that stuff.
Let's see what we have got. Close this. I like to close it and open it every time. That looks a lot better. Sometimes what I will do is put the day of the week in there, too. If you want to make these a little bit bigger, just a touch, like maybe that much bigger. I like to select these and then resize them together, even though I am going to have to move it. That way I make sure they are both the same size. Move them together.
Now, we will do with that format is right-click Properties and then add in front of that DDD. That is the three-digit code for the day of the week, like Monday, Tuesday, Wednesday, but only the first three characters. I have got videos on the format property, too. Go watch those if you want to learn more about this stuff.
Let's see. We have closed that. Save changes. Open it up. Looks better. Now you can very quickly and easily see that is a Saturday. Wait, I made this one on the Sunday. We will have to change that. We will make that for the 8th, which is Monday. For the 8th, Monday. All right, looks good so far.
Now these notes down here in the bottom, let's make this a little bit bigger. What I usually try to do is make that look like, let's see, where is it? I've got one, I think, in the contact form. Let's see. There it is. I make it look like the little yellow sticky pad, notepad. Let's go to Design View over here. Is that notes? And that is notes? Guess what, it's the same named field. We can just copy and paste it.
Watch this. Delete you. Come over here. Copy, paste. As long as the field is named the same thing, you do not have to change any other properties. There you go.
OK. Save it. You can give it that sunken shadow effect. I do that in some other classes too, but we are not going to get that fancy right now.
Let's take a look at our appointments again. Looks good. Now this is bound to whatever record you are on up here, so it is kind of a training issue. I know it is a little confusing for some people, but this is a continuous form. I like to put notes down in the footer or even up in the header. When you click on something, it now shows the note for that record (for example, this is the Star Trek note, and if I go back up here, you can see that is the Jim Smith note). That's how it's bound that way.
So that is pretty much the basic simple way to put together an appointment calendar form like this.
We need a way to get to it from the main menu. So, Design View. Let's add a button, command button. Drop it down here. Form operations. Open a form, next, Appointment Form, next. Let's show all the records, next. All right, appointments. Give it a name, AppointmentButton. I'll just abbreviate that one. That is OK. We will put Appointments right under here, like that. That is so big.
All right, close that main menu up, save it. Yes. Open it back up again. Appointments, there is my appointment calendar. You can slide it over here if you want to, wherever you want to put it. Save it.
Now, if you want to change this so that you only see appointments in the future when you open this up, you do not want to see your past appointments. You can make a query to do that. You could put a filter out in here, but that is a little more work. Let's say whenever you open up this appointment form, you want to only see your future appointments. So, we would make a query to filter the data. That's what queries are for.
Create, Query Design, bring in my appointmentT, bring in the star (that brings in all the fields). Now I am going to say, let's say that the end date/time has to be less than right now, because you could be in the middle of an appointment and still want to see it. Or maybe you do not want to see appointments after they are, let's say, three days old. So, you have got a couple days so it still shows up on there, so you can type in your notes or do whatever you want to. But you do not want to see them on your calendar, on your list form, if they are a certain age or older.
So, let's bring in end date/time. I am going to turn off the Show button, because I do not want to see duplicates of this field after that. You do not want to see appointmentT.end date/time. The criteria: If you have never done a query with a criteria before, go watch that video. I will put a link down below, query criteria.
We are going to say that the end date/time has to be greater than or equal to today's date minus three. OK, so take today's date, February 5th. Subtract three from it, so February 2nd. Only show me appointments that have ended more recently, or will end more recently, than three days ago. I am backing up three days and showing everything after that point. So, greater than or equal to three days ago.
I will save this. This will be my appointmentQ, appointment query. Save that. Now, let's run that query. Run that query. Now, let's put some dates in here. Let's put the old appointment. This is from 1/1 and ended 1/2.
Now if I close this query and reopen it, I should not see that. It is not there. It is still in the table. There is the table, but it is not going to show up in my query now, which means it will not show up on my appointment form. It is.
Why is it still showing up here? All right, I jumped ahead, but that illustrates an important point. I forgot to do what? I forgot to change where this form is getting its data from. It is still bound to the table. So I am going to see just the stuff in the query, which is what I want to see.
So I am going to change the record source. Design View, come in here, change this to appointmentQ. The record source property is now appointmentQ. Now when I open it up, I only see the new stuff.
Since you are beginners, I am going to say you are going to have to either go back to the table to see your old stuff. If you want to go back and look at the old stuff, you can make a second form that shows everything. You can change that record source with some VB code. I will cover that in the extended cut for the members. You can put a little button down here that says show current appointments or show old appointments or show all appointments. We will do that in the extended cut, too.
We can open this form up to see our appointments. Now that I am thinking about it, we only have two records in here. When you get more records, you will see this. The data is not sorted in any particular way. If I put another appointment in here, and I put it in here for, let's say, 2/7 at 12 p.m., so this is going to put it in at 12 p.m.
Let me put it in 2/7 at 3 p.m. See, it's coming in as new. If I put a 12 in there, it is just a bit too wide. I will make these a little bit wider. OK, so 2/7, let's make this 2/7 at 4 p.m. If I close this and then reopen it again, I want to see these sorted with the most recent ones up top.
So let's go into our query that we designed. Design View. Bring in start date/time now. Hide it so we do not have to look at it. Let's sort this guy ascending. All right, so the oldest appointments, which should be the next one (unless you have got old stuff in there), will show up at the top. Stuff that is way in the future will be on the bottom.
Save that, close it. Now when I open this up, it is sorted properly: 6, 7, 8.
Yes, you can change this with a sort in here. You can right click, sort oldest to newest there. You can right click, sort over here. If you want to sort by the description field, that is one of the nice things about using Access: you have complete control over all your data.
One more thing I like to do is print out a little calendar for myself. I am not going to cover how to print in a monthly format. That takes a lot of work. Access does not have that feature built in. I do cover that in my calendar seminar. I have got a full seminar on my website where I show you how to make a printable and a form that are laid out like a monthly calendar. That takes a little work, but I show you how to do it in the seminar.
For today, we are just going to do a simple report that's got a list of our upcoming stuff. Let's go to Create, Report Design. We are going to base this report off of that query that we made. This way, we are only going to see the relatively new stuff. I am going to say "the new stuff," even though we know it is going to be stuff that's maybe a day or two old as well.
If you want, you can make another query that's just future stuff. So when you are printing it out, you are just seeing the future dates. In fact, let's do that for our printed version. Let's make another one of these. I am going to copy this query, copy, paste. Let's call this appointmentFutureQ.
Right click, Design View. This guy, I am going to say let's get rid of end date/time. I want only future appointments for this one. So the criteria has got to be greater than Date. So greater than today. So you will see today's stuff. If it's 10 o'clock, and you had a 9 o'clock appointment, and you forgot about it, it will still show up on your daily printout. So, greater than today's date. Greater than today at midnight. Save that, appointmentFutureQ.
Now we will use the appointmentFutureQ for this report's record source. There it is. Let's bring in the fields. This is our printout. Go to Design, Add Existing Fields. Let's bring them all in. Drop them over here.
We can do the same tricks if we want to. Right click, Layout, Tabular. Move them over. You can resize this stuff right here if you want to. You might not want appointmentID on your printout. OK, delete it.
I think at this point I am going to get rid of the layout. Highlight, right click, Remove Layout, because I am going to do some different stuff here. We do not need the description label. I am going to put the start date/time over here like this and the end date/time underneath it like this. I am going to put the description here and the notes underneath it like so. The priority can sit over here. Above that we are going to put Date/Time like that, or if you want to put Date/Time, that's OK. Get rid of that label. Put appointment, and then priority is OK.
Let's see what we have so far. Slide this up. Save it. This will be our appointmentR.
Now I am getting this little guy over here. What does that mean? That means that the report width is greater than the page width. What are we looking at for margins here? Go to Page Setup, Margins, Narrow Margins. That means we have got a left and right quarter inch. We can go half an inch in. Now this is an 8 1/2 by 11 sheet of paper, so there is the edge of the page. I can only really come out to there.
The layout made this too big, so you have got to bring this guy in (8 1/2 minus the margins comes out to about 8 because it's a quarter inch on both sides). Once you do that, you should notice that little green thing goes away.
Let's do this. Let's bold both of those. Format, bold those. The start time and the description. Let's make these guys black so we can actually read them. Highlight everybody. Right click, Size to Grid. That's one of my pet peeves. I like to size to grid.
Save it. Close it. Take a look at what we have here. I am going to find that report. Where are you? Right there, appointment. Right click, Print Preview. That's how I like to see them.
We've got some work to do. Looks OK so far. First thing, let's turn all these borders off. We have got to make our date/time formatted and that alternating background color – I do not like that alternating background color.
First up, highlight all these guys. Go to Format, Shape Outline, Transparent. That turns those borders off. Second, let's set the background colors in here. That back color right there, standard colors, pick white. Then copy that. That's the color code. Tab, paste in the alternating background color. If you want that "word" effect (goes back and forth between white and gray), that's fine. I do not like it. Sometimes, but not all the time.
The last thing was the format for these. I was going to say format the start date/time with just a three-digit day of the week like we had, and not do it on the end date. Or just maybe even just put the time. But then if you do have something that spans multiple days, you want to see the same format in there.
With a little more advanced programming, you can make it so this one shows the full date and time, and this one just shows the time. So this will say Sunday, March 14th, 2 p.m., and then this one will say end time will just say 4 p.m. Maybe I will throw that in the extended cut. Maybe. I am not promising that one; that's a little more weird.
Let's just go format right here. DDD space, m/d/yy. If you want to, that will give you the one-digit month and day. So if it's January 1st, you just get 1/1. You won't get 01/01. Then the time hh. If you want 24-hour time, if you like that, if you are military or you just like a 24-hour clock, you do not have to put the AM/PM on the end. If you want AM/PM, put that in.
Save it. Let's left align everybody because I know these are going to come in right aligned. Save it, close it once again. Print preview. There we go. It still needs to be a little wider. It's still a bit too narrow. Design view.
Fortunately, we have plenty of space in here. Let's just select all this, go like that, go like this. I cover all this formatting of the forms and stuff in my beginner classes, so it's all stuff I have covered a million times.
There we go. How about a little line underneath that? Design view. Widen this guy out. Bring this down a little bit. Grab a line from in here. Drop a line right there. Draw it across. You will never get it exact the first try. Sometimes some of you will, I will not. I never do.
There we go. Maybe a little bit of gap there. You can leave as much space as you want in here.
Now since this is a report, this notes field will grow as big as it needs to be vertically. If you've got lots and lots of notes in there, that will get bigger. There is a Can Grow property under Format. If I had it in here somewhere, there is Can Grow. It's set to Yes.
Also, the detail section itself has a Can Grow and Can Shrink. The default is off for Can Shrink. Lots of people ask me why it will not get smaller if there is no data in there. You have got to turn Can Shrink on for both the field and the section it's in. That's another sticking point. People ask me that one all the time. I think I have another video on that one. I know I covered it in my class. If I have a TechHelp video for it, I will either make one soon because everyone asks me that question, or if I already have one, I'll post it down below. I do not feel like looking for it right now.
Save that. Close it. Check it again, print preview. Beautiful. Looks good. There are your upcoming appointments. You will not see the older ones. Let's make sure appointmentT – I've got one in there from 1/1, that's not showing up.
OK, so close that. Now we have got to open it from in here. I will put a button right down here on the bottom of the appointments form, Design View. There is my button. Drop it down there. Report operations, preview report, the appointmentR. I do not often use these picture buttons. I usually stick to text. Print Upcoming Appointments. Text is just so much more descriptive.
You could do buttons, and you can put control tip text to show what the button means if you hover over it. If you really are jammed for space, then go ahead.
Save it. Close it. This form is going to show me everything that is three days old or newer, so I do not see the super old stuff. I can print upcoming appointments. There it is right there. Now if you want to actually send this to the printer, click the print button.
That is a pretty good lesson. I showed you how to make an appointment table. I showed you how to make a continuous form to show your recent and upcoming appointments. You could do that in here too. In the caption, that is sometimes what these forms are good for, this caption property. Recent and upcoming appointments. Save that. Now when you open this up, you will see it says "Recent and upcoming appointments".
On this report, instead of appointmentR, you could put it in the caption or actually put it on top of the report itself if you want to. I will just throw in the caption for now. Upcoming appointments. Upcoming meeting today and the future. There. So you know it is upcoming appointments, so you do not look at this one and go, why is one missing over there? Well, because it is a day old, which is designed to be on here. Then you can put little notes on your forms and stuff to tell people what is going on.
Want to learn more? Let's see what we are going to do in the extended cut.
There is an extended cut, about 40 minutes long, that covers lots more with this appointment database.
First, we will have it so that when you type in the start date, it will default the end date to one hour after that. So if you type in 3 p.m., it will default the end date to 4 p.m.
Then we will make little buttons that you can click on, little links. You can add a day, you can add 15 minutes. Once you know those two, you can pretty much figure the rest of them out: subtract a day, add an hour, that kind of stuff.
We will make it so you can switch the data that is in the form: do you want to see recent and future appointments, future appointments only, or all appointments? Then we will program the report so it shows what is on the form. So if you change the form here, it will change the report.
On the report, if the end time is the same date as the start time, it will just put the time there. So now you can see it is just 1 p.m. to 2 p.m. Obviously, if it is a different day, it will show the full date.
Then we will add the customer to the appointment form so that we can assign each appointment to a customer if we want to. Then we will show that information on the appointment printout, too.
For the first time ever, I am doing a double extended cut. I have a second extended cut for Gold Members. So if you are going to join, consider becoming a Gold Member. This one is a lot more heavy into programming. So if you are an advanced user, you might want to consider the Gold membership.
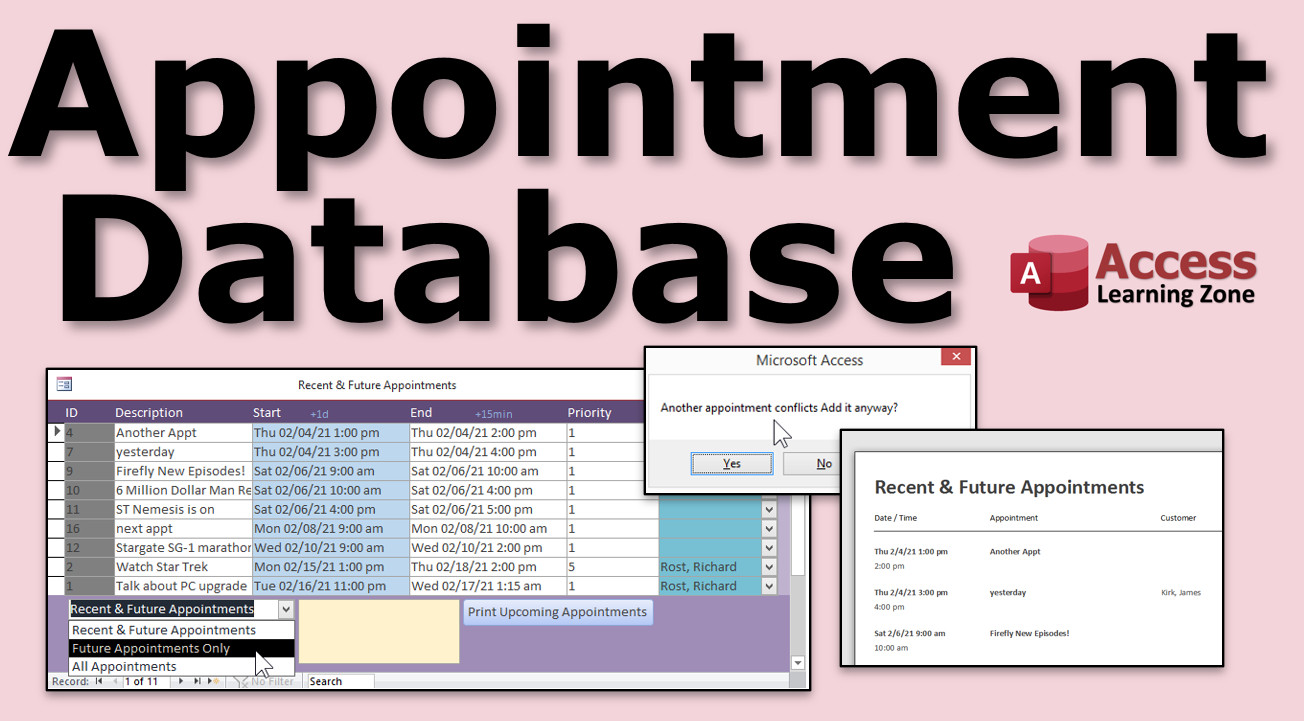
In this one, we will check for conflicts. So if you type in an appointment and there is already an appointment in that time slot, it will warn you. It will say, there is already an appointment for this one. Are you sure you want to add it? It will let you add it (you are the boss) but at least it warns you that you have got a conflict.
You will set it up so you can avoid weekends and after hours: Saturdays and Sundays, anything before 9 or after 5. Of course, you can control all that. It is your database.
We will make it so you can double click on the start time, and it will find the next available appointment slot. So if it is Thursday and your next available appointment is Tuesday at 10 a.m., there it goes. You do not have to go looking on your calendar to figure out when is my next available appointment. That alone is worth the price of membership. It is a pretty cool trick.
Then we will make it so that you can type in just the hour for the end time. So if you pick 3 p.m. on Tuesday for the start time, hit Tab, and then just type in 5 p.m., boom, it grabs the date from the start time. So, that's a little trick, too. That is in the Gold Member bonus.
First time I am doing that, giving it a try, see if I can get some more Gold Members here.
How do you become a member? Click the Join button below the video. If you click the Join button, you will see a list of all the different types of membership levels that are available.
Silver Members and up will get access to all of the extended cut TechHelp videos, live video and chat sessions, and more.
Gold Members get access to a download folder containing all the sample databases that I build in my TechHelp videos, plus my Code Vault where I keep tons of different functions that I use.
Platinum Members get all the previous perks plus access to my full beginner courses and some of my expert courses. These are the full-length courses found on my website and not just for Access. I also teach Word, Excel, Visual Basic, ASP, and lots more.
These free TechHelp videos are going to keep coming. As long as you keep watching them, I will keep making more.
If you liked this video, please give me a thumbs up and feel free to post any comments that you have. I do read them all. Make sure you subscribe to my channel, which is completely free, and click the bell icon and select all to receive notifications when new videos are posted.
Click on the Show More link below the video to find additional resources and links. You will see a list of other videos, additional information related to the current topic, free lessons, and lots more.
YouTube no longer sends out email notifications when new videos are posted, so if you would like to get an email every time I post a new video, click on the link to join my mailing list.
If you have not yet tried my free Access Level 1 course, check it out now. It covers all the basics of building databases with Access. It's over three hours long. You can find it on my website or on my YouTube channel. If you like Level 1, Level 2 is just one dollar. It is also free for all members of my YouTube channel at any level.
Want to have your question answered in a video just like this one? Visit my TechHelp page and you can send me your question there.
Click here to watch my free Access Beginner Level 1 course, more of my TechHelp videos, or to subscribe to my channel.
Thanks for watching this video from AccessLearningZone.com.Quiz Q1. What is the main objective of the video?
A. To build a report for printing customer invoices
B. To create an appointment database in Access
C. To manage contacts using Outlook
D. To synchronize Access with Google Calendar
Q2. Why did Gabriella want to move from Outlook to Access for appointments?
A. Outlook does not support reminders
B. She wants to tie appointments to customers in her database
C. Access is free, Outlook is not
D. She prefers cloud storage options
Q3. What is the default value formula used to set the start date and time for new appointments?
A. =Date() + 1
B. =Now() + 1
C. =Date() + 1 + (13/24)
D. =DateAdd("h", 1, Date())
Q4. Why is a notes field (Long Text) added to the appointment table?
A. To record only phone numbers
B. For short descriptions of the appointment
C. For extra information like directions or details discussed
D. To list all customer names
Q5. What type of form is created to list appointments in this video?
A. Single form
B. Continuous form
C. Split form
D. Modal dialog form
Q6. How does the video suggest to format the date and time fields on the form?
A. m/d/yyyy hh:mm:ss
B. dd-mm-yy h:nn AMPM
C. mm dd yy h:nn AM/PM
D. yyyy-mm-dd
Q7. What is the purpose of using a query as the record source for the appointments form?
A. To sort appointments alphabetically
B. To filter and only show current and recent appointments
C. To speed up data entry
D. To allow direct editing of the table
Q8. What does changing the record source from the table to the query achieve?
A. Automatically adds new fields to the form
B. Ensures only filtered records (e.g., recent/future appointments) show on the form
C. Improves table relationships
D. Creates a backup of the appointments
Q9. How are future appointments printed according to the video?
A. By exporting the table to Excel
B. By printing the raw appointment table
C. By creating a report based on a query that filters future appointments
D. By using Access's built-in monthly calendar print
Q10. Which of the following is a recommended approach for visually organizing fields on the form?
A. Use layout, arrange, and size to grid features to align and resize controls
B. Only use the default layout provided by Access
C. Avoid using grid and alignment tools to save time
D. Use random placement of fields for variety
Q11. What is the Can Grow property used for on reports?
A. To allow reports to print in landscape mode
B. To automatically increase the height of controls and sections if there is more data
C. To increase report speed
D. To enable password protection
Q12. Which Access feature is used to restrict the report to only show appointments with an end time in the future?
A. Form filter
B. Table validation rule
C. Query criteria on end date
D. Using macros on form load
Q13. How can users print their upcoming appointments directly from the form?
A. By right-clicking on the table and selecting print
B. By clicking a button on the appointments form that opens the report for print preview
C. By exporting the form as a PDF
D. By copying and pasting into Word
Q14. Which field is suggested to use as the main label to display in list boxes and reports for appointments?
A. AppointmentID
B. Description
C. Priority
D. Notes
Q15. What is an advantage of using Access for appointments versus Outlook or Google Calendar, as mentioned in the video?
A. Access is easier to set up
B. Building your own database allows more flexibility and customization
C. Access can send SMS reminders
D. Google Calendar does not allow printing
Q16. What is a recommended default value for the 'priority' field in an appointment table?
A. Empty
B. 0
C. 1
D. 10
Q17. How does the video suggest handling appointments that are more than three days old on the main appointments form?
A. They are highlighted in red
B. They are filtered out by the query criteria
C. They are automatically deleted
D. They are moved to an archive table
Q18. What formatting trick is used to quickly set up and then disable layouts on form controls?
A. Use Tabular layout to arrange, then remove layout for custom adjusting
B. Always keep layout enabled for all fields
C. Remove all layouts and arrange individually from the start
D. Switch to datasheet view and back
Q19. For which purpose does the video copy the notes control from one form to another?
A. To preserve formatting and reuse a styled notes box
B. To create a shortcut for opening another form
C. To test record locking
D. To create a subform
Q20. What is the suggestion for summarizing the content of forms or reports for end users?
A. Use captions on forms and reports
B. Use macros for summaries
C. Write a VBA script to display summaries
D. Hide the title to save space
Answers: 1-B; 2-B; 3-C; 4-C; 5-B; 6-C; 7-B; 8-B; 9-C; 10-A; 11-B; 12-C; 13-B; 14-B; 15-B; 16-C; 17-B; 18-A; 19-A; 20-A
DISCLAIMER: Quiz questions are AI generated. If you find any that are wrong, don't make sense, or aren't related to the video topic at hand, then please post a comment and let me know. Thanks.Summary Today's video from Access Learning Zone focuses on building an appointment tracking database using Microsoft Access. This project is designed to help you manage your appointments, tasks, and to-do lists with the added benefit of printing them out when needed. We'll go through creating a table, designing useful queries, building a continuous form, and preparing a practical report layout for printing.
This lesson was inspired by a question from someone who wanted to move from using Outlook to Access to manage her appointments, with the hope of eventually connecting those appointments to customer records. Access is a powerful tool for this purpose, offering flexibility to customize fields like due dates, priorities, and more. While many people rely on tools like Google Calendar or Outlook, having your own Access-based appointment calendar gives you far more control over your data.
I'll be demonstrating everything in my free TechHelp template database, which you can download from my website. This template already includes tables for customers, contacts, orders, and order details. For this project, rather than storing appointments in the contacts table, we're going to set up a new, dedicated appointment table so we can track the timing and details of each appointment more accurately.
We start by creating a new table in design view. The fields I recommend include AppointmentID (set as an AutoNumber), a short text Description, StartDateTime and EndDateTime fields for the start and end of each appointment, a long text Notes field for anything extra you want to record, and a numeric Priority field. For convenience, I like to set the default StartDateTime to tomorrow at 1 p.m. You can achieve this by calculating today's date, adding one day, and then adding the hours as a fraction of a day. Similarly, if most appointments are one hour long, set the EndDateTime accordingly.
Including the Priority field allows you to mark more urgent appointments, which can help when sorting or filtering upcoming activities. The Notes field is where you might jot down directions, contact details, or other important information about each appointment.
After setting up the basic structure in the table, I always add a few sample records by switching to datasheet view. This helps confirm that everything is working as expected and gives us some data to work with as we build the rest of the system. Normally, users enter records through forms rather than directly in tables, but these early samples are handy during development.
Next, I'll show you how to build a continuous form that displays a list of appointments. The TechHelp template includes a blank continuous form, which you can copy and use. Bind the form to the appointment table, add all the relevant fields, and arrange them for clarity. I use a quick trick to initially lay out the fields using a tabular layout and then break them out of the layout for finer adjustment. I like the ID field to be gray to indicate it is not editable, while Description, Start and End times, Priority, and Notes are laid out for easy viewing.
It helps to shrink unnecessary empty spaces and format the date and time fields for readability. For appointments, I typically use the month/day/year and hour:minute AM/PM format. Adding the three-letter day of the week (such as Mon, Tue, etc.) before the date can make timelines even clearer.
Where possible, I reuse controls from other forms, such as a styled Notes box, ensuring consistency across the database. I include design touches—for example, a sticky note look for long text fields—so users can quickly recognize what goes where.
Once the form looks right and is functioning well, it needs to be accessible from your main menu. Add a command button that opens this appointment form, making it easily reachable.
Now, for seeing only the records you want—like current or upcoming appointments—you should set up a query to filter the results. This saves you from seeing outdated entries every time you open the form. For example, you might want to exclude appointments that ended more than three days ago. You can handle this by creating a query that only returns records where the EndDateTime is within the last three days. Set the appointment form's record source to this filtered query so that only relevant data appears.
Sorting appointments by StartDateTime in ascending order ensures your list is always in order by date and time, with the soonest appointments at the top.
Printing a traditional monthly calendar is complex in Access (and is covered in my calendar seminar), but it's quick and easy to generate a simple report with your upcoming appointments. I recommend setting up another query that returns only future appointments—those with a StartDateTime later than today—for cleaner printouts.
When building the report, bring in the necessary fields and format them as needed. Arrange fields to emphasize the most important information—date and times, description, notes, and priority. Pay attention to the report width to avoid layout issues when printing. Use narrow margins and make sure everything fits within the printable area.
For visual clarity, turn off field borders and avoid alternating background colors unless you prefer that style. Format date-time fields to show the day of the week, date, and time as needed. You might want the field to expand vertically if lots of notes are present, which you can control with the Can Grow property for both the field and the section.
Once your report is ready, add a button on the appointment form to print the list of upcoming appointments. This button can open a print preview of your report for easy access.
To recap, in this lesson, we created an appointment table, set up a continuous form to display active and future appointments, filtered records using queries, and built a simple but effective printable report. We also discussed how form and report captions can be used to clarify which records are being displayed or printed.
In today's Extended Cut, there is much more. We will make it so that entering a start date automatically sets the end date to one hour later. We'll add handy buttons for quickly adjusting appointment times (adding minutes, hours, or days). I'll show you how to let users switch between seeing recent/future appointments, future appointments only, or all appointments, and sync the report with the form settings. We'll enhance the report to display time ranges more intelligently, include customer assignment on appointments (and print that information), and more.
For the first time, there's also a double extended cut for Gold Members, featuring advanced programming techniques. Gold Members will see how to detect and warn of scheduling conflicts, restrict appointments to business hours and weekdays, quickly find the next available slot, and make end time entry even easier.
For those interested in joining as a Silver, Gold, or Platinum Member, you can find all the membership options and their perks on my website. Membership gets you access to extended lessons, downloadable sample files, the Code Vault, and premium courses on a variety of subjects.
Don't forget to check out my free Access Level 1 course, which covers database fundamentals. It's three hours long and available on my website and YouTube channel. Level 2 is just a dollar or free for all members.
If you have more questions or need further tutorials, visit my TechHelp page and send in your query—you could see your question answered in a future video.
You can find a complete video tutorial with step-by-step instructions on everything discussed here on my website at the link below.
Live long and prosper, my friends.Topic List Building an appointment tracking table in Access
Setting default values for date and time fields
Formatting start and end date/time fields
Adding fields for description, notes, and priority
Creating and populating sample appointment records
Building a continuous form to display appointments
Binding forms to tables and queries
Using layout tools to arrange and format form controls
Formatting date and time displays in forms
Customizing the appearance and usability of forms
Filtering appointments to show only recent or upcoming items
Creating queries to filter and sort appointment data
Changing form record sources to use filtered queries
Sorting appointments by date in queries
Designing reports to print lists of upcoming appointments
Setting up print-friendly formatting in Access reports
Formatting report fields and adjusting layout for printing
Configuring Can Grow and Can Shrink properties for reports
Adding buttons to forms for navigation and report printing
Customizing captions and labels for improved clarityPrimary Topics Access appointment tracking, table design, default date/time values, continuous forms, query filtering, report creation, data sorting, form/report formatting
Secondary Topics user interface customization, field formatting, use of queries for filtering, form navigation buttons, basic report design, handling notes field
|


