|
|
Free Lessons Courses Seminars |
TechHelp Fast Tips Templates |
Topic Index Forum ABCD |
|
||||||
|
|
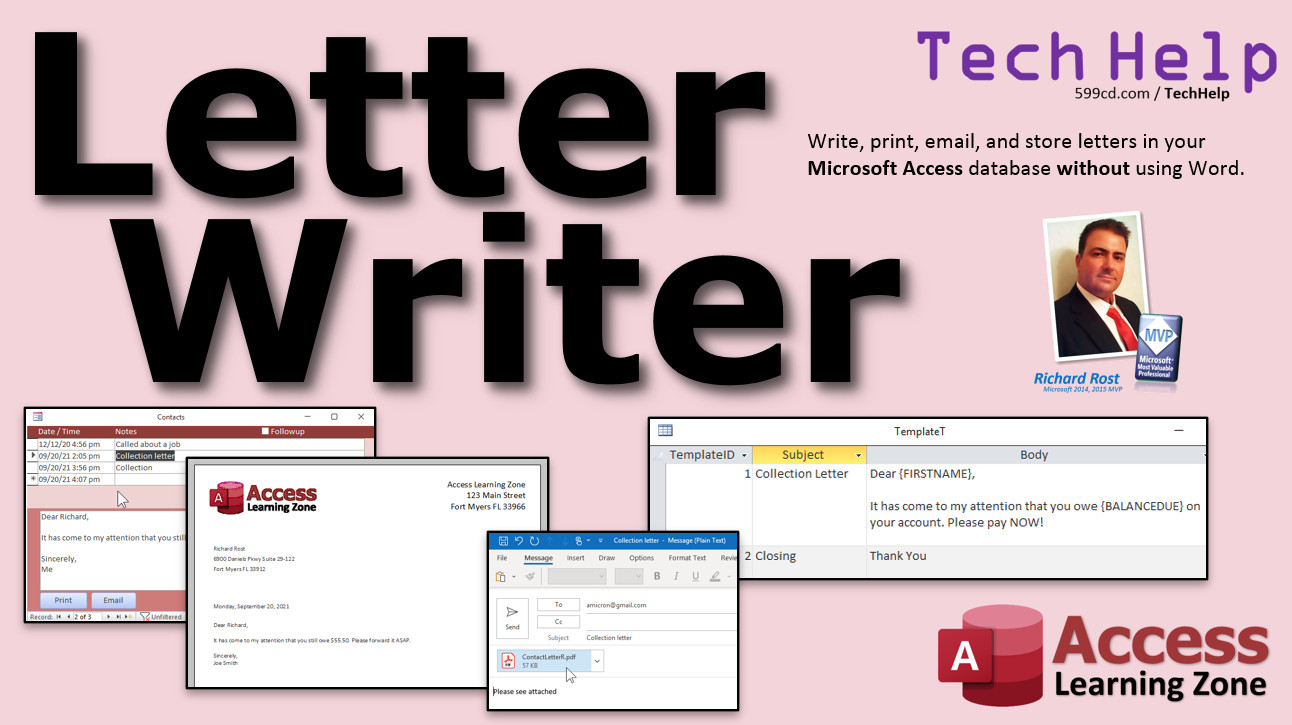
Letter Writer By Richard Rost Write, Store, Print, Email Correspondence in Access In this video, I will show you how to use Access as a word processor to print, send, and store all of your written correspondence to your customers. I'll also show you how to email it with one extra click. Carter from Kansas City, Missouri (a Gold Member) asks: My office sends a lot of written correspondence to our clients. We can't just use email. Is there a way to store all of this in my Access database? I know you frown upon attachments, so storing Word documents in the customer's record is bad thing, right? MembersMembers will learn how to create a list of stock correspondence templates like welcomings, collection letters, and more. Plus, we'll incorporate merge codes into them to automatically fill in data from the customer's info.
Silver Members and up get access to view Extended Cut videos, when available. Gold Members can download the files from class plus get access to the Code Vault. If you're not a member, Join Today!
Links
Keywordsmicrosoft access, ms access, ms access tutorial, #msaccess, #microsoftaccess, #help, #howto, #tutorial, #learn, #lesson, #training, #database, letter writer, Me.Refresh, SendObject, Print Letters, Word Processor, Microsoft Word, Written Correspondence, Templates, Generating a Letter, Mail Merge, Merge Codes, Email Attachments, Send Attachment in Email, Send Report in Email
IntroIn this video, you will learn how to build a letter writer directly inside Microsoft Access, allowing you to write, print, email, and store client correspondence in your Access database without using Microsoft Word. We will walk through modifying your contacts table and forms to accommodate full-length letters, creating a report for printed correspondence, including custom formatting, adding print and email buttons, and ensuring data is properly saved before generating letters. You will also see how to send your letters as PDF attachments via email through Access, making it easy to manage all your communications in one place.TranscriptWelcome to another TechHelp video brought to you by AccessLearningZone.com. I am your instructor, Richard Rost.In today's video, we are going to build a letter writer inside Microsoft Access. We are going to see how to write, print, email, and store letters in your Access database without using Microsoft Word. Carter from Kansas City, Missouri, one of my Gold members, writes: My office sends a lot of written correspondence to our clients. We cannot just use email. Is there a way to store all of this in my Access database? I know you frown upon attachments, so storing Word documents in the customer's record is a bad thing. Yes, generally I recommend against storing anything in your database: Word documents, PDFs, images, any of that stuff. Access databases are designed to store data information, but not necessarily to store objects like Word documents and things like that. I have other videos that discuss this topic in detail, but to answer your question, you do not want to do that. So what I am going to suggest is, unless you need some complicated options that are in Microsoft Word, why not just use Access as your letter writer? You can write all of your correspondence in your database, print it right from there, email it right from there if you want to, and it is all stored right in your tables. Unless there is some specific need that you have to use Microsoft Word, do not use it. If all you are sending is basic correspondence, written letters, welcome information, collection notices, and that kind of stuff, just do it all in Access. Let me show you how I would do it. Before we get started, a couple of prerequisites. If you have not watched my free blank template, my TechHelp free template video, go watch that blank. Then the contact manager, where we learn how to store contacts for each customer, that will teach you basic relationships, so go watch that one. Go watch invoicing only because I show how to set up a basic report the way that I like it. Even if you are not going to be doing invoicing, go watch that video too. These are all free. They are on my website and on my YouTube channel. Go watch these and then come back here. So go on, go watch them. Go. Okay. So here I am in my TechHelp free template. By now you know what this is and how I built it. We have our customer list. Open this up. We have a customer form, and in each one of our customers we have contacts and we have orders. Under the orders, we have the invoice report. That is what I wanted you to learn how to set up - that report. Now in the contact manager, right now we are just using this for every time we talk to them on the phone or if they come in and we have a chat, called about a job, came in for an interview. There are notes down here. We can use this to store our correspondence too. It is not just necessarily for tracking every time we talk. We can put whole letters in, written correspondence, and things like that in here. So what I am going to do is redesign this a little bit so it is better for writing letters. I just make it a little bit bigger. Let's make this a little bit larger. Slide this out like so. I am going to move the follow-up up here. It can be in the form footer or the form header. It does not matter. It is still bound to the record that you are on. You can make the description a little bit bigger if you want to. Notes will make this larger because we are going to be writing our letter there in the notes section. Maybe a little bit taller too. Since it is going to be a letter now, I am going to put it back to basic white. It just looks more like you are writing correspondence on a white field like that. Maybe a little bit bigger than that. Let's go down to about there. Okay. Looks good. Close that. Save changes. Yes. Open it back up again. Now we come down here and then we will put in here a collection letter. Now you just come down to the bottom. Dear, who am I on? Let's see here. Oh, that's me. Okay. Dear Richard, it has come to my attention that you owe $90 on your account. Please pay now. You have to excuse me. I just spilled coffee on my laptop. Well, my dog spilled the coffee on my laptop yesterday, so my spacebar is sticking. I have a replacement coming. Cordially, you want to leave room for a signature there. That is fine. Collections department or whatever department. There you go. So this is now where we are going to be putting our written correspondence. You can make this bigger if you want to. If you want to make this this big, so your whole thing fits in there. You can make a separate form for this too if you want to. You can make a small one that is formatted for just contacts and make a bigger one for writing letters. Whatever you want to do, that is why you are using Access so you can build your own database. If I click on collection letter, you can see the collection letter. Now I want to print this, so we are going to need to make a report out of it. Before we make the report, I am going to make a query because I am going to include some other fields on the printed correspondence. I want the customer's name. I know I typed Richard there, but I want first name, last name. I want their address on the report, so let's make a query that has all of the information that I want to put in the report together in one spot. So, create query design. And that came in messy, did not it? I hate that. So I am going to bring in the customer table and the contact table. Let's do contact first and then customer. Let's bring in the contact ID. Let's bring in the notes because that is the letter that I just typed out. Let's bring in the contact date. We will use that for the date on the written letter. So if you print it up again in the future, it will put the date that you actually printed it the first time. You will know when you sent it too. Now the customer name. I am going to put first name and last name together. I am going to use string concatenation. I should have put this in the prerequisites. String concatenation is how you put two or more strings together into one. If you have not watched that string concatenation video, or if you have never done that before, go watch that now. Pause this one and come back. So right here in this column, I am going to zoom in, Shift-F2. I am going to make this custom name. My customer name is going to be: first name & " " & last name. That is how you do concatenation. I am going to hit OK. Let's just see what you have got. Let's run this guy right real quick. There we go. I am seeing all of them. There is the customer name. Now it would be nice for my report if I only saw the one contact that I am on. I do not want to print all of these out. I just want to print out just the one. So to do that, we are going to put a criteria under contact ID. That is going to be equals. Let me zoom in again, Shift-F2. That is going to be: =Forms!ContactF!ContactID That is how you get the contact ID off the contact form that is currently open. Again, I should have probably put this in the prerequisites too. There is another video for you to go watch: get a value from an open form. You have a form, it is open, you want to grab a value from it like the contact ID. So I will hit OK down here. Now, when I run this, you can see I am only seeing the contact that is open, the one that is open here in the background. Just this one, the collection letter. Back to design view. Let's save this guy while I am at it real quick. Control-S to save. Let's save this as: MyContactLetterQ, ContactLetterQ. Now let's put the address fields together. Now address one is just going to be address. We will come right here, close this box, come right here and go: Address1: Address If you have an address 2, add that. I did not bother adding an address 2 in mine. I usually put a two-line address together in the same box. I do not care. For me, address 2 is going to be, let me zoom in again on these, they are really small to see. Address2 is going to be: City & " " & State & " " & ZipCode Hit OK. Address3 is going to be the country, so address3 is just Country. Now if I run that, you can see I have all the address lines right here: CustomerName, Address1, Address2, Address3. Address3 is blank for me because in my database I am in the US; I do not bother putting US in the country field. So this is all set to go. This has the one record in it that we want to print and it is based on the open form back here. So now I can make my report off of that query. Let's go over to our template. I have this BlankR that we set up in the invoicing video. I am going to copy and paste this guy - Control-C, Control-V. I am going to call this my ContactLetterR. Let's design this guy. Now it already goes out to eight inches. I think I have margins set to Narrow. Let's see. Yes. Narrow margins, so it is a quarter inch on each side. You can change it if you want to. Eight and a half is the actual physical edge of the paper. You want to go just shy of that. I do not think we are going to need a report header and footer, so we can turn those off for this one. Right click, turn report header and footer off. We will need the page header and footer though. I want to put the return address and my company logo on the top of each page. Let's go to report design. Just grab a label. I am going to put the return address over here. Computer Learning Zone 123 Main Street Fort Myers, Florida 33966 I am going to go to format. Let's make that a little bit bigger, maybe 18 point, and right align it. Let's make it black so you can actually read it. Change the font if you want to. Let's put the company logo over here. Normally, I preach against putting images and graphics and things like that in your database. I am against storing them in records. If you have a customer profile picture or product pictures, do not store all of those, tons and tons of pictures. But if you have a company logo and it is a nice small graphic file, feel free to include that in your reports. That is in the design of the database. That is different than storing images inside the records of your database. I have a nice tiny AccessLearningZone logo I am going to put right there. Go to report design, insert image, browse. I have a nice little tiny guy right there - look, it is like 27K, it is tiny. Pick that guy, hit OK. Put it right there. There we go. There is nothing wrong with that. Do not be storing 5,000 different two-megabyte gif files in your database. That is what I am talking about when I say do not store images and files in your database. Like your Word documents, Carter. You do not want to, if you have 5,000 customers, and each one has 10 letters that you have written in each Word document, that is three megabytes each - that is a lot of space. Access is not designed to store that kind of information. In the detail section, we are going to put the information for our letter. Let's go to Add Existing Fields. Oh, I did not bind this report to a table yet, did I? Let's come over here, open up the report properties, go to Record Source. We are going to bind this to ContactLetterQ that we built - that query that has the one record in it. Now I can add existing fields. Let's start off with the customer name and address. Just grab all four of those things together. Click on the first one, shift-click on the last one, click and drag and drop right there. Now we can get rid of these. We are going to make these wider like that. You can snug them up next to each other if you want, make them a little bit bigger if you want. Whatever you want to do. I keep this one around because it has the format that I want. So I am going to double-click on the format painter and go format, format, format, format, because by default it brings in the border around it and it makes it gray. No, I do not want that. Now I can get rid of you. That is why I keep him around. Slide this over here like so, wherever you want the customer's address going, and you might have to kind of guess where you want it. I like to line this up because I use window envelopes. I have window envelopes printed with my return address on them, and I threefold the paper and stick it in. I want to get that address right inside that window. If I save this now, right click, print preview, that might have to go down a little bit lower, maybe down to about here. You get the point. You have to line this up exactly where you want - you can measure it if you want to, or you can just eyeball it and guess. That is up to you. Do not forget to include your margins when you're measuring. This here is an inch; here is another inch; you have a quarter inch margin on the top. You'll get it though; you just have to print a couple and waste some paper. Back to design. Let's see what we have got going on here. Save. Next up is the contact date. Add existing fields. We are going to need the contact date and the notes. Bring these two guys in. Drop them right down there. We do not need the ID on this, so we will get rid of those labels. Contact date is going to go next, right about there, and notes is going to go below that. Slide that down a little bit. Contact date on printed correspondence - I like a nice, full-length date. I do not want just 1/1/20. I want "Wednesday, February 14, 2020." I want it to look nice. It is written correspondence. What does it look like right now? Right click, print preview. That is what you have there. We got our borders back on there; that is a default, but I do not want that on printed correspondence. First, let's de-border these things. Click, click. Let's left align this. Format left. Let's put a custom format on this date. Let's go with dddd - that is the day of the week spelled out like "Wednesday," comma space (my spacebar is not working again), the full month name MMMM, space, the day like 20th, dd comma space yyyy. Press Tab. Access puts little quotes and spaces around the commas there, but that is the format code that I am using right there. See the day, month, day, year. That is all covered in my - which video? Let me go see. I covered this in a bunch of different classes and videos like date, add date, and things like that. Here are all the codes. I will put a link to this in the link section. But if we take a look at what we have now, you can see that - that is pretty. "Monday, September 20, 2021." See? You can see there is our body right there. Now, we have to make that notes field bigger. Close that. Slide this all the way over here. Horizontally it will go as big as it goes. There is a Can Grow, Can Shrink property. By default, each of these fields, if you go under Format, find Can Grow, Can Shrink - Can Grow and Can Shrink are both set to Yes. That is fine. There is also Can Grow, Can Shrink for the section too, right there. By default, it is Yes, Can Grow; No, Can Shrink. So it cannot get any smaller than that, but it can get bigger if it needs to. That is fine. Save that. Let's take a peek again. Here we go. Looks good. Want to put some stuff down here in the page footer. Design view, come down to bottom, page footer. I like to put a horizontal line going across. Grab the horizontal line tool right there. Click and drag. Looks good. Maybe some additional contact information down here. Something like this: 239-555-2222 [email protected] Whatever you want to put down there. Form that paint to get rid of that gray. Maybe align that to the right. See, I was not clicked on it. There we go. I was not clicked on you. Go back there. Want to put page numbering over here? Sure. Grab one of these boxes or whatever, copy, paste. Slide it down here, right there. Open it up. Come in here. Name it: PGNM, whatever, page number. The control source is going to be: =Page & " of " & Pages That puts the page number and the total number of pages next to it. I will show you what that looks like. Save it. Right click, print preview. There we go. Page 1 of 1 and your contact information over there, looking pretty good now. This will get as big as it needs to if you have more stuff. Let me close this. Let me copy and paste this here. Copy, paste, paste, paste, paste, paste, paste, paste, paste, paste. Now if I go back to, we have to be on this one, remember? If I print preview this guy, see, it will get bigger. Looking pretty good. Now we need a button that we can click on down here to quickly and easily print this. I do not want to go back to my navigation pane and find the report. I want a button that I can click on to print this. Let's do that. But first, a word from our sponsor. Who is the sponsor? Well, that is me. If you are enjoying my videos, check out my Access Expert classes. Expert 5, 6, and 7 do a lot more with this letter writer that we are building in this TechHelp video. Expert 5 is over an hour long. We will set up something similar to what we are building in this video, with some additional features. Level 6 takes it another step. We do mass mailing, so instead of just sending correspondence to one person at a time, we send it to a whole bunch of people - a collection letter to everybody who owes you money. We have different collection letters - people who are less than 30 days late get one, 30 to 60 get another, more than 60 get a final reminder. You can specify the dates that you want to send them out for people. Then in level seven, it will create different groups. Let's say you want to break your customers down by what they are interested in (hardware, service, software, training, whatever). You will be able to say, "Okay, I want to send this particular letter to everybody in the hardware and software groups." Then we will print the letters and the envelopes. That is my Access Expert 5, 6, and 7 classes. Check them out on my website. There is the link. I will put it in the link section too. Commercial over. I have to put a plug in here and there. Let's make our button. Right click, design view. I am going to make some room down here for a button, put it right there. Now, the wizard does make this button for us. That is nice and easy. Here is the button. Drop it there. This is a decent wizard. I do not like a lot of the wizards, but I do like this one. Report Operations. Preview a report. You can go right to print if you want to send it right to your printer. I do not like doing that. I like to preview it first. Preview report. Next, which report? ContactLetterR. Next. I am going to put on here: Print Report. I know it is preview, but the user is not going to know the difference. Print Report. Next. Name the button: PrintBtn or whatever you want to call it, and then Finish. Slide it over there and close it. Save changes. Yes. Go to contacts. Pick the collection letter. Print report. There it is. Pops right up. You want to print it, you hit the print button. It goes to your printer. Want to export it as a PDF file? Click right there. Now, there is one more thing I want to teach you real quick. Actually, there are two more things I am going to teach you. I am going to teach you one more thing about this, then we are going to do a bonus, which is sending this by email. If you make changes to this - let's say I come in here and get rid of all this stuff, delete all that - that is all we have got left now. Notice the record is still dirty. See that pencil? That means this record is in the middle of being edited and those changes have not been committed or saved to the table yet. If I hit print report now, see, it is still got all that extra stuff that I just removed because this is pulling off the query, which is reading the table, but the table has not been updated yet. So we have to refresh this record before we print the report. You can do that by either leaving the record and coming back to it and then hitting that. Now it has been refreshed. Now you can see there is a little bit of stuff there, but that's a pain. So what I want to do is add a refresh command to this button. How do we do that? Now, normally I prefer VBA (go watch my Intro to VBA class, it teaches you all the basics of programming in VBA - it's really easy, I love it), but this is a case where the button is already made. It's a nice simple button. We only have to add one little command. So, right click, design view, right click on the button and go to Build Event. It's way up top here. Let me move this so you can see it. Slide that up, right click, build event. There it is. Build Event brings up the Macro Builder. This is what the Wizard actually creates for us - it is an OpenReport macro. We are going to add a command down here where it says Add New Action, and all it is is literally just: Refresh It is RunMenuCommand Refresh. But we have to make sure this runs before OpenReport. I am going to close the action catalog over here. See this little green arrow there? It says Move Up. Click on that. That will move the Refresh command above OpenReport. We have to refresh it first, then open report. Save that. Close it. Close this. Save changes. Yes. Ready. Contacts, collection letter. I am going to come in here and put a bunch of X's in there. Notice the record is still dirty. I have not left it yet. Print report. It refreshed it and there is my line of X's. See that? That is important. You have to refresh the data, which basically saves it to the underlying table, before you can open up that report or another form. That is something you have got to do. Now Carter, I know you said you do not rely on email, but I am sure all the good people at home would like to know how we could very easily email that. I have another video where I cover sending email to Microsoft Outlook using Access, and it will actually just send the text. But since we have a nice printed report here, we can send this as a PDF attachment to an email. How do we do that? Close this. One more button. There is a wizard for this one too. Go to the button tool, over here. Report Operation, Mail Report. Why they did not make it Email Report, I do not know. They should have. It should be Email Report, but they made it Mail Report, which is unfortunate. Next. ContactLetterR. Next. We are going to Email report. Next. Email button is the name of the button, then Finish. Now same deal: we are going to have to put the refresh in there. But let me just show you how it works first. Close it, save it, open it up. Collection letter. Hit the Email Report button. First, it comes up: Send Object As? What format do you want to send it as? I am going to teach how to get around this in just a minute. Also, you may get the Outlook security warning popping up at this point. I cover this on my other email video. I will put a link to that down below. If you get the message up, let me see if I can find a picture of it. Here is my other Send Email video. I talk about this. If you see this right here, the Microsoft Outlook Security Warning: "A program is trying to send an email message on your behalf. This is just Outlook saying, 'Hey, something's trying to send an email to me.' You may or may not have allowed this. Are you sure you want to let this happen?" You can circumvent this window appearing by updating your Windows Defender. Windows Defender is an antivirus program that comes built into Windows 8, 10, 11, I am sure it is going to have it. You can go down to your taskbar, then go to Security, and then just update your virus profile and it will get rid of that message until the next time there is an update available. So once a month, you have to update your virus definitions. As long as your virus definitions are updated, you will not see this. I talk more about this in the Send Email video. I will put a link down below. Watch that if you want step-by-step instructions. For now, I am going to pick PDF. Hit OK. It will make the attachment. There it is. Now it puts you here and it wants you to type in who you want to send it to, type in a subject line, put something down here. It is working, but I want Access to fill all this stuff in for me. Let's cancel this and let's edit this button. Right click, design view, right click this button, go to Build Event again. Here we are inside the button. You will see all of the options and parameters in here. You can see this: Report is ContactLetterR. The Output Format, we are going to drop this down and pick PDF. You can send it as a text file, as an Excel sheet, as HTML - I like PDF. The To: Assuming you have the customer form open behind the contact form, you can go: =Forms!CustomerF!Email because we have their email address on that form. Subject line: Let's make this the description up here. So, =Description. Message Text you could put: Please see attached. Edit the message means do you want Outlook to pop up that send window, or do you want to just send it right away? I like to open up the send window if I am doing individual correspondence. If you are doing a mass mailing, set that to No. We also need to put that Refresh command in here because we have to refresh the data before we create the PDF. Put the refresh in there and then move it up to the top. This would be two lines of VBA code; I really prefer VBA. But since the macro is already made, we will stick with it. Save changes. Yes. Close this. Save changes. Yes. One more. Here we go. Contacts, collection letter. Let me get rid of this stuff here. Delete, and Email Report. Here it comes. Look at that. It grabs the email address off the customer form because the customer form is open back here. It has collection letter as the subject. There is my attachment. It has "please see attached" down here. You can put whatever text in there you want. You can click on this and open up the PDF. There it is. Looks good. Close that, and now just hit Send. There you go. That is how you do a basic letter writer in Microsoft Access. You can store all the correspondence right in your contact table. You can print it. You can email it. You do not have to use any other programs. You do not use Word. You can do everything right inside Access. If you want to learn more, in the extended cut for members, I will show you how to create letter templates. These little things here where you can say: Dear {First Name}, it has come to my attention that you owe {Balance Due}. We will include merge codes. I will show you a first name and balance due. When you pick them from a list down here and hit the load button, that will pull that information up into the letter, fill in first name, fill in balance due, and you are all set. Then, you can do different parts too. If you have document parts, certain paragraphs that you use all the time - a closing paragraph, for example, a greeting - pick that, pick closing, and it goes right up in there to that. Then, print the email and you are on your way. 16 minutes, extended cut. Silver members and up get access to all the extended cut videos. Gold members can download these databases. How do you become a member? Click the Join button below the video. After you click the Join button, you will see a list of all the different types of membership levels that are available. Silver members and up will get access to all of the extended cut TechHelp videos, live video and chat sessions, and more. Gold members get access to a download folder containing all the sample databases that I build in my TechHelp videos, plus my code vault where I keep tons of different functions that I use. Platinum members get all the previous perks plus access to my full beginner courses and some of my expert courses. These are the full-length courses found on my website and not just for Access; I also teach Word, Excel, Visual Basic, ASP, and lots more. But do not worry, these free TechHelp videos are going to keep coming. As long as you keep watching them, I will keep making more. If you liked this video, please give me a thumbs up and feel free to post any comments that you have. I do read them all. Make sure you subscribe to my channel, which is completely free, and click the bell icon and select All to receive notifications when new videos are posted. Click on the Show More link below the video to find additional resources and links. You will see a list of other videos, additional information related to the current topic, free lessons, and lots more. YouTube no longer sends out email notifications when new videos are posted. If you would like to get an email every time I post a new video, click on the link to join my mailing list. If you have not yet tried my free Access Level 1 course, check it out now. It covers all the basics of building databases with Access. It is over three hours long. You can find it on my website or on my YouTube channel. If you like Level 1, Level 2 is just one dollar. It is also free for all members of my YouTube channel at any level. Want to have your question answered in a video just like this one? Visit my TechHelp page and you can send me your question there. Click here to watch my free Access Beginner Level 1 course, more of my TechHelp videos, or to subscribe to my channel. Thanks for watching this video from AccessLearningZone.com. QuizQ1. Why does Richard recommend against storing Word documents and images in your Access database?A. Access databases are designed to store data, not large objects like Word documents B. Access databases can only store text fields, not any images C. Access databases cannot print images D. Word documents will cause Access to crash Q2. What is the main advantage of using Access as your letter writer instead of Microsoft Word, according to the video? A. All correspondence stays in your Access tables and can be easily printed or emailed B. Access has more formatting options than Word C. Access offers a mail merge feature that Word does not D. Access can only create collection notices Q3. In the redesigned Contact Manager, where does Richard suggest storing the body of the written letter? A. In the Notes field B. In the Description field C. In the Contact Date field D. In a separate attached Word document Q4. What is a key prerequisite video Richard recommends before following this letter writer tutorial? A. The free blank template video B. Access SQL programming tutorial C. Report automation video D. Importing Word documents into Access Q5. Why does Richard make the Notes field larger and change its background to white? A. To make it more suitable for writing and reading letters B. To allow for color coding of correspondence C. To merge multiple letters in one field D. To hide the letters from users Q6. What is string concatenation used for in the letter writer query? A. Joining first name and last name into a full customer name B. Separating address fields into different columns C. Calculating total owed by customers D. Formatting dates for the letter Q7. How does the query know which single contact record to show for printing a letter? A. It uses the ContactID from the currently open form B. It always shows all records C. It filters by the customer's last name D. It uses today's date as a filter Q8. When building the letter report, how does Richard suggest handling the customer address fields? A. By building Address1, Address2, and Address3 fields in the query for formatted output B. By printing each address field separately with no formatting C. By only including email addresses D. By storing all address info in a memo field Q9. Why is it important to refresh the record before printing or emailing the report? A. To ensure unsaved changes are committed and reflected on the report B. To backup the table before sending correspondence C. To speed up Access performance D. To update the Access version Q10. What does the 'Can Grow' property do for the Notes field in the report? A. Allows the field to expand to fit longer letters B. Makes the text italicized C. Prevents users from editing the field D. Automatically translates the letter Q11. According to Richard, when is it acceptable to store an image in an Access database? A. For small graphics like a company logo in the report design B. For every customer profile photo C. For storing all product images D. For archiving all received faxes Q12. What is the function of the "Print Report" button added to the Contact form? A. It previews the letter report for the current contact B. It sends the letter directly to all customers C. It exports the letter to Excel D. It prints all letters in the database regardless of record Q13. What extra step must be added to the Print or Email button macros to ensure correct data is included every time? A. Add a Refresh command before opening the report B. Add a Close Form command C. Add a Delete Record command D. Add a Sort By Date command Q14. What action does the "Mail Report" button perform in Access? A. Emails the current report as a PDF attachment B. Saves the report as a text file C. Uploads the report to a web server D. Prints all reports in a batch Q15. How can Access automatically fill in the recipient's email address when emailing a report? A. By referencing the Customer form's Email field in the macro setup B. By hard-coding the email address into the button C. By leaving the email field blank D. By sending to a generic company email address Q16. What security warning might you see in Outlook when emailing a report from Access? A. A program is trying to send an email message on your behalf B. The report has not been saved C. The database is corrupted D. Your hard drive is full Q17. How can you avoid the Outlook security warning described in the video? A. By updating your Windows Defender virus definitions B. By disabling email in Access C. By turning off your firewall D. By sending only text files Q18. What additional features does Richard say are covered in his Access Expert 6 and 7 courses? A. Mass mailing and sending letters to customer groups based on interest B. Converting reports to Word documents C. Using Access as a web server D. Importing handwriting recognition Q19. What future lesson does Richard mention that involves using merge codes like {First Name} and {Balance Due} in letter templates? A. Creating letter templates that can auto-fill fields for each customer B. Encrypting all correspondence C. Building a calendar module D. Integrating with PowerPoint presentations Answers: 1-A; 2-A; 3-A; 4-A; 5-A; 6-A; 7-A; 8-A; 9-A; 10-A; 11-A; 12-A; 13-A; 14-A; 15-A; 16-A; 17-A; 18-A; 19-A DISCLAIMER: Quiz questions are AI generated. If you find any that are wrong, don't make sense, or aren't related to the video topic at hand, then please post a comment and let me know. Thanks. SummaryToday's video from Access Learning Zone focuses on creating a letter writer inside Microsoft Access. I will show you how to write, print, email, and store your letters right inside your Access database, all without relying on Microsoft Word.The idea for this lesson comes from a viewer who wanted to know if it's possible to store written correspondence directly in an Access database rather than attaching Word documents to customer records. This is a great question, and it brings up an important point: I strongly advise against storing files like Word documents, PDFs, or images inside Access tables. Access databases are designed to store data, not bulky files or external objects. Keeping correspondence as simple text in your database is much more efficient and reliable. Unless you have some unique requirements that only Microsoft Word can handle, it's usually best to keep all your written correspondence in Access itself. That way, you can easily write letters, print them, email them, and search through your communications—all managed from within Access. Before we get started, there are a few recommended prerequisites. If you're not already familiar with my free blank template, the TechHelp free template, the contact manager videos (which show how to store multiple contacts per customer), and my invoicing tutorial (demonstrating report setup), I suggest you watch those first. These videos teach the foundational concepts like table relationships and basic reporting in Access, which we'll build upon in this lesson. They're all freely available on my site and YouTube channel. Now, after setting up the free TechHelp template and opening the customer list and forms, you'll see that each customer can have multiple contacts and orders. The contact manager is typically used for logging phone calls and simple interactions, but it's also a perfect place to store all written correspondence, including full letters. To make writing letters easier, I redesign the notes section of the contact form to give you more space for composing your message. It helps to expand the notes field, making it a large, white area so it feels like you're truly writing correspondence. You can even create a dedicated form for letter writing if you want an even bigger workspace. Once you've composed a letter (say, a collection notice), the next step is to print a formatted version to send to your customer. To do this effectively, I recommend building a query that pulls together all the information you want to appear in the letter: the customer's name, address, contact date, and the body of the letter. To format the customer's full name, use string concatenation to combine first and last names. If you aren't familiar with Access string concatenation, I have another video that goes into more detail. The query should be set to only pull up the contact record you're currently viewing in your contact form. By referencing the open form's contact ID using an expression, you ensure that your report will only show the current letter. For the address, it's best to assemble multiple address lines in the query for easy formatting on the report. That might include street, city, state, zip code, and optionally country. Having all of this in your query makes your report design much easier. Next, create a report based on this query. You can use the template blank report set up in the invoicing video as a starting point. Tailor the margins, remove unnecessary headers and footers, and lay out the return address and company logo in the page header, along with any other branding you want. Storing a small logo graphic in the report design is fine as long as you keep it light—just avoid putting large graphics or customer images in your database tables. Populate the report detail section with the customer's information and your letter's contents. That includes name, address, date (formatted with a full, professional date style), and the notes (which is where your letter text resides). Remember to adjust properties like Can Grow and Can Shrink so the report fields expand as needed for longer letters. You can also include custom footers for additional contact information or page numbering. Once the report looks the way you want, it's a good idea to add command buttons to your form for quick access to printing or previewing the letter. You can use the built-in button wizard to create a print preview button linked to your report. It's important to make sure any unsaved edits to the letter are committed to the table before printing. Because of the way Access handles forms and records, if you have not saved your current changes, the report might be generated with outdated information. To fix this, add a refresh command to your button's macro—this ensures the latest data is pulled into the report. You may also want to email the letter as a PDF attachment. Access has a wizard for creating a button to email a report. Configure the macro to send your letter report as a PDF, filling in the recipient's email address and other fields automatically based on data already stored in your forms. Again, remember to add the refresh action to the macro before it sends the report. If you encounter prompts like Outlook security warnings when emailing, updating your Windows Defender virus definitions can help suppress those notices. I have a separate video that covers sending email and related security tips in detail, which you'll find linked in the resources. After setting all of this up, you'll be able to write, store, print, and email all your customer correspondence from right within Access. This keeps your communications centralized, efficient, and easy to manage—no need to juggle separate Word documents or external files. If you're interested in more advanced features, in today's Extended Cut for members, I explain how to create letter templates using merge codes. This allows you to build templates with placeholders such as {First Name} and {Balance Due}, which Access replaces with the appropriate customer data when generating the letter. I also show how to assemble common letter parts like greetings and closings that can be inserted as needed. These features make your letter writing even more powerful and efficient. Silver members and up can watch all extended cut TechHelp videos, and Gold members have access to download all example databases and the code vault. Platinum members receive all these benefits plus access to my comprehensive beginner and expert courses in Access, Word, Excel, Visual Basic, ASP, and more. Even if you stick with the free videos, you will find plenty of valuable lessons to keep building your Access skills. If you enjoyed this tutorial, please give it a like and leave any comments or questions. Be sure to subscribe so you never miss a new lesson, and visit the Show More section for additional links and resources. If you have not yet tried my free Access Level 1 course, give it a try—it's three hours long and covers the basics of database building with Access. If you want to submit a question for a future TechHelp video, you can do so on my website. You will find a complete video tutorial with step-by-step instructions on everything discussed here on my website at the link below. Live long and prosper, my friends. Topic ListBuilding a letter writer in Microsoft AccessRedesigning a contact form for letter writing Expanding notes field for letter correspondence Creating a query to compile letter and address data Using string concatenation for customer names Filtering query results with form criteria Assembling mailing address fields in a query Binding a report to a custom query Formatting and aligning address blocks on reports Customizing date formats in printed correspondence Setting Can Grow and Can Shrink for report fields Adding headers, return address, and logo to reports Adding page numbers and footers to reports Adding a print preview button with the command button wizard Modifying button macros to refresh records before printing Adding an email report button using the wizard Configuring the email macro to use PDF format Pulling recipient email and subject from open forms Suppressing Outlook security warnings for Access email Ensuring report data is refreshed before emailing Primary Topicsstoring correspondence in Access, redesigning contact manager for letters, Access report design for letters, query creation for dynamic data, print and email automation, macro customization, integrating report fieldsSecondary Topicsavoiding file attachments in databases, string concatenation, layout formatting, handling Outlook security prompts |
||||||||||||||||||||||||||||||||
|
| |||
| Keywords: TechHelp Access letter writer, Me.Refresh, SendObject, Print Letters, Word Processor, Microsoft Word, Written Correspondence, Templates, Generating a Letter, Mail Merge, Merge Codes, Email Attachments, Send Attachment in Email, Send Report in Email PermaLink Letter Writer in Microsoft Access |