Dymo Labels
By Richard Rost

 5 years ago
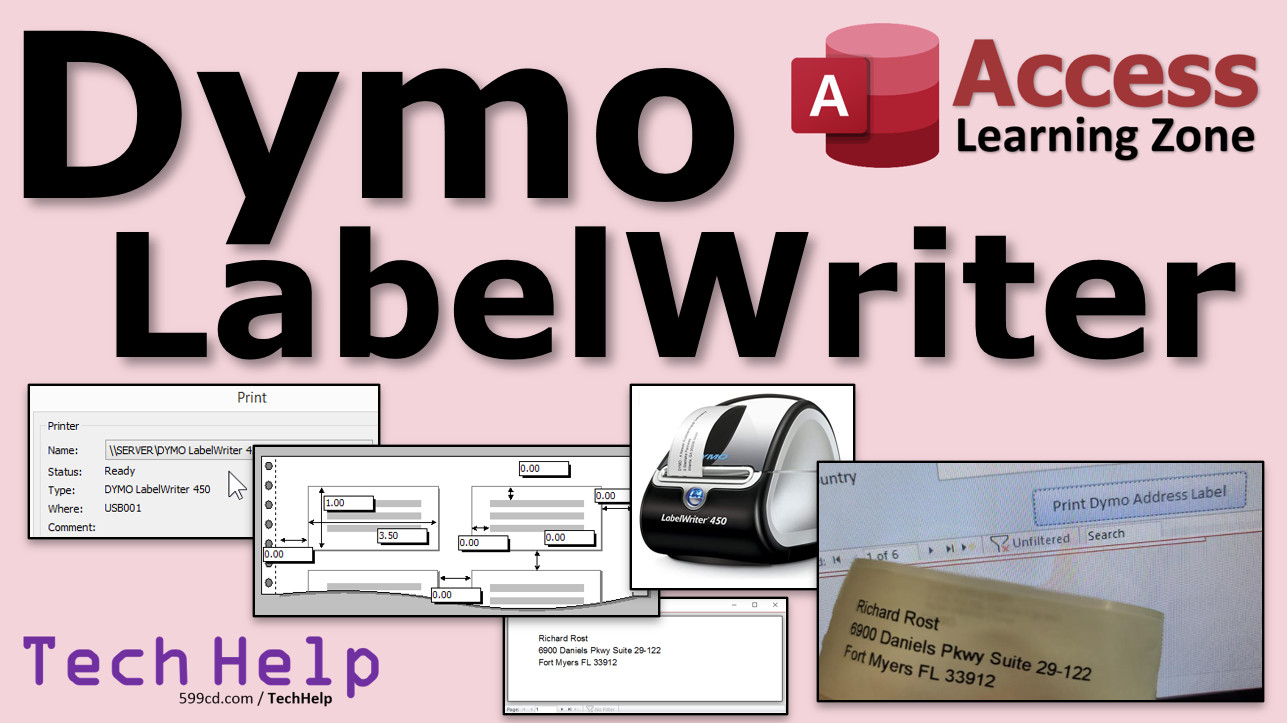
Printing to a Dymo LabelWriter 450 in Access
Learn how to print a single mailing label on your Dymo LabelWriter 450 from your Microsoft Access customer database with one click!
Nancy from Swanton, Maryland (a Gold Member) asks: "I've got a Dymo LabelWriter 450. Is there any way to get labels from Microsoft Access to print on it? I will literally send you a printer if you can show me how to do this."
Members
I'll show you how to print that single label without making a query, we'll design a custom label from scratch, and I'll talk about getting your LabelWriter to work across a network so you can share it.
Silver Members and up get access to view Extended Cut videos, when available. Gold Members can download the files from class plus get access to the Code Vault. If you're not a member, Join Today!
 Links Links
Query Criteria: https://599cd.com/Criteria
Query Design: https://599cd.com/QueryDesign
Forms FormName Notation: https://599cd.com/FormName
Mailing Label Seminar: https://599cd.com/MailingLabel
 Subscribe to Dymo Labels
Get notifications when this page is updated
Intro In this video, I will show you how to print mailing labels for individual customers from Microsoft Access directly to a DYMO LabelWriter 450 printer. You will learn how to set up a query to select the currently open customer, create a custom-sized label report, adjust margins to fit the DYMO label, assign the correct printer, and add a button to your form for one-click printing. I will also cover how to fine-tune your label layout to avoid common printing issues such as extra blank labels.Transcript Welcome to another TechHelp video brought to you by AccessLearningZone.com. I am your instructor, Richard Rost. In today's lesson, I am going to show you how to print mailing labels from Microsoft Access to a DYMO LabelWriter 450.
Today's question comes from Nancy from Swanton, Maryland, a Gold member. This, I believe, is Nancy's second or third TechHelp video. It pays to be a member.
Nancy says, "I've got a DYMO LabelWriter 450. Is there a way to get labels from Microsoft Access to print on it? I will literally send you a printer if you can show me how to do this." And yes, folks, Nancy actually sent me one. I used to have one of these years ago, like 10-15 years ago, but I never bothered to try to print from Microsoft Access to it. Now I do not have one. I do not know what happened with the old one, so she sent me one. This is just a reminder, folks, that I can be bribed with gifts.
Another one of my students sent me some Maine lobsters a couple weeks ago, so that was fantastic, too.
Printing to the LabelWriter 450 is pretty similar to printing to pretty much any other printer. Now, I do not have a different brand or model of DYMO LabelWriter, so I can only guarantee this works with the 450. But from what I understand, they are pretty much all similar.
A few prerequisites before you watch this video. First, set up your printer and make sure it works. I am not going to cover setting up the printer. Set it up, install their software, make sure you can print labels from their software, and you have it set up on your system as a printer. DYMO has some fantastic tutorials on their website if you are having problems getting the printer to work. Once it works, now I will show you how to connect to it from Access.
Here I am in my TechHelp free database template. This is a free database. You can download it from my website. I will put links down below. You can grab a copy. In this database, I have a customer list, and I can open up any one of these customers to the customer form.
What I would like to do is, once I have this customer form open, I want to take this address right here and print it on my LabelWriter. The whole point of these address label printers is so you can print them one at a time. I do not want to have to waste the whole sheet of labels. I want to just go, "Oh, I have to mail this guy something," click, and then it spits out on the printer.
The first thing I am going to need to do is set up a query that only shows the current customer. Yes, there is a way to do this without a query, but that involves a tiny bit of programming, and I will show that in the extended cut for the members. But for the rest of you, come up and click on Create and then Query Design.
If you have never made a query before, go watch my video on Queries. On my website, it is free, it is on YouTube. I will put a link down below. Bring in the customer T, the customer table. Close that. Bring in all of the fields that you want on your label in addition to the customer ID. We want the customer ID, first name, last name, and then address through country. Hold down the shift key and then drag those and drop those there. There are all the fields we want on the label.
Now, why did I bring in the customer ID? Because we are going to put a criteria on here that says only show the current open customer, the one that is open on the customer form back here. If you have never done a query criteria before, go watch my query criteria video right now.
What is the criteria that we want? Well, this has to be equal to forms!CustomerF!CustomerID. That is called forms form name notation. I have a video on that. Go watch the form name notation video if you have never seen this before.
Now, let us save this. We are going to save this as MyCustomerAddressQ. If I run this now, look at that, it uses the current open customer. If I close this and switch to a different customer, let us open up James Kirk. Run that query now, and look, it has James Kirk in it. So now I can base my mailing label for the DYMO printer off of this query because it has only the currently open customer.
You are only going to be able to run it from this form. This form has to be open, but them's the breaks.
Next, let us prepare our label. Go to Create. If you have never done mailing labels before, I cover them in my Access Beginner 1 class, and I have also got a separate mailing label seminar. I will put links to that stuff down below too. Go watch the Beginner Level 1 class if you have not already. It is three hours long and covers all the basics, including how to make simple mailing labels.
Click on MyCustomerAddressQ. Do not open it; just make sure it is selected. That way, Access knows which table or query you want to use to build this report with. Now go to Create, and then Labels, and the Label Wizard appears. Again, I cover this in Access Beginner 1.
The key here is to find a label that is close to the one that you want. There is a way to set up a custom label by getting out your ruler and actually measuring it and typing in the measurements and all that. I will show that for the members in the extended cut. It is a little more involved. But for now, just find one that is close.
The one that I am using is the address label that they give you. It is about three and a half inches wide and one inch tall. Go to Continuous labels over here, not sheet fed. Sheet fed is like the normal types of paper that you put in your printer. Use Continuous. They come on a roll. Continuous is also like that old dot matrix style stuff. Remember these with the little holes in them? I remember these. The printer would go... actually, they still use those in some offices.
The label that I have found that is close enough to what I want is this one here, the Avery 4240 under Continuous. It is one and a quarter by four and three quarters. We can adjust this a little bit when we get inside the actual design of the label. It is close enough for government work.
Hit Next. Pick the font and style that you want. Again, I cover all this in Beginner 1. This is fine. Next.
Now we are going to set up the prototype label, the label that we want our label to look like. We do not need customer ID on the label, so First Name, space, Last Name, Enter. Address, Enter. City, put a comma there if you want to, I never do, space, State, space, space, Zip, Enter, Country. There is my prototype label. That is what I want it to look like. Hit Next.
Do you want to sort it? No, no reason to sort it. It is only going to be one label in it. Next. What name would you like to give to it? Let us call this the Customer Address Label report. Then Finish.
Now this is going to come up, "The section width is greater than the page width." Do not worry about it. We are going to fix this in a second. I get that a lot.
There is the sample label. Now we are going to come in here and correct this thing. Right click, go to Design View. The first thing is my label is three and a half inches wide, so I can really only come out to here, plus there are margins.
First, let us turn the margins off. I am going to get rid of the margins because the LabelWriter prints right up to the edge of the page. A lot of labels, the continuous ones, the sheet-fed ones, have margins that the printer cannot print to, but you do not have to worry about that too much with the DYMO.
Go under Page Setup. Go into Page Setup here. Do not worry about the margins over here; use this one, Page Setup.
You can just set these to zero. You will not be able to, but get them as close to zero as you can. Make sure those are all as small as they can be. Just type zeros over them. Hit OK.
Now you do not have to worry about too many zeros. This can only come out to three and a half inches. I am going to slide these over a little bit and make them all just shy of three and a half inches. Bring this in just shy of three and a half inches like that.
This height here is about one inch, so we are just going to slide that up just under one, so it looks like that. Save it, close it.
Now let us take a peek at it. Find it down here, Customer Address Label, right click, Print Preview. Look at that. It still looks gigantic. What is going on here? Well, this guy is still formatted for your default printer. My default printer is my Canon laser printer.
Here is what we have to do. Right click, Design View again. We are going to say, "Hey, you are only going to print on that DYMO printer. I am setting you up for that printer only." Page Setup, Page Setup again, Page. Use specific printer. Go to your printer window. See, my default is my Canon laser printer. Drop this down. Find your DYMO.
I had to set mine up over a network. Mine is sitting on my server because my laptop that I work on normally is out of USB ports, and I do not want to get a hub because I hate hubs. So I just set it up over on my server. I will talk about setting this up over a network in the extended cut for the members. If you want to set this up, you can actually make everybody in your office use one label printer if you set it up over the network. There is a trick to get it to work. I will talk about it for the members.
Now, pick that printer. Hit OK, hit OK, save it. That is going to save that printer in the report design. If you do have this set up on a network for other people to use, they will have to have it named the exact same printer if you are going to share this database.
Now right click, Print Preview. Look at that. That looks just like a label that is going to print on that printer.
If I happen to print it now, where is the print button? I am going to find the print button. There is the print button. Let me see if it goes. Ready? Click. OK, and go. I hear it. It worked and printed, but I got an extra blank label at the end of it. Why? Because it is still too wide.
Let me see. Remember, the printers are rolling out this way, so this guy came out too wide, so it printed out an extra blank. Let us take a peek. This is a common problem. This happens all the time. See, it is a little note over here. It is a little greenness. This is only in newer versions of Access. The older versions will not tell you that. Remember that error message we got before? So that was too wide.
Let us check it out. Drop this down here. See, report width is greater than page width. You can edit your margins, which we have already done before, and margins are these guys. Sometimes when you change a printer... look at that. Sometimes when you change the printer, it will change these margins too. Hit OK. Get rid of the margins. Still a bit too wide. Shrink this up a little bit. Now, just bring this in until it does not tell you that the margins are too wide. OK, then see, it went away. If you bring it out here, that error message pops up, so you have to bring it in just shy of where you can.
Go a little wider. Go a little wider. You have to find that sweet spot right about there. Perfect. Once that goes away, you are good. Now, resize these. Make them bigger if you want to. Save it. Close it. Print Preview again. Looks good. Let me hit print again. Print. Go. OK, hear it printing. Perfect. One label, exactly what I wanted.
I can take a picture of my camera and show you. Wait a minute, here, hold on. There it is. This is what it looks like. It says Jim Kirk on it. I took a picture of this one earlier for the cover.
Now, how do we put a button on here to print this without having to open up that report? Let us make a button out of it. There are a bunch of buttons for stuff. Unfortunately, none of the buttons will print directly to the printer without a little bit of tweaking.
I have tried these a million times, and they do not work. Grab the Command Button off to Design, drop it down here. If you have never done Command Buttons before, I have videos on Command Buttons.
There is Report Operations. There is mail it, open it, preview it, print it, send a file like PDF or whatever. Open it will open it in normal view like if you double click on it over here. Preview opens up in Print Preview. Print report, you would think, would send it directly to the printer, but it does not. It opens it up in Print Preview and gives you a little dialog box. I hate it, but I will show you one little thing you can change to make this work.
Pick Print Report. Hit Next. Pick the report you want. Hit Next. Print DYMO label. Next. Print Label button. Finish.
Here is my print label button. Now, it would be nice if it sent it right to the printer. Save it. Close it. Open it up. Hit the print button, and you get that. It is one click too many. I do not want to have to click on this again and then close that. I want to send it directly to the printer.
So, how do we do that? Right click, Design View. This thing here, when you use the wizard, it creates a macro under this button. I am not going to go into all the macro design. In my whole advanced series, I have six classes on macros. I do not use macros that much, but the wizard creates macros.
Double click on this guy. The On Click event says Embedded Macro right there. Click on the dot, dot, dot button. That will open up the macro under that button. It is OpenReport. Here is the report name. Then it says Print Preview. Drop that option down and pick Print. I do not know why the wizard does not do this.
Save it. You get this little warning message over here. It is an unsafe action. They consider it an unsafe action because, yes, someone could send you a bogus database and waste your paper. I do not know.
Close it. Actually, hold on, go back in there. I forgot one thing. What happens is this guy runs this, and it normally opens it up in Print Preview mode and then issues the RunCommand to print it, which opens up that dialog box. We need to get rid of this RunCommand down here. Otherwise, you will see the dialog box again. All we need is this OpenReport command. Change that to Print. That is all we need. Save it. Close it. Close that. Save changes. Yes, a bunch of saving and closing.
Now open it up, and the last time, click, and there it goes. I hear it, it prints, and it looks good. I got more address labels.
So you see, it is not that hard to do. There are not that many steps. You basically have to know how to make one mailing label, that was the whole query and the report thing. Mailing labels are that easy. You just have to find a label that is close to what you are looking for, the size that you want. If not, you can always readjust it. Bring in your margins. Bring in the size of that label. Make sure you pick the printer. Just follow the steps I gave you in this video and you will be OK.
This shows you how to make that one button, and I will show the members how to do it with one line of VBA code instead of messing with that macro.
If you would like to learn more, in the extended cut for members, I am going to talk about setting this up to print across the network. I assume you already know how to set up a network printer. If you do not know how to do any network-based printing, then this is not the video for you. There is a little trick or two that you have to do with the DYMO software to get it to work across a network, but I assume you already know how to set up a network printer.
I will show you how to set up custom label sizes, so if you do not want to go through dealing with finding a label that is close to what you want, there is a way to go into Access and actually get out your ruler and measure the size of the label and say, "OK, it is this much across by this much high." Then I will show you how to print a single label without using that query trick. It involves one line of VBA code, but I try to find solutions for the free videos that do not require programming, not because I am holding out on you, but because I know I have a lot of beginners that watch these videos. I do not want to scare people off by saying, "Well, you have to use Visual Basic for this." No, if I can solve the problem without programming, I will try to. If there is more stuff I can show you, I will put it in the extended cut.
That is all in the extended cut for members, Silver members and up. You get access to all of my extended cut videos. We are getting close to 100. We are over 100 regular TechHelp videos, and we are getting close to 100 extended cuts, too. Your membership, Silver members and up, get access to all that stuff, so there is lots and lots of stuff to watch.
How do you become a member? Click the Join button below the video. After you click the Join button, you will see a list of all the different types of membership levels that are available. Silver members and up will get access to all of the extended cut TechHelp videos, live video and chat sessions, and more. Gold members get access to a download folder containing all the sample databases that I build in my TechHelp videos, plus my Code Vault, where I keep tons of different functions that I use. Platinum members get all the previous perks, plus access to my full beginner courses and some of my expert courses. These are the full-length courses found on my website, and not just for Access. I also teach Word, Excel, Visual Basic, ASP, and lots more.
Do not worry, these free TechHelp videos are going to keep coming. As long as you keep watching them, I will keep making more. If you liked this video, please give me a thumbs up, and feel free to post any comments that you have. I do read them all. Make sure you subscribe to my channel, which is completely free, and click the bell icon and select "All" to receive notifications when new videos are posted. Click on the "Show More" link below the video to find additional resources and links. You will see a list of other videos, additional information related to the current topic, free lessons, and lots more.
YouTube no longer sends out email notifications when new videos are posted, so if you would like to get an email every time I post a new video, click on the link to join my mailing list.
If you have not yet tried my free Access Level 1 course, check it out now. It covers all the basics of building databases with Access. It is over three hours long; you can find it on my website or on my YouTube channel. If you like Level 1, Level 2 is just one dollar, and it is also free for all members of my YouTube channel at any level.
Want to have your question answered in a video just like this one? Visit my TechHelp page and you can send me your question there.
Click here to watch my free Access Beginner Level 1 course, more of my TechHelp videos, or to subscribe to my channel.
Thanks for watching this video from AccessLearningZone.com.Quiz Q1. What is the first prerequisite before trying to print mailing labels from Access to a DYMO LabelWriter 450?
A. Set up the printer and make sure it works
B. Install Microsoft Access
C. Format your database table
D. Design your mailing label report
Q2. Why is it recommended to use a query for printing a single mailing label from Access?
A. To display only the currently open customer
B. To display all customers for batch printing
C. To join multiple tables for advanced reporting
D. To sort customers alphabetically
Q3. In the query's criteria, what notation is used to refer to the currently open form's CustomerID?
A. Forms!FormName!ControlName
B. [CustomerIDField]
C. Me.CustomerID
D. Table.CustomerID
Q4. What type of label should you select in the Access Label Wizard for a DYMO LabelWriter?
A. Continuous labels
B. Sheet fed labels
C. Envelope labels
D. Card stock labels
Q5. If the exact label dimensions are not available in the wizard, what does the video recommend?
A. Select a label that is close in size and adjust manually
B. Cancel the wizard and install new labels
C. Use only default Avery sizes
D. Wait for DYMO software updates
Q6. When setting up the label design, why should you turn the margins off or minimize them?
A. The LabelWriter prints to the edge of the label
B. To increase the number of labels on each sheet
C. Margins cannot be changed in Access
D. Margins are required for DYMO printing
Q7. If you get the message "The section width is greater than the page width", what should you do?
A. Adjust the width of your report and the margins
B. Change the label to a sheet-fed type
C. Delete unused fields from the report
D. Lower the font size
Q8. Why is it necessary to assign the specific DYMO printer to the report instead of using the default printer?
A. The default printer may have different dimensions than the DYMO
B. Access cannot print to default printers
C. Only network printers are supported
D. It will automatically pick label sizes
Q9. What is a common cause of an extra blank label printing after the correct one?
A. The label is set too wide for the printer
B. The customer data has missing fields
C. The printer needs to be recalibrated
D. Margins are too small
Q10. Why might you need to adjust the label width multiple times?
A. To find the exact width that avoids the margin warning
B. To fit more text on the label
C. To print multiple labels per customer
D. To select a different font
Q11. If you want to print a label from a button on your form, what must you modify in the macro created by the wizard?
A. Change "Print Preview" to "Print" and remove the extra RunCommand
B. Add a new embedded macro for the printer
C. Use the OpenTable command
D. Change the button to open the query
Q12. Why does the Access macro wizard require an extra step to send the report directly to the printer?
A. The default macro opens Print Preview, not Print
B. Access cannot send print jobs directly
C. DYMO printers need extra drivers
D. Macros cannot access printers
Q13. When sharing a database with others over a network, what must be true about the DYMO printer's name?
A. It should be named exactly the same on all systems
B. Each user should have their own printer
C. Rename the printer for each user
D. Use the default printer name for Access
Q14. Which of the following topics are mentioned as being found in the extended cut for members?
A. Printing over a network, custom label sizes, VBA for printing
B. Query basics and selecting fonts
C. Printing to PDF
D. Using macros for all Access reports
Q15. What is suggested for beginners who want to learn more about mailing labels in Access?
A. Watch the Access Beginner 1 class or mailing label seminar
B. Upgrade to a Platinum membership
C. Only use DYMO software
D. Focus on advanced VBA coding first
Answers: 1-A; 2-A; 3-A; 4-A; 5-A; 6-A; 7-A; 8-A; 9-A; 10-A; 11-A; 12-A; 13-A; 14-A; 15-A
DISCLAIMER: Quiz questions are AI generated. If you find any that are wrong, don't make sense, or aren't related to the video topic at hand, then please post a comment and let me know. Thanks.Summary Today's video from Access Learning Zone covers how to print mailing labels from Microsoft Access directly to a DYMO LabelWriter 450. This lesson was inspired by a student question about connecting Microsoft Access with the DYMO printer, specifically the 450 model, and the process should be very similar for other DYMO LabelWriter devices.
Before getting started with Access, you need to have your DYMO LabelWriter installed and working with its official software. Make sure you can print a test label using their application first. If you run into trouble, DYMO offers good tutorials on their website for hardware and driver setup. Once you're sure the printer is working on your system, you can start with the Access component.
I demonstrate the process using my free TechHelp database template, which you can download from my website. In this database, I have a customer form that allows you to view any customer's details. The goal is to use this form to print that individual customer's address label without printing a whole sheet — which is the main appeal of these types of label printers.
The first step is to set up a query that will display only the information for the customer currently open in the form. While it's possible to do this without a query (with a little bit of programming, a topic I handle in the extended cut), for most users a simple query will work fine. You need to include the customer ID and all the fields you want on the label, and set the criteria for customer ID to reference the currently open form. This sets up the query to always show the right customer.
After you have this query, you can use it to create a mailing label. If you have never made mailing labels in Access, I recommend my Access Beginner 1 class and a separate seminar I offer on labels — both have free resources available on my website. When creating your label, you'll use the Label Wizard, which lets you choose from many built-in label formats. DYMO labels are continuous—they print from a roll—so pick a similar continuous label format. If you cannot find an exact match, just pick one that closely fits the size of your actual label, since you can always fine-tune the measurements in Design View later. Setting up custom sizes is covered for members in the extended cut.
The label wizard helps with initial setup — enter the fields you want to appear (typically first name, last name, address, city, state, zip, and country). Since we're printing only a single label at a time, sorting doesn't matter.
When you finish the wizard, you may get an error that the section width is too large for the page. This is a common issue, but it is easy to fix. Switch to Design View and make sure that your label's width and height match your actual DYMO label, factoring in the lack of significant margins (since the DYMO prints almost to the edge). Adjust the margins in Page Setup to be as close to zero as possible.
Initially, your report may still be formatted for your system's default printer (for example, a laser printer). You will need to switch it specifically to use the DYMO LabelWriter. In Page Setup, set the report to use a specific printer and select your DYMO model. If your printer is shared over a network, be sure that all users have the printer installed with the identical name on their PCs; sharing and configuring DYMO printers over a network has a few particular steps, which I cover in the extended cut.
Once the printer is selected, verify the label size again in Design View. If you get warnings about the report width exceeding page width, keep shrinking the label until these alerts disappear. There's usually an optimal width you can use, found through a little trial and error, where the extra blank label problem no longer occurs.
Printing from the report window works, but it's even more convenient to have a button on the customer form. You can create a command button using the wizard to print the customer's address label report. By default, the button runs a macro that opens the print dialog, so you'll need to edit this macro so it sends the report directly to the printer instead of opening a preview. This just involves changing the action type from Print Preview to Print, and removing any secondary print commands that would trigger extra dialogs. The result is a single-click process that immediately prints a label for the customer you're viewing.
Throughout this lesson, I focus on solutions that avoid programming, because many beginners prefer not to use Visual Basic right away. However, for those comfortable with code, I show members in the extended cut how to achieve the same thing with a single line of VBA code.
In the extended cut for members, I explain how to set up printing to the DYMO LabelWriter over a network, talk about configuring custom label sizes using precise measurements, and demonstrate how to print a single label without relying on a query. These topics require some additional knowledge and are best suited for those already familiar with concepts like network printers and custom setup in Access.
Membership at the Silver level and above grants access to all of my extended cut videos, which now number nearly a hundred, as well as bonus content like the download folder with sample databases and my Code Vault for Gold members. Platinum members get full access to all my beginner and many expert courses, not just for Access but also Word, Excel, Visual Basic, ASP, and more.
You'll find plenty of additional free resources on my website, including the Access Level 1 course, which covers all the basics of building databases and lasts over three hours. Level 2 is just one dollar, or free for any channel member. If you want your question answered in a future video, visit my TechHelp page.
For a complete video tutorial with step-by-step instructions on everything discussed here, visit my website at the link below. Live long and prosper, my friends.Topic List Setting up a query to show the current customer
Using form field criteria in a query
Creating a mailing label report in Access
Selecting the correct label template for the DYMO printer
Adjusting label size and layout in report design
Setting custom page margins for the LabelWriter 450
Assigning a specific printer to the mailing label report
Resolving "section width is greater than page width" errors
Troubleshooting extra blank labels during printing
Fine-tuning label dimensions to avoid printer errors
Adding a print button to a form for the label report
Editing the button's macro to send reports directly to the printer
Removing unnecessary macro actions for direct printing |


