|
|
Free Lessons Courses Seminars |
TechHelp Fast Tips Templates |
Topic Index Forum ABCD |
|
||||||
|
|
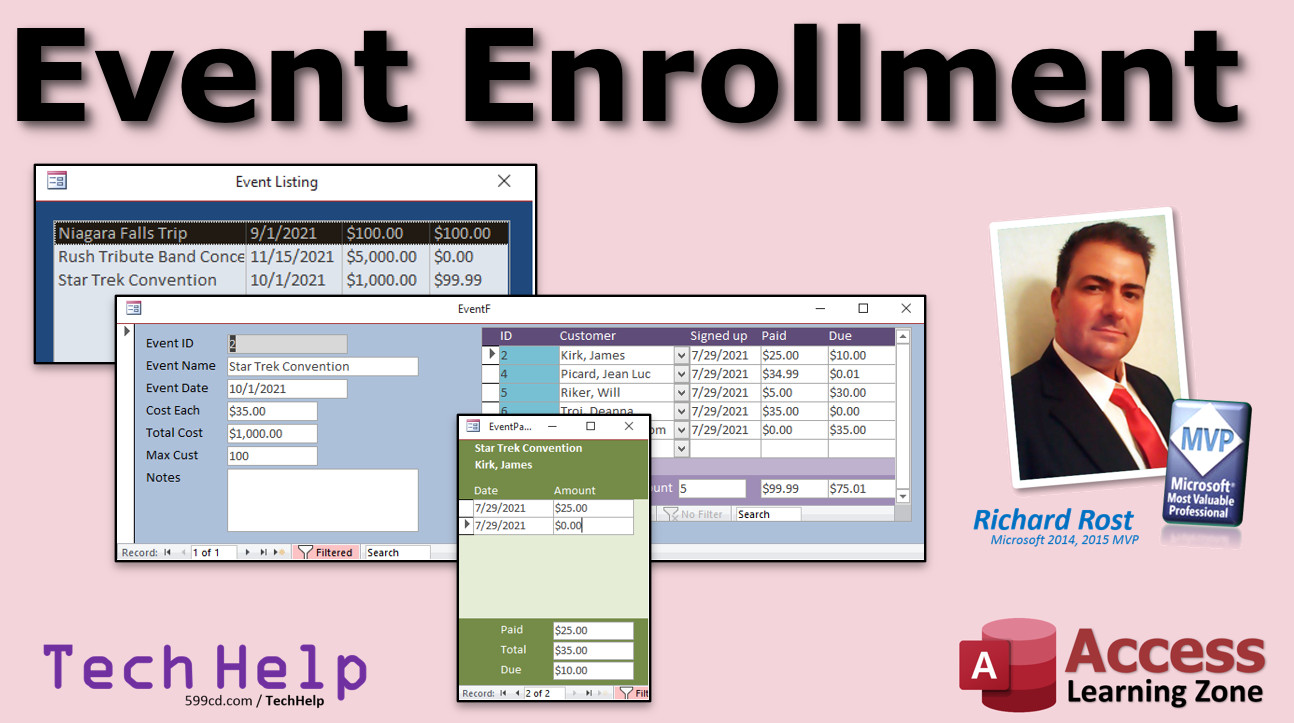
Event Enrollment By Richard Rost How to Track Enrollment in Classes, Trips, et al. In this video, I'm going to show you how to track event enrollment in Microsoft Access. This technique works equally well for students in classes, people on trips, employee training, or anything you need to track enrollment or signups for. We will see how to make subforms to view the people enrolled in each event and the other way: which events each customer is signed up form. Cassidy from Jersey City, New Jersey (a Platinum Member) asks: I schedule regular seminars for my customers. How can I make a database to track what customers are enrolled in which seminars? MembersMembers will learn how to track payments from customers to see how much they owe for a given event, and how much total revenue that event is generating. We will also learn how to prevent a customer from signing up for the same event twice and set a maximum number of attendees for each event. We will also make double-click events to move between the forms. Dianne from Ontario, California (an Access Developer Student) asks: I work for a church and I wanted to know which courses would be best for learning how to take payments for mission trips, I would need to know how to keep track of payments and balance due for individuals, as well as totals and balance due for the trip as a whole.
Silver Members and up get access to view Extended Cut videos, when available. Gold Members can download the files from class plus get access to the Code Vault. If you're not a member, Join Today!
Links
Keywordsmicrosoft access, ms access, #msaccess, #microsoftaccess, #help, #howto, #tutorial, #instruction, #learn, #lesson, #training, #database, many to many, event enrollment, student class enrollment, trip signups, composite key, vacation management, event management, registrations, bookings, class tracking
IntroIn this video, we will talk about how to set up event enrollment tracking in Microsoft Access, including how to manage a many-to-many relationship between customers and events such as classes, seminars, or trips. I will show you how to create the necessary tables for events and attendees, build junction tables to track enrollments, and design forms and subforms that let you easily sign up participants and view which customers are registered for which events and vice versa. This tutorial is ideal for anyone who needs to organize and manage event registrations in a Microsoft Access database.TranscriptWelcome to another TechHelp video brought to you by AccessLearningZone.com. I am your instructor, Richard Rost.In today's video, we're going to talk about event enrollment. It's basically signing people up for things and tracking who's in which class. This could be students in classes, people going on trips, employee training, or any kind of enrollment into events. That's what we're doing today. This question comes from Cassidy from Jersey City, New Jersey, one of my platinum members. Cassidy says, I schedule regular events, such as seminars for my customers. How can I make a database to track what customers are enrolled in which seminars? Well, Cassidy, the best way to handle this is to set up something called a many-to-many relationship. If you've never used a many-to-many relationship before, go watch this video first: Many-to-many. It's free. It's on my website and on my YouTube channel. I'll put a link down below. Go watch that. Also, watch my sub-forms video because we're going to set up a many-to-many relationship for each customer with each event and then display the customers in a sub-form under the event. Go watch both of these videos right now if you don't know what these things are, and then come back. Here we are in my TechHelp free template. Go grab a copy of this from my website if you don't have it already. I'll put a link down below. If you haven't watched the video where I build this, I recommend you do that as well. If you went and watched my sub-form video and my many-to-many video, those videos recommend you watch this one. Everything in Access is like, you have to learn this to learn this to learn this, so there might be a few other videos you have to go watch first. Go watch those and then come back. It's like learning math. You have to learn arithmetic first, then you can learn algebra, then trigonometry. You have to know one to know the ones that come after it. So you have to learn how this stuff works, how basic forms and list forms and all this stuff work before we can do the class today. The first thing we have to set up is a table to hold our events. We already have a customer table, so we don't have to do that again. We built this in a previous video. We already have the customers, who will be our event attendees. Again, this works equally well, whether you're talking about students and classes, people on trips, employees and training, etc. Anytime you have to deal with people getting enrolled in events or classes, the same technique applies. Let us create a table. Go to table design. This will be our event table, so we'll call it event. EventID, set as auto number. We'll have the event name. Don't use name by itself, as name is a reserved word. Maybe add event date, if you want to put a date in here. You could add notes if you want to. I'm so used to typing in memo, and in older versions of Access it's called memo. It's now called long text. That's good enough for now. Save this as eventT – it's my event table. Now let's enter some sample events in here. Let's put in Niagara Falls trip. The event date is 8/1. Let's add a Star Trek convention. That'll be on 10/1. Then a Rush Tribute Band concert. I'm actually going to one of these at the end of the month myself. Love Rush. Let's say that's 11/15. So we've got a couple of different events in our table. Now we have to track which customers are enrolled in each event. Before I do that, though, one real quick thing. I like to take these things in design view when I'm building new tables. Before I start working, I like to take little screen clips of this. There is a screen clip tool that comes with Office. There are a bunch online. I use one called HyperSnap. It's nice and easy to use. I'll put a link to it down in the link section if you want to check it out. I can just do this and take a screen clip of the design of the table like that. I'm just going to drop it into Paint. Paint comes with Windows. Everyone has it. Paste it in right there and slide it over here. Just so I can see the fields when I'm designing a new query or a form. I don't want to keep looking back in the table to see what I named that field. Once you've used it for a while, like the customer table, you'll know what those fields are. Let's put the customer table right here just so we can see it for relationship purposes. Flip back over to Access. I'm going to open up my customerT in design view. I don't need all the fields, just the ones I'm not familiar with. Then I'm going to use my screen clip tool. HyperSnap. I've been using HyperSnap for years. I love it. Then we'll flip back over to Paint and paste that in right there. So I've got customers, and I've got events. CustomerID and EventID. Now I need a junction table between these tables to track which customers are enrolled in which events. The junction table is covered in the many-to-many relationships video. Let's go build it. Back to Access. Create table, design. We're going to have an EventXCustomerID. That's just the auto number for each record in here. Then we're going to have an EventID, a number of type long integer. That's our foreign key to the event table. Then a CustomerID, which is also a foreign key to the customer table. This table joins together those other two tables. If you want to track things that are unique to this specific pairing, like the sign-up date, you could put that in here and maybe default that to today's date. That will track when this relationship was made, what date they signed up. Other notes, special requests for the trip or whatever, special meals they need, etc. Anything that is unique to this particular joining, you could put in here. If you're tracking enrollments in a class or visitors to a trip, you can track if they are paid or not. Add an IsPaid field, for example. I'm not going to go too much further here. Let's save this. This will be my EventXCustomerT. It's my event-times-customer table. Again, I'll take another screen clip of this. Just grab this stuff here. This is just for me. Come back over here to Paint and now I can paste that right in there. If you want to make your little join lines, you can open this guy up and make little pencil lines here like this. You don't have to get too fancy. This is just so I can see what the fields are. Sometimes I just slide this over onto my other monitor so I can keep an eye on it. Let's close this. Let's open all three tables so we can see some sample data going in here. I'm going to minimize the ribbon a little bit there. There's my customers. Here are my events, just so you understand how these things are working at the table level. Now we'll open up our junction table. Here's the junction table. I'll put the junction table between those two. There's the junction table in the middle. Let's say Richard Rost signs up for the Rush tribute band concert. So Event is 3. Customer is 1. Let's say I signed up on 7/15. Let's say Jim Kirk signs up for the Star Trek convention. So Event is 2. The CustomerID is 2. See how this works? This table is tracking those relationships. Let's say Will Riker is also going to the Rush tribute band concert. So Event is 3, and Will Riker is 5. See how that works? You don't want to have to do this with the tables to track these relationships. We're going to make forms for this stuff. The tables store the data, but you're not going to be working with tables day to day. Set this up, get it working, maybe enter some sample data. You and your end users will be working with forms that are much easier to understand. You won't have to type in the number; you can pick from a list. Let's go see how we make these forms. Start with a basic event form, just a single form with our events on it. Close these up. Let's go and make a form. If you've watched the blank template video, we've got the continuous and single blanks over here. I'm going to copy and paste that. We're going to call this my EventF, my event form. Open this up in design view. Bind this form to the eventT. So now this form is getting its data from the event table. Open up design, go to add existing fields, and bring these fields in. Click, drag, drop. The only reason I keep these things around is for formatting. Click on this guy, go to the format tab, format painter, paint over you, and then this guy, format painter, double click, click, click, click. I just grab the format and then I delete these ones. The only reason I keep them around is for that. I like to make my IDs gray because users know they cannot change that stuff. Slide this up in the corner here. Event name can be a little bigger, event date, and notes. Shrink that up like so. Looks good. Save that, close it, open it back up. There's my events. Maybe do some left justifying in here. Align left, I should say. Select all that, format, align left. Save it, open it up. I like to have all my data line up to the left. The default, like Excel, is numbers to the right, dates to the right, but I like everything lined up on the left side. That's just me. We could make these labels prettier. This is for people to see. It defaults to your field names, but you can do things like this: Event ID, Name, Date, etc. Slide this over to the left a little bit. I'm not going to take too much time to make this stuff pretty. If you want to see how to make stuff pretty, watch my Access Beginner 1 and 2 classes. I cover basic form design in detail. Access Level 1 – go watch it. I just re-recorded this for Access 2019 and 365. It's got a bunch of new stuff in it, and I take a lot of time covering the basics: how to build forms and tables and queries and all that. Level 2 covers more with form design and it's free for members of any level. If you're a member and you haven't gotten your free copy of Level 2 yet, send me an email, come and get me. I'll send you a free copy. Next, I need to track which people are enrolled in each of these events. I'm going to do that with a subform right here. So when I go to Star Trek Convention, I see a list of the customers in the Star Trek Convention. How do we do that? We're going to make a continuous form that's bound to our junction table. Let's close this and make a continuous form. Copy, paste. This will be my EventXCustomerF. EventXCustomerF. Design view. Let's open up the properties. We're going to bind this guy to my junction table. Go to Add Fields, bring everybody in, drop them there. I'll delete these labels on this one. Let's format paint that. That's my ID, which I don't really need to see, but I'll leave it here just for now. Now, the EventID I don't need on here because it's going to be a subform, and the form/subform relationship will be created by the Link Master Fields/Link Child Fields property in the subform object. That's why I wanted you to take the subforms class so you know about that. So we don't need EventID in here. In fact, let's delete these now. There's my EventID. I don't want to see the CustomerID here. I want to pick from a combo box. I don't want to reinvent the wheel. I've already got a combo box for customer. Let's go get it. Go to the main menu. It's on the order form. If you watched my invoicing video, which is part of the blank template series, there's a combo box right there that I can pick a customer from. I'll borrow this guy. Copy, and come over here and paste. If you don't know how to make a combo box, I have videos for that too. There's a wizard that does it nice and easy. There's the customer. We can put the sign-up date right next to it if you want that there too. Now, this is the ID, this is the customer, and over here we'll put the sign-up date. We'll just call it signed up. We'll probably have to adjust our tab order. Let's check the tab order. Let's use Auto Order. Select all these, right-click, size to grid. They are now sized perfectly. Shrink that up. Save it. Close it. Let's open it up, take a look at what we've got. That's what we've got. Let's left justify this and this. Make that a little bit bigger so the word "new" fits in there. It's one of my pet peeves – you have to make sure the word "new" fits in there because the new blank record will say "new" on it. Looks good. We're going to take this – here are all my signups for every event – and make it a subform inside of here. How do we do that? Close that. Right-click, design view. Open this up, make this bigger, grab the subform, click, drag, drop. That's all you have to do, and I covered that in the subform video. We're going to delete that label, slide this over here, make this a little bigger depending on how many attendees you plan on having. If you can only have three, four, five, that's fine. If you're going to have twenty, you'll get a scroll bar. Save it, close it, open up the event form. There we go. Nobody signed up for the Niagara Falls trip. We have Jim Kirk for the Star Trek Convention. We have two people for the Rush tribute band concert. Let's sign some more people up for the Star Trek Convention: Jean-Luc Picard, Will Riker, and Deanna Troi. They're all going to the Star Trek Convention. Who's going to the Niagara Falls trip? I'll go. For the Rush tribute band, let's add Malcolm Reynolds. Then Will Riker decides to drop out; he doesn't want to go. That's it. That's how you can track who is enrolled in each event, attending each event, or signed up for each class, and so on. This works for people on trips or whatever these events happen to be. It doesn't matter, but this is how you do it. Do you want to go the other way? Do you want to open up the customer form and then see which events the customer is enrolled in? We can do that too. I'll show you that in just a second. First, a quick commercial break. I have to throw a little tiny bit of advertising in these videos because I know a lot of you stop watching as soon as the video is over and you don't see the stuff at the end. If you like this kind of stuff, check out my Access Expert Lessons. I cover all kinds of topics: subforms, relationships, SQL, you name it. It's all on my website at 599cd.com/AccessExpert. Access Expert Level 3, in fact, covers creating subforms, forms for totals, SQL basics, lots of stuff in just this one level. You'll learn SQL, how to set up subforms, lots more, totals in the bottom, all kinds of stuff. That's Access Expert Level 3. I'll put a link down below in the link section. Let's go the other way. Let's make a CustomerXEvent subform. Same basic thing. Instead of a list of customers, we're going to make this a list of events. I'm going to copy and paste the subform we just made, copy, paste. It's going to be CustomerXEventF. Design view. Get rid of the customer combo box. What are the fields in here? Remember if we take a look at our table, we've got our Paint window – the same table has EventID and CustomerID. Now, instead of a customer combo box, we'll use the same setup but put an event combo box in there. That's why I keep that Paint screenshot hanging around. Let's make a new combo box, because we don't have one of these yet. Drop that in. I want the values to look up from a table or query. Next, get it from eventT. Next, bring over the EventID and the name, date if you want to. Next. Let's sort by event name. Next. This is what it's going to look like. The key column is hidden because it's an ID. Next, we will store that value in what field? We are picking an event from this combo box – store it in the EventID of my junction table. Next. What label would you like? We're going to delete it anyway and then hit finish. Delete the label, slide this up into place. Change the label to say "Event." Rename this to EventCombo. The other one was already named CustomerCombo because we copied it off a different form. Slide that up. Change the tab order. Auto order that. Save it. Close it. Same thing, just in reverse. Where is CustomerXEventF? Now we drop this in as a subform in my customer form. Right-click, design view. For class purposes, I'm going to rearrange this guy a bit. Move these fields over here like that. Slide them down. Get over there. These buttons can go under here. Notes can get shorter. Then we can put our subform right there. Grab the subform, click, drag, drop. There it is. These are the events that this customer is signed up for. It's singular. These are the events that this customer is signed up for. It would be plural if it was "these are the events that these customers are signed up for." I said it correctly. Let me show you, by the way, the subform object. This object right here is where that relationship is forged – Link Master Fields and Link Child Fields. It's part of the subform object. We covered this in the subform class. Save it. Close it. Now when I open a customer, you can see what events this customer is signed up for. James Kirk is signed up for the Star Trek Convention, Deanna Troi for the Star Trek Convention, etc. Malcolm Reynolds, the Rush tribute band, and so on. You can also make double-click events so you can double-click to open up the other form if you want to. I'll cover that in the extended cover for members. If you want to learn more, I cover a lot of extra stuff in the extended cut for members. I actually should have made this into a short seminar. I went way overboard – it's 60 minutes long. I covered a lot. We can do payments per person so each event can have a cost for each person, and then we do a total cost for the event. So, if you need to make a certain amount of money to even just book it as the promoter, you could put that in there, too. We'll do a master event listing that shows you each event, what the total cost is, and how much has been paid so far. Then you'll be able to track each attendee – when they signed up, how much they paid, how much is due – with totals. We will set a max number of attendees so you can say, okay, we can only have five people in this class, or whatever. Here's the database. Here's the master event list. Let's open up the Star Trek Convention. There it is – all your information, here are your attendees. Want to add another attendee? Just drop this down, let's say I'm going to go to it. I'm going to it now. You can see we have six now. Leave the record, you have six attendees. Let's make a payment for me. Click on that. You can either double-click here or click the payment button. It's what, $35? Let's say I pay $30 toward this. This updates, this updates, this updates. It all updates automatically – just a couple lines of code to do that. Changing something on this form – I made it so this form is locked, it's modal, so you can't click behind it and change stuff while this form is open. You have to close it and come back here. That's by design. I like that. It prevents you from changing the event while you have the wrong payment screen up. I've seen people do that a lot. I made it so you can, from the customer form, see what events I'm signed up for, and now you can also double-click to go to my Niagara Falls trip. Double-click – boom, there's the Niagara Falls trip, here's who's on it. I can't make a payment because I'm already paid up. But let's say I want to add another person. Let's add Deanna Troi, and then add Jean-Luc Picard. "Max enrollment" – I've hit my four. See that? Yes, default values are in there. If you have the customer open, it defaults, so if you have a trip that you want to add someone to and they're not on the trip already, that shows up. As I said, I went a little overboard on this one – lots of cool stuff, lots of calculations, lots of form footer totals, a little bit of VBA code – not much. I'd say the whole thing has maybe ten lines of code, not a lot, just a little bit here and there to get the recalculations to happen. That's covered in the extended cut for members. Silver members and up get access to all the extended cut videos. Gold members and up can download all of these templates, and you get access to my code vault. I'll show you how to become a member in just a minute. How do you become a member? Click the Join button below the video. After you click Join, you'll see a list of all the different membership levels that are available. Silver members and up will get access to all of the extended cut TechHelp videos, live video and chat sessions, and more. Gold members get access to a download folder containing all the sample databases that I build in my TechHelp videos, plus my code vault where I keep tons of different functions that I use. Platinum members get all the previous perks plus access to my full beginner courses and some of my expert courses. These are the full-length courses found on my website and not just for Access. I also teach Word, Excel, Visual Basic, ASP, and lots more. Don't worry – these free TechHelp videos will keep coming. As long as you keep watching them, I'll keep making more. If you liked this video, please give me a thumbs up and feel free to post any comments that you have. I do read them all. Make sure you subscribe to my channel, which is completely free, and click the bell icon and select "All" to receive notifications when new videos are posted. Click on the Show More link below the video to find additional resources and links. You'll see a list of other videos, additional information related to the current topic, free lessons, and lots more. YouTube no longer sends out email notifications when new videos are posted. If you would like to get an email every time I post a new video, click on the link to join my mailing list. If you have not yet tried my free Access Level 1 course, check it out now. It covers all the basics of building databases with Access. It's over three hours long. You can find it on my website or on my YouTube channel. If you like Level 1, Level 2 is just one dollar, and it's also free for all members of my YouTube channel at any level. Want to have your question answered in a video just like this one? Visit my TechHelp page and you can send me your question there. Click here to watch my free Access Beginner Level 1 course, more of my TechHelp videos, or to subscribe to my channel. Thanks for watching this video from AccessLearningZone.com. QuizQ1. What is the main goal of the video?A. To show how to create a simple customer contact list B. To demonstrate setting up a system for tracking event enrollments using Microsoft Access C. To design a report of all event payments D. To teach advanced SQL programming Q2. What type of database relationship is recommended for tracking which customers are enrolled in which events? A. One-to-one relationship B. One-to-many relationship C. Many-to-many relationship D. Self-referencing relationship Q3. Why do you need to create a junction table for event enrollments? A. To track only event names B. To store customer addresses C. To join customers and events in a many-to-many relationship D. To list only event dates Q4. What does the junction table (EventXCustomerT) contain? A. Only event names and customer names B. Only the event IDs C. The IDs of events and customers, and additional fields relating to the enrollment D. A list of all available events Q5. What type of form should be created to enter or view enrollments in each event? A. A report B. A macro C. A subform bound to the junction table D. A standalone form not connected to any table Q6. When making the event form, why is the EventID field formatted in gray? A. For aesthetic reasons only B. Because users are not supposed to change the auto number IDs C. So users know which record they selected D. It must always be hidden for Access to work Q7. On the enrollment subform, how do users select the customer? A. By typing the CustomerID manually B. By opening a macro C. By picking from a combo box listing customers D. By selecting from a report Q8. Why is it suggested to use combo boxes on forms for selecting either a customer or an event? A. To make data entry easier and prevent errors from manual typing B. To automatically run queries C. Because forms do not support textboxes D. To avoid the use of VBA code Q9. How does Access know which records to display in the subform for each event or customer? A. Through the Link Master Fields and Link Child Fields properties in the subform control B. By default, Access displays all records from all tables C. Using a macro attached to the form D. It manually filters data with a query each time Q10. What additional features are mentioned as possible to add to the basic enrollment system covered in the video? A. Exporting to Excel only B. Only printing attendee name tags C. Tracking payments, calculating totals, setting maximum enrollments D. Advanced data encryption Q11. Can you go from the customer form to see which events a customer is enrolled in? A. No, that is not possible B. Only from the event form C. Yes, by adding a subform showing events per customer D. Only with VBA code Q12. Why is the technique taught in the video generally applicable to many situations, not just customer seminars? A. Because Access is only used in schools B. Because only business customers are tracked C. Because the many-to-many setup works for classes, trips, employee training, and more D. Because it uses Excel imports Q13. What should you do if you are not familiar with many-to-many relationships or subforms? A. Skip those parts of the video B. Watch the recommended prerequisite videos first C. Try to guess how to create them D. Only use one-to-many relationships Q14. What is a potential field to include in the junction table to track specific enrollment information? A. Customer's phone number B. Event organizer's salary C. SignUpDate or IsPaid D. The Access version number Q15. What benefit does adding totals and maximum attendee features offer in event enrollment tracking systems? A. Faster database queries B. Automatic email notifications C. Ability to manage event capacity and financials more accurately D. Reduces storage space needs Answers: 1-B; 2-C; 3-C; 4-C; 5-C; 6-B; 7-C; 8-A; 9-A; 10-C; 11-C; 12-C; 13-B; 14-C; 15-C DISCLAIMER: Quiz questions are AI generated. If you find any that are wrong, don't make sense, or aren't related to the video topic at hand, then please post a comment and let me know. Thanks. SummaryToday's video from Access Learning Zone focuses on creating an event enrollment tracking system in Microsoft Access. This is useful for keeping record of which individuals are signed up for which events, such as seminars for customers, students in classes, employees in training sessions, or any scenario where people are enrolled in different kinds of activities.The primary question addressed comes from a viewer who organizes regular events for customers and wants to know how to set up a database to keep track of each customer's seminar attendance. The best approach is to use a many-to-many relationship, a method where each customer can be enrolled in multiple events and each event can have multiple customers. If you are unfamiliar with many-to-many relationships in Access, I recommend viewing the relevant tutorials on my website first, as well as the videos covering subforms, since both concepts are crucial for this lesson. Once you understand the required prerequisites, you will want to set up a new table to store your events. Since we already have a table for customers (built in earlier tutorials), we do not need to repeat that step. Each event record might include fields like EventID (set as an auto number for unique identification), event name (avoid using the reserved word 'name'), event date, and notes. In modern versions of Access, use the 'long text' type for descriptive fields. After creating and saving the event table and entering some sample events, the next step is to establish how you will track which customers are enrolled in which events. This is accomplished using a junction table. The junction table links the customers and events together—each record represents a single enrollment, containing fields for its own ID, the EventID, and the CustomerID. Additional fields like sign-up date, payment status, or special notes can be added if needed, making it possible to capture details unique to each enrollment. To visualize the setup and for easier reference while designing queries and forms, I keep a screen capture of the table designs handy in a tool like Paint. With all three tables (customers, events, and the junction table) created and filled with sample data, you can see how the relationships work at the data level. For example, if Richard Rost signs up for a Rush tribute band concert, a record is added to the junction table associating his CustomerID with the relevant EventID, along with a sign-up date. This process is repeated for other attendees and events. Naturally, users will interact with your database via forms, not by manually editing tables. So, the next task is to create a main event form and a subform to display the list of enrolled customers for each event. The event form draws its data from the events table, and standard formatting can make the layout cleaner and user-friendly, such as left-aligning fields, resizing labels, and using color to highlight non-editable fields. To display enrolled customers, a continuous subform is created and linked to the junction table. In the subform, rather than having users type customer IDs directly, a combo box lets them select a customer from a list. You only need to include fields that will help users manage event enrollments; for example, EventID is omitted from the subform since the main form handles that automatically. Once the forms are set up, embedding the subform within the event form allows users to see and manage which customers are signed up for each event. The setup is flexible enough for scenarios ranging from trips to classes. Users can pick customers from a dropdown and quickly add or remove enrollments as needed. The process works in reverse as well. If you want to see which events a particular customer is enrolled in, you create another continuous subform, this time based on events, and embed it in the customer form. Here, the combo box is set to select events instead of customers, allowing for the management of each customer's event list. An important part of connecting main forms and subforms is the Link Master Fields and Link Child Fields properties, which ensure that the corresponding records are correctly related. This is explained in much greater detail in my subforms class. In the extended cut for members, I cover even more advanced features for event management, such as processing payments per attendee, calculating the total cost per event, tracking outstanding balances, setting a maximum number of attendees, and summarizing event statistics with totals. You will also learn tips like locking forms to avoid accidental edits while working with related data, and using a small amount of VBA code to handle real-time recalculations. The full extended lesson includes more about handling attendee limits, setting default values, and using form footer totals, with only a small amount of code required. For those seeking to advance their Access skills further, my Access Expert Level 3 course explores subforms, totals, and SQL in greater depth. Silver members and higher receive access to all extended cut videos, while Gold members can download the databases and access my code vault. Platinum members receive even more, including my full beginner and some expert courses for Access, as well as courses in Word, Excel, Visual Basic, ASP, and more. All of my core video lessons, including my free Access Level 1 course, are available on my website and YouTube channel. Level 2 is available for just one dollar or for free to any channel member. If you have a question you would like answered in a future TechHelp video, visit the TechHelp page on my website. For those who need a comprehensive tutorial with step-by-step instructions covering all the material discussed here, you can find a complete video lesson on my website at the link below. Live long and prosper, my friends. Topic ListCreating an event table for event enrollmentSetting up fields in the event table Entering sample events into the event table Using screen clipping tools for table design reference Reviewing and referencing the customer table Designing a junction table for many-to-many relationships Adding fields to the junction table for event enrollment Tracking sign-up date and special requests in the junction table Entering sample enrollment data in related tables Understanding table relationships for event tracking Creating a basic event input form Binding the event form to the event table Adding fields and formatting to the event form Customizing labels and layout on the event form Creating a continuous subform for event enrollments Binding the subform to the junction table Using a combo box to pick customers on the subform Adjusting subform tab order and formatting Embedding the enrollment subform in the event form Testing event enrollment from the main form Signing up and removing customers from events via the form Creating a reverse subform for events per customer Embedding the events subform in the customer form Creating an event selection combo box for the customer subform Linking subforms to main forms using Link Master Fields Viewing events by customer in the customer form Testing reverse lookup for event participation |
||||||||||||||||||||||||||||||||||||
|
| |||
| Keywords: TechHelp Access many to many, certifications, classes, training, event enrollment, student class enrollment, trip signups, composite key, vacation management, event management, registrations, bookings, class tracking, payments, subforms, signups PermaLink Event Enrollment in Microsoft Access |