Calculator 4
By Richard Rost

 3 years ago
Build an On-Screen Calculator in Access - Part 4
This is part 4 of my Microsoft Access on-screen calculator tutorial. We are continuing to build the calculator that we started in part 1. In today's video we're going to build a square root button, a positive / negative (negate) button, and will replace the forward slash and asterisk symbols with the proper division and multiplication symbols.
Members
There is no extended cut, but here is the database file:
Silver Members and up get access to view Extended Cut videos, when available. Gold Members can download the files from class plus get access to the Code Vault. If you're not a member, Join Today!
Prerequisites
Next Video
Links
Recommended Courses
Keywords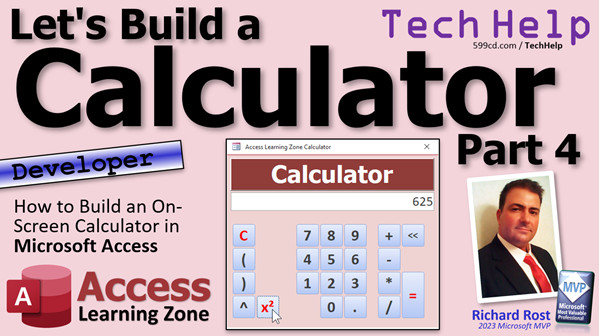
access 2016, access 2019, access 2021, access 365, microsoft access, ms access, ms access tutorial, #msaccess, #microsoftaccess, #help, #howto, #tutorial, #learn, #lesson, #training, #database, Onscreen calculator, calculator, on-screen calculator, square root, positive, negative, negate, right string function, forward slash, division symbol, asterisk, multiplication
 Subscribe to Calculator 4
Get notifications when this page is updated
Intro In this video, we continue building the custom calculator in Microsoft Access by adding new buttons and features. You'll learn how to create and program square root and plus/minus buttons, update operator symbols for division and multiplication, and adjust your form layout to accommodate more controls. We'll also cover how to use ASCII codes for button captions, use string functions for sign toggling, and ensure your calculator can interpret and evaluate different operator inputs correctly. This is part 4.Transcript Welcome to another TechHelp video brought to you by AccessLearningZone.com. I'm your instructor, Richard Rost.
Yes, folks, part four. We're still building the calculator, going to make some more cool buttons and do some more cool stuff and have some fun. If you haven't watched parts one through three, go watch those now. You'll find links down below. Go watch them, come on back. We're going to do some more stuff.
All right, so our calculator is shaping up nicely. The last thing we did was we made this little X squared button down here. Oh, error - can't square null. Yeah, okay, fine.
What about doing something similar to take the square root, to go the other direction? For those of you that know your math, it's the same thing, but instead of raising it to a power of two, we're going to raise it to a power of one half, which is 0.5. So it's the exact same thing.
So let's go to design view. Let's take this guy, copy and paste it. We'll go down another row here. Let's make this a little bigger. This guy's going to get really big, my original one that I showed you before. We have lots of buttons coming up, so we're going to make it a little bit taller here. Let's bring this stuff down below here like that.
Okay, so this guy, what are we going to name him? Let's call him ButtonSQRT (square root). The caption is going to be the square root symbol, which is ASCII 251. Hold down the Alt key, 251, there's that. You can do that, or put square root x, whichever you want, that's fine.
All right, what's the code going to look like? Well, we can basically copy the code from the other one. Event: On Click. Literally just copy this, paste it in here, and instead of raising it to the power of two, we're going to raise it to the power of 0.5. That's how you do a square root.
Save it. All right, close it, close it, open it. Give me a hundred and square root it, boom - 10. Square root again, boom - 3.1. Good enough. All right, that's how you do square roots, simple enough.
You want to find a cube root? You could do that yourself, watch this - do a thousand, raise it to the power of one divided by three here, then evaluate that. Like if you ten... Okay. Easy enough. I know you math folks.
Remember that whole algebra trick - I'll never use this stuff? Well, if you want to be a computer programmer, having all that math really does help. I've come into a lot of situations where algebra especially is very helpful.
I can't say that I've used calculus a lot. Trig I've used a bunch of times trying to figure out stuff, but it's good to know. One of the things for people that say they're never going to use this stuff, a lot of it is learning a way to think, a way to process new information, and how to figure things out and problem solve. So, you might never need to calculate derivatives or all that stuff, but learning how to process stuff mathematically forms your brain as a child into problem solving. So it's very helpful even if you don't think you're ever going to use advanced math. It's teaching you how to think, not what to think.
All right, next up, how about a little plus or minus button? We'll stick that guy right there so I can easily negate this guy, instead of having to click over here and do that. Well, actually, that puts it at the end of it, so that's not even correct. So back it up, so I'd have to click there and then hit it on the keyboard. The whole point is to avoid not having to use a keyboard if we're using this on a tablet or a smartphone.
So, I want a little plus minus button. What does that have to do? Well, the plus minus button has to stick a minus sign out front on the left side of the calc text unless there's a minus sign there already, in which case remove it. So we need an if-then, and we need those string functions that we covered before.
Okay, let's make our button. Design view. Just copy one of these other buttons, doesn't matter which one. Put it there. This is going to be Alt 241 - that's a little plus minus symbol like that. I like that guy.
All right, and we don't need this because we're not adding under the calc. Let's call this guy ButtonNegate.
All right, and then event: On Click. What's this going to look like? Well, first, On Error Resume Next. Again, if it's null, there are issues where this might cause a problem, but they're not critical, so just On Error Resume Next works fine. Those people that say don't use On Error Resume Next - don't listen to them. It's fine for simple situations like this.
So, the first thing I have to do is check to see if the left one character is a minus sign already. So if left of calc minus one, if that one character is equal to a negative sign, then we have to remove the negative sign. Otherwise, we're going to add the negative sign.
Add negative sign - and that's simple. I can do the simple stuff first: calc equals negative sign and calc, and end if. All right, get the easy guy out of the way first.
Now, we have to remove that negative sign. What's that going to look like? It's exactly the opposite of what we did before with our backspace button. Instead of looking at the left side of the string, though, we're going to look at the right side of the string. So we're going to say calc equals the right of calc. How many characters? The length of calc minus one, remember? That's it. That's just going to remove that negative sign.
All right, save it, give me a quick debug, compile, make sure we're all good. All right, close it, close it, open it up. 96. Negative, positive, negative, positive, negative, positive, negative, positive, negative, positive, negative, positive, negative, positive, negative, positive.
All right, there we go. So we got negative 96. Give me a square root, oh, error. I guess we can't handle imaginary numbers. That would be an advanced feature for it. Maybe I'll add that to the extended cut - we'll see. If you want to see it, let me know. It would literally just be looking to see if the value that you're trying to square is negative, and if so, calculate the square root of its positive and add an i on the end of it. Yeah, maybe, we'll see.
All right, moving on. These guys - the multiplication and division - now your user might not be familiar with that being division. So let's put the friendly division symbol there.
All right, let's go in here, design view, change this guy to, I think it's Alt 247? No, 246, Alt 246. There we go. All right, there's our friendly division symbol. Save it, close it, open it up again. Let's try it out. Nine divided by three equals, error. What's that?
Well, Eval doesn't know about that guy. It doesn't know that that symbol is division. So you have two options here. You can either manually throw a division in here instead of adding to calc the caption, do an add to the calc the thingy, but then the user is going to see that up here too. I don't want that. I want them to see the division symbol in here too. So what we're going to do is we're going to intercept it.
Okay, in our button equals click, let's go back to our code. Where are you? DoCalc. Right here, right in our DoCalc, in the button equals click, right when it gets to this point here, before it evaluates it, we're going to replace that character - that division character - with an actual division sign. Then the user will never see that. It happens immediately before it gets evaluated.
To do this, we're going to use the Replace function, which looks inside a string and replaces any instance of a particular string inside of that string. So you can say, take that calc string and replace every division symbol with a forward slash.
All right, so right here, that's going to say: calc = Replace(calc, what are we looking for, Alt 246, I can never, it's all right, I always get 246 and 247 mixed up, and what are we replacing it with? A forward slash).
While we're in here, I'm going to save you a minute. While we're in here, we're also going to replace the star, the asterisk, with an x. So we're going to come back over here, and this guy, I just put a little x in there. Everyone knows x is multiply.
So if it sees an x, replace the x with an asterisk. Copy that, paste it, put an x in there, replace that with an asterisk. Okay, I'll zoom in so you can get a better look at the code.
Debug, compile, close it, close it, save it, open it. Five divided by two equals and it works. Look at that. Times three equals. Beautiful. It's beautiful.
You look marvelous. If you're old like me, you know what that's from.
So yeah, there we go. That's going to be part - what part was this - four? Yeah, part four.
Let's do our little end-of-lesson color change. What are we doing today? Let's go with, let's go gray. Yeah, we'll do a dark. We'll make this black. Yeah, that looks good. Let's see, all right, looking good.
What's up next? Part five. We're going to do these memory buttons. Memory button. That's going to be cool.
So that's it. That's your part four. Hope you learned something today. Live long and prosper, my friends. I'll see you next time. What's today? Today, this is going to be Monday's video. So yeah, part five will be tomorrow, Tuesday. Bye.Quiz Q1. What mathematical operation is performed by raising a number to the power of 0.5?
A. Square root
B. Cube root
C. Squaring
D. Multiplication
Q2. How was the square root button implemented in the calculator project?
A. By raising the value to the power of 2
B. By raising the value to the power of 0.5
C. By dividing the value by 2
D. By subtracting from zero
Q3. What is the purpose of using ASCII codes like Alt 251 or Alt 241 in the calculator?
A. To insert code comments
B. To display mathematical symbols on buttons
C. To apply color formatting
D. To assign hotkeys to buttons
Q4. Which string function is used to check whether the first character of the calc text is a minus sign?
A. Left
B. Mid
C. Right
D. InStr
Q5. What does the plus minus button do on the calculator?
A. Multiplies by negative one
B. Always adds a positive sign to the number
C. Toggles the sign of the current value
D. Calculates the absolute value
Q6. What simple error handling method was used in the ButtonNegate code to handle null values?
A. On Error Resume Next
B. Try...Catch
C. Ignore Errors
D. On Error GoTo
Q7. When implementing the square root function, what issue occurred if the value was negative?
A. The calculator returned an error; imaginary numbers were not handled
B. The value was automatically made positive
C. The program crashed
D. The calculator displayed zero
Q8. Why was it necessary to intercept and replace the division symbol before evaluating the calculation?
A. Because the calculator could not visually display the symbol
B. Because the internal evaluation function did not recognize the visual division character as division
C. Because users may accidentally double-enter the symbol
D. Because it would change the button positions
Q9. What function was used to replace division and multiplication symbols in the calculation string before evaluation?
A. Replace
B. Substitute
C. FindAndReplace
D. Switch
Q10. If a calculation string contains an x for multiplication, what does the code replace it with before evaluation?
A. A plus sign
B. An asterisk
C. A forward slash
D. The word multiply
Q11. According to the video, why is learning advanced mathematics helpful for programming, even if the concepts are not used directly?
A. Because all programming languages use calculus syntax
B. Because math trains problem-solving and logical thinking skills
C. Because it is required for all computer programming jobs
D. Because calculators cannot work without advanced math
Answers: 1-A; 2-B; 3-B; 4-A; 5-C; 6-A; 7-A; 8-B; 9-A; 10-B; 11-B
DISCLAIMER: Quiz questions are AI generated. If you find any that are wrong, don't make sense, or aren't related to the video topic at hand, then please post a comment and let me know. Thanks.Summary Today's TechHelp tutorial from Access Learning Zone continues our series on building a calculator in Microsoft Access using VBA. In this fourth installment, I'll be adding some new buttons and features to enhance our calculator form.
If you missed the first three parts, I recommend going back and watching those first so you're up to speed with the current progress. You can find the links to those lessons on my website.
We left off last time by creating an X squared button. At this point, I want to introduce a square root button as well. Mathematically, to find a square root, you simply raise your number to the power of one-half, or 0.5. This approach is almost identical to what we did for squaring a number, except for the exponent.
To add this function, I switch to design view, copy and paste the existing X squared button, and adjust the layout of the form to accommodate additional buttons. I rename the new control ButtonSQRT and set its caption to the square root symbol. If you have trouble finding this symbol, you can use ASCII code 251 by holding down the Alt key and typing 251 on the number pad, or simply use text like "sqrt x" as an alternative.
For the event code behind the button, I take the same logic used for squaring, but instead raise the value to 0.5. This gives us the square root functionality. A quick test confirms that it works: entering 100 and pressing the square root button gives 10; pressing it again on the result yields approximately 3.1.
As an aside, if you want to calculate a cube root, you can use the same concept by raising the number to the power of one-third (1 divided by 3). Just enter something like 1000 and apply the appropriate exponent. These math tricks from algebra definitely come in handy in programming.
A brief aside here: Many students wonder if they'll ever use algebra in real life. I can tell you that as a programmer, algebra is certainly useful. Concepts from trigonometry are also helpful from time to time. Even if you never calculate derivatives, having this mental training in math helps you learn to think logically and solve problems—skills that are invaluable for programmers and anyone who needs to process information.
Next, I want to add a plus/minus button to allow the user to easily convert a value from positive to negative or vice versa, without having to use the keyboard. The idea is that pressing this button places a minus sign at the left of the current input unless there is already one present in which case it removes it. For this I create a new button, name it ButtonNegate, and use the plus/minus symbol, which you can enter with Alt 241.
In the button's click event, I use some basic string functions. First, I check if the left-most character is already a minus sign. If so, I remove it. If not, I add it. This is done using simple string manipulation—if the left character is a minus, I assign the value to everything except the first character; otherwise, I just prepend a minus to the string. This keeps the code straightforward and avoids complications. For minor cases where the control may be null, On Error Resume Next is sufficient. It is safe for simple logic like this, despite what some people might say.
After debugging and compiling, I test the new button by entering a number and toggling its sign back and forth. It works as expected, and the user does not need to use the keyboard at all for this.
When trying to take the square root of a negative number, an error occurs, since our calculator as built does not handle imaginary numbers. This could be an option for a future advanced feature, such as checking if the number is negative, taking the square root of its positive value, and appending an "i." If that's something you'd like to see, let me know.
Next, let's improve the multiplication and division input. The division button in the standard calculator uses the traditional division symbol, which is more familiar for users than the forward slash. In design view, I change the button's caption to the division symbol using Alt 246.
However, when I test division now, an error appears, because the Eval function in VBA does not recognize the division symbol as a valid operator. The solution is to intercept this before evaluation. Just before running Eval, I use the Replace function to search the input string for any division symbols (from the button) and replace them with a forward slash. This way, users see the familiar division symbol, but VBA uses the proper syntax for evaluation.
I also apply this approach to multiplication. When users enter an "x" for multiplication (a traditional calculator character), I use Replace to convert it to the asterisk that Eval expects.
With these replacements in place, I test the calculator again and confirm that the division and multiplication buttons work as intended, using the proper symbols both in the interface and in the calculation logic.
At the end of this lesson, I finish with some aesthetic tweaks, changing the calculator's color scheme to give it a new look. This sets us up for the next part of the series, where we will be looking at implementing memory buttons.
I hope you found this lesson helpful. You can watch a complete video tutorial with step-by-step instructions for everything covered here on my website at the link below. Live long and prosper, my friends.Topic List Adding a square root button to the calculator
Assigning the square root symbol using Alt codes
Writing VBA code to calculate the square root
Testing the square root functionality
Adding a plus minus negate button
Using string functions to add or remove a negative sign
Writing VBA code for the plus minus button
Testing the plus minus button functionality
Changing the division button to use the division symbol
Assigning the division symbol using Alt codes
Handling the division symbol in VBA with the Replace function
Replacing the multiplication symbol with an asterisk for evaluation
Testing division and multiplication with new symbols in the calculator |


