|
|
Free Lessons Courses Seminars |
TechHelp Fast Tips Templates |
Topic Index Forum ABCD |
|
|
||||||
|
||||||
|
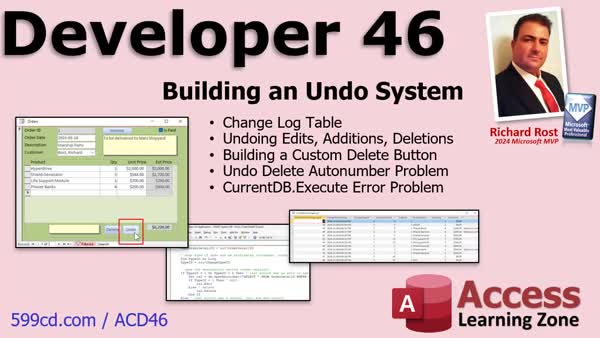
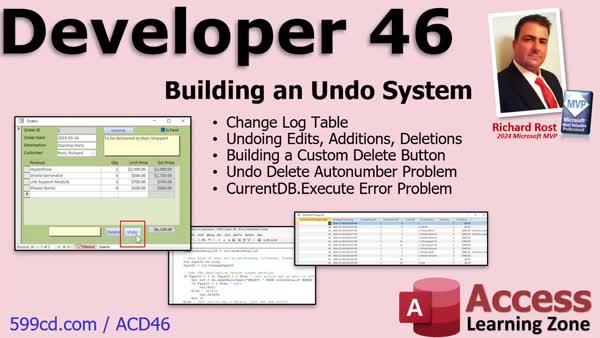
Access Developer 46 Undo System, Change Log, Restore, Error Handling Welcome to Access Developer 46. In this course you will learn how to build an undo system in Microsoft Access by creating a change log table to track multiple types of changes, including edits and deletions. We'll discuss making a custom delete button, handling the challenges of restoring deleted records with autonumbers, and managing error handling with CurrentDb.Execute. You will see how to track change types, update the undo button display based on available actions, and ensure the system works smoothly using recordsets and SQL statements. Lessons
Database FilesLinks
Resources
Lesson SummaryWelcome! Undo System: Change Log, Delete, Errors - Welcome to Microsoft Access Developer Level 46. In this course we will build an undo system for your Microsoft Access database, allowing you to undo multiple changes such as edits and deletions by creating a change log table. We will cover making a custom delete button, discuss challenges with restoring deleted records that use autonumbers, and address how CurrentDb.Execute handles errors. You will learn to track different types of record changes and adjust the undo button display based on available actions. Prerequisites include familiarity with recordsets and SQL statements, as these skills are necessary for the lessons.
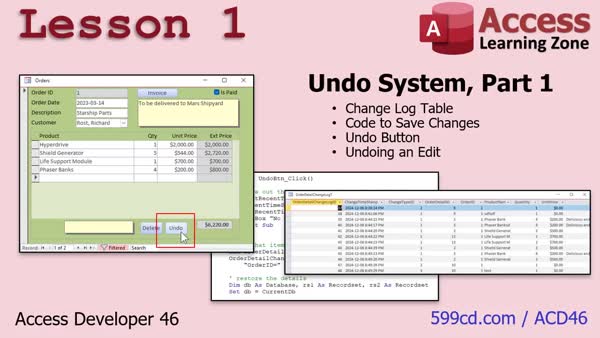
Lesson 1: Undo Change Log With Restore - In Lesson 1, we begin building an undo system for Microsoft Access by creating a change log table to track edits and undos for order details. We will walk through designing the new table, setting up the necessary primary key and timestamp, and writing code to log changes using the Before Update event. I will also show you how to add an undo button and start developing the code needed to identify the most recent change and begin restoring an edited record when the undo action is triggered.
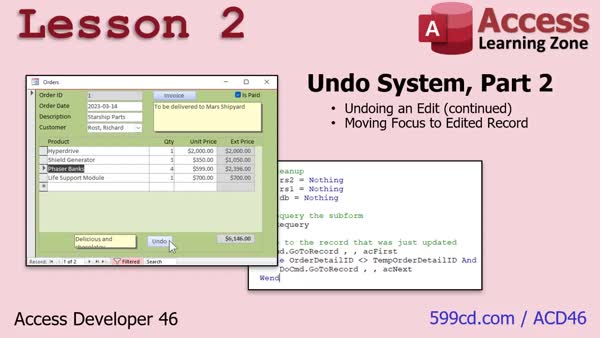
Lesson 2: Undo and Focus on Last Record - In Lesson 2, we continue developing our Undo System by finishing the process for undoing an edit to a record. I will show you how to restore all fields except for the primary keys, clean up the change log, and update the form by moving the focus to the most recently modified record. We will discuss some techniques for navigating records after an undo and why using recordsets is more effective than SQL for this purpose. We will also talk about future lessons where we will handle undoing record additions and deletions.
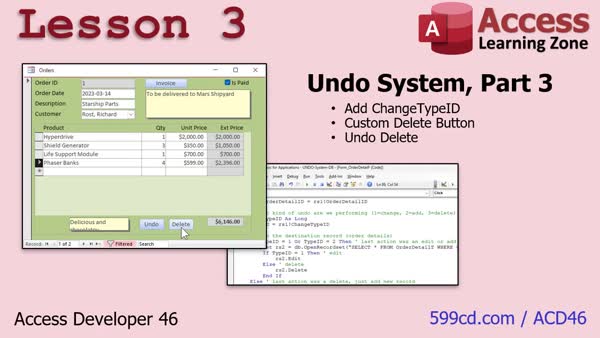
Lesson 3: Track Edits, Add, Delete, Undo - In Lesson 3, we will enhance our Undo System by tracking the type of change made to records - whether it was an edit, addition, or deletion - using a change log with a ChangeTypeID. I will show you how to create a custom delete button to manage deletions manually and ensure proper handling, including saving deleted records to the undo table. We will also walk through updating the undo code to restore deleted records by re-adding them, and discuss how to handle additions, which will be covered in more detail in the next lesson.
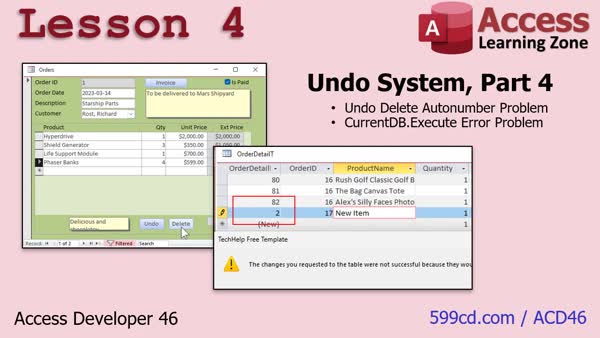
Lesson 4: Fix AutoNumber Errors & Execute - In Lesson 4, we address two important issues with the Undo System 4. First, we will walk through how restoring deleted records with auto numbers in Access can reset the auto number counter and cause duplicate key errors, and I will show you how to fix this by burning an extra auto number. We will also discuss problems with currentDB.execute not reporting errors when inserting records that violate required field constraints, and how using DoCmd.RunSQL can help catch these issues. Finally, we will set up the After Insert event to track added records in the change log for undo purposes.
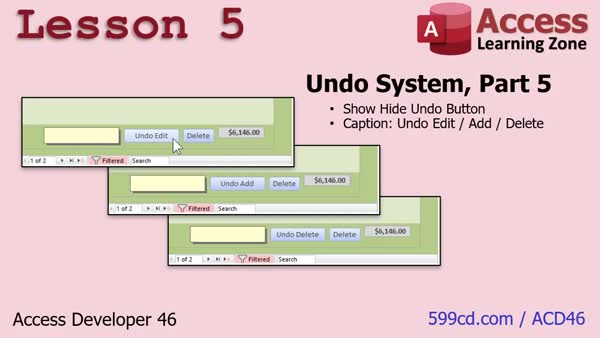
Lesson 5: Show/Hide Undo, Show Last Action - In Lesson 5, we will enhance the Undo System by showing or hiding the undo button based on whether there are actions to undo, ensuring the button is only visible when appropriate. We will also update the undo button's caption to display the type of the last change - edit, add, or delete - allowing users to see what action will be reversed. We will walk through updating form events to handle this logic and briefly discuss ideas for further improvements like adding redo functionality or showing a list of recent changes.
Lesson 6: Access Index, AI Bot, & Help - In this lesson, we will discuss what's next after Access Developer 46, including plans for upcoming lessons like Access Developer 47, regular video release schedules, and the importance of student feedback in shaping future topics. We'll also talk about ways to search for content on the website, using tools like the site search box, Access Index, and the new AI Access Bot. If you need more help, you can post in the forums, and daily TechHelp videos are available covering Access and related topics.
NavigationKeywordsundo system, change log, undo button, custom delete button, restore deleted record, track record changes, autonumber fix, error handling, form events, CurrentDb.Execute, DoCmd.RunSQL, after insert event, undo deleted records, display last action
IntroIn this lesson you will learn how to build a multi-level undo system for your Microsoft Access database. We will create a change log to track edits, additions, and deletions, then add an undo button that can handle each case. I will show you how to use recordsets and SQL to restore previous states, address issues with autonumbers when restoring deleted records, handle errors with CurrentDB.Execute, and make sure the undo button appears only when there are actions to undo. This lesson is designed for users familiar with recordsets and SQL in Access. This is part 46.TranscriptWelcome to Microsoft Access Developer Level 46 brought to you by AccessLearningZone.com. I am your instructor, Richard Rost.Today's lessons are going to cover building an Undo system for your Microsoft Access database. Access allows you one undo. But what if you are working in an order and you want to undo the last three or four things that you did, such as an edit or a delete? That is what we are going to cover in today's class. It is going to involve building a change log so we can track exactly what changes are made to the order. Then, an undo button will have to do three separate cases: undoing edits, additions, and deletions. They are all separate. We will make a custom delete button. We have done that before, but there are some subtleties with this one. Then, we will talk about two significant problems that come up. One is when you delete a record from a table and then restore it with its autonumber. A problem comes up, and we will talk about how to fix that. We will also see how CurrentDB.Execute does not always give you, or really ever gives you, error messages, and we will deal with that problem too. I like to say that the prerequisite for this class is the one before it, but Developer 44 and 45 dealt with customizing the ribbon. A lot of you probably will never need to do that, so I am not going to call these prerequisites. However, you really should have taken Developer 16. That is where I cover recordsets. There will be a lot with recordsets today, and of course, SQL. You should know your SQL, especially how to write SQL statements: insert, update, and delete statements. If you have not taken those courses, I do have a couple of free TechHelp videos to cover the very basics. Here is one on recordsets, and here is one on SQL with Access. This one only covers select statements, but it gives you the gist. I cover all of this stuff in all the previous developer lessons. That is why I say take all these classes and do not skip levels. Then, you will not miss anything. It is currently December 2024, so the current version of Access is Access 2024. In my recommendation, get an Access 365 subscription. I did not update the picture here, but you get the point. The lessons today and all this material should work going back as far as Access 2007. So this stuff is pretty good. If you are using any of the modern versions of Access, it should work. It might even work going back as far as 2003, but I would not try it. If you have questions, just scroll down to the bottom of the page you are watching this on. You can post them right there. If you have questions beyond that, be sure to visit the Access Forum on the website and chat with the guys. We have great moderators on the website. All right, let's take a closer look at exactly what is covered in Access Developer 46. In lesson one, we are beginning our undo system. We are going to build a change log table so we can track the undos and the edits in the table. We will make the code to save those changes into the log table. We will build our undo button and begin writing the code to actually restore that edited record when the user clicks undo. In lesson two, we are continuing with our undo system. We are going to finish undoing an edited record. Once the change is made, we will move the focus on that record so the user can see that was the last one modified and what was undone. In lesson three, we are going to track what type of change it was, whether it was an edit, an addition, or a deletion. Then, we will build our own custom delete button, because I like to handle it myself instead of relying on the built-in events for delete. We will handle undoing a record deletion by adding it back to the order. In lesson four, we are going to address two problems that will come up, though one has already come up and we just did not realize it. One is the problem that happens with autonumbers when you insert an autonumber back in the table. We will see how that is fixed. We will also talk about a problem that happens with CurrentDB.Execute and it not telling you that there is a problem. That is coming up in this lesson. In lesson five, we are going to show or hide the undo button based on whether or not there is anything to undo. If you open up a new record, you do not want to see an undo button when there is nothing to undo. We will make the undo button show what the last action item was. Was it an edit? Do you have to undo an add? Do you have to undo a delete? That will be pretty cool. We are going to cover that in lesson five. QuizQUIZ FOR ACCESS DEVELOPER 46LESSON 1: Q1. What prompted the creation of the undo system discussed in Developer 46? A. Microsoft's new feature updates B. A need for multi-user data handling C. A question from a moderator about Microsoft Access D. Problems with Windows rollback features Q2. How many undo actions does the default "undo" control in Microsoft Access allow? A. Unlimited B. Two C. Three D. One Q3. What type of table is proposed to track changes in order details for an undo system? A. Historical archive table B. Order detail update table C. Order detail change log D. Main transaction table Q4. Why is a date-time timestamp important in the order detail change log table? A. To identify when the database was last backed up B. To keep track of the user's login time C. To know the order in which changes were made D. To verify the age of the records Q5. What event is used to trigger saving information to a change log before changes are committed in the order detail table? A. After Insert B. After Update C. Before Delete D. Before Update Q6. How are multiple changes for the same order detail ID handled in the change log? A. By using multiple tables B. By using individual databases C. By having multiple entries with a unique change log ID and timestamp D. By overwriting the previous changes Q7. What command is used to insert a record into the order detail change log? A. INSERT INTO ... SELECT ... FROM B. UPDATE ... SET ... WHERE C. DELETE ... FROM D. ALTER TABLE ... ADD Q8. In a multi-user environment, how should access to orders be managed to prevent conflicts with the undo system? A. Use a shared access mode for all users B. Allow all users to make changes simultaneously C. Lock orders for a single user when changes are being made D. Implement a rolling backup system Q9. What is the first step in getting the most recent change for an order to implement the undo function? A. Use the DCount function to count recent changes B. Use the DMax function to find the latest timestamp C. Use the DSUM function to compute the change total D. Use the DMin function to find the first timestamp Q10. How should the code be structured to restore the details of an order from the change log back into the order detail table? A. Use a simple SQL query to restore all fields B. Open a record set and selectively copy over the required fields C. Directly overwrite the existing record D. Export the log to a CSV and re-import it Answers: 1-C; 2-D; 3-C; 4-C; 5-D; 6-C; 7-A; 8-C; 9-B; 10-B. ------------------------------------------------------------------------------- LESSON 2: Q1. What was the main task being continued in lesson two? A. Creating a new record B. Finishing the undo system C. Implementing a search filter D. Designing a new user interface Q2. Which operation are we performing on the order detail table? A. Inserting new records B. Deleting all records C. Editing and undoing changes D. Exporting records to a CSV file Q3. What is the purpose of setting rs2.productname to rs1.productname? A. To compare product names in different tables B. To copy and restore the product name in the undo operation C. To create a new, combined product name D. To display the product name on the form Q4. Why is a record set preferred over an SQL insert statement when copying large amounts of information? A. To avoid accidental data insertion B. Because SQL cannot handle large text fields C. To simplify the handling of special characters in text fields D. Due to SQL syntax limitations Q5. What must be done after updating and closing rs2 to clean up the process? A. Send a confirmation email B. Delete the record from the change log C. Restart the system D. Archive the order detail table Q6. Which command is used to update the form after all changes are made? A. Me.refresh B. Me.recalculate C. Me.requery D. Me.reload Q7. How is the recently changed record located if the ID is not visible on the form? A. By guessing the record position B. By looping through the records until the correct one is found C. By using a timestamp search D. By asking the user to input the ID Q8. What is stored in the variable temp_order_detail_id and why? A. The full database connection string, to optimize connection reuse B. The user's previous search query, to remember user preferences C. The order_id, to create a backup of changes D. The order_detail_id, because it is needed after rs1 is closed Q9. How does the lesson suggest handling a situation where the loop might not find the desired record? A. By displaying an error message B. By sending an alert to the developer C. By exiting the loop if it reaches a null order_detail_id D. By restarting the loop from the beginning Q10. What is the focus of lesson three as mentioned in the video? A. More advanced filtering methods B. Adding user authentication C. Restoring records after they are added or deleted D. Designing a new order form layout Answers: 1-B; 2-C; 3-B; 4-C; 5-B; 6-C; 7-B; 8-D; 9-C; 10-C. ------------------------------------------------------------------------------- LESSON 3: Q1. What is the default change type ID value when a new record is added in the change log? A. 0 B. 1 C. 2 D. 3 Q2. Why is a custom delete button created in the tutorial? A. To handle changes in the table B. Because Access does not have a good on delete event C. To handle multiple table modifications D. To simplify the delete confirmation process Q3. Which VBA constant is used to confirm a delete action with a question dialog? A. VBYesNoCancel B. VBCritical C. VBDefaultButton2 D. VBSNoCancel Q4. How can a record be permanently deleted in Access from the tutorial's context? A. By using SQL DELETE command B. Using delete record command via do command.run command ACCMDDeleteRecord C. Deleting it manually from the DB table D. By setting the change type ID to 3 and saving Q5. What is the purpose of copying the deleted record into an undo table before deletion? A. To keep a record of deleted entries B. To allow the user to restore it if they undo the deletion C. For compliance and auditing purposes D. To save memory space in the main table Q6. Why is setting the order detail ID important when undoing a deletion? A. To avoid conflicts in key constraints B. To ensure record uniqueness C. So the deleted record can be restored with its original ID D. To maintain a history of changes in a clear sequence Q7. What happens if the user confirms the deletion with the custom delete button? A. The app gives a confirmation message but no deletion occurs B. The record is copied to a log table and removed from the main one C. The record is removed entirely with no trace D. The change type ID is reverted to 0 Q8. In what scenario is it possible to set an auto number to an order detail ID programmatically? A. When performing a bulk update B. When the record was previously deleted and the ID doesn't exist C. During an initial database setup D. In the case of primary key setting for a new table Q9. Which conditions trigger the undo operation to add a new record? A. If the change type ID equals 1 B. If the change type ID equals 2 C. If the change type ID equals 3 D. If the change type ID equals 0 Q10. Leveraging what feature allows the undo button to handle various types of changes? A. Creating multiple undo buttons for each change type B. Using a loop to process each change sequentially C. Implementing a case structure based on change type IDs D. Programmatically creating tables for every type of undo operation Answers: 1-B; 2-B; 3-D; 4-B; 5-B; 6-C; 7-B; 8-B; 9-C; 10-C. ------------------------------------------------------------------------------- LESSON 4: Q1. What issue is discussed in this lesson regarding auto numbers in Access? A. Auto numbers must be manipulated manually in Access because they are visible to users. B. Auto numbers are for user-oriented identification, making them crucial for data entry. C. Access resets the auto number counter when a number is restored, potentially causing duplicates. D. Auto numbers can be cycled back to the start if Access runs out of available numbers. Q2. Why is manually inserting and deleting a dummy record suggested as a solution for the auto number problem? A. It helps purge unused records from the database. B. It allows users to reset all fields manually. C. It prevents the error of creating duplicate records. D. It re-establishes the auto number sequence by consuming the next available number. Q3. What alternative SQL feature does the speaker mention is available in SQL Server but not in Access regarding auto numbers? A. Auto increment property B. Primary key designation C. Seed property for resetting auto numbers D. Foreign key constraint Q4. What is the issue with using current DB.execute according to the lesson? A. It always throws detailed error messages for every SQL command. B. It bypasses Access's query engine and does not provide error messages for validation issues. C. It automatically runs every query twice, leading to data duplication. D. It is slower than using manual table interactions for inserting data. Q5. What is the after insert event used for in this context? A. To change the design of the table after a record is inserted. B. To log changes made to a record after it is added to a table. C. To delete all records in the table after a new one is added. D. To notify users of record additions using a pop-up message. Q6. Why does the lesson emphasize not relying on auto numbers for anything other than relationships? A. Because auto numbers are meant for user identification purposes. B. Auto numbers are unreliable and prone to deletion by users. C. They are internally used by Access, and there's a risk of mismanagement if used for identification. D. Auto numbers reset automatically every time a database is restarted. Q7. How does the speaker suggest resolving the lack of error messages when using current DB.execute? A. Run additional diagnostic tools provided by Access. B. Switch to using do command run SQL, which engages Access's query logic checking. C. Enable a debugging mode within current DB.execute. D. Leverage manual code rewriting to catch potential errors. Q8. What two major problems does this lesson aim to fix? A. Inconsistent font sizes and slow query execution. B. Auto number duplication and lack of error reporting by current DB.execute. C. Database connectivity issues and outdated access permissions. D. Data loss during undo operations and incorrect foreign key assignments. Answers: 1-C; 2-D; 3-C; 4-B; 5-B; 6-C; 7-B; 8-B. ------------------------------------------------------------------------------- LESSON 5: Q1. In the context of the video tutorial, when should the undo button be hidden? A. When a new record is added. B. When there are no changes to undo in the change log. C. When the form is first opened. D. When a record is updated. Q2. Where is the best place to update the visibility of the undo button as per the tutorial? A. On Open event. B. On Current event. C. On Load event. D. On Close event. Q3. What is the purpose of using the DLookup function in this tutorial? A. To count the number of records in the table. B. To find the Order ID in the change log. C. To retrieve the ChangeLog ID for the current order. D. To delete unwanted records from the table. Q4. What programming concept was demonstrated to avoid duplicated code when locating the most recent change for an order? A. Creating a new table for change logs. B. Using global variables. C. Writing a Private Function to encapsulate the logic. D. Using multiple subroutines for similar operations. Q5. How is the subtitle of the undo button determined in the tutorial? A. It is set to a default subtitle of "Undo Last Change." B. By using Select Case based on the ChangeTypeID. C. By querying the database for the latest field change. D. Through user input during the operation. Q6. What optional feature was suggested to give users more context about undo operations? A. A feature that displays detailed logs in a message box. B. A redo button to reverse undo actions. C. A pop-up table showing the list of recent changes. D. Automatic email notifications for each change. Q7. What are some proposed improvements discussed for the undo feature in the video? A. Adding a clear log button to reset changes. B. Implementing a redo feature alongside undo. C. Automatically locking records when they're changed. D. Displaying a history of user actions in a timeline. Q8. How does the video tutorial propose dealing with already undone changes if a redo feature is implemented? A. Deleting the entries from the current change log. B. Ignoring records with a new status field indicating they are undone. C. Adding separate redo buttons for each type of record change. D. Automatically updating records based on user preferences. Answers: 1-B; 2-B; 3-C; 4-C; 5-B; 6-C; 7-B; 8-B. ------------------------------------------------------------------------------- DISCLAIMER: Quiz questions are AI generated. If you find any that are wrong, don't make sense, or aren't related to the video topic at hand, then please post a comment and let me know. Thanks. SummaryToday's video from Access Learning Zone focuses on creating a robust Undo system for your Microsoft Access database. Normally, Access only lets you undo your last action, but what happens if you need to roll back more than one change, such as editing or deleting several records within an order? In today's lesson, I am going to show you how to implement a change log to track all modifications to orders. This will allow you to undo not just edits, but also additions and deletions, each handled separately.We will begin by designing a change log table that will keep a record of all changes. I will walk you through setting up the logic so that every edit, addition, or deletion is logged appropriately. Then, we will create an Undo button, which must handle reversing each of these different action types. Specifically, we will add a custom delete button, which we have covered before, but this version will include a few new intricacies necessary for our undo system. There are two significant challenges that we need to address. The first is an issue with autonumbers. When you delete a record and later try to restore it with the same autonumber, complications can arise. I will explain exactly why this occurs and how to correct it. The second challenge is that running commands with CurrentDB.Execute does not provide error messages if something goes wrong. I will show you how to detect and resolve these situations as well. To be prepared for this class, you should be comfortable with recordsets and writing SQL queries in Access, particularly Insert, Update, and Delete statements. Developer Level 16 covers recordsets in detail, which is fundamental for what we will be doing today. If you have missed these topics or want a refresher, I have some free TechHelp videos available that cover the basics of recordsets and SQL, although the SQL video introduces only Select statements. The concepts and code in this lesson will work in Access 2024 and older versions, all the way back to Access 2007. I recommend getting a Microsoft 365 subscription for the latest features, but as long as you are using a modern version, you should have no issues. If you run into questions, you can post them at the bottom of the page where you are watching this video, or drop by the Access Forum on my website where our community moderators can help you out. Let me outline what we will cover in this lesson, Access Developer 46: In the first lesson, we start building the undo system by setting up a change log table. We will write the code necessary to store changes in this log and begin the work to create an Undo button, including writing the logic to restore an edited record. The second lesson continues with fine-tuning the Undo system. We will finish the process for undoing edits, ensuring that the user interface reflects the last modified record, so it is clear what has been changed or undone. Lesson three will have us tracking exactly what kind of change was made to each record, including edits, additions, and deletions. This is also where we implement a custom delete button that handles deletions in a way that supports undo, and then we write the functionality to restore deleted records back to an order if the user requests. In lesson four, we tackle the two major problems mentioned earlier. First, I will show you how to manage restoring deleted records that use autonumbers, addressing the issue this can cause. We will also discuss the lack of error feedback from CurrentDB.Execute and how to overcome this challenge. Lesson five covers making the Undo button dynamic. The button will only be visible when there is actually something that can be undone, and it will indicate what the last action was - whether it was an edit, an addition, or a deletion. This feature helps keep your interface cleaner and more informative for the user. If you want step-by-step instructions and a complete walkthrough of everything we discuss here, you can find the full video tutorial on my website at the link below. Live long and prosper, my friends. Topic ListBuilding a change log table for tracking editsSaving changes to the change log table Creating an undo button to restore edited records Restoring focus to the last modified record after undo Tracking change types: edit, addition, deletion Building a custom delete button for records Undoing record deletions by restoring deleted records Handling autonumber issues when restoring deleted records Addressing error handling with CurrentDB.Execute Controlling visibility of the undo button based on changes Displaying last action type on the undo button |
||||||||||||||||||||||||||||||||||||||||||||||||||||||||||
|
| |||
| Keywords: undo system, change log, undo button, custom delete button, restore deleted record, track record changes, autonumber fix, error handling, form events, CurrentDb.Execute, DoCmd.RunSQL, after insert event, undo deleted records, display last action PermaLink How To Build a Multi-Level Undo System With Change Log and Custom Delete Button in Microsoft Access |