Fitness 72
By Richard Rost

 4 months ago
Build a Dynamic Menu System Using a List Box, Part 1 In this lesson, we begin building a dynamic, data-driven menu system in Microsoft Access using a list box, eliminating the need to manually add or rearrange menu buttons when changes are made to the database. I demonstrate how to create a menu table with hierarchical relationships, set up the form with a list box, and write basic VBA code to open forms based on menu selections. We discuss how to structure the menu for main items and submenus, and set up the list box to only display top-level menu items. Further sub menu functionality will be addressed in the next lesson. MembersThere is no extended cut, but here is the file download: Silver Members and up get access to view Extended Cut videos, when available. Gold Members can download the files from class plus get access to the Code Vault. If you're not a member, Join Today!
PrerequisitesLinksRecommended CoursesUp Next
Keywords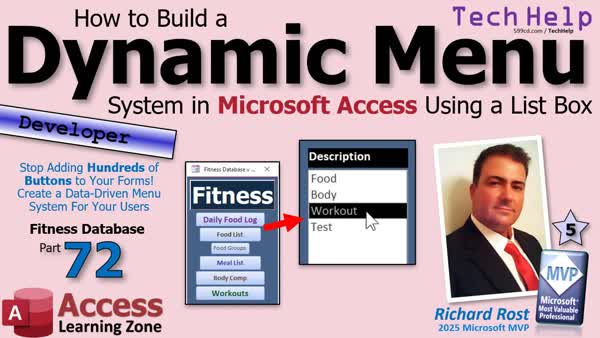 TechHelp Access, dynamic menu, menuing system, list box menu, data-driven menu, hierarchical menu, menu table, sub menu, parent ID, self join relationship, sort order, object to open, form navigation, openForm VBA, on click event, menuID, VBA menu code
 Subscribe to Fitness 72
Get notifications when this page is updated
Transcript Ever get tired of constantly adding and rearranging buttons on your menus every time your database changes? Welcome to another TechHelp video brought to you by AccessLearningZone.com. I am your instructor, Richard Rost.
Today we are going to start building a dynamic menuing system in Microsoft Access using a list box so you do not have to add hundreds of buttons to your forms. We are going to create a data-driven menuing system that will pull the data right out of a table. You can have menus and sub menus and menus under those sub menus and more.
Now yes, this is part 72 of my fitness database series, but if you do not care about fitness, that is fine. This is about building a good database, and you do not even have to have watched parts one through 71 to benefit from the dynamic menu system. We are going to build this from scratch, so whatever database you are working with, it does not matter. You can just throw this right in there.
This is a developer level video though, so we are going to be using some VBA. If you are jumping in midstream and you have not watched the rest of the series, at least go watch my intro to VBA video. You have to be up to speed and know some basic VBA.
Let us get into it.
After yesterday's video when we made the workout stuff, we made the sub menu and then another menu. I got to thinking that it would be better to make a dynamic menu on the main menu here, and I have been thinking about doing this.
I did a video about this a few years ago. It is this video about the main menu where I show how to do it with buttons and then how to do it with a list box. Let us take this one step further. Instead of just a single list here, let us make it hierarchical. I do not know how to pronounce it, like array and array.
Instead of this mess, we will replace this with this. This is my mockup I did earlier. Here is our main menu. You have got food because this is all food. We will do a body menu for body composition and whatever else we want to throw on there. We will do workouts because here we are going to have workouts, routines, and a bunch of other stuff.
If I open the food menu, it goes to the food menu. You have got the daily food log, your food list, your food groups, your meal list. That is all under that menu.
If you want to go back up, click the thing up top, back to the main menu, go to your workouts menu, exercises, and so on. That will replace all of this and having to keep making buttons, and you can adjust this if you want without having to make design changes to the database. That data is going to be fed from a menu table.
Let us build that in today's class.
Here we are back in our database. Let us create a table to store the menu items. Create, table design, menu ID, then we are going to have a parent ID. The parent ID is a number that points back to the menu ID. That is called a self join relationship. If you want to learn more about self join relationships, go watch my genealogy database because you can do the same thing.
You can have a self join. You can have two parent IDs, a mother ID and a father ID, and it links back to another person, and that person can have parent IDs and so on. That is the whole basis behind a genealogy database.
Now, a sort order inside each menu so you can control the order that they are in, a description for text, notes. Of course, if you want to put notes on the bottom about what the menu is about and all that stuff. Then a field we are going to call object to open, and that will be short text. That will be the name of a form or, as I show in the other database, you could do reports in here too, or you can open tables or queries. We are just going to stick to forms for today.
All right, let us save this as menuT. Yep. Let us put some sample data in here. Let me move this over so we can see what is on the menu right now.
I am going to define it so that the parent ID of zero means that is the main menu. Sort order one, description, let's do a food menu. Then we will do a body menu. Then we will do a workouts menu. All right, that is the main menu. Have those three items.
Now, parent ID one. What is under the food menu? Sort order one. We have got our daily food log. That will be up top. We will leave the notes blank for now. The object to open, what is the form name for that one? Well, that is the foodLogF.
Parent ID one, next item on the food list is going to be the food list, and that is the foodListF. Next, we have the food groups, and that is going to be the foodGroupF. Finally, the meal list, and that is just mealF.
That is our food menu.
Now, the next menu, menu two, will be the body menu. Right now we have only got one thing in there. We might add more later. That is our body composition menu, and that opens up the bodyCompF.
Menu three is going to be workouts. The first item for that will be the exercises. That will show the one we just made in the last video. We are going to open it right to the muscleGroupExerciseF.
We are going to make the weight plates on its own form. So we will do the weight plates thing, and that will be a to be to make late. We will make a form for that later.
Now you could do menus under these too. We will test all that when we get to it. For now, this is a nice, simple start.
There is our main menu. See how this works? Parent ID zero, that is our main menu top level. Second level under food will be that. Second level under body comp is just that. Second level under menu three is that.
If you want, you can have another level under exercises. In fact, you could break up food, so you have got the food log separate from the food list and the food groups. The meals you can put wherever you want with this. I think this is nice and simple for now.
Close that, we have got our table all set.
Now let us put a list box on the main menu. Make this a little bigger. We are going to slide it in here. We are going to remove these buttons, but for now, let us just do them side by side. Form design, find me a list box, which is right there. Drag it right like that.
Going to get the value from a table or query. Next, we are going to use our menuT. Next, what do we want for the fields? We want the menuID, the parentID, we need the sort order. You know what, let us just bring everybody over. Let us bring everybody to the party.
Next, what do you want to sort by? The sort order, obviously. Next, what is it going to look like? We do not need to see the key column. Hide that. Do not need to see the parent. Do not need to see the sort order, but we want them in there. I really do not want to see the object to open. So, really, the only visible column is the description column. But we need everything else in there so we can use it, so we can decide what to do in our code.
This is fine for now. Next, label description is fine, then finish.
There is our list box. I am going to make it a little bit bigger. Let us put this up here. In fact, let us make it so we can actually see that. Let us go with a black background and white text. Maybe bold it. Let us make all of this bigger so it is menu-like. Let us go up to maybe 14 point. That looks better.
Got to make it look good.
Let us give this guy a good name, open this up. I do not like List127. Let us call this the menuList. Let us clean up that row source.
Here is the row source. Shift F2 to zoom in. That is a bit messy. Since we only have one table, we do not need all the menuTs everywhere, and since we are good little programmers, when we do not have spaces, we do not need the brackets. We can clean this up a lot and make it easier to read as well. Like this, like this, like that. Like this.
From menuT, order by sort order. We technically do not need that semicolon.
That is the simplest one.
Now, here is what we are going to do. I want you to copy this to your clipboard, and in fact, let us throw this on Notepad. Open up your Notepad. Just drop that in there for now. We are going to put it in our code in just a minute, but for now, it is okay where it is at.
Hit OK. Save it. Close it. Open it. This guy comes up in our startups. That is fine. Just close that for now.
Looks good. I am getting everything in here though, so now we need to make it so that when this form opens, we only see the stuff on the main menu. I do not want to see all of the items.
Let us go back into that row source. These are always easier to work with if you put them on multiple lines. They do not stay. I wish they stayed, but they do not. They are easier to work in here.
Select those fields from the menuT where the parentID equals zero. Again, copy this to your Notepad. Let us put that in our notebook. Always keep this Notepad up to date with your updated SQL.
Looks good. Hit OK. Save it. Close it. Open it. Get rid of this guy. I am going to move this guy over here. Get him out of the way.
There we go. Food, body, workouts - looks good.
Now we have to make it so that when we click on one of these, it moves to the next menu.
And speaking of moving, move your little butt over and click on that like button right now. Hit the like, hit the subscribe, all that good stuff. It helps the channel out, helps me out. Go do it.
I have to throw in the little intermissions in there because I know a lot of you do not remember to click on the like when you are watching YouTube videos either. I like it when the creators remind me, hey, hit the like button. It really helps. It tells the YouTube algorithm that you are enjoying the video, and it helps my video go out to more people. So it helps me out.
So let us go into this guy. This is the menuList, and let us look for the events. Let us find its on-click event. You can use click or you can use double click, whichever one you prefer. I like to use click because too much double clicking gets annoying after a while.
Let us go into the on-click event for that guy.
All right, here he says this little bit. There we go.
On-click for the menu.
Now, what we are going to do is say, if this guy has an object to open value, that means we are going to open that form. If not, it is a menu item, and then we are going to open that menu.
Now, where is object to open? It is right there. So it is in column zero. Remember, they start at zero: one, two, three, four is the value.
Since it is part of a list box, it is going to either be a value or it will be an empty string. It will not be null because it is part of a list box. You could use DLookup if you prefer. You do not have to put all this stuff in the box. You could DLookup all this stuff. For simple things like this, I like loading them in the box.
So, what we are going to do is we are going to say:
Dim objectToOpen As String
objectToOpen = menuList.Column(4)
Then we are going to say, if objectToOpen is an empty string, then open another menu. We will do that in a minute. Otherwise, open a form:
DoCmd.OpenForm objectToOpen
End If
That is our code so far.
Save it. Debug compile. Go back over here. Close it. Open it.
Now, unfortunately, all of these are menu items, but you should be able to click on them and nothing happens.
Let us sneak something in here just to test it. Let us go to the menu table. Where are you, menu? Just to test it, let us put something on the parent. Sort order, put it at the bottom, so four. We will call this the test, and we will just open up the meal. Just to give it a test.
Close it. Open it. Let us hit test. There is our meal form. So that part is working pretty well. Save it.
These guys do not have code behind them yet. If you want to test them, you could just put a message box in here when you hit the button. It is all working with what we have so far.
Now we need to make it so that if we have to open up another menu, then we are going to say openMenu menuList.Value, because the menuList value is what? It is column zero, so it is the menuID. Now we are sending to the openMenu subroutine the menuID, so it will know that it has to open whatever we are on. It is open menu two, right, and then we can load the items from menu two into the menu.
We will do that in tomorrow's video. So tune in tomorrow, same bat time, same bat channel. If you are a member, you can watch it right now because I am going to record a bunch of these today since I have some time and I want to get them done. I really love this stuff.
So we have got our dynamic menuing system started. In the next video, we will work on opening up those sub menus.
Post a comment down below. Let me know what you thought about today's video. That is going to do it for your TechHelp video for today. I hope you learned something.
Live long and prosper, my friends. I will see you next time.Intro In this lesson, we begin building a dynamic, data-driven menu system in Microsoft Access using a list box, eliminating the need to manually add or rearrange menu buttons when changes are made to the database. I demonstrate how to create a menu table with hierarchical relationships, set up the form with a list box, and write basic VBA code to open forms based on menu selections. We discuss how to structure the menu for main items and submenus, and set up the list box to only display top-level menu items. Further sub menu functionality will be addressed in the next lesson.Quiz Q1. What is the main purpose of the dynamic menuing system described in the video?
A. To allow users to easily input data into tables
B. To create a data-driven, hierarchical menu system using a list box
C. To sort records in a table dynamically
D. To replace Access with a different database system
Q2. What data structure is used to store the menu items for the dynamic menu system?
A. A query
B. A macro
C. A table called menuT
D. A report
Q3. What is the role of the parentID field in the menu table?
A. It identifies the parent form for each menu
B. It creates a self join relationship to indicate hierarchical structure
C. It links to a different table for menu security
D. It stores the menu description
Q4. Which of the following is NOT a recommended field in the menuT table as discussed?
A. menuID
B. parentID
C. sortOrder
D. userPassword
Q5. How does the user navigate between main menus and submenus in the system?
A. By using ribbon tabs
B. By clicking on list box items that represent menus and submenus
C. By double clicking records in a table
D. By running macros
Q6. What is used to display the menu options to users instead of static command buttons?
A. A continuous form
B. A navigation form
C. A list box
D. A combo box
Q7. What is the function of the "object to open" field in the menu table?
A. To store the order of menu items
B. To provide notes about the menu
C. To hold the name of the form to be opened when the item is selected
D. To indicate user permissions
Q8. What does a parentID of zero represent in the context of the menu system?
A. The lowest submenu
B. Records with no parent menu, i.e. main menu items
C. An invalid record
D. A hidden menu item
Q9. Why does Richard prefer to load data into the list box as columns instead of using DLookup for menu item details?
A. It speeds up data loading for dynamic menus
B. DLookup only works with reports
C. List boxes cannot display multiple columns
D. It limits the menu to only three levels
Q10. What event is used to trigger opening a form or submenu from the list box?
A. AfterUpdate event
B. DoubleClick event
C. Click event
D. Form Open event
Q11. When a user clicks a menu item with a non-empty "object to open" field, what happens?
A. No action is taken
B. The form named in "object to open" is opened
C. The database closes
D. A report is generated
Q12. How does the dynamic menu system make future modifications easier compared to using static command buttons?
A. All menu items are hard-coded in VBA
B. Buttons are created automatically on form load
C. Menu items are driven by data in a table so changes do not require form redesign
D. It restricts users to only a single menu level
Q13. Why is the sort order field important in this menu system?
A. It makes the menu table more secure
B. It controls the display order of menu items in the list box
C. It determines which form will open
D. It links menu items to users
Answers: 1-B; 2-C; 3-B; 4-D; 5-B; 6-C; 7-C; 8-B; 9-A; 10-C; 11-B; 12-C; 13-B
DISCLAIMER: Quiz questions are AI generated. If you find any that are wrong, don't make sense, or aren't related to the video topic at hand, then please post a comment and let me know. Thanks.Summary Today's video from Access Learning Zone focuses on building a dynamic menu system in Microsoft Access, using a list box as the interface. This will allow you to simplify your forms and avoid the hassle of constantly adding or rearranging buttons as your database grows or changes. By using this approach, you can create menus, sub-menus, and even deeper menu structures without cluttering your forms or having to redesign them every time you want to add options.
Even though this is part 72 in my fitness database series, all of the techniques shown here are universal. You do not need to have followed any of the earlier parts of the series or even care about fitness databases at all. The main focus is on how to build a versatile and efficient Access database, and you can incorporate these ideas into any database you work with. We are creating this together from scratch so you can adapt it to your own projects as needed.
Keep in mind, this is a developer-focused lesson, so we will spend some time working with VBA. If you are new to VBA, I encourage you to check out my introductory video first, as you will need to be familiar with the basics to follow along today.
After working on the workout section of the database in the previous video, I realized there should be a better way to handle the main menu than continually creating new buttons. I have shown something similar with buttons and list boxes in older videos, but now I want to take it further and introduce a hierarchical, data-driven menu system using a list box. Hierarchical in this context means that menu items can have sub-menus beneath them, and those can have their own sub-menus, creating a flexible organization.
To give you an idea of the end goal: instead of dozens of buttons on your form, you will see a list-driven menu where, for example, the main options are Food, Body, and Workouts. When you select Food, you will see related options such as the daily food log, the food list, food groups, and your meal list. You can easily go back to the main menu and navigate to other sections the same way. All of this is controlled by data inside a table so adding, rearranging, or removing menu items is simple and does not require redesigning forms.
Let's start setting this up. The first step is to create a table that will store the menu items. Each menu item has a menu ID and a parent ID. The parent ID determines the menu hierarchy: if it is zero, that item appears at the top level. If it is a different value, it is a sub-menu of the menu item with that ID. This is a standard self-join relationship, which is a common database concept and something I cover in my genealogy database videos.
Besides the menu and parent IDs, the table also contains fields for sort order (so you can control the order in which items appear), a description, notes, and an "object to open" field. The last one is important: it tells the system what should happen when you select the item (for example, which form to open). You could use this for reports, tables, or queries too, but today we will stick to forms.
After designing the table (which I call menuT), I enter some sample data. The main menu items, with a parent ID of zero, might be Food, Body, and Workouts. Under these, a parent ID corresponding to the main menu item connects sub-menu items: for instance, daily food log, food list, food groups, and meal list under Food. Other menus like Body and Workouts can have their own sub-items as well. This setup allows you to go several levels deep if needed.
With the table ready, it's time to set up the list box on the main menu form. I add a list box that will display menu items from the menuT table. In the list box's properties, I set it to get its data from the menuT table and bring in all the fields. I make sure that only the description is visible, but all other columns (IDs, sort order, object to open, notes) are there for use in the background. This makes the list box easy to style and lets you easily adjust its look with formatting such as background color, bolding, and font size.
Naming conventions are important, so I change the default name (like List127) to something meaningful, such as menuList. I also clean up the row source SQL statement, making it easier to read and removing any unnecessary bits, such as table prefixes or brackets.
To make the main menu work as designed, I set the row source so it only displays items with a parent ID of zero. Now, when the form opens, users will only see the top-level menu options.
The next important feature is enabling navigation. When a user selects an item in the list box, the program should either open a form (if the item is a final destination like a data entry form) or show the next level of menu items (if it is a sub-menu). To do this, I set up an event handler for the list box's click event.
In the event procedure, I check if the selected item has an "object to open" value. If it does, the appropriate form opens. If it doesn't, that means it is a menu with more options underneath, so the menu system will refresh the list box to display those sub-menu items. For simple cases like this, loading the necessary fields directly into the list box is efficient. But you could also use DLookup if you prefer to keep things even more dynamic.
I also demonstrate how to test opening a form from the menu by adding a quick test entry in the menuT table. This helps confirm that the code is working properly.
That's the foundation of our dynamic menu system. Next, I'll show you how to extend this system to handle loading sub-menus when a menu item is selected. If you are interested in following along with the next step, be sure to check out the next video.
As always, you can watch a complete video tutorial with step-by-step instructions covering everything discussed here on my website at the link below.
Live long and prosper, my friends.Topic List Creating a table to store menu items
Designing menuID and parentID fields
Implementing a self-join relationship in the menu table
Assigning sort order for menu items
Adding description, notes, and object to open fields
Populating sample menu data including submenus
Setting up hierarchical menu structure with parentID
Configuring a list box to display menu items
Filtering list box to show main menu items using SQL
Customizing list box appearance and naming
Cleaning up and optimizing the list box row source SQL
Writing VBA to handle list box item selection
Using the list box column property to get field values
Opening forms dynamically based on the menu selection
Testing form opening from menu items
Calling subroutines to open submenus based on selectionArticle If you are tired of constantly updating and rearranging buttons in your Microsoft Access menus every time your database changes, you might benefit from a dynamic, data-driven menuing system. Instead of having dozens or even hundreds of static buttons on your forms, you can create a single menu system that adjusts automatically based on your data. In this tutorial, you will learn how to build a dynamic menu using a list box that pulls its menu items straight from a table in your Access database. This system supports hierarchical menus, meaning you can have menus, submenus, and menus branching off even further as your database evolves.
Before you start, you should have some familiarity with VBA in Access, as this method uses some basic programming. If you are new to VBA, it is a good idea to review introductory materials first, as understanding how to use events and basic code is important for getting the most out of this system.
To begin, you need to design a table to hold your menu structure. Open your database and go to the table design view to create a new table, which we will call "menuT". The fields you need are as follows: an auto-incrementing MenuID (your primary key), a ParentID (which relates each menu item to its parent menu item for supporting hierarchy), a SortOrder (so you control the order in which menu items appear), a Description (the text the user will see), Notes (optional for additional description), and the crucial ObjectToOpen (which will be the name of the form to open when this menu item is selected).
The ParentID field is the key to how the hierarchy works. A ParentID of zero means the item is a top-level main menu item. If a menu item's ParentID matches the MenuID of another item, it is treated as a child or submenu under that parent. This pattern, often called a self-join relationship, is quite versatile. If you are familiar with genealogy databases, the concept is the same: each record can refer to another record within the same table, allowing you to build complex relationships and structures.
Now, fill in some sample data in menuT. For a main menu, enter three items with ParentID zero: Food, Body, and Workouts, giving each a sort order and description. For each submenu, add additional items where ParentID matches the top-level menu's MenuID, for example, ParentID 1 for items that appear under Food. Give each submenu item its own description and ObjectToOpen value, such as the name of the form you want to open.
Your table might look something like this for a few entries:
MenuID | ParentID | SortOrder | Description | Notes | ObjectToOpen
-----------------------------------------------------------------------
1 | 0 | 1 | Food | |
2 | 0 | 2 | Body | |
3 | 0 | 3 | Workouts | |
4 | 1 | 1 | Daily Food Log | | foodLogF
5 | 1 | 2 | Food List | | foodListF
6 | 1 | 3 | Food Groups | | foodGroupF
7 | 1 | 4 | Meal List | | mealF
8 | 2 | 1 | Body Comp | | bodyCompF
9 | 3 | 1 | Exercises | | muscleGroupExerciseF
10 | 3 | 2 | Weight Plates | | toBeMadeLaterF
Continue this pattern to add as many menu and submenu items as your application needs.
With your menu table in place, the next step is to add a list box control to your main menu form. Open your form in design view and insert a list box. When prompted, choose to get values from a table or query, select menuT, and then add all the fields. For display, set the Description column as visible and hide the other columns like MenuID, ParentID, SortOrder, and ObjectToOpen, as these are used in code but need not be seen by users. Set your list box to sort by the SortOrder field, so your menus appear in the correct sequence. Give your list box a clear and descriptive name, such as "menuList".
At this point, the list box will show all menu and submenu items by default. To only show the top-level menu (those with ParentID zero) when the form loads, you need to set or edit the Row Source SQL for the list box. Change the SQL to:
select MenuID, ParentID, SortOrder, Description, Notes, ObjectToOpen from menuT where ParentID=0 order by SortOrder
This limits the displayed items to the top-level menu. You can further format the list box by adjusting background and text colors, font size, and so forth to make it look like a real menu.
Next comes the VBA part. Open the properties for your list box, find the On Click event, and build an event procedure. Here's a sample code that checks if the selected menu item has an ObjectToOpen set. If it does, the code opens the corresponding form. If ObjectToOpen is blank, that means the item is a menu (not a form) and selection should instead show the submenu.
The first part of the code looks like this:
Dim objectToOpen As String
objectToOpen = menuList.Column(4)
If objectToOpen <> "" Then
DoCmd.OpenForm objectToOpen
Else
' You will add code here later to update the list box to show submenu items
End If
If you want to see which number is which column: Column(0) is MenuID, (1) is ParentID, (2) is SortOrder, (3) is Description, (4) is Notes, and (5) is ObjectToOpen - adjust as needed if you have tweaked your list box.
With this code, clicking on a menu item that has an ObjectToOpen value opens that form. If the item has no form linked, you can instead reload the list box to display submenu items by updating its Row Source SQL to reference the selected MenuID as the new ParentID, thus showing only those entries that are children of the selected menu.
If you would like to test that part quickly, add a main menu item with an actual ObjectToOpen value to see a form open on click. Once this basic functionality works, expand upon it so that clicking a parent menu item updates the list box to show its submenu, using logic similar to:
menuList.RowSource = "select MenuID, ParentID, SortOrder, Description, Notes, ObjectToOpen from menuT where ParentID=" & menuList.Value & " order by SortOrder"
menuList.Requery
You can enhance the system further by adding a 'Back' button to return to the previous menu when navigating submenus, or implement a navigation stack if you want to go multiple levels deep.
With this data-driven approach, you no longer need to redesign the form or add new buttons manually every time your menu structure changes. Just update your menuT table as needed, and your list box menu will adapt automatically. This keeps your database cleaner, easier to maintain, and much more flexible as your project grows.Primary Topics
Microsoft Access, dynamic menu system, hierarchical menus, list box controls, menu table design, self-join relationships, basic VBA, navigation forms, fitness database example
Secondary Topics
SQL row sources, UI design tweaks, testing form objects, developer best practices
|


