Calculator
By Richard Rost

 3 years ago
Build an On-Screen Calculator in Access - Part 1
In this Microsoft Access tutorial I'm going to teach you how to build an on-screen calculator that you can use with your keyboard and mouse or a touch screen device in Access VBA. This is part one of a series of I don't know how many parts. Let's have some fun...
Members
There is no extended cut, but here is the database file:
Silver Members and up get access to view Extended Cut videos, when available. Gold Members can download the files from class plus get access to the Code Vault. If you're not a member, Join Today!
Prerequisites
Next Video
Links
Recommended Courses
Keywords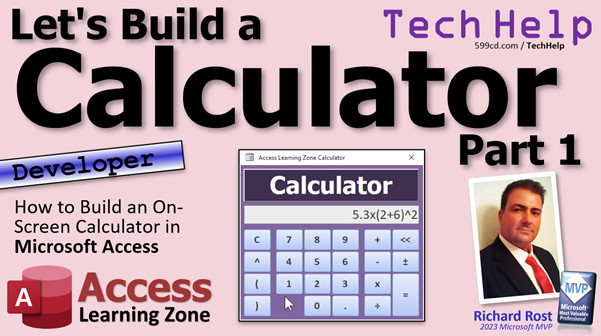
access 2016, access 2019, access 2021, access 365, microsoft access, ms access, ms access tutorial, #msaccess, #microsoftaccess, #help, #howto, #tutorial, #learn, #lesson, #training, #database, Onscreen calculator, calculator, eval function, on-screen calculator
 Subscribe to Calculator
Get notifications when this page is updated
Intro In this video, we'll start building a custom calculator using Microsoft Access and VBA. You'll learn how to design a calculator form, create number and operation buttons, use functions to handle button clicks, and employ the Eval function to perform calculations. I'll show you techniques to streamline your code, set up basic calculator features like clear and decimal buttons, and discuss ways you can expand the project with more advanced options in future videos. This is a great programming example for anyone looking to practice and learn new VBA skills with Microsoft Access.Transcript Welcome to another TechHelp video brought to you by AccessLearningZone.com. I am your instructor, Richard Rost.
Let's build a calculator. This is something that lots of people have asked me how to do over the last couple of years, and I've done little lessons here and there in my Expert and Developer courses on how to build a calculator. But I figured this would make a perfect series for the TechHelp video.
So, over the next couple or several or dozens of videos, depending on how popular it is, we're going to make ourselves a calculator.
Now, you might be saying to yourself, I don't need a calculator because I have the built-in Windows calculator. It's pretty good. It does all the basic stuff that I need and more. Yeah, that's true. But this is more of a programming example. This is more of a "let's teach us some cool stuff with VB" kind of thing.
If you have no desire to build a calculator or to learn some cool nifty tricks, then stop watching. But we're going to have some fun. We're going to build a calculator and maybe teach a couple things you didn't know. Most importantly, we're going to have a good time doing it. Let's see what we have to do here.
Now, this is a developer-level class, but I'm going to start with the basics. I'm not going to assume you know anything other than the simplest of the simple VBA. So if you've never done any VBA programming before, don't worry. It's not hard.
Go watch this video first, my intro to VBA. It's about 20 minutes long. It teaches you all the basics - everything you need to know to get started. That's the minimum of what I'm going to assume you know before going into the rest of the calculator project. Anything more advanced than that, I'll talk about as we're going along.
We're going to start with the basics. Just a little simple stuff here, adding numbers together, multiplying, dividing, and all that cool stuff. I actually posted a couple days ago that I'm going to be building this calculator, and lots of people on the website posted lots of different information and ideas.
Not going to get this crazy, Kevin Settle down. Well, maybe, I don't know - eventually. But there's lots of stuff here that gave me some ideas. So I built it a little more complicated than I was planning on doing.
Here's my finished product that I have so far. It's pretty cool. You can do 56 times three equals whatever. You can memory plus it. You can get the sine of that. You can clear it. You can take a number and square it. You can do those. You can do this. You can do all kinds of cool stuff.
I'm going to teach you how to do all of the things that I did right here over the next several videos. But let's start from the beginning.
For the beginning, I'm going to use my TechHelp free template, but only because I don't feel like starting a blank new database from scratch. I'm going to take everything out of this database pretty much. I'm going to delete all the objects except for that main menu. So delete. Goodbye. See you. Bye.
This form is pretty much already almost formatted to what I need. So, right-click, Design View. If you don't have a copy of this template, you can go grab a copy if you want from my website. It's a free download. I'll put a link down below.
I'm going to change this to say "Calculator" right here. You can change the name of it if you want to "Calculate." That doesn't matter. We're not going to refer to it. The only time I ever worry about what that name is is if I'm going to refer to it later. For example, if I'm going to change the background, say, calcLabel.BackColor equals whatever or something like that.
The box up here is going to be for our values that we get, so we'll put that at the top. Presentation is going to be important with this, so we're going to make it look pretty.
Right now this box shows the current date. We're going to change this to just "calc." That's the name of the text box: "calc." I'm going to get rid of the control source and the format so it's just a number. I think we're going to use a bigger font - let's do 20-point. That looks good. 20-point is fine. Let's right-justify it because pretty much every calculator I've ever seen is right-aligned. You can make it center if you want. It's your calculator - build it how you want to build it.
Now, my sample demo one, I made mine purple, but I'm going to do the other one differently. I'm going to put both of these up for the members to download, by the way, because I've got some little nifty changes in mind that I might not incorporate into this one. But let's make this background one dark blue. That looks good. Let's make our caption.
It's not the TechHelp free template anymore. It's the Access Learning Zone Calculator. We'll take this out of here for now. We don't need that. We don't need these. We just need one button to play with.
Let's get rid of all the VBA code that might be in here already. I've put a button up here on my Quick Launch toolbar to view code that just opens up the code editor. But if you can't find that for any reason, just go up here, go into Events, and just pick any event. If you see any event in here, just click on that and go to the Builder button. That'll bring you right in here. We don't need any of this stuff, including my status label. Just delete everything except for my copyright notice, obviously. But you want to leave Option Compare Database and Option Explicit up there.
I've talked about what these are in previous videos. Option Compare Database is just a way of doing string comparisons. For example, "Richard" in all caps and "richard" in all lowercase are technically the same thing. You can change that to binary. There are other methods if you want to change the way you are comparing. If you want to make sure two strings with different cases are considered different, then you can change that value. You can also do it with functions.
Option Explicit is important because it requires and forces you to explicitly declare your variables. We want that because the number one reason why people have errors they can't figure out with their programming is because they typed a variable name wrong. They think it's a field name or something, and Access will just assign a new value to it. It doesn't care. You want to make sure you have that, which forces the compiler to say, "I don't know what that value is," so leave it there.
Now we've got all the code array-style cleared out. We can close that for now. I will do my best to put links to any other videos I have that mention topics I talk about in this one down below in the links section. So if you want a video for Option Explicit, for example, go watch that if you want to learn more about it.
This is kind of bothering me. I want that to be a little bit lighter. Let's go to more colors, then let's go right here and slide this up a little bit too. That's a little better. I like that better.
Now let's make our number buttons. I'm going to take one button and make it the shape and size that you want, so we're about like there. Change the caption, we'll put a "1" in there, for example. Change the font, make it look good now because it's easier to do it now than to change them all later. Let's go 24-point. That's about right. Maybe bold. That looks good for our number one.
They usually go backwards from a phone: one, two, three, four, five, six, seven, eight, nine. I like that.
This is going to be BTN1. Unfortunately, for those of you who might be familiar with Visual Basic (the actual Visual Basic, not VBA), you can do something called a control array like this. Make that button one and then all the other buttons will be in the same array. But unfortunately, Access doesn't work like that. So we're going to go with just button one, like BTN1.
Now we're going to copy this guy. I'm going to copy it (Control+C), and paste it twice (Control+V, Control+V). Why just those couple? You'll see why in a minute.
Slide these over here. We're going to make this one button two and then button three, and don't forget to change their names: BTN2 and BTN3.
Now we're going to copy that, copy, paste, paste - a couple more times. Stack one of these ones up here, like this. Then we'll slide these up here like that.
This will be four, five, and six - and seven, eight, nine. Don't forget to change the names over here: BTN4, BTN5, BTN6, BTN7, BTN8, BTN9.
If you want to, you can just go BTN and copy that into the clipboard. It makes it easier. Paste five, six, seven, eight.
Yes, in older videos I used to edit this part out and not make you watch all this stuff, but then people complained that I edited it out. So I leave it in now. I don't care.
Don't forget, of course, our zero down here, to make it look just like a numeric keypad. This will be BTN0.
Save it (Control+S), give it a good save. I'm going to close it and open it back up. Again, I have a button on my menu bar up here that opens the main menu. You'll find it right there, of course. I like to use this little button here.
Oh, it says TechHelp free template cannot run the macro that calls OpenMainMenu. Maybe I shouldn't have deleted that one macro.
If you realize that you've accidentally deleted something that you need, go back to your backup and grab it from your backup and put it in there. Since a lot of you might have missed that lesson, let me show you how I made that macro real quick. It's real simple.
Create, and then Macro. All this macro is going to do is open form. What form is it going to open? MainMenuF. Save that as OpenMainMenu.
Now that button is right there, and this guy is on the Quick Launch toolbar. Go to More Commands, Quick Access Toolbar, and you can add macros over here. That's the OpenMainMenu macro right there.
You just drop this down, pick Macros, and there's my OpenMainMenu macro. Slide it over here. Any other things you want on your Quick Launch toolbar, that's how you do it. If you want a button up here on your toolbar, on your Quick Launch toolbar, to open any form, just make a macro for it and then drop it up top there. That's how I did that. Everyone always asks me, then I always forward them back to the video where I cover how I do that.
I didn't intend on re-covering that. It just happened.
Now we have this cool form. We have this bar here where the numbers are going to go. We have these buttons, but I click on them and nothing happens. Why does nothing happen? Because we didn't make the buttons do anything yet.
Normally, if I click on a button, let's say this button one, the code that runs that is if I right-click and go to Build Event, then I can put some code in here for ButtonOne_Click. Let me give it some extra spacing here.
ButtonOne_Click. What do I want to say in here? I want to take whatever is in that calc box. "calc" is the name of this box over here, and I want to add a 1 to it. So I'm going to say calc = calc & "1".
Treat it as a text string, because if the user is going to be clicking on one, two, three, right, that's the numbers. You want the number 123. So you're going to use string concatenation. We're going to treat this calc box like a text string (like a text box) until we're actually ready to evaluate what's in there. If you don't know about string concatenation, go watch this video.
Save that. Come back out. Let me close and reopen my form. Now, if I click the button one, look at that: 1, 1, 1, 1, 1, 1, 1, 1, 1. We could do one and zero and make a binary calculator. Actually, that would be pretty fun to do in binary. But that's not very helpful for what we want. We want each button to be able to put a number up there.
Now, I can make an event for two. I can make an event for three. I can make an event for four. But that's a lot of work with basically the same code. Wouldn't it be nice if I could make my own function out here where I can say, instead of doing that every time: AddToCalculator, and then in this case, the number 1. That'd be pretty handy.
So, I'm going to make my own function up here. It's going to be a private function. Private means only this form can use it. Other forms can't use it. They won't even see it.
AddToCalc, and I'm going to send into it a string of some kind: s As String.
Now, what is this guy going to do? It's basically going to do what the other button was going to do, so just instead of adding a 1, add s, whatever I send to it: calc = calc & s.
Down here, button one is clicked and it says AddToCalc "1". So "1" comes up into here, and then calc = calc + (in this case) "1".
Save it. If you want to learn more about creating your own function, I've got a whole video on that where you make a function to convert Celsius to Fahrenheit, for example. Go watch that one.
Now if I come out here, I push the one button, the same thing happens. It doesn't look any different to the user, but you know behind the scenes, you've got this skill.
If I'm going to make my next button, let's make button two - right click, Build Event. I can just come in here and say AddToCalc "2".
Save it, close it, open it. One, two. One, two. Pretty. See that?
Now, you could make an event for each button, but that's a lot of code in here. There has to be an easier way. There is. Check this out.
There's a reason why I made this a function, because normally the more advanced users out there might be thinking that didn't need to be a function, that could have been a subroutine. There's a subroutine that just does stuff. There are two kinds of procedures: subroutines and functions. Subroutines just say, "go do this stuff." Functions usually return a value out here. But functions can also handle events for you like this. Watch this.
Delete this stuff out here. This only works with functions, by the way, only with functions.
Now we've got AddToCalc, and let's send it the numbers, but instead of using event procedures, we're going to put the code right in here.
Go to Event, get rid of this event procedure, and then come in here and say =AddToCalc("1") - like a string like that. I'll zoom in so you can see better.
=AddToCalc("1")
Copy that to your clipboard. AddToCalc "1", and then come over here - same thing - paste it in, AddToCalc "2". While we're at it, let's do three: paste, AddToCalc "3".
If you double-click in here, it switches over to event procedure. Just watch for that. AddToCalc "3".
So we've got 1, 2, and 3 done. Save it. Close it. Go back and open the form up. 1, 2, 3. Easy as that. No extraneous code in here. That's all handled in the button.
Let's call it an event handler function or a control event function. There are a bunch of names for it. I've seen people call them different things. That's what I call it. It's a function that you put in an event. It has to be a function.
Now here's something neat you can do. Watch this. Copy this to the clipboard.
You've already got 1, 2, and 3 in there, so select 7, 8, 9, 4, 5, and 6, and then hold the Shift key down and pick 0. That gets just those ones selected.
Now come over here to On Click. Paste that in there, hit Tab or Enter. Now that goes into all of these buttons. Look at that. You can now go through and change that from 1, 2, 3, 4, etc.
So change this one to 4, change this one to 5, and just go through and change all those buttons like that.
Want an even better trick? Watch this. Pick one, like 0. I'm going to zoom in for this one.
Instead of doing that, what you're going to say is ActiveControl.Caption. Copy that.
Let me just show you how that works real quick. Close that. Open it up. Click the button. Now look at that, you get a zero in there. Why? Because the active control is this button. What are we doing? We're passing to that function the caption of that control, which is the zero.
So now I can select all of these guys and just say AddToCalc(ActiveControl.Caption). So whatever your caption happens to be, send it in there. You don't have to go one at a time through all those buttons. That's why I wanted to teach this method to you.
Pretty cool stuff. Save it, close it, open it. You can see that these buttons work. Because the active control is the button you're clicking on and we're sending that to the function that adds it to the calc value.
That's why you learn this stuff. This is fun, isn't it?
Now that we've got that, let's add our buttons for operations: plus, subtract, multiplication, and division. That's easy to do now. We can just copy this.
Copy, click off of it, and then paste it. Because if you do a copy-paste, it pastes them down below, and then you have to resize the form or move them around. Undo that.
Instead, copy, click off of it, and then paste. Then they come up here in the upper left corner. Then you can drag and drop them right there.
Now, this will be addition, subtraction. Multiplication is a star, and division is a slash - that's basic VBA computer math. In a future video, I'll show you how to change that so it's an "x" and a division sign for the user to see in the calculator, and then internally we'll change it.
Now, our code will still work: AddToCalc(ActiveControl.Caption), but we still have to rename our buttons. There's no easy way to do that, unfortunately - sorry. You still have to give these guys good button names. So this will be BTNPlus, BTNMinus, BTNMult, and BTNDiv.
Now, the same thing should go on here. Click on it: 96 plus 32, looks good. Divided by 2. Like I said, later on, we'll switch them to symbols. For now, this is how the computer wants to see it.
Now, the magic is going to happen. We're going to make our equals button. The equals button is going to look at this mess of stuff up here and evaluate it, and do the math on it. How do we do that? There's a magic function built into VBA called "Evaluate." It's Eval. That's it. That's all you have to do, and it will look at this math string, and as long as it's valid mathematical code the way the computer wants to see it, it will do all the math for you.
Ready for that? Let's make our equals button.
Right-click, Design. I'm going to put the equals button - we're going to put more stuff on top of it, so we'll just copy this guy. Put you right here. Equals deserves to be double high, so we'll do that. Make it say "=", and I'm going to make all of the buttons that just do something right away a different color, because we're going to have two different types of buttons. We're going to have buttons that just put values up top, and we're going to have other buttons like "clear" that will clear that, or "equals" which will actually do the math, or these ones like "sine," "tangent," "cosine" that will actually do the calculation.
So, normally those ones would be red. This guy is going to be BTNEqual.
Ready for the code? It's long and complicated. Oh, I just did there - right-click, Build. I'm glad that this happened. Since we have an expression in there, this is technically an expression - a function. If you go right-click, Build Event, like I just did, it takes you into the Expression Builder, which I almost never use. I completely ignore this thing, I don't like it.
So what you have to do here is go to the event and just delete the expression that's in there. Then hit your ellipsis (...), and it will put you in there. Good. Normally I ignore the expression builder.
So, big long monster ton of typing code to do here. Ready?
calc = Eval(calc)
That's it. That's literally it. Calc is our text box. It has our equation in it. We're going to send that to the evaluate function. It's going to take "10 + 5," evaluate that (which should be 15), and then put that value in the box.
Debug, compile, save it. Come back out here, close it, open it up.
9 + 6 = 15. It's that simple. 15 / 3 = 5. 5 * 2 + 1, or -1, etc.
Here's the problem though. This might give an error message. Let's see. If you do something incorrect in here, you're going to get an error. We'll deal with this. We're going to do a whole separate lesson on error handling. For now, just make sure what you put in here is valid.
5 - 6 + 9 * 2 =
If you want to add parentheses, add parentheses buttons. Let's do parentheses buttons.
Design View. Let's just throw those over on the left side. Let me take two of these, actually three of these. Copy, paste. Oops, did the thing I told you not to do. So three of these: copy, paste. We're going to put them right there. This will be left parenthesis, actually this will be the "C" button (clear), left parenthesis, and right parenthesis.
This will be my clear button. This is going to get its own separate event. Go to All. This will be BTNC, and these will use that event. This will be BTNLP (left parenthesis) and BTNRP (right parenthesis). Save that.
Let's make this guy red too, because that's going to do something immediately. Save it. Close it. Open it.
So, 56 + (2 / 1) - 6 =
Assuming the math is correct, it works. The good thing about doing it this way too is you can just come up here and type stuff. You can just say, 10 + 5 * 3 - 9 ^ 2, we'll cover exponents in the next video, then "=" and it gets it.
Which reminds me, while we're in here, Design View, let's do a quick tab order - auto order, because we want that calc bar to be on top.
Now let's do our "C" button. This is going to be a really easy event.
This is simply going to be calc = Null. So whatever is in there, just erase it.
85 - 6, C, gone.
For those of you who like typing at the keyboard, you could make the equals button your default button. If you go to Other, there's a Default Button setting. Set that to Yes. The default button on a form is the one that gets pressed when the user presses Enter, as long as the user isn't in any long text field box.
Likewise, the "C" button can be the Escape button or the Cancel button.
What else do we need? How about a decimal point? Copy one of these guys, paste, slide it down here, put a decimal point in the caption. This will be BTNDecimal or whatever you want to call it. Save it. Close it. Open it.
2.3 * 6 =
There you go.
As you can see, it's coming along. We've got a lot more features to go. Let me take a look at my notes here, all the stuff that I've done.
We're going to do error handling in the next video, because if you type in something invalid, you'll get an error. We don't want that to happen, so we're going to fix that with a little error handling.
We're going to make a back button, so you type in some stuff, and you want to go back, back, back. Yes, we all have a keyboard, but what if you're running this on a tablet? You don't want to have to open up the on-screen keyboard. You just want to be able to hit the back button.
We're going to make a button to toggle plus or minus. We're going to change these so it's multiplication and division symbols on there, so that's what you see.
We're going to do an x squared button. Let me clear that. Like an x squared, square root of x, sine, cosine, tangent, memory stuff. We're going to use a temp variable so that even if you close your calculator and then reopen it, it remembers what was in memory. See that? We're going to do that.
You can make this pop up if you want to, or modal, or one of those things. I'll show you how to make a copy button to copy whatever your value is to the clipboard. Then you can paste it in another application or somewhere else in your database.
Some of the other things that people on the website suggested: maybe adding percentages. Someone asked if we could do fractions. Fractions are kind of tough, but you could put fractions in here like division. If you want like one-fifth, you could say 9 + 1/5, and there's your fraction. So fractions are basically supported by default if you type them in as division.
Alex suggested maybe a history where you can slide out and see everything you entered, like a register tape. We'll do that maybe.
Someone else wanted conversions, like gallons to ounces, meters to inches, that kind of stuff. Sure.
What features are you interested in? What do you want to see? I'll do as many of these videos as people are interested in, as long as I get the views and the comments and you like this. Speak up, let me know, tell me. We'll make as many of these as you want to see.
That's going to be it for today. That's part one of "let's build a calculator." Tomorrow, part two, we'll start off with error handling and see where it goes.
That's your TechHelp video for today. I hope you learned something. I hope you had some fun. Live long and prosper, my friends. I'll see you next time.Quiz Q1. What is the primary purpose of building a calculator in this Access/VBA project?
A. To replace the Windows calculator with a more advanced tool
B. To provide a programming example for learning VBA techniques
C. To create a tool for mathematical research
D. To compete with commercial calculator software
Q2. According to the video, what VBA knowledge is assumed before starting the calculator project?
A. Advanced class modules and API calls
B. Only the basics of VBA, covered in the 20-minute intro video
C. Deep understanding of SQL integration with VBA
D. Extensive use of object-oriented VBA
Q3. Why does Richard recommend using his TechHelp free template to start the project?
A. It is the only template that works in Access
B. It is pre-formatted and saves time compared to starting from scratch
C. It includes built-in calculator functions
D. It has an auto-save feature
Q4. What is the significance of setting Option Explicit in the VBA code module?
A. It improves code performance by turning off events
B. It requires explicit variable declaration, reducing errors
C. It locks code to prevent editing
D. It enables binary string comparisons
Q5. Why is the calculator's display (the "calc" textbox) right-justified in the form?
A. It is the Access default for numbers
B. It matches standard calculator design conventions
C. Left-justified controls are not supported in Access
D. Right-justification is required for VBA string functions
Q6. What is the major advantage of using a single AddToCalc function for all number and operation buttons?
A. It allows every button to have a unique event procedure
B. It makes code maintenance and event assignment much simpler
C. It eliminates the need for a calculator display
D. It restricts calculations to only two numbers
Q7. How can every number button be set up to pass its value to AddToCalc without writing separate code for each button?
A. By assigning AddToCalc(ActiveControl.Caption) as the On Click event for each button
B. By using the default button property
C. By copying the button names into the function
D. By referencing each button in a macro
Q8. In VBA for Access, what character is used for multiplication and division in expressions?
A. Multiplication is x and division is :
B. Multiplication is * and division is /
C. Multiplication is * and division is \D. Multiplication is ^ and division is /
Q9. What built-in VBA function is used to evaluate a string expression for the calculator's equals button?
A. Calculate()
B. Eval()
C. Execute()
D. Perform()
Q10. What does the clear "C" button do in the calculator?
A. Sets the calculator value to zero
B. Deletes the last character only
C. Sets the calc textbox to Null (clears it completely)
D. Copies the value to the clipboard
Q11. Why might error handling be necessary for the calculator when using Eval()?
A. To discard all input over 10 characters
B. To prevent the calculator from crashing on invalid input
C. To enable keyboard shortcuts
D. To convert strings into numbers automatically
Q12. What is the default action of setting a button's Default property to Yes?
A. It changes the button's color
B. It is activated when the Enter key is pressed, unless in a long text field
C. It disables the button if another button is clicked
D. It makes the button appear larger
Q13. Why did Richard create a macro named OpenMainMenu in the project?
A. To open any VBA module directly
B. To allow easy access to the main menu form via a toolbar button
C. To compile all VBA code in the project
D. To set the template as read-only
Q14. When designing the calculator, why is it beneficial to use larger, formatted buttons and align them to match a numeric keypad?
A. It reduces form file size
B. It makes the calculator visually familiar and user-friendly
C. It prevents code errors in VBA
D. It automatically binds controls to source fields
Q15. What is the difference between a subroutine and a function in VBA, as related to handling control events?
A. Subroutines can handle events, functions cannot
B. Functions can be called directly from control events and can return values, while subroutines do not
C. Subroutines always require arguments, functions do not
D. Functions always display a message box, subroutines do not
Q16. Why were parentheses buttons added to the calculator form?
A. To allow for grouping and operator precedence in calculations
B. To clear the calculator display
C. To allow input of large numbers
D. To save calculation history
Q17. What reason is given for considering additional features such as exponents, memory, square root or trigonometric functions in future videos?
A. Those features are required for accreditation
B. Users have requested them and suggested more advanced functionality
C. Basic calculators cannot have buttons added
D. Access supports these features natively by default
Q18. What is the main benefit of making the equals and clear buttons a different color than the number buttons?
A. It helps users distinguish immediate action buttons from value input buttons
B. It disables those buttons
C. It changes their default properties to modal
D. It allows only one action button on a form
Answers: 1-B; 2-B; 3-B; 4-B; 5-B; 6-B; 7-A; 8-B; 9-B; 10-C; 11-B; 12-B; 13-B; 14-B; 15-B; 16-A; 17-B; 18-A
DISCLAIMER: Quiz questions are AI generated. If you find any that are wrong, don't make sense, or aren't related to the video topic at hand, then please post a comment and let me know. Thanks.Summary Today's TechHelp tutorial from Access Learning Zone focuses on building a calculator in Microsoft Access using VBA. My name is Richard Rost, and together we're going to explore how to create a functioning calculator. This is a common request that I've received over the past few years, and I've covered elements of this in other courses, but this series will break down the process in a step-by-step manner appropriate for both beginners and seasoned developers.
While you might rightly think that the Windows calculator is fully sufficient for normal use, the point of this exercise is to teach programming techniques and show off some interesting tricks in Visual Basic for Applications. Even if you never actually need your own calculator, the skills you'll pick up along the way will be valuable in all sorts of Access applications.
For this project, I'm starting from the basics. If you've never worked with VBA before, I recommend you watch my introductory VBA lesson which will cover everything you need to know to get started. You don't need any advanced knowledge for these first steps, and I'll explain more complex ideas as they come up.
We'll begin with some foundational features of the calculator: entering numbers, adding, subtracting, multiplying, and dividing. Recently, I mentioned this upcoming project to the community, which sparked a lot of great suggestions. As a result, the calculator will be more advanced than I was originally planning, but that just makes things more interesting.
In my demonstration version, this calculator can handle things like multiplication, memory functions, trigonometric calculations, clearing the screen, squaring numbers, and more. We'll get to all of those functions as we work through this series, but first, let's set up the basics.
For convenience, I'm using my TechHelp free template rather than starting a database from scratch. I'll remove nearly all of the existing objects, keeping only the main menu. This gives us a form that's already formatted and ready to go. If you don't have this template, it's available for free on my website.
Next, I update the form so that it clearly indicates we're building a calculator. I rename the form title and adjust the main text box so that it's right-aligned, significantly larger, and suited for displaying calculator values. You can format this any way you prefer, but I find this type of presentation works best.
For the calculations, the central text box (which I name "calc") will display both the numbers and results. I remove its default control source so it simply displays numbers as we input them. The font size is increased for readability, and the background color is changed to suit my preference. You're free to personalize these settings as you like.
All unnecessary VBA code is stripped out of the template except for required options at the top: "Option Compare Database" and "Option Explicit." I emphasize keeping Option Explicit because it forces you to declare all variables, reducing the risk of subtle programming errors due to typos or misnamed fields.
Once the setup is complete, I start building the calculator's buttons. Each number from 0 to 9 gets its own button, sized and styled for a classic calculator look. In Access VBA, you can't use control arrays as you might in Visual Basic, so each button gets a unique name like BTN1, BTN2, etc.
The process of creating the buttons involves copying and pasting the formatted button, renaming each accordingly to BTN4, BTN5, BTN6, and so on. This way, you replicate the look and function of a typical hardware calculator keypad.
Now, to make these buttons functional, I explain how clicking a button should add that digit to the "calc" box. The simplest way is to use the button's click event to concatenate the button's number to what's already in the box. However, doing this individually for each button would be redundant. To streamline things, I demonstrate how to build a function, AddToCalc, that takes any string and adds it to the calc box. This allows you to use one function for all number buttons.
It's more efficient to place AddToCalc("1"), AddToCalc("2"), and so forth in the click event properties, rather than writing separate event procedures for each button. Even better, by passing ActiveControl.Caption to AddToCalc, each button uses its label as the string to append. This greatly simplifies setup and future changes.
Next, I introduce operation buttons for addition, subtraction, multiplication, and division, using standard operation symbols familiar to VBA. The system is then set up so that pressing these buttons inserts the appropriate operator into the calculation string shown in the text box.
The equals button is where the real computation happens. When clicked, it uses VBA's Eval function to evaluate the string currently in the calc box as a mathematical expression. This provides a quick and straightforward way to calculate a result from the user input, as long as the input is valid VBA syntax. A quick compile and test confirms it's working-pressing 9 plus 6 and then equals produces 15, just as expected.
Of course, if the input is incorrect, this could produce an error. I'll address error handling in the next lesson, but for now, it serves our needs.
Parentheses buttons are the next enhancement, allowing the user to structure more complex expressions. These buttons are formatted and added just like the others and use the same technique to insert their symbols into the calculation string.
I also add a clear button, which simply resets the calc box to Null, allowing quick erasure of the current input. You can designate this as the form's Cancel button, letting users quickly clear the calculator with the Escape key.
A decimal point button is included for entering non-integer numbers. This is just another button with its caption set to a period, named appropriately, and functions in the same way as the other input buttons.
Other user interface improvements, such as setting the form's tab order so that the calc box is selected first, are discussed for smoother keyboard navigation.
I finish the tutorial by outlining what features are planned for the next lessons. These will include error handling, a backspace button for removing the last digit or character, a button to toggle the plus or minus sign, improved display for multiplication and division operators, and additional functions like squares, square roots, trigonometric operations, and memory features. I'll demonstrate how to store values temporarily so they're preserved even if the calculator is closed and reopened, and also how to add clipboard functionality.
Several viewer suggestions are also on the table for future videos, like adding percentage calculations, fraction support (using division), calculation history, and unit conversions.
If you have feature requests or ideas, please let me know. As long as there is interest, I'll continue producing these tutorials.
You can find a complete video tutorial with step-by-step instructions for everything discussed here on my website at the link below. Live long and prosper, my friends.Topic List Creating a calculator form in Microsoft Access
Designing and formatting the calculator display
Setting up a text box to show input and results
Right-aligning the calculator input box
Customizing form and control appearance
Naming buttons for a numeric keypad layout
Creating number buttons for calculator input
Assigning event handlers to calculator buttons
Using functions versus subroutines for button events
Passing button captions to a handler function
Assigning one handler function to multiple controls
Using ActiveControl.Caption in event procedures
Creating operation buttons for addition, subtraction, multiplication, and division
Mapping calculator operators to VBA syntax
Implementing an equals button
Evaluating math expressions using Eval() function
Handling user input as strings for concatenation
Adding parentheses buttons for complex expressions
Clearing the calculator with a clear button
Setting the equals button as a default button
Adding a decimal point button
Setting form tab order for better user navigation |


