Fitness 78
By Richard Rost

 3 months ago
Highlight Current Row with Conditional Formatting
In this lesson, we will walk through how to highlight the current row in continuous forms using conditional formatting to make it easier to track which record you are working with in your fitness database. I will show you how to set up unbound controls and use VBA in the On Current event so the entire row highlights as you navigate through the records. We will also discuss handling focus changes in subforms and how to add control tip text to improve user experience. The techniques covered here apply to any continuous form, not just those in a fitness database.
Members
There is no extended cut, but here is the file download:
Silver Members and up get access to view Extended Cut videos, when available. Gold Members can download the files from class plus get access to the Code Vault. If you're not a member, Join Today!
Prerequisites
Recommended Courses
Up Next
Keywords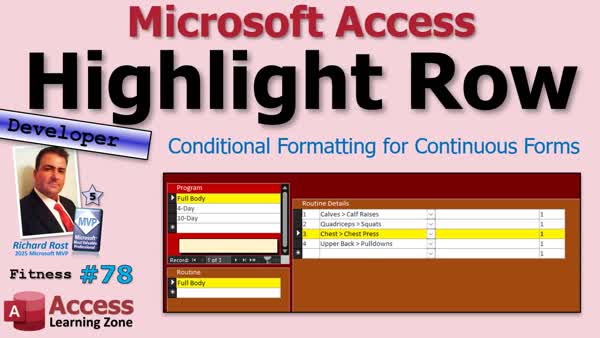
TechHelp Access, continuous forms, highlight current row, conditional formatting, navigation, unbound controls, On Current event, current record, row highlighting, form design, subform focus, VBA, user interface, MoveUp MoveDown buttons, record selector, database UI, control tip text
 Subscribe to Fitness 78
Get notifications when this page is updated
More InformationTranscript Have you ever clicked around continuous forms and lost track of what record you are actually on? Today, we are going to fix that by highlighting the current row, making it much easier for users to navigate and work with related records.
Welcome to another TechHelp video brought to you by AccessLearningZone.com. I am your instructor Richard Rost. This is part 78 of my Fitness Database series, and remember, even if you are not building a fitness database, the techniques we are covering today can be used anywhere you work with continuous forms. Whether you are managing customers, orders, inventory, support tickets, or still working on that list of your favorite Star Trek captains, it does not matter. We are having fun, we are building a database.
The last time, we added MoveUp and MoveDown buttons so users could reorder the records with a single click instead of manually changing sort values. Today, we are going to use conditional formatting on current events and a couple of unbound controls to highlight the current record and make it much easier to see exactly where you are as you move through the data. The whole row will highlight, not just the field you are on, and we will see what happens when you lose focus out of a subform. You also lose traditional continuous formatting. We will fix that too.
I have done some other videos on this technique, but I have not covered it yet here in the Fitness Database. I want to add this one to it. This is where you can use conditional formatting to highlight what field you are on, and we have done this before for just a single field, like we did it in the food log and a couple of other places. With this one, we are going to do it so we can see the entire row. The whole row across will be highlighted regardless of what field you are on. You do this one with an expression equals in conditional formatting, and all you have to do is set the current sort order in an unbound field. You set that value in an event somewhere.
So, watch. I will just - here, I will copy this guy. Copy paste, copy paste, copy paste. There it goes. It is my screen recording software, I think.
We are going to call this guy current. Actually, it is going to be the current routine detail ID and make it unbound.
All right, current routine detail ID. Now what you do is, in the On Current event for this form, when you go from record to record, the On Current event, we are going to set that equal to the routine detail ID of the current record. Since this can be null, make sure you handle your null values to put a zero in there.
So we use this in conditional formatting. We come into here. Since we do not have any conditional formatting, we can do them all at once. Click on all of these guys. Go to Format, Conditional Formatting, New Rule. This is not Bill Marr, but it is a new rule. We are going to go Expression Is, and then we are going to say - I just pasted it - the routine detail ID equals, and make sure you put this guy in brackets, because conditional formatting has a way of not bracketing stuff in here. It will think it is a text string and throw it in quotes on you.
Put them both in brackets, because conditional formatting has a way of not bracketing stuff in here. It will think it is a text string and throw it in quotes on you. Then just give it the format you want. We will do yellow.
Hit OK, Apply, and now close it, and then open it. Go back to Workouts, and see, it gets the whole row. I am surprised I have not done that yet in the fitness database series. I have a whole separate video on that. It is a conditional formatting for the row, whatever.
Essentially what happens is, the conditional formatting is basically saying, if you look at it - let me go back in here, just pick one of them - it says, of the row that I am on, is this row's routine detail ID equal to the current routine detail ID? This is an unbound field that gets changed as you move from record to record. It only has one value in it. It is not necessarily the current record. If you do not have this as an unbound field, essentially every row will match that condition, because every row matches that field for itself, so it cannot be bound. It is a cool little trick.
To make these really stand out, let us make these guys yellow too. That is only one field in there, so we can just do each one of those individually with a Has Focus.
Click on this guy, Format, Conditional Formatting, and this will just be Field Has Focus. Make it yellow. This way you know exactly which one you are on. This one too. Format, Conditional Formatting, Field Has Focus. This will be so much easier to find your way around now.
Save it, close it, open it. Oh, look at that. Well this guy did not have - oh that is interesting. Hmm. You do not have focus when you leave that subform. We could do the same trick in here, even though it is only one field. Let us do it.
I did not realize. I thought that the focus would stay there, even if it was in that subform, but I just learned something new. So let us do the same thing. This is kind of cramped here, so let us do it outside in the forms themselves.
So we have the program f design view. We just have to do the same exact thing that we just did before. I will slide this over, so we have some more room here. We will copy paste. We will set this guy. This will be the current program ID, and that will be unbound.
In the uncurrent event, we will say Current Program ID equals Program ID. In the conditional formatting, we will get rid of this. Now we can open this up and change this to Expression Is Program ID equals Current Program ID. Hit OK, hit OK, close it, save it, close it. Let us take a peek.
Even if I am over here now, it keeps it yellow. We will do the same thing with the routine subform, and then we will cook with gas.
This will be the Routine f design view. I was looking at it going, wait a minute, but it is got two boxes in it because it is got the other guy. We will move these over just a little bit. This will be the Routine ID. So it is the current Routine ID copy paste. Slide it up.
You are the current routine ID. Get rid of that. Here we go. Format, Conditional Edit, Expression Is Routine ID equals Current Routine ID. Hit OK, save it, close it, and open it.
We forgot our On Current event. I always forget one little step. But see, it is good that I forget them because you will probably forget them too. I am just trying to say that to make myself feel better at this point.
Events, On Current. The current routine ID equals the routine ID. Now it should work. The buck and pile once in a while.
Ready and bam. Look at that. So nice. Now you know exactly what program, routine, and routine details are. Oh, that is sexy.
A couple little things I still want to do. I want to make this say Legs, Legs Details, Pull Details. Maybe even add the program in there too. I want to give this more detail, or put it up here maybe. We will do something cool with that in the next video.
While I am thinking about it, hover buttons or our control tip text, I like to, when users hover over buttons, I like to make sure they know what they are. So control tip text. Move item or move exercise down. And move exercise up.
I thought of this when I was going to make the slide, the title slide for the video. I am like, that would be cool if the mouse is hovering over that so people know what those buttons do. Just like your users are going to want to know what those buttons do.
So if I hover here, move exercise down. See, move exercise up. Perfect.
On to the next.
Today we used conditional formatting and a few simple VBA techniques to highlight the current row in our continuous forms, making it much easier to see which program, routine, and exercise record we are working with.
In the next lesson, we are going to continue polishing the user interface by adding more descriptive information to the forms and making it easier for users to see where they are as they navigate through the database.
Post a comment down below. Let me know what you thought of today's lesson and what you would like to see coming up in the next lessons.
With that, it is going to be your TechHelp video for today brought to you by AccessLearningZone.com. I hope you learned something. Live long and prosper my friends. I will see you soon for part 79. Intro In this lesson, we will walk through how to highlight the current row in continuous forms using conditional formatting to make it easier to track which record you are working with in your fitness database. I will show you how to set up unbound controls and use VBA in the On Current event so the entire row highlights as you navigate through the records. We will also discuss handling focus changes in subforms and how to add control tip text to improve user experience. The techniques covered here apply to any continuous form, not just those in a fitness database. Quiz Q1. What problem does highlighting the current row in a continuous form solve?
A. It makes it easier to know which record you are currently on when navigating records.
B. It allows users to edit all records at once.
C. It prevents accidental deletion of records.
D. It automatically saves data after every change.
Q2. What key technique is used in this video to highlight the entire current row in a continuous form?
A. Adding a background image
B. Conditional Formatting with an expression
C. Using alternating row colors
D. Changing the form's theme
Q3. What type of control is used to store the value of the current record for comparison in conditional formatting?
A. Bound text box
B. Combo box
C. Unbound text box
D. Option group
Q4. Why must the control used for highlighting the current row be unbound?
A. Otherwise, it would not save changes to the database.
B. Otherwise, every row would get highlighted for itself.
C. Unbound controls support more colors.
D. Bound controls can not be formatted.
Q5. In which event should you set the value of the unbound text box to the current record's ID?
A. On Click event
B. On Load event
C. On Current event
D. On Open event
Q6. When setting up conditional formatting to highlight the current row, which option do you select in the new rule dialog?
A. Field has focus
B. Expression Is
C. Value Equals
D. Greater Than
Q7. What should you consider when comparing IDs in conditional formatting expressions?
A. Both should be unbound controls
B. Both names should not be bracketed
C. Both should be enclosed in brackets to avoid errors
D. Both should be enclosed in quotes
Q8. How can you further indicate which specific field is currently being edited on the form?
A. Use a calculated field
B. Apply conditional formatting using 'Field has focus'
C. Make the field read-only
D. Change the record source
Q9. What issue arises when focus is lost from a subform with conditional formatting?
A. The record source changes
B. The row highlighting is lost
C. The database closes
D. The navigation buttons stop working
Q10. What simple user interface improvement was suggested for buttons in the form?
A. Resize them for easier clicking
B. Add control tip text to explain their function
C. Change their colors randomly
D. Remove all text from the buttons
Q11. Why is this technique valuable for forms other than a fitness database?
A. It is only useful in fitness databases
B. It only works with Star Trek captain lists
C. It is helpful in any form using continuous forms with multiple records like customers or orders
D. It only highlights forms with one field
Q12. What does the On Current event handler typically do in this scenario?
A. Recalculates all totals in the form
B. Sets the unbound control equal to the ID of the current record
C. Deletes the current record automatically
D. Changes the table structure dynamically
Answers: 1-A; 2-B; 3-C; 4-B; 5-C; 6-B; 7-C; 8-B; 9-B; 10-B; 11-C; 12-B
DISCLAIMER: Quiz questions are AI generated. If you find any that are wrong, don't make sense, or aren't related to the video topic at hand, then please post a comment and let me know. Thanks. Summary Today's video from Access Learning Zone focuses on helping you easily identify which record you are currently working on in a Microsoft Access continuous form by highlighting the entire active row. This technique can be applied in many different types of databases, whether you are managing orders, inventory, support tickets, or even something fun like a list of your favorite TV show characters. It makes navigation and editing much clearer for your users.
Previously in our Fitness Database series, I showed how to add buttons for moving records up and down, allowing users to change the sort order quickly. In today's lesson, I want to take things a step further and show you how to use conditional formatting along with a couple of unbound controls to emphasize the current record. This method makes it obvious which record is currently selected, no matter which field you are working on in that row.
The idea is to highlight the full row of the current record, rather than just the single field you are in. To accomplish this, we use an unbound textbox to store the ID of the current record. Then, with the On Current event of the form, we update this textbox to contain the ID of the record the user is viewing. Since this value can sometimes be null, it's important to account for that and default it to zero when necessary.
Once you have your unbound control set up to store the current record's ID, you'll use conditional formatting for each field in your continuous form. Set up a rule that checks if the record's ID matches the value in your unbound textbox. If it does, you set your desired formatting - for example, a yellow background. This highlights the entire row wherever you click within it.
It's important to use an unbound control here. If you tried to use a bound field, every row would match itself and you would not see any highlighting. The unbound control is what makes the logic work across the entire form.
For extra clarity, I also like to add a separate conditional formatting rule to each field so that when a particular field has the focus, it stands out as well. This makes it even easier to navigate and know exactly where you are, even if you click into another form or subform.
If you have subforms on your main form, remember that conditional formatting may reset if you move focus away from the subform. To keep the formatting consistent, you can replicate this highlighting trick by adding a similar unbound control and On Current event to each subform. Update those controls just like you did in the main form, and set up the same conditional formatting rules.
While setting this up, keep in mind that you can adjust the formatting and add additional details to make your forms more user-friendly. For example, consider updating labels or headers on your forms to reflect the current context. You might want to display more descriptive information about the selected program or routine, which helps users always know exactly where they are in the workflow.
Another tip to improve usability is to use control tip text for your buttons. Adding a clear description that appears when a user hovers over a button helps avoid confusion about what each button does.
By combining these techniques - conditional formatting, unbound controls, well-designed buttons, and helpful labels - you can create a more intuitive experience for anyone using your Access database.
All of the procedures I discussed today rely on conditional formatting expressions and a small amount of simple VBA code for updating the unbound control as users move between records. This approach makes your forms much better for navigation and ensures that your users always have a clear idea of what they are editing.
If you would like to see a complete video tutorial with step-by-step instructions on everything discussed here, you can find it on my website at the link below. Live long and prosper, my friends. Topic List Highlighting current row in continuous forms
Using conditional formatting for current record
Setting up unbound control for current record ID
Writing VBA in On Current event to track current record
Applying conditional formatting to multiple fields
Ensuring correct use of brackets in expressions
Highlighting full row instead of single field
Handling null values in current record tracking
Adding "Has Focus" formatting for active fields
Retaining highlight when subform loses focus
Implementing same technique in main form and subforms
Customizing ControlTip Text for navigation buttons Article Have you ever found yourself clicking around in a Microsoft Access continuous form and losing track of which record you are actually on? If so, you know how frustrating it can be. Fortunately, there is a great way to solve this problem using conditional formatting and a little simple VBA code. By highlighting the entire row for the current record, you make it much easier for users to see exactly where they are as they navigate through the data.
Let me walk you through how to accomplish this. This technique works not just for fitness databases but for any situation where you are using continuous forms in Access, whether you manage customers, orders, support tickets, or even your favorite Star Trek captains.
The core idea here is to use conditional formatting to change how the current row looks in your continuous form. Conditional formatting usually applies to individual fields, but with this trick, you can highlight the entire row. First, you will need an unbound control, such as a text box, that will temporarily store the primary key of the current record as you move through the form. For example, suppose your main form's continuous records are based on a field called RoutineDetailID. You would add an unbound text box to the form (you can call it txtCurrentRoutineDetailID) and set its Control Source to blank so it is unbound.
Next, you need to ensure that this text box gets updated every time you move to a new record. You do this by adding a very simple VBA code to the form's On Current event. Open the form in Design View, go to the form's property sheet, select the Event tab, and find the On Current event. Click the ... button to open the VBA editor and enter the following code:
If IsNull(Me.RoutineDetailID) Then
Me.txtCurrentRoutineDetailID = 0
Else
Me.txtCurrentRoutineDetailID = Me.RoutineDetailID
End If
This code checks if RoutineDetailID is null (which can happen with new records) and sets the unbound box to 0 in that case, or else updates it with the current RoutineDetailID.
Now you want to apply conditional formatting to all the controls (text boxes) that make up the row in your form. Select every control in your row (hold Shift and click each one), go to the Format tab on the Ribbon, and click Conditional Formatting. Create a new rule using the Expression Is option. The expression will look like this:
[RoutineDetailID] = [txtCurrentRoutineDetailID]
Make sure both field names are surrounded by square brackets. Access sometimes misinterprets names in conditional formatting and could treat them as text strings if not correctly bracketed. Set the formatting you want for the highlighted row, such as a yellow background.
Once you have this set up, as you move from record to record, the On Current event updates the unbound text box to store the key of the current record. The conditional formatting then checks, for each row, whether its RoutineDetailID matches the unbound box. Only the current row will match, and that whole row becomes highlighted according to your formatting.
You might want to make it even more obvious which field within the row has focus. For that, open the Conditional Formatting dialog for each individual control and add another rule. This time, select the Field Has Focus option and choose a formatting style such as yellow. Now, not only will the entire current row be highlighted as you move through the records, but the exact field you are working with will also stand out.
Sometimes, especially if you are working with subforms, you might notice that the highlight disappears when the subform loses focus. To fix this, you can repeat the trick at each level. On every form or subform where you want the current record highlighted, add an unbound text box to hold the current record's key, update it in the On Current event, and apply matching conditional formatting for that primary key. This way, even if you move focus out of a subform, you retain the highlight for the last selected row.
For example, if you have a main Programs form, a subform for Routines, and another subform for Routine Details, you can set up an unbound text box for the current ProgramID, another for the current RoutineID, and another for the current RoutineDetailID within each corresponding form or subform. Make sure each one's On Current event updates the correct unbound text box with the current record's key. Then, apply conditional formatting using the same expression technique described above.
Do not forget the small details that make the form more user-friendly. For example, you can set the ControlTip Text property on navigation buttons like Move Up and Move Down so users easily know what each button does when they hover the mouse pointer over them.
By highlighting the current row and field using conditional formatting and a simple unbound text box updated with VBA, you make it much easier for yourself and your users to see exactly which record you are working with in any continuous form. This simple change can greatly improve the usability of your Access applications.
In summary, the steps are: add an unbound text box to hold the current record's key, update it in the form's On Current event with a small VBA snippet, and then use conditional formatting with an expression to highlight all the controls in the current row. This approach gives you clear visual feedback about your current location in the data and works at every level of nested subforms if applied systematically. Now you will never lose track of the current record in your forms again. Primary Topics
Access continuous forms, conditional formatting, VBA OnCurrent event, unbound controls, user interface improvement, record navigation
Secondary Topics
focus management, control tip text, subform formatting, form design best practices
|