Send Email with CDO 2
By Richard Rost

 2 years ago
Send Email with CDO in Access, without Outlook Part 2
In this Microsoft Access tutorial, I will show you how to send email using CDO by communicating directly with the mail server, bypassing programs like Outlook. We'll set up configuration and code modules, handle email settings for providers like Gmail, and test the process. This is part 2.
Members
There is no extended cut, but here is the database download:
Silver Members and up get access to view Extended Cut videos, when available. Gold Members can download the files from class plus get access to the Code Vault. If you're not a member, Join Today!
Prerequisites
Links
Recommended Courses
Up Next
Keywords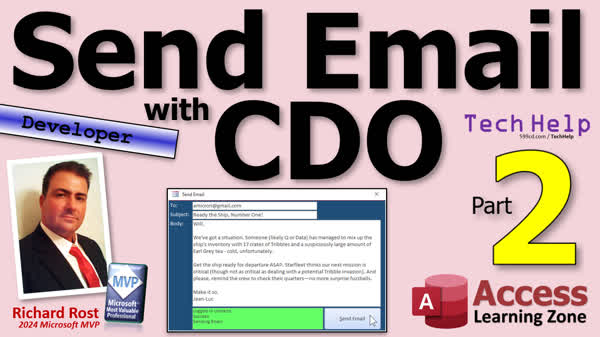
TechHelp Access, send email using CDO in Microsoft Access, VBA email without Outlook, Access CDO email, Microsoft Access email tutorial, sending mail from Access, VBA send email CDO, Microsoft Access CDO configuration, Access CDO SMTP settings, CDO email module Access, VBA send email Gmail, Access custom email VBA, CDO email troubleshooting
Intro In this video, you'll learn how to send email directly from Microsoft Access using CDO, without needing Outlook or any other mail program. I'll walk you through setting up the necessary configuration and code modules, specifying SMTP server and port settings, managing authentication, and building a simple subroutine to send emails from your Access database. We'll cover testing, common errors, and tips for debugging your setup to make sure your messages are sent successfully. This is part 2.Transcript Welcome to another TechHelp video brought to you by AccessLearningZone.com. I'm your instructor, Richard Rost. Today is part two of sending email with CDO, or basically sending email by talking directly to the mail server and not going through a mail program like Outlook.
If you haven't watched part one yet, go watch that first; you'll find a link down below, and then come on back.
Before we get started today, a little program note, I meant to mention these videos in the last lesson, but if you want to check out my other videos where I do cover sending email through Outlook, these still work fine if you're using the classic Microsoft Outlook that comes with Office, not the new one. This one uses send object to send a report, and it's very easy to implement.
Then I have another email video that talks about sending email through Outlook, but this one uses a mail item object. This one uses code that looks more like this, where you actually make a reference to an Outlook mail item. Now, I haven't tested this with new Outlook yet. I don't even have new Outlook installed because, well, I don't like it, and I don't plan on using it. But if any of you have new Outlook, let me know if this method works with that. I don't think it does, but I'm not sure.
Alright, so I'll put links to both of those videos down below; you can check those out.
Alright, so continuing on, we have our forms already set here. We have our email, we have our mail form, now we need to put stuff in this button to actually send a mail. So, we're going to set up some code.
Now there are going to be two modules I'm going to create. The first one has my configuration in it. The second one's going to have the actual code that sends the email. Now, I do this for class so that I can set up the configuration module, put my password in it, and then I don't accidentally flash that on the screen in the future. I've done that before. So, I'm going to make two modules. You can put these in one module if you want to.
Alright, they're just going to go down here with our global modules.
Alright, so I'm going to go to create and then module, regular module, not a class module, just module. That'll open up the code window.
Okay, now in here, I'm going to paste this stuff. This is going to be just a lot of copy and paste today because I'm not going to retype all this code. Gold members, you'll find this in the code vault. You can also download my copy of the database from the website.
Gold members and everybody else, well, you can either type it in or you can use some on-screen OCR to grab the text if you want to, but we're going to make some public constants in here. These are settings you're going to get from your mail provider.
Now these are the settings for Gmail. You've got the SMTP server, which is the actual web address of the server you're using, the port that that server uses. If you're using a secure server, usually it's 465, and you'll have use SSL set to 1. You'll find a lot of unsecure servers will use port 25, and you can set SSL to 0, but again, ask your mail person about this, your IT guy, whoever you got to talk to. You'll also see port 587 used a lot too.
This is your username and password. Now remember, for Gmail, you have to get that app password that I talked about last time. This is not just your Google login password. Your email address, your app password goes here, and then I've got my timeout set to 10 seconds. In other words, if the mail server doesn't reply, timeout in 10 seconds and give an error. That seems to be about a reasonable amount of time to wait for a mail server.
Okay, I'm going to save this as send mail config module, M-O-D. Okay, save that. This is the last time you're going to see this. I'm going to put my password in here, and then you're not going to see this anymore, so get it now. Oh, wait a minute, no, I'm just kidding. I got you there. No, it's not really my password. When you get the database, you'll see that.
Okay, so there's that one. Now, we're going to create another module, and this is where the actual code is going to go for the sending of the email itself.
Now, like I said, a lot of copy and paste, a lot of typing, you don't have to understand what all of this is, but this is the code that you need. This is the simplest version of the code that I can put together that actually makes this work.
We're going to create a subroutine called simple send email. Why simple? Well, because in the extended cut for the members, we're going to make a whole lot more options on it, but this is the basic one. Message to, email address it's going to, message from, is the from address that you can put your address in there, subject, and body, those are the things you're going to send into it.
Alright, we create some objects in here. There's a message object, which is cdo.message, and a configuration object. These are just objects you got to set up, right, configuration fields. Then you set up something called a schema, which basically is a set of instructions. Essentially, you're just setting what the options are based on those options that we looked at a second ago. This is the format that it wants them in.
The only options that are different in here that you might want to change, send using, there's SMTP server or the local SMTP. Usually, this is only something that you do if you are running on like a Windows server, and you've got mail running on that server, then your local SMTP server can just pick up the mail instead of having to authenticate on a different server, but that's almost never the case.
If you're running this on a Windows server, you might want to set that to 1, and if you know how to do that, then you don't need to worry about it. Then there's SMTP authenticate, which is basically you need to log in. Those are the generally default options, so this connects us to the server.
Once we're connected, we set up our message object, where we set up the to, from, subject, text body, the configuration, and then we send it. When that's all done, we free up our objects, and it's done.
Now, there are a ton more options. There's the reply address, a CC, a BCC, attachments, all that stuff. We'll talk about a lot of that in the extended cut. I also cover a lot of that in my email seminar. We are going to also talk about some basic error handling because we just dot send, and that just sends the email, but we're not getting back any kind of a response to know whether it was successful or not. We will address that in this video series. I don't know if we'll get to it today, but there's the basics. That's what you need.
Again, copy and paste, do whatever you got to do, get that text in your database, and like I've said in many videos, you don't have to understand every little line of code to be able to use it. I don't understand what every little thing does in the engine of my car, but I know how to drive it. A lot of the times, even advanced programmers just copy and paste stuff from other programmers. That's just the nature of how this works, and there's no shame in not understanding every little tidbit in here.
Alright, let's give this a quick debug compile, make sure everything's good, no errors, and now let's save this. I'm going to say yes, and let's save this as my send mail. Let's call this the simple mod.
Alright, let's give it a test. Let's go into our customer form, go to our send mail button, and let's right-click design view, right-click build event, and in here, the simplest form of this is going to be simple, send email space.
Message two is the email address that happens to be a field, right. We've got fields on here, we've got email, subject, and body, so that's going to be email, comma. The from address is your address or your info at mydomain.com, whatever. I'll just put my [email protected] in here. The subject is in the subject field, and the body is in the body field. That's the most basic implementation of this.
Save it, again, throw in a debug compile for good measure, let's come back over to here, send email. Alright, this is my tester, yada, yada, yada, yada, yada, yada, yada, and then I'll hit send. Okay, hold on, we got the server is not available. What did I do? Oh, you know what I did, I forgot to put my actual password back in here, so that's a good example showing you what happens if you get an error message.
So, let me put my actual password in here, and let's try that again. Send, and I didn't put anything in here to let us know when it's done. Let's do that real quick. Let's put in a done right at the end of all of this. Status done, so we know we're done. We don't need that exit sub right here yet. We're going to need it later, but save that.
Alright, debug compile, oh, that brings up a good point. We can't use status out here because I'm in a global module, right, and status is in this form, right, or this form here, the status box is here, and the function. So, what we can do is we can put the status in this guy, design view, right-click, build event, we'll put the status after that, right, because the global module doesn't know anything about status. It's a private sub, private subroutine inside of the email form, and some of my videos I do make a global status and it just puts it in the main menu status box.
Alright, one more try. See, I like leaving these little errors in here because if I make these mistakes, chances are you guys will make the same mistakes too.
Alright, so blah, blah, blah, blah, blah, blah, blah, blah, I sound like Alex Lifeson at the Rock and Roll Hall of Fame, blah, blah, blah, blah, blah. Send, done. Alright, let me check my inbox, and here I am in my inbox in Gmail. You can see there's the first one, it actually went through, and there's the one I just sent just now. Alright, so it's working, but there's still a lot of other stuff I want to do to it.
I want to do some checks to make sure that the person put in a subject and a body, I want to get a status back so I know whether or not it was successful or failed, and I want to log this in the person's contact so I can come in here and see a history of what was said to them even in email. We'll talk about all that stuff.
In tomorrow's video, you know the drill, tune in tomorrow, same bat time, same bat channel, or if you're a member, you can watch it right now, but that is going to be your TechHelp video for today. I hope you learned something. Live long and prosper, my friends, I'll see you tomorrow for part three.
A special thank you and shout out to our diamond sponsor, Juan Soto with Access Experts Software Solutions. They're manufacturing experts specializing in Microsoft Access and SQL Server. Juan is a 13-time Microsoft Access MVP. Check him out at accessexperts.com.
Show more links below the video to find additional resources and links. YouTube does a pretty good job of hiding it. It's right down there, see this part of the description here, right. The name, the videos up here, there's a little show more down there, right down the bottom, it's kind of hard to find. But once you click on that, you'll see a list of other videos, additional information related to the current topic, free lessons, and lots more. YouTube no longer sends out email notifications when new videos are posted like they used to do, but if you'd like to get an email every time I post a new video, click on the link to join my mailing list. And you can pick how frequently to get emails from me, either as they happen daily, weekly, or monthly.
Now if you'd like to become a paid member of my channel and receive all kinds of awesome perks, click on the join button. You'll see a list of all the different membership levels that are available, each with its own special perks, including my extended cut videos, access to my code vault (lots of VBA source code in there), template downloads, and lots more. I'll talk more about these perks at the end of the video.
Even if you don't want to commit to becoming a paid member and you'd like to help support my work, please feel free to click on the tip jar link. Your patronage is greatly appreciated and will help keep these free videos coming. I got some puppies to feed. But don't worry, no matter what, these free TechHelp videos are going to keep coming. As long as you keep watching them, I'll keep making more and they'll always be free.
Now if you really want to learn Access and you haven't tried my free Access Level 1 course, check it out now. It covers all the basics of Microsoft Access, including building forms, queries, reports, and more. It's over four hours long. You can find it on my website or on my YouTube channel. I'll put a link down below you can click on. And did I mention it's completely free? The whole thing is free, four hours. Go watch it.
And okay, okay, a lot of you have told me that you don't have time to sit through a four-hour course, so I do now have a quicker Microsoft Access for Beginners video that covers all the basics faster in about 30 minutes. And no, I didn't just put the video on fast forward. But I'll put a link to this down below as well.
Now if you like Level 1, Level 2 is just a dollar. That's it, $1. And that's another whole like 90-minute course. Level 2 is also free for paid members of any level, including supporters. So, if you're a member, go watch Level 2, it's free.
Okay, want to get your question answered in a video just like this one? Visit my TechHelp page and send me your question there. Members get priority, of course. While I do try to read and respond to all of the comments posted below in the comments section, I only have time to go through them briefly a couple of times a month. And sometimes I get thousands of them. So send me your question here on the TechHelp page, and you'll have a better chance of getting it answered.
And while you're on my website, be sure to stop by my Access Forum. We've got lots of lively conversations about Microsoft Access and other topics. I have a fantastic group of moderators who help me answer questions. Shout out to Alex, Kevin, Scott, Adam, John, Dan, Juan, and everybody else who helps out on the site. I appreciate everything you do. I couldn't do it without you.
Be sure to follow my blog, find me on Twitter, and of course on YouTube. Yeah, I'm on Facebook too, but I don't like Facebook. Don't get me started.
Now, let's talk more about those member perks if you do decide to join as a paid member.There are different levels: Silver, Gold, Platinum, and Diamond.
Silver members and up get access to all of my extended cut TechHelp videos, one free beginner class every month, and some other perks.
Gold members get all the previous perks, plus access to download the sample databases that I build in my TechHelp videos, plus access to my code vault where I keep tons of different functions that I use, the code that I build in most of the videos. You'll also get higher priority if you do submit any TechHelp questions. Now, answers are never guaranteed, but you do go higher in the list for me to read them. And if I like your question, you have a good chance of it being answered. You'll also get one free expert-level class each month after you've finished the beginner series.
Platinum members get all the previous perks, plus even higher priority for TechHelp questions. You get access to all of my full beginner-level courses for every subject. I cover lots of different subjects like Word, Excel, VBA, ASP, and lots of different stuff, not just Access. These are the full-length courses found on my website. You get all the beginner ones. In addition, once you finish the expert classes, you get one free developer class per month, so lots of training.
And finally, you can also become a Diamond sponsor. You'll have your name or your company name listed on a sponsors page that will be shown on each video as long as you're a sponsor. You'll get a shout out in the video and a link to your website or product in the text below the video and on my website.
So that's it. Once again, my name is Richard Rost. Thank you for watching this video brought to you by AccessLearningZone.com. I hope you enjoyed it. I hope you learned something today. Live long and prosper, my friends. I'll see you again soon.
TOPICS:
Setting up forms for email
Creating and configuring modules
Setting SMTP server settings
Using different ports for secure servers
Defining public constants for email settings
Creating a configuration module
Writing code for sending emails
Creating a subroutine for simple email sending
Setting up message and configuration objects
Configuring schema for email options
Using local SMTP servers
Implementing SMTP authentication
Setting up email message properties
Sending email using CDO code
Debugging and error handling in email sending
Testing email functionality
Adding status updates
Ensuring email fields have values
Logging email interactions with contacts
COMMERCIAL:
In today's video, I'll guide you through part two of sending emails with CDO, skipping mail programs like Outlook. We'll set up necessary configurations and dive into the code that actually sends the email. You'll learn how to manage SMTP settings, handle server communication, and send messages directly. Plus, I'll give some helpful debugging tips along the way. Don't worry if you missed part one; there's a link below to catch up. You'll find the complete video on my YouTube channel and on my website at the link shown. Live long and prosper my friends.Quiz Q1. What does the CDO method focus on for sending emails?
A. Sending emails through Microsoft Outlook
B. Sending emails using a third-party mail program
C. Sending emails directly to the mail server
D. Sending emails using web-based email services
Q2. What should you do before watching part two of the CDO email sending tutorial?
A. Set up your mail server
B. Watch the previous video (part one)
C. Install the latest version of Outlook
D. Obtain an app password from Google
Q3. Why does Richard Rost create two modules in the tutorial?
A. To separate the email content from other application data
B. To organize different types of emails
C. To keep the configuration and email sending code separate
D. To follow software development best practices
Q4. What is the purpose of the first module created in the tutorial?
A. To setup email templates
B. To store email logs
C. To hold configuration settings for email sending
D. To process incoming emails
Q5. What are the three main settings you need to configure for sending emails through Gmail mentioned in the video?
A. SMTP server address, IMAP server address, and SSL setting
B. SMTP server address, port number, and SSL setting
C. IMAP server address, port number, and username
D. SMTP server address, username, and email signature
Q6. What must you use for the Gmail password when configuring the CDO setup?
A. Your regular Google login password
B. A temporary password
C. An app password provided by Google
D. A password reset link
Q7. What module type does Richard create for the configuration data?
A. Class module
B. Regular module
C. Form module
D. Report module
Q8. What is the main reason for creating a module with email configuration separate from the email sending code?
A. To allow multiple users to send emails simultaneously
B. To avoid accidentally revealing sensitive information during demonstrations
C. To improve the speed of the application
D. To ensure better email format compliance
Q9. What is the main function defined in the second module created by Richard?
A. sendEmail()
B. configureEmail()
C. simpleSendEmail()
D. sendMail()
Q10. What main objects are created within the simpleSendEmail subroutine?
A. Mail and Configuration
B. Message and Configuration
C. Mail and Schema
D. Schema and Message
Q11. When setting up schema instructions, which of the following is usually used for a secure server?
A. Port 25 with SSL set to 0
B. Port 465 with SSL set to 0
C. Port 465 with SSL set to 1
D. Port 587 with SSL set to 0
Q12. Why might you change the "send using" option in the schema?
A. To switch between different email clients
B. To run the emails through a web browser
C. To use the local SMTP server on a Windows server
D. To set the email format as HTML
Q13. What does SMTP authenticate ensure during the email sending process?
A. The email body is properly formatted
B. The server logs all email activities
C. The user is logged in when sending emails
D. The message subject is correctly set
Q14. Which command is used to send the email after setting up the message object?
A. email.send
B. smtpSend
C. msgSend
D. .send
Q15. What additional aspects of email sending does Richard mention will be covered in the extended cut and email seminar?
A. Automating email responses and HTML email formatting
B. Error handling, logging emails, and adding attachments
C. Configuring different email accounts and tracking delivery status
D. Setting up email categories and sending frequency
Answers: 1-C; 2-B; 3-C; 4-C; 5-B; 6-C; 7-B; 8-B; 9-C; 10-B; 11-C; 12-C; 13-C; 14-D; 15-B
DISCLAIMER: Quiz questions are AI generated. If you find any that are wrong, don't make sense, or aren't related to the video topic at hand, then please post a comment and let me know. Thanks.Summary Today's TechHelp tutorial from Access Learning Zone continues our exploration of sending emails with CDO directly from Microsoft Access, bypassing traditional mail clients like Outlook. This is part two in the series, so if you have not yet studied part one, I recommend that you start there to get up to speed. You will find everything you need on my website.
I also want to quickly mention that I have additional tutorials available on sending email through Outlook if you are still using the classic desktop application included with Office. These videos cover methods like using SendObject to email Access reports, as well as a more detailed approach that works with the Outlook MailItem object. Note that I have not tested these methods with the new Outlook app, as I do not personally use it, so if you have tried them out please let me know about your experience.
Now, picking up from where we left off, we already have forms set up that allow us to compose and send emails. The next step is to add the required VBA code to our send mail button so it can actually deliver those messages.
To organize things more securely, I am setting up two separate modules in the database. One module contains configuration settings like your mail server address, port, and security details, and the other module holds the code that actually sends messages. Keeping the configuration information, including your email password, in its own module reduces the risk of accidentally displaying sensitive data. However, if you prefer, everything can be combined in a single module.
Starting with the configuration module, I define several public constants. These store the essential parameters your email provider requires: the SMTP server address, the port (for example, Gmail typically uses port 465 for SSL connections), and whether SSL encryption should be enabled. Some servers use port 25 for non-secure email, and port 587 also sees a lot of use, especially with secure connections. Be sure to verify these settings with your IT administrator or email provider.
The user name and password are also set as constants in the module. For Gmail users, remember you will need to use an app password, not your standard Google login. There is also a setting for timeout, which I have set to 10 seconds to ensure you do not wait around unnecessarily if your server is unresponsive.
Once you have your configuration set, save the module and make any necessary changes, such as inserting your actual password. After that, you will not need to display this module again, and you can proceed to the next step.
The second module contains the procedure that sends your email. I focus on a simple subroutine which takes the most important fields as arguments: the recipient, the sender, the email subject, and the body content. In the code, we create a message object and a configuration object, then configure these using the schema format required by CDO. These settings are based on the details defined in your configuration module.
There are a couple of sender options worth mentioning. The default setup assumes you are connecting to an external authenticated SMTP server, which covers most cases. If, however, you are running your own Windows mail server locally, you could change this so messages are relayed internally, but that is not common, especially in small office or personal use.
Once the server is configured, we assign the To, From, Subject, and Body fields to the message object, apply the configuration, and then send it. Afterwards, we release the objects to free up memory.
While this basic subroutine does not yet include advanced features like reply-to address, CC, BCC, or attachments, those are covered in more detail in my extended cut videos and in my Email Seminar courses. I will also be outlining improved error handling in upcoming lessons so that you can receive more useful feedback about the success or failure of your emails.
If you do not fully understand every single line in the supplied code, that is perfectly normal. Many programmers use and adapt snippets from others without grasping every detail. What matters most is knowing how to integrate and use the solution effectively in your project.
Once your modules are ready, I recommend performing a debug compile to catch any syntax errors before testing in your form. In the form's button event, call the simple email subroutine, passing in values from your form controls for the recipient, subject, and body. You can specify your own sending address as desired.
During testing, be vigilant for error messages. For example, if you forget to enter the correct password, the server will not accept your login and you will see an error. As you refine your setup, you may wish to add a simple indicator or status message to your form to confirm when an email has been successfully sent.
It is important to place status messages in the form's event code, not in global modules, since global modules do not have direct access to form controls.
After making these adjustments and correcting any errors, try sending a test message. If everything is configured properly, you should find the email in your recipient's inbox. If not, check your error handling and configuration details.
There are still several enhancements I want to add: checks to make sure users do not send out blank subjects or bodies, better status reporting and error messages, and logging of sent email for each contact, so you can review your communication history directly in your Access application. All of these topics will be explored further in future lessons.
If you are looking for more in-depth instruction, my free Access Level 1 course covers the essentials of Microsoft Access and is available both on my website and YouTube. There is also a 30-minute introductory video for learners who are short on time. Should you want to continue beyond the first level, Level 2 is just one dollar—or free for members.
I encourage you to submit your TechHelp questions through the website if you would like to see your issue addressed in a future video. Members enjoy higher priority, but I try to review all questions as time allows. You will also find a lively Access discussion forum and numerous resources to help you on your journey.
If you want to help support my tutorials, you can leave a tip, subscribe to the mailing list for notifications, or consider joining as a paid member at different levels for additional perks. Member benefits range from exclusive extended cut videos and downloadable sample databases to complete courses in Access and other subjects.
That is all for today's lesson on sending email with CDO in Microsoft Access. For step-by-step instructions on everything discussed here, you can find the complete video tutorial on my website at the link below.
Live long and prosper, my friends.Topic List Setting up forms to send email
Creating configuration and send mail modules
Configuring SMTP server and port settings
Specifying secure and unsecure server options
Using public constants for email settings
Storing email username and app password
Setting mail server connection timeout
Writing a basic CDO email send subroutine
Passing To From Subject and Body to the subroutine
Creating CDO message and configuration objects
Setting up schema for CDO configuration
Choosing between remote and local SMTP server
Enabling SMTP authentication
Assigning message properties To From Subject Body
Sending email via CDO from Access
Testing email send workflow from a form
Handling CDO error messages during send
Providing user status updates after sending
Addressing module scope for status updates |


